Advertisement
Quick Links
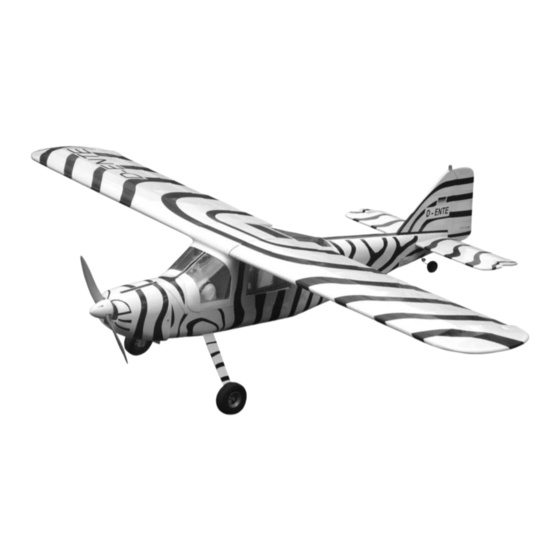
Radio control model
R/C Flugmodell
INSTRUCTION MANUAL
MONTAGEANLEITUNG
Designed for brushless electric motors
Entwickelt für Brushless Elektro Motoren
VQ No: VQA091
TECHNISCHE DATEN
Spannweite
Lange
Elektroantrieb
(siehe nächste Seite)
Verbrennerantrieb
7.5cc 2-T / 8.5cc 4-T
Fernsteuerung
6 Kanal / 6-7 Servos
WARNING!
This radio controlled model is NOT a toy. If modified or flown carelessly it could go out of controll and
cause serious human injury or property damage. Before flying your airplane, ensure the air field is spacious enough.
Always fly it outdoors in safe areas and seek professional advice if you are unexperienced.
ACHTUNG!
Dieses ferngesteuerte Modell ist KEIN Spielzeug! Es ist für fortgeschrittene Modellflugpiloten bestimmt,
die ausreichende Erfahrung im Umgang mit derartigen Modellen besitzen Bei unsachgemäßer Verwendung kann
hoher Personen- und/oder Sachschaden entstehen. Fragen Sie in einem Modellbauverein in Ihrer Nähe um
professionelle Unterstützung, wenn Sie Hilfe im Bau und Betrieb benötigen. Der Zusammenbau dieses Modells ist
durch die vielen Abbildungen selbsterklärend und ist für fortgeschrittene, erfahrene Modellbauer bestimmt.
SPECIFICATIONS
Wingspan
1620mm
Length
1210mm
Electric Motor
Glow Engine
Radio
DORNIER
DO-27
(.46-.52 class glow conversion optional)
(7,5 -8,5cc Glühzündermotor Einbau möglich)
PICHLER
(See next page)
.46 2Stroke / .52 4-Stroke
6 Channel / 6-7 Servos
VQ No: VQA090
ARF BY
63 in.
47.6 in.
Advertisement

Subscribe to Our Youtube Channel
Related Manuals for VQ Models VQA090


Summary of Contents for VQ Models VQA090
- Page 1 R/C Flugmodell INSTRUCTION MANUAL DO-27 MONTAGEANLEITUNG Designed for brushless electric motors (.46-.52 class glow conversion optional) Entwickelt für Brushless Elektro Motoren (7,5 -8,5cc Glühzündermotor Einbau möglich) VQ No: VQA090 VQ No: VQA091 PICHLER ARF BY TECHNISCHE DATEN SPECIFICATIONS Wingspan 63 in.
- Page 2 RECOMMENDED ACCESSORIES (Purchase separately) Empfohlenes Zubehör (Nicht im Lieferumfang enthalten) Egänzungskit Verbrenner (Tank + Motorträger) Best.Nr. C4165 Antrieb Standard: 1 x Servo S4020 BOOST 40 Brushless Combo Set, Best.Nr. C2983 (für Seitenruder) LiPo Battery RED POWER 3200-3S, Best.Nr. C3164 Best.Nr. C1687 Luftschraube 12*6, Best.Nr.
- Page 3 Full the elevator out of the horizontal stabilizer. Cut away only the film both side Aluminum wing joiner B=B’ B’ Stabilizer Stabilizer A=A’ A’ When you are satisfied with the alignment, use a pencil to trace around the top and bottom of the stabilizer where it meets the fuselage.
- Page 4 WARNING! Securely glue together. If coming off during flights, you lose control Thin CA glue of your airplane which leads to accidents ! Vergewissern Sie sich, sauber geklebt zu haben. Andernfalls konnen Probleme mit der Flugeigenschaft auftreten! Thin CA glue Elevator connector Apply thin CA to both side of the hinge...
- Page 5 When you are satisfied with the alignment, use a pencil to trace around the right and left of the stabilizer where it meets the fuselage. Cut away only the covering both side WARNING! Securely glue together. If coming off during flights, you lose control of your airplane which leads to accidents ! Vergewissern Sie sich, sauber geklebt zu haben.
- Page 6 Note: The slots for the control horn installation pre- cut at factory. Control horn WARNING! Securely glue together. If coming off during flights, you lose control of your airplane which leads to accidents ! ...1 Vergewissern Sie sich, sauber geklebt zu haben. Andernfalls konnen Probleme mit der Flugeigenschaft auftreten! 4X20mm screw ....4...
- Page 7 Using a aluminum motor mounting plate as a template, mark Plywood motor the plywood motor mounting plate where the four holes are mounting to be drilled (A). Remove the aluminum motor mounting plate and drill a 3mm hole through the plywood at each of the four marks marked (B). Aluminum motor mounting plate Pull the magnetic battery hatch (included with electric motor set)
-
Page 8: Board - Top View
SIDE-VIEW / Seitenansicht B=B’ Attach the aluminum motor mounting B’ plate on to the motor and secure it in Firewall place with four screws ( included with 113mm motor set) (F). A=A’ A’ ! Engine thrust on balk head is already adjust at factory Sturz und Zug beachten! TOP-VIEW / Draufsicht Sperrholztrager Platten zusammenkleben, wie gezeigt ausrichten... - Page 9 1/16 1.5mm Aileron & flap extension cord Aileron & flap pushrod 1.2mm O Alenk-Gestange Trial fit the control horn into the slot. If the parts will join, but with a gaps, sand or trim the parts a little at a time until the parts meet exactly with no gaps.
- Page 10 Note: Cut out the stickers and apply them in the proper area. Do not peel the backing paper off all at once. Peel off one corner of the backing and cut off with scissors. Arrange sticker on model and when satisfied adhere the corner without backing.
- Page 11 RECOMMENDED ACCESSORIES (Purchase separately) Empfohlenes Zubehör (Nicht im Lieferumfang enthalten) Egänzungskit Verbrenner (Tank + Motorträger) Best.Nr. C4165 Antrieb Standard: 1 x Servo S4020 BOOST 40 Brushless Combo Set, Best.Nr. C2983 (für Seitenruder) LiPo Battery RED POWER 3200-3S, Best.Nr. C3164 Best.Nr. C1687 Luftschraube 12*6, Best.Nr.
Need help?
Do you have a question about the VQA090 and is the answer not in the manual?
Questions and answers