Table of Contents
Advertisement
Quick Links
Advertisement
Table of Contents

Related Manuals for L-Acoustics X15 HIQ


Summary of Contents for L-Acoustics X15 HIQ
- Page 1 X15 HIQ rigging manual (EN)
- Page 2 Document reference: X15 HiQ rigging manual (EN) version 4.0 Distribution date: June 12, 2018 © 2018 L-Acoustics. All rights reserved. No part of this publication may be reproduced or transmitted in any form or by any means without the express written consent of the publisher.
-
Page 3: Table Of Contents
Using a U-bracket with X-UTILT......................... 23 Flying with a U-bracket........................... 29 Flying with X-BAR............................34 Pole-mounting with a U-bracket........................ 40 Forbidden congurations........................... 44 Specications..............................46 X15 HiQ specications..........................46 SB18 specications..........................48 X-UL15 specications..........................50 X-US1215 specications.......................... 51 X-UTILT specications..........................52 X-BAR specications..........................53... -
Page 4: Safety
Respect the Working Load Limit (WLL) of third party equipment. L-Acoustics is not responsible for any rigging equipment and accessories provided by third party manufacturers. Verify that the Working Load Limit (WLL) of the suspension points, chain hoists and all additional hardware rigging accessories is respected. -
Page 5: Symbols
This symbol noties the user about instructions that must be strictly followed to ensure proper installation or operation of the product. This symbol noties the user about complementary information or optional instructions. X15 HiQ rigging manual (EN) version 4.0... -
Page 6: Welcome
3D acoustical and mechanical modeling software Refer to the Soundvision help. Other X15 HiQ system components Other components of the system are presented in the X15 HiQ user manual along with the enclosure congurations and connection schemes. X15 HiQ rigging manual (EN) version 4.0... -
Page 7: Rigging Elements
System components Rigging elements EMBi X-UTILT X-BAR X-UL15 X-US1215 X15 HiQ rigging manual (EN) version 4.0... -
Page 8: Mechanical Safety
Mechanical safety Flown congurations The X15 HiQ rigging system complies with 2006/42/EC: Machinery Directive. It has been designed following the guidelines of BGV-C1. 2006/42/EC: Machinery Directive species a safety factor of 4 against the rupture. The own deployments described in this manual achieve a safety factor of 5 or higher. - Page 9 Soundvision calculations are based on usual environmental conditions. A higher safety factor is recommended with factors such as extreme high or low temperatures, strong wind, prolonged exposition to salt water, etc. Always consult a rigging specialist to adopt safety practices adapted to such a situation. X15 HiQ rigging manual (EN) version 4.0...
-
Page 10: Rigging System Description
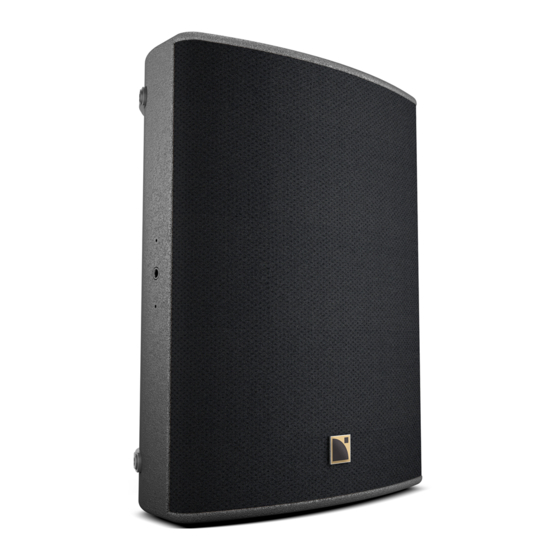
Rigging system description X15 HiQ X15 HiQ features a M8 DIN580 threaded insert designed to implement a secondary safety. The logo on the enclosure front can be rotated to adapt to every conguration. X15 HiQ features ergonomic handles on both sides for easy transportation. - Page 11 Rigging system description X15 HiQ features four runners on the bottom to protect the enclosure. X15 HiQ features raisers that allow to change the monitor angle from 35° to 55° relative to the vertical. CLICK! X15 HiQ rigging manual (EN) version 4.0...
-
Page 12: Elements For Ying And Wall-Mounting
X-US1215 and X-UL15 X15 HiQ can be tted with a short U-bracket, X-US1215, or a long U-bracket, X-UL15. The brackets are secured in the enclosure inserts with two threaded knobs. A spring-lock safety mechanism secures the knobs in the U-brackets. - Page 13 Rigging system description X-US1215 and X-UL15 can be used for wall-mounting, ceiling-mounting or ying X15 HiQ. Short U-bracket in horizontal position In this position, the enclosure applies a diagonal force of 419 daN on the anchoring points. Fasteners for wall-mounting or ceiling-mounting Secure the bracket with three M10 screws.
- Page 14 When using the additional holes, consider the maximum site angle available. Maximum angles. X-US1215 features additional holes on the sides to closely t the enclosure and to optimize visual impact. The knobs shall be stored in the U-brackets. X15 HiQ rigging manual (EN) version 4.0...
-
Page 15: X-Utilt
Secure the X-UTILT with two M10 screws. Select screw length and anchors applicable to the wall properties. X-BAR X-BAR is a rigging bar for ying X15 HiQ. The rigging system consists of a threaded axis with a cam lever. X15 HiQ rigging manual (EN) version 4.0... - Page 16 X-BAR shall be secured to the inserts on the enclosure, perpendicular to the front. Five angulation holes are available. X-BAR is compatible with a Ø12 mm shackle WLL 1 t (provided) and with CLAMP250. X15 HiQ rigging manual (EN) version 4.0...
-
Page 17: Elements For Pole-Mounting
Rigging system description Elements for pole-mounting Pole sockets X15 HiQ features two 35 mm pole sockets integrated in the handles. EMBi EMBi is a pole-mount adapter for X-US1215 (35 mm pole). The site angle can be adjusted with the U-bracket. -
Page 18: Subwoofer
Rigging system description Subwoofer SB18 features a 35 mm pole socket. X15 HiQ rigging manual (EN) version 4.0... -
Page 19: Rigging Procedures
The same procedure applies for X-UL15 in vertical position or in ceiling-mounting conguration and X-US1215 in horizontal or vertical position or in ceiling-mounting conguration. Assembly Procedure 1. Drive the knobs in the inserts on the enclosure. Stop when the threading is halfway in. X15 HiQ rigging manual (EN) version 4.0... - Page 20 3. Lift the enclosure by the knobs and place it inside the U-bracket. Adjust the knobs on both sides so that the safety washer is between the hook and the enclosure. 4. Push until the knobs are locked inside the spring-lock safety mechanism. SHLAK! X15 HiQ rigging manual (EN) version 4.0...
- Page 21 Rigging procedures 5. Set the site angle. Use the screw as a reference point to read the label. 6. Tighten the knobs. Make sure the enclosure is steady. X15 HiQ rigging manual (EN) version 4.0...
- Page 22 Do not unscrew the knobs all the way. 2. On both sides, pull on the safety mechanism while lifting the enclosure by the knobs to release it. 3. Remove the U-bracket from the wall. X15 HiQ rigging manual (EN) version 4.0...
-
Page 23: Using A U-Bracket With X-Utilt
X-UTILT shall only be used vertically. Fasteners for wall-mounting Secure the X-UTILT with two M10 screws. Select screw length and anchors applicable to the wall properties. 1. Secure X-UTILT to the wall using M10 screws. X15 HiQ rigging manual (EN) version 4.0... - Page 24 Rigging procedures 2. Secure the U-bracket to X-UTILT. 3. Secure the rigging arm to the U-bracket. Make sure the rigging arm is in the correct position. Always use the central insert. X15 HiQ rigging manual (EN) version 4.0...
- Page 25 Stop when the threading is halfway in. 6. Lift the enclosure by the knobs and place it inside the U-bracket. Adjust the knobs on both sides so that the safety washer is between the hook and the enclosure. X15 HiQ rigging manual (EN) version 4.0...
- Page 26 Rigging procedures 7. Push until the knobs are locked inside the spring-lock safety mechanism. SHLAK! 8. Set the azimuth angle. Use the screw as a reference point to read the label. X15 HiQ rigging manual (EN) version 4.0...
- Page 27 Rigging procedures 9. Tighten the knobs. Make sure the enclosure is steady. X15 HiQ rigging manual (EN) version 4.0...
- Page 28 Do not unscrew the knobs all the way. 2. On both sides, pull on the safety mechanism while sliding the enclosure out of the U-bracket. 3. Remove the U-bracket and X-UTILT from the wall. X15 HiQ rigging manual (EN) version 4.0...
-
Page 29: Flying With A U-Bracket
1. Drive the knobs in the inserts on the enclosure. Stop when the threading is halfway in. 2. Place the U-bracket around the assembly. Adjust the knobs on both sides so that the safety washer is between the hook and the enclosure. X15 HiQ rigging manual (EN) version 4.0... - Page 30 3. Push down until the knobs are locked inside the spring-lock mechanism. SHLAK! Alternatively, use the additional holes on the U-bracket. The hooks on the bracket must be oriented towards the front of the enclosure. X15 HiQ rigging manual (EN) version 4.0...
- Page 31 Make sure the safety washer goes through the hole on the bracket. 4. Tighten the knobs and y the enclosure with a clamp. 5. Loosen the knobs to set the site angle. Use the screw as a reference point to read the label. X15 HiQ rigging manual (EN) version 4.0...
- Page 32 Rigging procedures 6. Tighten the knobs. Make sure the enclosure is steady. Maximum angles When using the additional holes on the U-bracket, consider the maximum negative site angle available. -30° -15° X15 HiQ rigging manual (EN) version 4.0...
- Page 33 Rigging procedures Disassembly Procedure 1. Place the enclosure on a at surface. 2. Loosen the knobs. 3. Pull on the safety mechanism and remove the U-bracket from the enclosure. X15 HiQ rigging manual (EN) version 4.0...
-
Page 34: Flying With X-Bar
Additional safety for own arrays When ying an array, use the M8 DIN580 threaded insert to implement a secondary safety. Assembly Procedure 1. Lay the enclosure on a at surface. 2. Drive the X-BAR in the insert. X15 HiQ rigging manual (EN) version 4.0... - Page 35 3. Rotate the X-BAR until perpendicular to the front grill. Use the screws as reference points. 4. Tighten the X-BAR. a) Lift the lever and rotate it counter-clockwise, release the lever and rotate it clockwise. Repeat until the X-BAR is tightly secured. X15 HiQ rigging manual (EN) version 4.0...
- Page 36 Rigging procedures b) Finally, store the lever on the right. X15 HiQ rigging manual (EN) version 4.0...
- Page 37 • Front extension on horizontal enclosure +14° +22° +4.5° +30° +38° • Rear extension on vertical enclosure -1.5° -8.5° +5.5° -15° -22° • Front extension on vertical enclosure +4.5° -2° -9° +11.5° +18.5° X15 HiQ rigging manual (EN) version 4.0...
- Page 38 Rigging procedures 6. Lift the assembly. X15 HiQ rigging manual (EN) version 4.0...
- Page 39 Rigging procedures Disassembly Procedure 1. Take down the assembly. 2. Lift the lever and rotate it clockwise. 3. Release the lever and rotate it counter-clockwise. 4. Repeat until the X-BAR can be removed. X15 HiQ rigging manual (EN) version 4.0...
-
Page 40: Pole-Mounting With A U-Bracket
1. Secure EMBi to the U-bracket with the provided bolts and nuts. 2. Secure the U-bracket to the enclosure using the additional holes. The hooks on the bracket must be oriented towards the front of the enclosure. X15 HiQ rigging manual (EN) version 4.0... - Page 41 3. Tighten the knobs, reverse the assembly and mount it on a pole. 4. Tighten EMBi. 5. Loosen the knobs to set the site angle. Consider the maximum positive site angle available. Maximum angles X15 HiQ rigging manual (EN) version 4.0...
- Page 42 Rigging procedures +30° +15° 6. Tighten the knobs. Make sure the enclosure is steady. The assembly can be mounted on a tripod or on a subwoofer. X15 HiQ rigging manual (EN) version 4.0...
- Page 43 About this task Remove the assembly from the pole before disassembling the enclosure and the bracket. Procedure 1. Loosen EMBi to remove the assembly from the pole. 2. Remove the bracket from the enclosure. X15 HiQ rigging manual (EN) version 4.0...
-
Page 44: Forbidden ConGurations
Forbidden congurations Forbidden congurations Forbidden Authorized X15 HiQ rigging manual (EN) version 4.0... - Page 45 Forbidden congurations Forbidden Authorized X15 HiQ rigging manual (EN) version 4.0...
-
Page 46: SpeciCations
Pantone 426C custom RAL code on special order IP43 Peak level measured at 1 m under free eld conditions using pink noise with crest factor 4 (preset specied in brackets). X15 HiQ rigging manual (EN) version 4.0... - Page 47 Specications X15 HiQ dimensions 430 mm / 16.9 in 375 mm / 14.8 in 471 mm / 18.5 in 500 mm / 19.7 in X15 HiQ rigging manual (EN) version 4.0...
-
Page 48: Sb18 SpeciCations
Rigging components steel with anti-corrosion coating Finish dark grey brown Pantone 426C IP45 Peak level at 1 m under half space conditions using pink noise with crest factor 4 (preset specied in brackets). X15 HiQ rigging manual (EN) version 4.0... - Page 49 Specications SB18 dimensions 707 mm / 27.8 in 750 mm / 29.5 in X15 HiQ rigging manual (EN) version 4.0...
-
Page 50: X-Ul15 SpeciCations
X-UL15 dimensions 685 mm / 27 in 200 mm / 7.9 in Ø M10 643 mm / 25.3 in 53 mm / 2.1 in 96 mm / 3.8 in X15 HiQ rigging manual (EN) version 4.0... -
Page 51: X-Us1215 SpeciCations
Specications X-US1215 specications Description Short U-bracket for X12 and X15 HiQ Weight (net) 3 kg / 6.6 lb Material high grade steel with anti-corrosion coating X-US1215 dimensions 535 mm / 21.1 in 200 mm / 7.9 in Ø M10 493 mm / 19.4 in 53 mm / 2.1 in... -
Page 52: X-Utilt SpeciCations
1.5 kg / 3.3 lb Material high grade steel with anti-corrosion coating X-UTILT dimensions 300 mm / 11.8 in 88 mm / 3.5 in 65 mm / 2.6 in 200 mm / 7.9 in Ø M10 X15 HiQ rigging manual (EN) version 4.0... -
Page 53: X-Bar SpeciCations
1 × Ø12 mm shackle WLL 1 t Weight (net) 1.1 kg / 2.4 lb Material high grade steel with anti-corrosion coating X-BAR dimensions 83 mm / 3.3 in Ø 13 mm / 0.5 in 185 mm / 7.3 in X15 HiQ rigging manual (EN) version 4.0... -
Page 54: Embi SpeciCations
Pole mount socket: 8XTi/12XTi and X series Weight (net) 0.5 kg / 1 lb Material high grade steel with anti-corrosion coating EMBi dimensions 35 mm / 1.4 in 46 mm / 1.8 in 115.5 mm / 4.5 in X15 HiQ rigging manual (EN) version 4.0... - Page 55 L-Acoustics, an L-Group Company 13 rue Levacher Cintrat - 91460 Marcoussis - France +33 1 69 63 69 63 - info@l-acoustics.com www.l-acoustics.com L-Acoustics GmbH L-Acoustics Ltd. L-Acoustics Inc. Steiermärker Str. 3-5 PO. Box Adler Shine - Aston House 2645 Townsgate Road, Suite 600...
Need help?
Do you have a question about the X15 HIQ and is the answer not in the manual?
Questions and answers