
Subscribe to Our Youtube Channel
Related Manuals for Sunny SF-T7512


Summary of Contents for Sunny SF-T7512
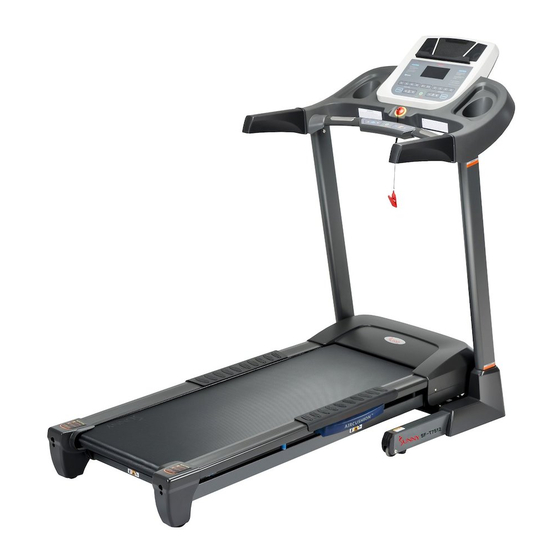
- Page 1 18″ TREADMILL SF-T7512 USER MANUAL IMPORTANT: Read all instructions carefully before using this product. Retain owner’s manual for future reference. For customer service, please contact: support@sunnyhealthfitness.com...
-
Page 2: Important Safety Information
IMPORTANT SAFETY INFORMATION We thank you for choosing our product. To ensure your safety and health, please use this equipment correctly. It is important to read this entire manual before assembling and using the equipment. Safe and effective use can only be assured if the equipment is assembled, maintained, and used properly. -
Page 3: Important Operation Instructions
IMPORTANT OPERATION INSTRUCTIONS 1. Insert the power plug into the socket directly. 2. The constant running time for this machine is less than 2 hours. Be sure to read the manual entirely before operating the equipment. 3. Changes in speed do not occur immediately. Set your desired speed using the adjustment key on the computer console. -
Page 4: Exploded Drawing
EXPLODED DRAWING... -
Page 5: Parts List
PARTS LIST Description Specification Description Specification Base frame Plastic bracket Main frame Side rail Incline bracket Running belt Console bracket Air cushion Left upright tube Side rail anti-slip pad Right upright tube Black cushion Motor bracket Blue cushion Front roller Blue cushion Back roller Transportation wheels... - Page 6 Speed sensor 1000mm Bolt M10*60 DC motor Bolt M10*45 Incline motor Bolt M10*30 Running board Bolt M8*50 Overload protector Bolt M8*40 Square switch Bolt M8*30 Power socket Bolt M8*20 Magnetic ring Bolt M8*15 Magnetic core Bolt M8*40 Power wire Bolt M8*42 Safety key wire 450mm...
-
Page 7: Assembly Hardware
ASSEMBLY HARDWARE CARTON CONTENTS: HARDWARE PACKAGE Description Specification Qty Description Specification Qty M8*50 Main Frame Bolt M8*15 Console base Bolt 5# Allen wrench Lock washer B13 Wrench with Screw Driver S=13, 14, 15 Power wire Safety key MP3 connecting wire Left upright tube cover Lubricant oil C09 Right upright tube cover... -
Page 8: Assembly Instructions
ASSEMBLY INSTRUCTIONS STEP 1: Open the carton and remove all contents. Place the Main Frame (No. A02) on level ground and ensure that you have a clean work space that has adequate space. Note: For safety reasons, do NOT cut the Packing Belt (No. F) until you’ve completed the assembly. - Page 9 ASSEMBLY INSTRUCTIONS STEP 3: Insert the Left Upright Tube Cover (No. C08) into the bottom of the Left Upright Tube (No. A05). Push down to fasten the Left Upright Tube Cover (No. C08) to the Base Frame (No. A01). Repeat the step above to attach the Right Upright Tube Cover (No. C09) to the Base Frame (No.
- Page 10 ASSEMBLY INSTRUCTIONS STEP 5: Cut the Packing Belt (No. F). STEP 6: Insert the Safety Key (No. C31) into the magnet area of the Console (No. E). The assembly is now complete!
-
Page 11: Unfolding The Treadmill
FOLDING INSTRUCTIONS FOLDING THE TREADMILL Place your hand at the end of the running deck [position A] and lift up the Main Frame (No. A02) until the Air Pressure Cylinder (No. B03) locks [position B]. NOTE: You will hear a click when Pressure Cylinder... -
Page 12: How To Move The Machine
HOW TO MOVE THE MACHINE Before attempting to move the treadmill, please make sure the treadmill has been properly folded and the power cord has been removed from the outlet. Start by placing one hand at position A to support the top end of the treadmill. Next, place one foot at position B to hold steady the bottom end of the treadmill. -
Page 13: Important Electrical Information
IMPORTANT ELECTRICAL INFORMATION IMPORTANT NOTE: This treadmill requires a power source of 18 amps (110 Volts) in order to properly operate. For your safety, as well as the safety of others, please verify that the power source is correct before powering the equipment. Any power supply source above or below this level could cause significant damage to the equipment and/or user. -
Page 14: Operating The Console
OPERATING THE CONSOLE WINDOW DISPLAY 1. SPEED/PULSE: The speed range is 0.6-11MPH. 0.6MPH is the default running speed. When the runner holds both hands on the pulse sensors (located on the handles), the system will calculate the runner’s heart beat and display it in this window. The pulse range is 50-200 beats/min (This data is just for reference, and cannot be used as the medical data). -
Page 15: Function Keys
5. STEPS: Display steps that the user has walked. When display steps, it will count from 0 to 99999, when up to 99999, it will count again form 0. 6. MATRIX: The matrix window will display a 0.25miles running track. Once you finish running the lap, the machine will beep and show the number of laps you’ve completed. -
Page 16: Quick Start
QUICK START 1. Insert the magnet end of the safety key into the computer console. 2. Press the START button, a buzzer will sound and the system will automatically display a 3 second countdown. When the countdown reaches zero, the running belt will start. The initial speed will be 0.6MPH (the default running speed). -
Page 17: Built-In Programs
LUBRICATION REMINDER Your treadmill needs lubrication maintenance every 300 miles. The system will release a beeping sound every 10 seconds and display on “OIL” icon on your LCD display to remind you when it’s time. Please read the MAINTENANCE INSTRUCTIONS on Page 21 to learn the proper steps to lubricating your machine. -
Page 18: Range Of Program
INCLINE SPEED INCLINE SPEED INCLINE SPEED INCLINE SPEED INCLINE SPEED INCLINE USER SETTINGS (U1-U3): Press the PROGRAM button to cycle through the programs until you reach U1-U2-U3. User Settings Programs (U1-U3) are programs that allow the user to manually preset each of the 10 exercise programs in order to tailor your personal workout regime. - Page 19 BODY FAT CALCULATION Press the PROGRAM button until the window displays FAT (Body Fat Calculation). Press MODE to enter F-1, F-2, F-3, F-4, F-5 (F-1 SEX, F-2 AGE, F-3 HEIGHT, F-4 WEIGHT, F-5 Body Quality Index). Press the SPEED +/- keys to set F1-F4 (refer to the chart below). Once you have finished setting F1-F4, press MODE, this will take you to the setup for F-5 (Body Quality Index).
-
Page 20: Exercise Instructions
EXERCISE INSTRUCTIONS GETTING STARTED Before starting any exercise program you should consult your physician to determine if you have any medical or physical conditions that could put your health and safety at risk, or prevent you from using the equipment properly. Be aware of your body’s signals. Incorrect or excessive exercise can damage your health. -
Page 21: Adjusting The Running Belt
MAINTENANCE GUIDE General cleaning will help to prolong the life and improve performance on your treadmill. Keep the unit clean and maintained by dusting the components on a regular basis, cleaning the two exposed sides of the running belt to prevent dust from accumulating underneath the belt. -
Page 22: Lubricating The Treadmill
LUBRICATING THE TREADMILL Lubricating the running belt & running board is essential as the friction affects the life span and operations on the treadmill. Therefore, it is suggested that the running belt be inspected regularly. Should you find any wear on the running board, please contact us at support@sunnyhealthfitness.com WARNING: Always unplug the treadmill from the electrical outlet before cleaning, lubricating, or repairing the unit. -
Page 23: Troubleshooting
TROUBLESHOOTING PROBLEM CAUSE SOLUTION Not plugged in Plug cord into outlet Treadmill will not start Safety Key not inserted Insert Safety Key Running speed inaccurate Not calibrated correctly Recalibrate speed setting Running belt tension not Tighten adjustment Running belt not centered proper on the left or right bolts on the left and right sides of the running board... - Page 24 incline motor Reconnect or replace the Console displays E04: damaged OR the wire for wire for the incline motor. Incline failure the incline motor is not Replace the incline motor. connected properly or has become damaged Restart treadmill. The incoming voltage is Check incoming voltage...
Need help?
Do you have a question about the SF-T7512 and is the answer not in the manual?
Questions and answers