Table of Contents

Subscribe to Our Youtube Channel
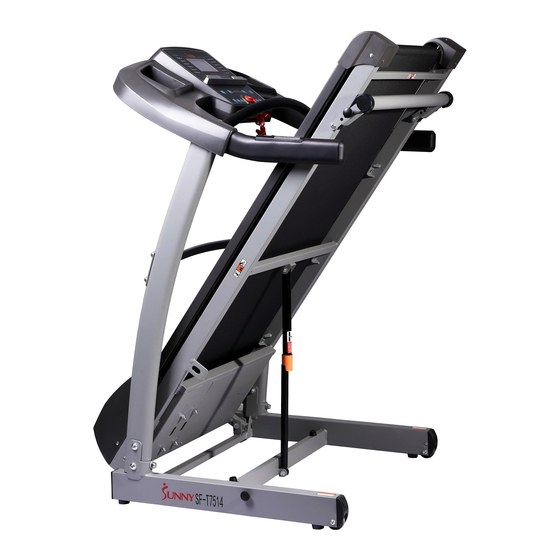
Related Manuals for Sunny SF-T7514


Summary of Contents for Sunny SF-T7514
- Page 1 HEAVY DUTY WALKING TREADMILL SF-T7514 USER MANUAL IMPORTANT: Please read this manual carefully before using the product. Retain owner’s manual for future reference. For Customer Service, please contact: support@sunnyhealthfitness.com...
-
Page 2: Important Safety Information
IMPORTANT SAFETY INFORMATION We thank you for choosing our product. To ensure your safety and health, please use this equipment correctly. It is important to read this entire manual before assembling and using the equipment. Safe and effective use can only be assured if the equipment is assembled, maintained, and used properly. - Page 3 IMPORTANT OPERATIONAL INSTRUCTIONS WARNING! To reduce the risk of electric shock, personal injuries, and potential damage to your equipment, please ensure to follow these instructions: Always unplug the treadmill from the outlet immediately after use and before cleaning, assembling, or servicing. ...
- Page 4 EXPLODED DRAWING...
-
Page 5: Parts List
PARTS LIST Description Spec. Description Spec. Base Frame Safety Key Height Adjuster Computer Main Frame Screw ST4.0*15 Support Tube-L End Cap-C Support Tube-R Connecting Tube Handlebar Screw M8×55 Bracket Carrier Screw M8x50 Screw M4*8 Screw M4*12 φ8 Washer Overload Protector Transportation Wheels Power Switch Power Cord... - Page 6 PACKAGE CONTENTS TOOLS & HARDWARE KIT Part Description Part Description Hex Wrench #5 Arc Washer Hex Wrench #6 Screw Spanner Screw Silicone Oil Arc Washer #26 Screw #32 Screw #23 Nut #24 Arc Washer #33 Arc Washer (2 PCS) (4 PCS) (2 PCS) (2 PCS) (4 PCS)
-
Page 7: Assembly Instructions
ASSEMBLY INSTRUCTIONS WARNING: Do not attempt to plug the treadmill to a power source until you’ve completed assembly. STEP 1: Open the carton to remove the contents. Place the Main Frame (No. 3) on level ground and carefully raise the Right & Left Support Tubes (No. 4 & No. 5). Fix the bottom of the Right &... - Page 8 ASSEMBLY INSTRUCTIONS STEP 2: *IMPORTANT NOTE: For this step of assembly, it is strongly advised to seek assistance as it requires the help of an extra set of hands to hold a heavy component while you fix the top console. With the help of your assistant holding up the Top Console, connect Mid Cable (No.
- Page 9 ASSEMBLY INSTRUCTIONS Safety Key (No. 41) Rise Right and Left Upright tubes evenly and carefully. Attach 2 Screws (26) and 2 Arc Washers (24) and 2 Nut to fix the bottom of Upright tubes. STEP 3: Insert the Safety Key (No. 41) into the magnetic area of the top console. In case of emergency, pull out the Safety Key (No.
-
Page 10: The Display Console
THE DISPLAY CONSOLE DISPLAY WINDOW & FUNCTION KEYS: 1. LCD display window shows: Time, Speed, Distance, Calories Burned, and Pulse. 2. Function Keys: START, STOP, PROG (Program), MODE, + SPEED, - SPEED. 3. 1 MPH, 2 MPH, 3 MPH, 4 MPH are “Quick Speed” keys for convenient access to preprogrammed speeds. - Page 11 THE DISPLAY CONSOLE HANDLEBAR KEYS (No. 40): 1. Right side: SPEED buttons + and – 2. Left side: START and STOP buttons PULSE SENSORS (ON HANDLEBARS): 1. Grab the Pulse Sensors (No. 40) located on the left & right handlebars and hold for 8 seconds.
- Page 12 THE DISPLAY CONSOLE CONSOLE DISPLAY: Initialization Setting Initialization Setting Range Display Range Time (MIN: SEC) 0:00 30:00 8:00-99:00 0:00~99:59 0.5-4 Speed (MPH) 1.0-99.0 0.0-99.9 Distance (MI) 40-199 Heart Rate (TIME/MIN) 20-990 0-999 Calorie (KCAL) BODY FAT CALCULATION: 1. To test your body fat percentage, press the PROG key 2.
-
Page 13: Exercise Instructions
EXERCISE INSTRUCTIONS Before beginning a workout, ensure that the Safety Key (No. 41) is properly attached onto the Top Console and the Safety Clip is securely attached to an article of your clothing. Always begin by standing on the Side Rails (No. 62), not the running belt. Allow the treadmill to reach the default speed of 0.5 MPH before walking onto the running belt. - Page 14 MOVING & STORING THE MACHINE INCLINE/HEIGHT ADJUSTMENT: This treadmill is designed with 3 levels of incline preferences. Remove Pin (No. 18) and reinsert the Pin (No. 18) into one of the 3 holes located on the sides of the Height Adjuster (No.
- Page 15 LUBRICATING YOUR TREADMILL This treadmill has been lubricated with Silicone Oil (No. 80) before leaving the manufacturer. Silicone oil is free of volatility and is gradually permeated through the There’s no need to reapply the lubricant in normal Running Belt (No. 65). circumstances, however, in other circumstances, lubrication may be required before the first use.
- Page 16 MAINTENANCE & CARE General cleaning will help prolong the life and performance of your treadmill. Keep the unit clean and maintained by dusting the components on a regular basis. Clean both sides of the running belt to prevent dust from accumulating underneath the belt. Keep your running shoes clean so the dirt from your shoes do not wear out the Running Deck (No.
Need help?
Do you have a question about the SF-T7514 and is the answer not in the manual?
Questions and answers
My SF-T7514 treadmill is now making a ticking noise while running. What can I do?
@Jeff Glaznap
To fix a ticking noise on a Sunny SF-T7514 treadmill while running, check if the running belt is rubbing against the running deck due to increased resistance. If so, unplug the treadmill, then apply the included silicone oil to lubricate the deck under the belt. Do not over-lubricate, and wipe off any excess with a clean towel. Use only silicone oil lubricants.
This answer is automatically generated