
Subscribe to Our Youtube Channel
Related Manuals for Sunny SF-T7610


Summary of Contents for Sunny SF-T7610
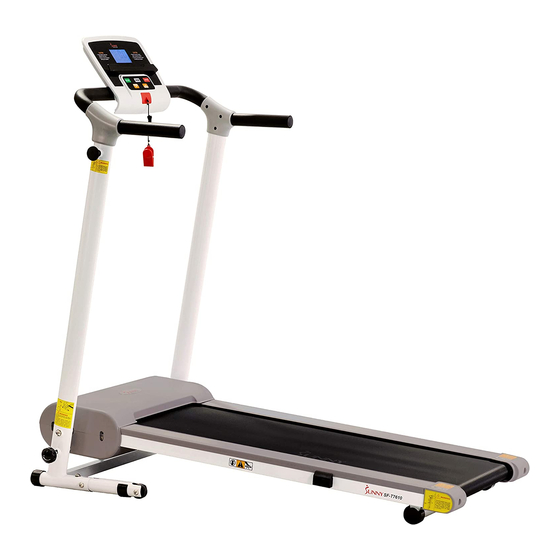
- Page 1 SF-T7610 TREADMILL USER MANUAL IMPORTANT: Read all instructions carefully before using this product. Retain owner’s manual for future reference. For customer service, please contact: support@sunnyhealthfitness.com...
-
Page 2: Important Safety Instructions
IMPORTANT SAFETY INSTRUCTIONS When using an electrical appliance, basic precautions should always be followed, including the following: Read all instructions before using this treadmill. DANGER – To reduce the risk of electrical shock: 1. Always unplug this appliance from the electrical outlet immediately after using and before cleaning. -
Page 3: Important Safety Information
IMPORTANT SAFETY INFORMATION We thank you for choosing our product. It is important to read this entire manual before assembling and using the equipment. It is your responsibility to ensure that all users of the equipment are informed of all warnings and precautions. 1. -
Page 4: Important Note
IMPORTANT OPERATING INSTRUCTIONS 1. Insert the power plug directly into the socket. 2. Read the manual before operating the equipment. 3. Changes in speed do not occur immediately. Set your desired speed using the adjustment keys on the main console. The speed will increase gradually. 4. -
Page 5: Exploded Drawing
EXPLODED DRAWING... -
Page 6: Parts List
PARTS LIST Base frame Keyboard Base support tube Connection line 100mm Main frame Console upper wire 650mm Handrail connecting Console lower wire 1600mm bracket Handrail bracket Speed sensor 200mm Running board strengthen DC motor tube Front roller AC single line Blue 200mm Rear roller AC single line... - Page 7 Fixed block Washer Cushion Washer Inner cap Spring washer Safety key Flat washer C Rubber cushion Bolt M8*40 console display Bolt M6*15 Control board...
-
Page 8: Assembly Hardware
ASSEMBLY HARDWARE CARTON CONTENTS: Parts List: NO. DES. Specification Nos. NO. DES. Specification Nos. Main Frame Safety key Base support tube Handrail bracket Bolt M8*50 B03 Spanner w/ Screw Driver S=13、14、15 Bolt M8*15 Allen wrench Arc Washer Lock knob ASSEMBLY TOOLS Allen Wrench (5mm) –... -
Page 9: Assembly Instructions
ASSEMBLY INSTRUCTIONS STEP 1: Notice: We recommend having two people do the assembly. Open the carton box, take out the contents, and place the Main Frame (A) on level ground. STEP 2: Notice: Support Main frame (A03) at position “F” with one hand to prevent it from falling down during assembly. - Page 10 STEP 3: Notice: To avoid any possible injury, please hold on the Main frame (A03) at position “F” before you pull the Locking pin (C25) and ensure that the space directly underneath it is clear of any objects. Once the Main frame (A03) is released, please continue to hold on until it reaches the floor.
- Page 11 STEP 5: Insert Lock knob (B09). Secure the Base frame (A01) to Main frame (A03) by turning Lock knob (B09) clockwise until tight. STEP 6: Turn the Console display (B) to right angle. IMPORTANT NOTE! You will need to lubricate your treadmill before the first use.
-
Page 12: Maintenance And Care
MAINTENANCE & CARE General cleaning will help prolong the life and performance of your treadmill. Keep the unit clean and maintained by dusting the components on a regular basis. Clean both sides of the running belt to prevent dust from accumulating underneath the belt. Keep your running shoes clean so that dirt from your shoes does not wear out the running board and belt. -
Page 13: Lubricating The Treadmill
LUBRICATING THE TREADMILL *IMPORTANT NOTE: Lubricate your treadmill before the first use. RUNNING BELTS & TREADMILL LUBRICANT: Lubricating the running board and running belt is essential as the friction between the two affects the life span and function of the treadmill. Inspect both the running board and the belt regularly. -
Page 14: Folding Instructions
FOLDING INSTRUCTIONS FOLD UP: Loosen the Lock knob (B09) counterclockwise and pull it out. Fold up the Main frame. Notice: Remember where you keep the Lock knob (B09) after you pull it out. You will need it when you unfold the machine. - Page 15 UNFOLD: NOTE: Before lowering the Main Frame (A03), ensure that space directly underneath it is clear of any objects. To avoid any possible injury, please hold on the Main frame (A03) at position “F” before you pull the Locking pin (C25). Once the Main frame (A03) released,...
-
Page 16: How To Move The Machine
HOW TO MOVE THE MACHINE Before attempting to move the treadmill, make sure that it has been properly folded. Unplug the power cord. To tilt, start by placing one hand at position “P” to support the top end of the treadmill. Next, place one foot at position “K”... -
Page 17: How To Use Safety Key
HOW TO USE SAFETY KEY Insert the Safety Key (C32) into the magnetic area of the Console (B) and clip to your clothes. Note: In an emergency, pull out the Safety Key (C32), and the machine will stop. -
Page 18: Important Electrical Information
IMPORTANT ELECTRICAL INFORMATION WARNING: This treadmill requires a power source of 8 amps (100-120 V) in order to properly operate. For your safety, as well as the safety of others, verify that the power source is correct before plugging the equipment. Any power source above or below this level could cause significant damage to the equipment and or user. -
Page 19: The Display Console
THE DISPLAY CONSOLE DISPLAY 1. SPEED: Displays current speed (range 0.5-6.5MPH). When in setting mode, the window displays H-1, H-2, H-3. 2. TIME: Display running time. Display the exercise time positive direction clock from 0:00-99:59 MINS. If the time reaches 99:59, the machine will stop smoothly and display “End”... -
Page 20: Function Keys
THE DISPLAY CONSOLE FUNCTION KEYS 1. START: To start the machine, insert the magnet end of the safety key into the computer console then press the START button. This machine requires the Safety Key in order to start. 0.5 MPH is the default start speed. 2. - Page 21 TREADMILL FUNCTIONS SAFETY LOCK FUNCTION: Remove the Safety Key (C32) from the computer console while the treadmill is running and the treadmill will stop immediately. Once the treadmill reaches a full stop, the display will show “- - -“and the buzzer will beep 3 times. To start the treadmill again, insert the magnet end of the Safety Key (C32) into the computer console and press the START button.
-
Page 22: Getting Started
EXERCISE INSTRUCTIONS GETTING STARTED: Get to know your treadmill. Before attempting to use the treadmill, take some time to familiarize yourself with the controls. Once you get on, stand with your feet on the side rails and stabilize yourself by holding onto the handrails. Next, attach the clip end of the Safety Key to your clothes and insert the magnetic end of the key into the computer console. -
Page 23: Troubleshooting
TROUBLESHOOTING PROBLEM POSSIBLE CAUSE SUGGESTED ACTION Not plugged in Plug cord into outlet Treadmill will not start Safety Key not inserted Insert Safety Key Not calibrated correctly Re-calibrate speed setting Running speed inaccurate Speed set in the wrong Change setting to proper Units of measurement units. - Page 24 Check motor wires to see if the motor is connected. If the The motor wire is not wire has been punctured or E06: Motor Abnormality connected or the motor is damaged, you will need to damaged. replace it. If the problem is not rectified, you may need to replace the motor Check the upper and middle...
Need help?
Do you have a question about the SF-T7610 and is the answer not in the manual?
Questions and answers