Table of Contents
Advertisement
Quick Links
WALK
W
KING
IMP
PORTANT!
! Please r
sati
sfaction is
very impor
sup
pport@sunn
nyhealthfitn
G TR
EAD
SF
USE
retain own
ner's manu
rtant to us,
, PLEASE
ness.com
or 1- 877 -
o
DMILL
L WI
F-T78
857
R MAN
NUAL
ual for ma
aintenance
DO NOT R
RETURN U
90SUNNY
Y (877-907
TH H
HAND
and adju
stment ins
UNTIL YOU
U HAVE CO
-8669).
DRA
AIL
structions.
Your
ONTACTE
D US:
Advertisement
Table of Contents

Subscribe to Our Youtube Channel
Summary of Contents for Sunny SF-T7857
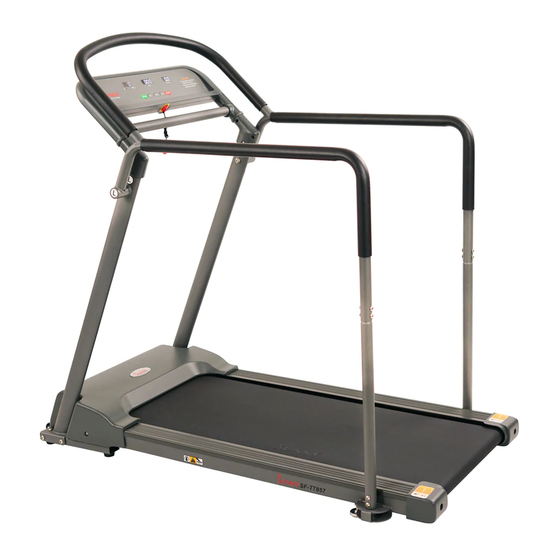
- Page 1 WALK KING G TR DMILL L WI TH H HAND F-T78 R MAN NUAL PORTANT! ! Please r retain own ner’s manu ual for ma aintenance and adju stment ins structions. Your sati sfaction is very impor rtant to us, , PLEASE DO NOT R RETURN U...
-
Page 2: Important Safety Instructions
IMPORTANT SAFETY INSTRUCTIONS When using an electrical appliance, basic precautions should always be followed. Read all instructions before using this treadmill. DANGER – To reduce the risk of electrical shock: 1. Always unplug this appliance from the electrical outlet immediately after using and before cleaning. WARNING –... -
Page 3: Important Safety Information
IMPORTANT SAFETY INFORMATION We thank you for choosing our product. To ensure your safety and health, please use this equipment correctly. It is important to read this entire manual before assembling and using the equipment. Safe and effective use can only be achieved if the equipment is assembled, maintained, and used properly. - Page 4 IMPO RTAN T OPE ERATI NG IN STRU CTION 1. In nsert the p ower plug directly int to the sock ket. 2. R Read the m manual befo ore operati ng the equ uipment. 3. C Changes in n speed do not occur immediate ely.
- Page 5 EX X PLOD DED DI AGRA A M 1...
- Page 6 EX X PLOD DED DI AGRA A M 2...
-
Page 7: Parts List
PARTS LIST Description Specification Description Specification Ribbon Cable on Key Main Frame Board Left Upright Upper Signal Wire Right Upright Middle Signal Wire Console Bracket Bottom Signal Wire Support Tube Safety Key Sensor Left Side Handlebar Safety Key Right Side Handlebar Power Wire Front Handlebar Power Switch... - Page 8 Description Specification Description Specification Optional Grounding Wire Optional Audio Jack Wire M5*8 Optional Bolt Speaker Optional ST2.9*6.0 Mp3 Connecting Optional Screw Optional Wire Optional Audio Module Fixing Cap Optional Amplifier Board Optional Amplifier Wire Ordering Replacement Parts (U.S. and Canadian Customers only) Please provide the following information in order for us to accurately identify the part(s) needed: ...
- Page 13 C-4 4...
- Page 15 C-6 6...
- Page 18 OW TO O ADJ JUST T THE BA ALAN To a achieve a s smooth an nd comforta able experi ience, you must ensu ure that the e treadmill is stable. If you noti ce that the e treadmill is unbalan nced during g use, you should adj...
-
Page 19: Maintenance And Care
MAINTENANCE & CARE General cleaning will help prolong the life and performance of your treadmill. Keep the unit clean and maintained by dusting the components on a regular basis. Clean both sides of the Running Belt (No. C19) to prevent dust from accumulating underneath. Keep your running shoes clean so that dirt from your shoes does not wear out the Running Board (No. - Page 20 LUBRIC CATIN NG THE E TREA ADMIL PORTANT NOTE: u will need to lubricate e your trea admill befor re the first use. NNING BE ELTS & TR READMILL LUBRICA ANT: bricating th e Running g Board ( No. D13) a and Runn ing Belt ( No.
- Page 21 IMPOR RTANT T ELEC CTRIC CAL IN FORM MATIO ARNIN This t treadmill re equires a co orrect pow er source i in order to properly o perate. Fo r your safe ety, as wel l as the saf fety of othe ers, please e verify that t the powe...
- Page 22 NSOLE E INST TRUCT TIONS SPLAY A ND BUTT TON FUN NCTIONS 1. C CAL. / DIS: : Displays calories an nd distance 2. T TIME: Disp lays runnin ng time. 3. S SPEED: Dis splays curr rent speed 4. S START: Pre ess this bu tton at any...
- Page 23 WER O ON & P OWER R OFF POWER ON Flic k the powe er switch to o this symb bol to turn o on the trea admill. POWER OFF: Flic k the powe er switch to o this symb bol to turn t he treadmi ill off at any...
-
Page 24: Troubleshooting
TROUBLESHOOTING PROBLEM POSSIBLE CAUSE SUGGESTED ACTION Not plugged in. Plug cord into the outlet. Treadmill will not start Safety Key not inserted. Insert Safety Key. Running belt tension is not Tighten the adjustment bolts Running belt correct on the left or right on the left and right side of the centered side of the running board. - Page 25 Check motor wires to see if the motor is connected. If the The motor wire is not wire has been punctured or E06: Motor Abnormality connected or the motor is damaged, you will need to damaged. replace it. If the problem is not rectified, you may need to replace the motor.


Need help?
Do you have a question about the SF-T7857 and is the answer not in the manual?
Questions and answers