Table of Contents
Advertisement
Quick Links
Advertisement
Table of Contents

Related Manuals for Impulse IT6015B


Summary of Contents for Impulse IT6015B
- Page 1 IT6015B INCLINE BENCH Assembly Instructions...
-
Page 2: Table Of Contents
Table of contents Important Safety Instructions----------------------------------- 1 Exploded View Diagram------------------------------------------- 2 Assembly Part List-------------------------------------------------- 3 Hardware List--------------------------------------------------------- 4 Parts List--------------------------------------------------------------- 5 Assembly instructions--------------------------------------------- 6... -
Page 3: Important Safety Instructions
Important Safety Instructions Before beginning any fitness program, you should obtain a complete physical examination from your physician. When using exercise equipment, basic precautions should always be taken, including the following: * Read all instructions before using the INCLINE BENCH. These instructions are written to ensure your safety and to protect the unit. -
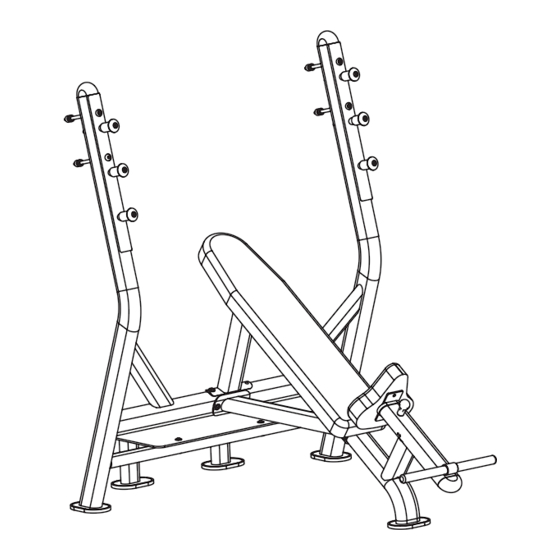
Page 4: Exploded View Diagram
T6015B INCLINE BENCH Exploded View Diagram... -
Page 5: Assembly Part List
Assembly Part List... -
Page 6: Hardware List
Hardware List Millimeters Inches... -
Page 7: Parts List
Parts List Item No. Description Main upright Pad upright Middle base Back upright Weight bar storage Slip upright Seat pad Feet beam Socket cap screw M8*20 Allen bolt M10*30 Allen bolt M10*60 Allen bolt M10*120 Allen bolt M10*125 Allen bolt M8*15 Washer Φ... -
Page 8: Assembly Instructions
Assembly Instructions Assembly of the FLAT BENCH takes professional installers about 2 hours. If this is the first time you have assembled this type of equipment, plan to spend more time. It is strongly recommended to assemble the equipment by professional installers. You may find it quicker, safer, easier to assemble this equipment with the help of a friend, as some of components may be large, heavy or awkward to handle alone. -
Page 9: Main Upright
STEP1 1)Attach the Pad upright(2#)to the Main upright (1#)use: Two Allen bolts(12#)M10*120 Four Washers(15#) 11* 23*2 Φ Φ Two Nylon Locknuts(16#)M10 2)Attach the Middle base(3#)to the Main upright(1#)and Pad upright(2#)use: Two Allen bolts(13#)M10*125 Two Allen bolts(23#)M10*80 Eight Washers(15#) 11* 23*2 Φ... -
Page 10: Back Upright
STEP2 1)Attach the Back upright(4#)to the Main upright (1#)use: Two Allen bolts(11#)M10*60 Four Washers(15#) 11* 23*2 Φ Φ Two Nylon Locknuts(16#)M10 2)Through the Slip upright(6#)to the Pad upright (2#) attened by: One Socket cap screw(9#)M8*20... -
Page 11: Seat Pad
STEP3 1)Attch the Back pad (20#)to the Pad upright (2#). Attch the Seat pad (7#)to the Slip upright(6#)use: Six Allen bolts(10#)M10*30 Six Washers(15#) 11* 23*2 Φ Φ Six Spring Washers(24#) 10 Φ Through the Feet beam(8#)to the Pad upright (2#) attened by: One Allen bolt(14#)M8*15...
Need help?
Do you have a question about the IT6015B and is the answer not in the manual?
Questions and answers