Table of Contents
Advertisement
Quick Links
Advertisement
Table of Contents

Related Manuals for Griven GR0466


Summary of Contents for Griven GR0466
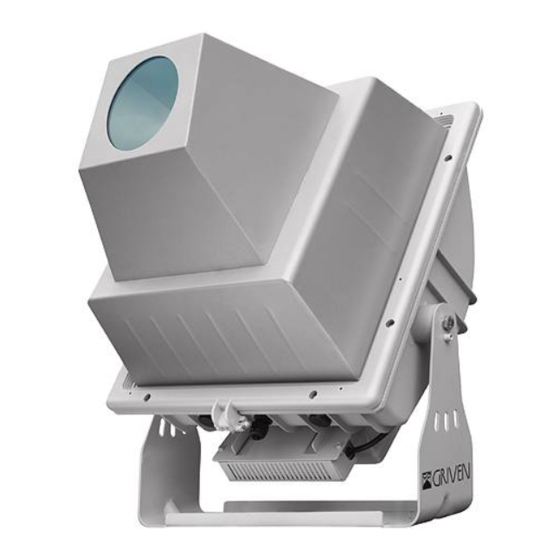
- Page 1 GOBOSTORM GR0466 Instruction manual...
-
Page 3: Table Of Contents
INDEX 1.0 Introduction ...........................4 1.1 Safety information.................................4 1.1.1 Protecting against electric shock ..........................4 1.1.2 Installation ..................................4 1.1.3 Protection against burns and fire ..........................4 1.1.4 Protection against lamp explosion ..........................4 1.1.5 Weather protection..............................4 1.1.6 Protection against UV radiation..........................4 1.3 Compliance ..................................4 2.0 Size ..............................5 3.0 Components of the unit........................6 4.0 Packaging and transport ......................6... -
Page 4: Introduction
• Never operate the fixture with missing or damaged lenses and / or cover. • Replace any damaged shields with original GRIVEN spare parts.. • Do not stare directly into the light. Never look at an exposed lamp while it is lit. -
Page 5: Size
2.0 Size 715mm 28,16” 473mm 18,62” 660mm 25,99” 506mm 19,92” 368mm 14,47” 173mm 6,81” 213mm 8,39” English... -
Page 6: Components Of The Unit
• Griven S.r.l. will accept claims for broken or missing goods only within seven days of receipt of the goods. • Returns of equipment will not be accepted without prior authorization granted by Griven S.r.l. and if not duly ac- companied by relevant shipping documents. -
Page 7: Quick Turn On
5.0 Quick turn on In this chapter brief essential instructions for an immediate use of the unit are listed. These instructions are neces- sary to connect and power up the unit, but they will not describe in complete details the functions of the unit it- self. - Page 8 G. Power up the unit by using the cable “4”. H.Set the DMX address and the working mode using the “5” dip- switch panel located within the fixture rear box. English...
-
Page 9: Installation
6.0 Installation 6.1 Fixing The unit can be used both rested on floor and fixed onto a structure. Possible mounting positions are shown in the following picture. Min 10 cm Min 10 cm Use the holes Ø12.5 and Ø14 in the bracket to fix the unit. 180mm 180mm 7,09in... -
Page 10: Adjusting Light Beam Direction
6.2 Adjusting light beam direction A. Untighten the screws "6" and the grain “7”. B. Rotate the body of the unit towards desired direction and tighten the screws “6” and the grain “7”. 6.3 Connection to mains power The unit can operate with voltage from 200 to 220Vac or 230 to 240Vac and with frequency of 50 and 60Hz. Warning! •... - Page 11 Connect the ballast by using the terminal “9”. Vac IN Cable n° 3 Cable n° 2 Cable n° 1 Close the projector following the numerical order shown in the picture. Power up the ballast. Main supply Brown Live Yellow Green Ground Blue Neutral...
-
Page 12: Connection To Dmx Signal
6.4 Connection to DMX signal The DMX signal is to be connected by using a shielded cable designed for devices RS-485. The unit is fitted with internal pins for the connection of the of the DMX signal cable, as shown in the following pictures. -
Page 13: Lamp Installation And Replacement
We recommend, therefore, that the lamp is replaced within the manufacturer’s specified lamp life. The specification of the lamp, available via the Griven network of dealers and distributors, are shown in the table below. -
Page 14: Lamp Installation
7.2 Lamp installation Attention! Disconnect the unit from mains supply before servicing it or performing any other action. The lamp is very hot during operations! Wait at least for 20 minutes before changing. A. Untighten the screws “8” ed open the projector. B. -
Page 15: Replacing Gobos And Focus
Close the projector following the numerical order shown in the picture. 8.0 Replacing gobos and focus 8.1 Replacing gobos Gobostorm features a gobos wheel hosting up to 5 gobos (D Size: Ext 53,3 – Int 38). A. Untighten the screws “8” ed open the projector. B. -
Page 16: Focus
C. Reinserire l’anello fermagobo “12” facendo in modo che il gobo aderisca in modo uniforme al supporto. 8.2 Focus The standard beam angle is 10°. By adjusting the objective it is possible to modify the focusing. A. Loosen the knobs “14”. B. -
Page 17: Mounting The Optional 16° Angle Lens
8.3 Mounting the optional 16° Angle lens By installing the optional lens (provided along with the fixture), the projector will achieve a 16° beam angle. A. Undo the screws “16”. B. Remove the objective “17”. C. Place the lens as shown in the picture and secure it by using the screws previously removed. -
Page 18: Use Of The Unit
Close the projector following the numerical order shown in the picture. 9.0 Use of the unit 9.1 Setting operating mode By the dip-switch set it is possible to select one of the following operating modes: • using DMX512 signal control mode Each fixture is controlled from DMX512 signal control. -
Page 19: Dmx Functions
Each unit will use 1 DMX channel. The number of the DMX address is to be calculated by summing the values corresponding to the activated dip- switches, which are written in the upper side of the dip-switch set (1, 2, 4, 8, 16, etc.). Example Unit with address 005 (dip-switch n°1 and 3= ON) -
Page 20: Master Configuration
10.1 MASTER configuration To execute a preset programme set the dip-switch Master to ON and choose the type of programme to be executed. The following pictures show some examples of MASTER units configuration. Unit set as Master (Master = ON) program 1°... -
Page 21: Automatic Configuration
10.3 AUTOMATIC configuration To set up the unit as AUTOMATIC the same instructions for the set up as MASTER must be followed (see paragraph 8.1 MASTER configuration). Adjust the dip-switch Master to ON and choose the programme to be executed. 11.0 Maintenance Attention! Always remove mains power prior to opening up the fixture. -
Page 22: Spare Parts
12.0 Spare parts All components of the unit are available as spare parts at Griven dealers. Exploded views, wiring diagrams, electronic layouts and advertising brochures are available on request. To make the job of assistance centres easier, specify serial number and model of the unit which spare parts are requested for. -
Page 23: Technical Specifications
15.0 Technical specifications Projector mechanical features Height ................598m (23.56”) Width . - Page 24 Via Bulgaria, 16 - 46042 CASTEL GOFFREDO (MN) - Italy Telefono 0376/779483 - Fax 0376/779682 - 0376/779552 http://www.griven.com/ e-mail griven@griven.com http://www.griven.it/ e-mail griven@griven.it User’s manual rel. 2.00EN...
Need help?
Do you have a question about the GR0466 and is the answer not in the manual?
Questions and answers