Table of Contents
Advertisement
Quick Links
Advertisement
Table of Contents

Related Manuals for 3D Systems ZPRINTER 650


Summary of Contents for 3D Systems ZPRINTER 650
- Page 1 ZPRINTER ® QUICK START GUIDE Part Number 09578 Rev. C 11/5/12...
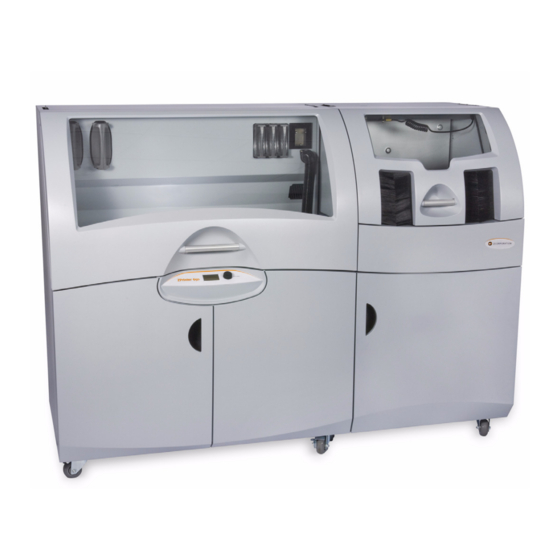
- Page 2 ZPrinter 650 Overview Post-Processing Unit Printer Debris Separator Binder Cartridges Arm Holes Air Wand Control Nut Heater Vent Air Wand Vacuum Hose Accessory Tray Arm Fast Axis Post-Processing Tray (shown raised) Service Station (hidden) Build Bed Control Panel Post-Processing Storage Printing Storage 3dscentral.3dsystems.com...
- Page 3 Printing Storage Post-Processing Storage Cleaning Tool Solution Basket Cartridge Accessory Tray Waste Parts Tray Trays Push the Control Knob once to: • Bring up the printer menu. • Select a menu command. • Start/Stop/Cancel a menu function. Turn the Control Knob left/right to highlight menu items. QSG-4 control panel When selecting the Raise/Lower Platform commands, hold the Control Knob down to raise/lower the platform.
- Page 4 ZPrinter 650 control familiarize you with your 3D Printer, and lead you through mak- panel. ing a build. Please refer to the ZPrinter 650 User Manual for • Ensure the ZPrint™ Software is installed and running, and...
-
Page 5: Table Of Contents
1.3 Steps To Print Follow the steps outlined in the sections below to print your part. Section Title Page Check The Printer Setup Your Build And Print Automatic Powder Removal Fine Powder Removal Routine Cleaning After Every Build Post-Processing With Z-Bond Additional Printer Operations 3dscentral.3dsystems.com... -
Page 6: Check The Printer
2. Check The Printer Open the printer top cover and pull the fast axis out toward you. Before you start your print job, it’s important that you check the Check for loose powder in or around the Build Bed, Fast printer. -
Page 7: Setup Your Build And Print
3. Setup Your Build And Print • Check the Bleed Compensation option, if it isn’t checked already. Now that your printer is clean, you need to open up the 3D file • If you want to print all in one color, check the Print in using ZPrint, and select your printing parameters. - Page 8 ZPrint checks each item in the Printer Status dialog prior to printing to ensure there are enough materials to complete Select File > 3D Print, or click on the Toolbar, to open the build. the Printer Status dialog. • Section 8 of this guide for instructions if you see a message saying any of the items needs attention.
- Page 9 features, uncheck this option. Also refer to the ZPrinter The Printing dialog also provides: 650 User Manual for information on adding fixtures and • The Pause button. Click to pause the current print job, bumpers to help protect delicate parts. Click again to resume printing.
-
Page 10: Automatic Powder Removal
4. Automatic Powder Removal Open the cover of the Post-Processing Unit. When the build is finished, the printer starts an automatic drying If the solid metal tray cycle. A counter on the printer LCD counts down the time has been placed on remaining before the part is dry. -
Page 11: Fine Powder Removal
5. Fine Powder Removal Using the Air Wand, remove all remaining The freshly-printed part will still have powder clinging to it, powder on the part. which must be removed before proceeding with the post-pro- The vacuum will evac- cessing steps. uate the powder through the floor of the Ensure the metal tray is latched in the up position in the top... -
Page 12: Routine Cleaning After Every Build
6. Routine Cleaning After Every Build Vacuum all powder from the Build Bed (but not the After every build, it is important to clean your printer following Feeder side), and from the the steps below. deck around the Build Bed. Be sure to remove the A clean, well-maintained printer produces better parts, powder between the Build... -
Page 13: Clean The Parking Caps
6.2 Empty The Debris Separator 6.3 Clean the Parking Caps The purpose of the Debris Separator is to keep any large parti- The Parking Caps keep the print heads from drying out between cles from going back into the Feeder during vacuuming. print jobs. - Page 14 Use a dry paper towel to wipe the caps clean. Remove the paper towels from the Deck and wipe up any water on the Fast Axis or Deck. Remove the paper towels from the front overflow and dry it thoroughly. Service Carriage Paper...
- Page 15 6.4 Clean The Rails and Carriage Keeping the Rails and Carriage clean will keep the Carriage mov- ing smoothly and thus optimize printing accuracy. Pull the Fast Axis toward you. 2.Wipe the top and bottom Rails with a paper towel Top Rail dampened with distilled...
-
Page 16: Clean The Service Station
6.5 Clean The Service Station Clean the Service Station after every build to remove residue buildup and to ensure the printer runs optimally for your next Clean Squeegee print job. Before you begin: Clean Spit Plate • Get several dry paper towels and a cotton swab. •... - Page 17 Remove the spit plate from the Service Station Place paper towels and clean it with a paper around the Service Sta- towel. Replace the spit tion, and between the plate, using the edge tabs Service Station and the for correct alignment. Build Bed.
-
Page 18: Post-Processing With Z-Bond
Best Practices, and material storage 3D Systems also offers a Z-Bond Dipping Kit, which contains guidelines. While you’re there, visit all the supplies needed for post-processing. The Kit provides a our 3DS Shop online store for all your 3D printing supplies. - Page 19 Follow the steps below to set up the Post-Processing Unit for Unlatch the metal tray from inside the top of the Post-Pro- infiltration. cessing Unit. Lower the metal tray to the bottom of the Post-Pro- WARNING cessing Unit and press The Post-Processing Unit is for use with Z-Bond only.
- Page 20 7.3 Post-Processing Using the Dipping Quickly and thoroughly wipe any excess liquid off the part with paper towels and place the part on the wax paper. Method • Do not let excess liquid pool on the part as this may Most parts can be infiltrated simply by dipping briefly in the Z- cause its texture to change.
- Page 21 7.4 Post-Processing Using the Drizzle Method • Move the part frequently for the first few minutes. This prevents pooling of Z-Bond under the part and the part Parts with delicate features may be damaged by the handling adhering to the paper. required for the dipping method.
-
Page 22: Additional Printer Operations
2.Check the expiration date. 3.Open both top covers on the ZPrinter 650 and place the powder canister in the Post- Processing Unit. 4.Remove the gray sealing cap from the top of the canister. -
Page 23: Add Binder
8.2 Add Binder If there is not enough binder in one or more of the cartridges, ZPrint displays BINDER LOW in the Printer Status dialog. Important: Do not add binder unless you are prompted to in the ZPrint Printer Status dialog. To add binder, follow the steps below. -
Page 24: Add Cleaning Solution
8.3 Add Cleaning Solution 8.4 Replace the Waste Tray If there is not enough cleaning solution, ZPrint displays If the Waste Tray is Full, ZPrint displays EMPTY WASTE TRAY CLEANING SOLUTION in the Printer Status dialog. the Printer Status dialog. Important: Do not add cleaning solution unless you are To replace the Waste Tray, follow the steps below. - Page 25 8.5 Change the Print Head(s) Dry with a clean paper towel. The printer checks the status of the print heads before every Select then PRINT HEADS CHANGE PRINT HEADS build. Do not change the print heads unless prompted to in the on the LCD menu.
- Page 26 For each printhead being 11. Close the carriage cover by pressing down until you hear it replaced, wipe off all the pogo click shut. Be sure both latches are engaged. pins (inside the carriage) with 12. Close the printer top cover. Select then CONTINUE EXIT...
- Page 27 Where To Go For More Information If you need an additional copy of the Quick Start Guide, please visit the Printers section of our Web site at 3dscentral.3dsystems.com to view or print the PDF format. For additional information, consult the ZPrinter® 650 User Manual or the ZPrint™...
- Page 28 ZPrint® 7.15 System Software Copyright (c) 1996-2012 3D Sys- by 3D Systems, and is to be used solely for the fabrication of tems, Inc.This software is based in part on the work of the Inde- appearance models and prototypes using new 3D Systems-sup- pendent JPEG Group.
- Page 29 You agree to WILL THE COMPANY'S LIABILITY EXCEED THE TOTAL CHARGE indemnify, defend and hold 3D Systems and its officers, directors OF THIS ZPRINTER® SYSTEM. and employees harmless from and against any and all claims, losses, damages, costs and expenses resulting from any use of WARRANTY PERIOD: In the U.S., warranty is for 90 days and...
- Page 30 General Caution: User should use care to avoid possible damage to equipment. Hot Surface: User should use care when working near or on the labelled item. High Voltage: User should use appropriate electrical safety pre- cautions. 3dscentral.3dsystems.com...
- Page 31 3D Systems Contact Information If you have any questions about your 3D Printer or the ZPrint/ ZEdit Software, please contact your local Reseller/Service Pro- vider. If they are unable to help, contact us directly. United States Technical Support - Europe/Middle East/...
- Page 32 Part and Model Samples 3D Systems Corporation, © 2012 All Rights Reserved...
Need help?
Do you have a question about the ZPRINTER 650 and is the answer not in the manual?
Questions and answers