
Related Manuals for R82 SWAN


Summary of Contents for R82 SWAN
- Page 1 English user manual © 2009 R82 A/S. All rights reserved. The R82 logo and the bathing chair Swan are registered trademarks of R82 A/S. 07.2016 - rev.4...
-
Page 2: Table Of Contents
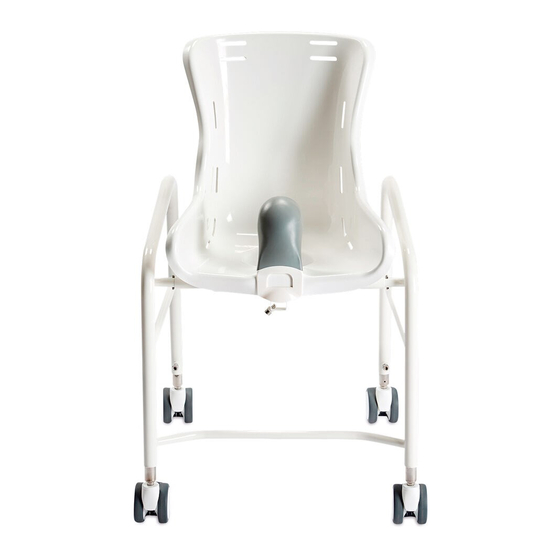
CONTENTS Safety ................4 Warranty ................4 Washing ................4 Tools .................. 4 Maintenance ..............5 Preparing for use ............... 5 Height Adjustment ............. 6 Seat angling............... 6 Mounting wheels..............7 Disassembling the wheels ..........7 Headrest ................8 Mounting various belts............8 Mounting the upholstery ............ - Page 3 SWAN The Swan is a classic commode from R82. The seat is made of fibre glass and the frame of powder coated and stainless steel respectively, which means the Swan is also splendid as a bathing chair. The Swan has been especially developed by R82 after many years of experience designing and manufacturing custom-made aids for disabled children and adults.
-
Page 4: Safety
SAFETY The Swan has earned the CE-mark. This certifies that it meets all relevant European safety requirements. The durability of this product is 5 years when it is used on a daily basis. Hereafter the product must be renovated (by R82 personnel) to extend the lifetime. -
Page 5: Maintenance
Adjustments which are not described in this manual, must only be made by authorized R82 personnel. PREPARING FOR Follow the instructions below to ready your Swan for use: 1) Remove the wrapping and wipe the chair with a cloth before use. -
Page 6: Height Adjustment
HEIGHT ADJUSTMENT 1) Start by loosening all screws (A). Remove the screws. Left rear wheel and both front wheels are to be adjusted to the holes in the internal rod. 2) Tighten the screws when the desired height √ is reached. 3) The right rear wheel is for adjustment and to avoid rocking. -
Page 7: Mounting Wheels
For information on adjusting the height, see passage on ‘Height adjustment’ DISASSEMBLING THE WHEELS Follow the instructions below to disassemble the wheels on swan: 1) Loosen the screws (A) with a 13 mm span- ner. 2) Mount ferrules (B) at the end of the legs. -
Page 8: Headrest
HEADREST 1) Loosen the tightening handle (A) and place the headrest in the white fitting. Tighten the handle when the requested height is reached. 2) Loosen the screw (B) to adjust the headrest from side to side. Push handle 1) Loosen the tightening handle (A) and place the push handle in the white fitting. -
Page 9: Mounting The Upholstery
MOUNTING THE UPHOLSTERY To mount the upholstery correctly, follow below instructions. Swan size 1+2+3: 1) Place the upholstery in the chair and lead the Velcro straps through the slots in the seat. 2) Velcro the straps together behind the seat. (A) -
Page 10: Splash Guard
SPLASH GUARD Only for size 4+5+6+7 To mount the splash guard just push it down until it locks. To remove the splash guard pull out the front edge and lift. MOUNTING THE The pan is mounted from the back of the chair. FOOTREST Follow the instrucions below to mount the foot- rest correctly:... - Page 11 Use this drawing together with the descriptions on the following pages.
-
Page 12: Vest And Crossvest
VEST AND CROSSVEST The vest and cross vest can be opened and closed by using the buckles and the zipper. Follow the instructions below, with help from page 11. * Lead the shoulderstraps through the slots at the top of the back (A). * Lead the upper straps in the sides through the slots in the back (B). -
Page 13: Hip Belt
HIP BELT The hip belt can be opened and closed by using the buckles. Follow the instructions below, with help from page 11. * Lead the straps through the slots in the seat (C). * When the straps has been led through the slots, fit a buckle at the end. -
Page 14: Product Identification
PRODUCT IDENTIFICATION A) Serial number The label is placed on the pan holder. B) Manufacturer The label is placed on the top bar on the back of the frame. XXXXXX Max load: xxx kg DMR ver.: XXXX Art. no.: XXXXXXX Product: XXXXXXX - Size X (XX)XXXXXXXXXXXXXX(XX)XXXXXX(XX)XXXXXX... -
Page 15: Measurements
MEASUREMENTS Size 2 Size 3 Size 4 Size 5 Size 6 Size 7 mm (inch) mm (inch) mm (inch) mm (inch) mm (inch) mm (inch) Seat width, back (A) 200 (7¾") 230 (9") 250 (9¾") 300 (11¾") 340 (13¾") 410 (16") Seat widht, front (A1) 300 (11¾") 340 (13¼") -
Page 16: Technical Data
TECHNICAL DATA Seat: Glass fibre Frame: Stainless steel/powdercoated PRODUCER DISTRIBUTOR R82 A/S Parallelvej 3 8751 Gedved Denmark Please find your distributor on www.R82.com...
Need help?
Do you have a question about the SWAN and is the answer not in the manual?
Questions and answers