
Related Manuals for NETGEAR D6300


Summary of Contents for NETGEAR D6300
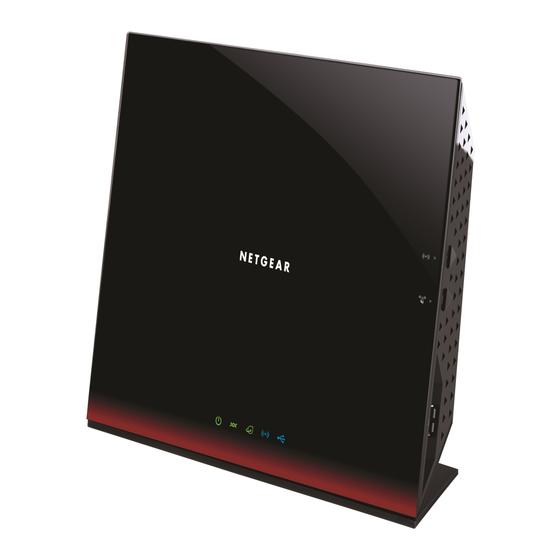
- Page 1 WiFi DSL Modem Router Mode l D63 00 Us e r Manual December 2015 202-11039-06 350 East Plumeria Drive San Jose, CA 95134...
- Page 2 Thank you for purchasing this NETGEAR product. You can visit to register your product, get help, access the latest downloads and user manuals, and join our community. We recommend that you use only official NETGEAR support resources. Conformity http://kb.netgear.com/app/answers/detail/a_id/11621.
-
Page 3: Table Of Contents
Use NETGEAR genie after Installation ........24... - Page 4 Guest Network Wireless Security Options ......36 Access the Router With NETGEAR genie Apps ......36 Chapter 4 NETGEAR genie ADVANCED Home Setup Wizard .
- Page 5 Turn Off Automatic Startup for NETGEAR USB Control Center... 75 Change the Language in NETGEAR USB Control Center ....76 Specify the Time-Out for NETGEAR USB Control Center.
- Page 6 D6300 WiFi DSL Modem Router IPv6 ............. . 113 Traffic Meter .
-
Page 7: Chapter 1 Hardware Setup
NETGEAR makes no express or implied representations or warranties about this product’s compatibility with any future standards. 802.11ac 1300 Mbps is approximately 3x faster than 802.11n 450 Mbps. -
Page 8: Product Highlights
• Secured connection. Push 'N' Connect ensures a quick and secure network connection. • NETGEAR green features. Use Power and WiFi On/Off buttons, and schedule WiFi to turn on and off to save energy when not in use. • Compatibility. Compatible with all major ADSL Internet service providers (ISPs). -
Page 9: Product Specifications
D6300 WiFi DSL Modem Router Product Specifications Package Contents • D6300 WiFi DSL Modem Router • Ethernet cable • Phone cable and filter • Power adapter, localized to country of sale Warranty • Localized to country of sale System Requirements •... - Page 10 D6300 WiFi DSL Modem Router • Double firewall protection (SPI and NAT firewall) • Denial of service (DoS) attack prevention Ease of Use • Easy installation. Connect to computer and open your browser to install • Push 'N' Connect using Wi-Fi Protected Setup® (WPS) Physical Specifications •...
-
Page 11: Unpack Your New Router
• Installation guide with cabling and router setup instructions If any of the parts are incorrect, missing, or damaged, contact your NETGEAR dealer. Keep the carton, including the original packing materials, in case you need to return the product for repair. -
Page 12: Hardware Features
D6300 WiFi DSL Modem Router Hardware Features Before you cable your router, take a moment to become familiar with the label and the front and back panels. Pay particular attention to the LEDs on the front panel. Label The label on the bottom of the modem router shows the router’s WiFi network name (SSID) and network key (password). -
Page 13: Back Panel
D6300 WiFi DSL Modem Router Back Panel The back panel has the Power On/Off button and port connections shown in the figure: 1. USB port 3. Gigabit Ethernet 7. Power LAN ports On/Off button 2. ADSL line 6. AC power 4. -
Page 14: Front Panel
D6300 WiFi DSL Modem Router Front Panel The modem router front panel has the 5 status LEDs, icons, and ports shown in the figure. Power Internet Wireless Figure 4. Front panel LEDs The following tables describe the LEDs and icons on the front panel from left to right. - Page 15 D6300 WiFi DSL Modem Router Table 1. Power On/Off LED Icon LED Activity Description Solid green The router is ready. Solid amber The router is starting. Power is not supplied to the router. Restore Factory LED blinks momentarily when the Restore Factory Settings button on the Settings bottom of the unit is pressed for 6 seconds.
-
Page 16: Side Panel
D6300 WiFi DSL Modem Router Table 5. USB LED Icon LED Activity Description Solid blue A USB port has detected a USB device. Blinking blue A USB device is plugged in and is trying to connect. No link is detected on these ports. -
Page 17: Position Your Wireless Router
D6300 WiFi DSL Modem Router Table 6. Wireless button Icon Description For information about the use of this button, see Wireless Connectivity on page 123. Table 7. WPS button Icon Description For information about the use of this button, see Wi-Fi Protected Setup (WPS) Method page 26. -
Page 18: Adsl Microfilters
D6300 WiFi DSL Modem Router Note: The D6300 should be put in a vertical position only. Also be aware that when you use multiple access points, it is better if adjacent access points use different radio frequency channels to reduce interference. The recommended channel spacing between adjacent access points is five channels (for example, use Channels 1 and 6, or 6 and 11). -
Page 19: Two-Line Adsl Microfilter (Included)
• Two-line ADSL microfilter with built-in splitter (included). Use to share an outlet with a phone and the modem router. Cable Your D6300 WiFi DSL Modem Router WARNING: DO not stack equipment, or place equipment in tight spaces, or in drawers. -
Page 20: Verify The Cabling
D6300 WiFi DSL Modem Router The installation guide that came in the box has a cabling diagram on the second page. 4 Browser 3 Computer 1 ADSL or Cable Fiber Modem 2 Power Figure 8. Cabling diagram CAUTION: Incorrectly connecting a filter to your modem router blocks your ADSL connection. -
Page 21: Chapter 2 Get Started With Netgear Genie
Co n n ec t to t h e m o d e m ro ute r This chapter explains how to use NETGEAR genie to set up your modem router after you complete cabling as described in the installation guide and in the previous chapter in this book. -
Page 22: Prepare To Set Up The Wifi Dsl Modem Router
Prepare to Set Up the WiFi DSL Modem Router You can set up your modem router with the NETGEAR genie automatically, or you can use the genie menus and screens to set up your modem router manually. However, before you start the setup process, you need to have your ISP information on hand and make sure the laptops, computers, and other devices in the network have the settings described here. -
Page 23: Netgear Genie Setup
NETGEAR genie Setup NETGEAR genie runs on any device with a web browser. It is the easiest way to set up the modem router because it automates many of the steps and verifies that those steps have been successfully completed. -
Page 24: Use Netgear Genie After Installation
Internet browser on a computer that is connected to the modem router. You can use NETGEAR genie again if you want to view or change settings for the modem router. Launch your browser from a computer or WiFi device that is connected to the modem router. -
Page 25: Wifi Dsl Modem Router Dashboard (Basic Home Screen)
Settings. Using this tab requires a solid understanding of networking concepts. • Help & Support. Go to the NETGEAR support site to get information, help, and product documentation. These links work once you have an Internet connection. Add WiFi devices or Computers to Your Network Choose either the manual or the WPS method to add WiFi devices and other equipment to your wireless network. -
Page 26: Wi-Fi Protected Setup (Wps) Method
D6300 WiFi DSL Modem Router Wi-Fi Protected Setup (WPS) Method Wi-Fi Protected Setup (WPS) is a standard for easily adding computers and other devices to a home network while maintaining security. To use WPS, make sure that all WiFi devices to be connected to the network are Wi-Fi certified and support WPS. -
Page 27: Chapter 3 Netgear Genie Basic Settings
Yo u r I n te r n e t co n n e c t i o n a nd n e two rk This chapter explains the features available from the NETGEAR genie BASIC Home screen, shown in the following figure: This chapter contains the following sections: •... -
Page 28: Internet Basic Settings
Enter the settings for the IP address and DNS server. The default settings usually work fine. If you have problems with your connection, check the ISP settings. Click Apply to save your settings. Click Test to test your Internet connection. If the NETGEAR website does not display within 1 minute, see Chapter 10, Troubleshooting. -
Page 29: Attached Devices
D6300 WiFi DSL Modem Router • Idle Timeout (In minutes). If you want to change the login time-out, enter a new value in minutes. This setting determines how long the modem router keeps the Internet connection active after there is no Internet activity from the LAN. Entering a value of 0 (zero) means never log out. -
Page 30: Parental Controls
D6300 WiFi DSL Modem Router • MAC Address. The unique MAC address for each device does not change. The MAC address is typically shown on the product label. You can click Refresh to update this screen. Parental Controls The first time you select Parental Controls from the BASIC Home screen, you are automatically directed to the Internet, where you can learn more about Live Parental Controls or download the application. -
Page 31: Readyshare Usb Storage And Printer
D6300 WiFi DSL Modem Router ReadySHARE USB Storage and Printer You can view information about a USB storage device that is connected to the modem router’s USB port here. USB Storage (Basic Settings) From the BASIC Home screen, select ReadySHARE to display the USB Storage (Basic Settings) page. -
Page 32: Wireless Settings Screen Fields
Note: The preset SSID and password are uniquely generated for every device to protect and maximize your wireless security. NETGEAR recommends that you do not change your preset security settings. If you do decide to change your preset security settings, make a note of the new settings and store it in a safe place where you can easily find it. -
Page 33: Wireless Network
The Security Options section of the Wireless Setup screen lets you change the security option and passphrase. NETGEAR recommends that you do not change the security option or passphrase, but if you want to change these settings, this section explains how. -
Page 34: Change Wpa Security Option And Passphrase
D6300 WiFi DSL Modem Router Change WPA Security Option and Passphrase Note: These settings apply separately to the 2.4-GHz b/g/n and 5-GHz a/n bands. Launch a web browser from a computer or WiFi device that is connected to the network. -
Page 35: Guest Networks
D6300 WiFi DSL Modem Router Guest Networks Adding a guest network allows visitors at your home to use the Internet without using your wireless security key. You can add a guest network to each wireless network: 2.4 GHz b/g/n and 5.0 GHz a/n. -
Page 36: Guest Network Wireless Security Options
It is also possible to set up a guest network without wireless security. NETGEAR does not recommend using no security on a wireless network. Wi-Fi Protected Access (WPA) encryption is built into all hardware that has the Wi-Fi-certified seal. - Page 37 D6300 WiFi DSL Modem Router The genie app dashboard page displays. NETGEAR genie BASIC Settings...
-
Page 38: Chapter 4 Netgear Genie Advanced Home
S p e c i f y c u stom s e t t i n g s The ADVANCED screens are for advanced users who want to specify custom settings. This chapter explains the features available from the NETGEAR genie ADVANCED Home page. This chapter contains the following sections: •... -
Page 39: Setup Wizard
D6300 WiFi DSL Modem Router Setup Wizard The NETGEAR genie installation process is launched the first time you set up the modem router. After setting up the modem router the first time, if you want to perform this task again, you can run Setup Wizard from the Advanced tab of the genie. -
Page 40: Vpn Wizard
D6300 WiFi DSL Modem Router Select ADVANCED > WPS Wizard. A note explaining WPS displays. Click the Next button. The WPS page displays. Select either Push Button or PIN Number. • To use the push button method, either click the WPS button on this screen, or press the WPS button on the top of the modem router. - Page 41 D6300 WiFi DSL Modem Router Select ADVANCED > Advanced - VPN > VPN Wizard. The VPN Wizard page displays. Click the Next button. Enter the requested information: • Connection name. Enter an appropriate name for the connection. This name is not supplied to the remote VPN endpoint.
-
Page 42: Vpn Policies
D6300 WiFi DSL Modem Router • If this information does not match the LAN IP address and subnet mask in the remote gateway, the secure tunnel fails to connect. • The IP address range used on the remote LAN has to be different from the IP address range used on the local LAN. -
Page 43: Add Or Edit An Auto Vpn Policy
D6300 WiFi DSL Modem Router The BASIC Home page displays. Select ADVANCED > Advanced - VPN > VPN Policies. The VPN Policies page displays. The Policy Table contains the following data: • Enable. Use this check box to enable or disable a policy as required. Click Apply when you are finished. - Page 44 D6300 WiFi DSL Modem Router The BASIC Home page displays. Select ADVANCED > Advanced - VPN > VPN Policies. The VPN Policies page displays. Click the Add Auto Policy button. The VPN - Auto Policy page displays. Enter or select the following settings: •...
- Page 45 D6300 WiFi DSL Modem Router Single PC - no Subnet. Select this option if there is no LAN (only a single computer) at the remote endpoint. If this option is selected, no additional data is required. Single address. Enter an IP address in the Single/Start IP address field.
-
Page 46: Add Or Edit A Manual Vpn Policy
D6300 WiFi DSL Modem Router Remote Identity Data. Enter the data for the selection. When IP Address is selected, no input is required. • Parameters. Encryption Algorithm. The encryption algorithm used for both IKE and IPSec. This setting must match the setting used on the remote VPN gateway. - Page 47 D6300 WiFi DSL Modem Router Click the Add Manual Policy button. The VPN - Manual Policy page displays. Enter or select the following parameters: • General. These settings identify this policy and determine its major characteristics. Policy Name. Enter a unique name to identify this policy. This name is not supplied to the remote VPN endpoint.
-
Page 48: Vpn Status
D6300 WiFi DSL Modem Router SPI. Enter the required SPIs. Each policy must have unique SPIs. These settings must match those for the remote VPN endpoint. The Incoming setting here must match the Outgoing setting on the remote VPN endpoint, and the Outgoing setting here must match the Incoming setting on the remote VPN endpoint. -
Page 49: Adsl Setup
D6300 WiFi DSL Modem Router • WAN Setup. Internet (WAN) setup. See WAN Setup on page 49. • LAN Setup. Local area network (LAN) setup. See LAN Setup on page 53. • QoS Setup. Quality of Service (QoS) setup. See Quality of Service Setup on page 56. -
Page 50: Default Dmz Server
D6300 WiFi DSL Modem Router • Default DMZ Server. This feature is sometimes helpful when you are playing online games or videoconferencing. Be careful when using this feature because it makes the firewall security less effective. See the following section,... -
Page 51: Change The Mtu Size
“fragmented” to accommodate the device with the smallest MTU. The best MTU setting for NETGEAR equipment is often just the default value, and changing the value might fix one problem but cause another. Leave MTU unchanged unless one of these situations occurs: •... - Page 52 Table 9. Common MTU sizes Application 1500 The largest Ethernet packet size and the default value. This is the typical setting for non-PPPoE, non-VPN connections, and is the default value for NETGEAR modem routers, adapters, and switches. 1492 Used in PPPoE environments.
-
Page 53: Lan Setup
D6300 WiFi DSL Modem Router LAN Setup The LAN Setup screen allows configuration of LAN IP services such as Dynamic Host Configuration Protocol (DHCP) and Routing Information Protocol (RIP). The modem router is shipped preconfigured to use private IP addresses on the LAN side and to act as a DHCP server. -
Page 54: Use The Wifi Dsl Modem Router As A Dhcp Server
D6300 WiFi DSL Modem Router • IP Subnet Mask. The LAN subnet mask of the modem router. Combined with the IP address, the IP subnet mask allows a device to know which other addresses are local to it, and which have to be reached through a gateway or modem router. -
Page 55: Address Reservation
D6300 WiFi DSL Modem Router The modem router delivers the following parameters to any LAN device that requests DHCP: • An IP address from the range that you have defined • Subnet mask • Gateway IP address (the modem router’s LAN IP address) •... -
Page 56: Quality Of Service Setup
D6300 WiFi DSL Modem Router The reserved address is not assigned until the next time the computer contacts the modem router’s DHCP server. Reboot the computer or access its IP configuration and force a DHCP release and renew. To edit or delete a reserved address entry, select the radio button next to the reserved address you want to edit or delete. - Page 57 D6300 WiFi DSL Modem Router Enter the modem router user name and password. The user name is admin. The default password is password. The user name and password are case-sensitive. The BASIC Home page displays. Select ADVANCED > Setup > QoS Setup.
- Page 58 D6300 WiFi DSL Modem Router Enter the modem router user name and password. The user name is admin. The default password is password. The user name and password are case-sensitive. The BASIC Home page displays. Select ADVANCED > Setup > QoS Setup.
- Page 59 D6300 WiFi DSL Modem Router From the Priority list, select the priority that this device’s traffic should receive relative to other applications and traffic when accessing the Internet. The options are Low, Normal, High, and Highest. Click Add to add this rule to MAC Device List.
-
Page 60: Chapter 5 Usb Storage
USB Storage A cce ss a n d con figu re a U S B s to ra g e dr i ve This chapter describes how to access and configure a USB storage drive attached to your modem router. The USB port on the modem router can connect only to USB storage devices like flash drives or hard drives. -
Page 61: Usb Drive Requirements
D6300 WiFi DSL Modem Router USB Drive Requirements The modem router works with 1.0 and 1.1 (USB Full Speed) and 2.0 (USB High Speed) standards. The approximate USB bus speeds are shown in the following table. Actual bus speeds can vary, depending on the CPU speed, memory, speed of the network, and other variables. - Page 62 D6300 WiFi DSL Modem Router • Sharing multimedia such as MP3 files, pictures, and other multimedia with local and remote users. • Sharing resources on your network. You might want to store files in a central location so that you do not have to power up a computer to perform local sharing. In addition, you can share files between Macintosh, Linux, and Windows computers by using the USB drive as a go-between across the systems.
-
Page 63: Usb Storage Basic Settings
D6300 WiFi DSL Modem Router Sharing files with a remote colleague involves the following considerations: • There are two user accounts: admin and guest. The password for admin is the same one that you use to access the modem router. By default, it is password. The guest user account has no password. -
Page 64: Usb Storage Advanced Settings
D6300 WiFi DSL Modem Router Select ReadySHARE Cloud. The USB Storage (Basic Settings) page displays. Click the Edit button. The USB Storage (Advanced Settings) page displays. Specify the changes that you want to make: • To add a folder, click Create Network Folder. -
Page 65: Safely Remove A Usb Storage Device
D6300 WiFi DSL Modem Router Available Network Folders You might need to scroll down to view this section of the screen. • Share Name. If only one device is connected, the default share name is USB_Storage. You can click the name shown, or you can type it in the address field of your web browser. -
Page 66: Media Server Settings
D6300 WiFi DSL Modem Router Media Server Settings By default, the modem router is set up to act as a Ready DLNA Media server, which lets you view movies and photos on DLNA/UPnP AV–compliant media players, such as Xbox360, Playstation, and NETGEAR’s Digital Entertainer Live. -
Page 67: Connect To The Usb Drive From A Remote Computer
D6300 WiFi DSL Modem Router Connect to the USB Drive from a Remote Computer To connect to the USB drive from remote computers with a web browser, you have to use the modem router’s Internet port IP address. If you are using Dynamic DNS, you can type the DNS name, rather than the IP address. -
Page 68: Chapter 6 Share A Usb Printer
You can share this USB printer among the Windows and Mac computers on your network. For more information about the features available in the NETGEAR USB Control Center, see the ReadySHARE Printer User Manual, which is available http://downloadcenter.netgear.com. -
Page 69: Install The Printer Driver And Cable The Printer
Follow the onscreen instructions to install the ReadySHARE Printer utility. Install the ReadySHARE Printer Utility You must install the ReadySHARE Printer utility on each computer that will share the printer. After you install it, the utility displays as NETGEAR USB Control Center on your computer. Share a USB Printer... - Page 70 Double-click the ReadySHARE Printer utility setup file that you downloaded. Follow the wizard instructions to install NETGEAR USB Control Center. After the InstallShield Wizard completes the installation, the NETGEAR USB Control Center prompts you to select a language: Share a USB Printer...
-
Page 71: Print Using The Netgear Usb Control Center
D6300 WiFi DSL Modem Router Select a language from the menu and click the OK button. The USB printer connected to the router displays in the NETGEAR USB Control Center window. Note: Some firewall software, such as Comodo or Norton, blocks NETGEAR USB Control Center from accessing the USB printer. - Page 72 If another computer is already connected to the printer, your print job goes into a queue to wait to be printed. If your document does not print, use the NETGEAR USB Control Center to check the printer status.
-
Page 73: View Or Change The Status Of A Printer
View or Change the Status of a Printer To view or change the status: Click the NETGEAR USB Control Center icon The Status column shows the status for each device: • Available. No print jobs are in progress. You can use the USB printer from any computer in the network. -
Page 74: Use The Scan Feature Of A Multifunction Usb Printer
The scanner widow displays so that you can use the USB printer for scanning. Change NETGEAR USB Control Center Settings You can stop the NETGEAR USB Control Center from starting automatically when you log in to Windows. You can also change the language and specify the time-out to release the printer connection. -
Page 75: Turn Off Automatic Startup For Netgear Usb Control Center
D6300 WiFi DSL Modem Router Turn Off Automatic Startup for NETGEAR USB Control Center You can stop the NETGEAR USB Control Center from starting automatically when you log in to Windows. To turn off automatic NETGEAR USB Control Center startup: ... -
Page 76: Change The Language In Netgear Usb Control Center
The Control Center - Configuration window displays. In the Language menu, select a language. Click the OK button. The next time NETGEAR USB Control Center starts, the language changes. Specify the Time-Out for NETGEAR USB Control Center Specify the time-out to release the printer connection. - Page 77 D6300 WiFi DSL Modem Router To specify the time-out: Click the NETGEAR USB Control Center icon Select Tools > Configuration. The Control Center - Configuration window displays. In the Timeout field, type the number of minutes. The time-out is the number of minutes that a computer holds its connection to the printer when the connection isn’t being used.
-
Page 78: Chapter 7 Security
Security Ke e p u n wa n te d con te nt o ut o f yo ur n e two r k This chapter explains how to use the basic firewall features of the modem router to prevent objectionable content from reaching the computers and other devices connected to your network. -
Page 79: Keyword Blocking Of Http Traffic
D6300 WiFi DSL Modem Router Keyword Blocking of HTTP Traffic Use keyword blocking to prevent certain types of HTTP traffic from accessing your network. The blocking can be always or according to a schedule. Launch a web browser from a computer or WiFi device that is connected to the network. - Page 80 D6300 WiFi DSL Modem Router a request for service to a server computer, the requested service is identified by a service or port number. This number appears as the destination port number in the transmitted IP packets. For example, a packet that is sent with the destination port number 80 is an HTTP (web server) request.
- Page 81 D6300 WiFi DSL Modem Router You can also specify whether these services are always allowed or blocked, or allowed or blocked per schedule as described in Schedule for Firewall Rules on page 83. To allow or block an outbound service, click the Add button.
-
Page 82: Add Custom Services To Allow Or Block
D6300 WiFi DSL Modem Router • Never. This choice never logs traffic covered by this rule, whether it matches or not. f. Click Apply to have your changes take effect, or click Cancel to return to the previous screen. Inbound Services. To allow or block an inbound service, click here to set up inbound firewall rules for gaming or other applications. -
Page 83: Schedule For Firewall Rules
D6300 WiFi DSL Modem Router Enter the starting and ending port numbers. If the application uses a single port number, enter that number in both fields. Click the Apply button to save your information and return to the previous screen. -
Page 84: Allow Or Block Access To Your Network
D6300 WiFi DSL Modem Router The user name is admin. The default password is password. The user name and password are case-sensitive. The BASIC Home page displays. Select ADVANCED > Security > E-mail. The E-mail page displays. To receive email logs and alerts from the modem router, select the Turn E-mail Notification On check box. - Page 85 Allow all new devices to connect. With this setting, if you buy a new device, it can access your network. You don’t need to enter its MAC address in this page. NETGEAR recommends that you leave this radio button selected. •...
-
Page 86: Chapter 8 Administration
Administration M a n a ge your n e t work This chapter describes the settings for administering and maintaining your modem router and home network. See also Remote Management on page 111 for information about upgrading or checking the status of your modem router over the Internet, and Traffic Meter on page 114 for information about monitoring the volume of Internet traffic passing through your modem router’s... -
Page 87: Upgrade The Wifi Dsl Modem Router Firmware
D6300 WiFi DSL Modem Router Upgrade the WiFi DSL Modem Router Firmware The modem router firmware (routing software) is stored in flash memory. You can update the firmware from the Administration menu on the Advanced tab. You might see a message at the top of the genie screens when new firmware is available for your product. -
Page 88: Router Information
IP Subnet Mask. The IP subnet mask being used by the Internet (WAN) port of the modem router. Domain Name Server. The Domain Name Server addresses being used by the modem router. A Domain Name Server translates human-language URLs such as www.netgear.com into IP addresses. Administration... - Page 89 D6300 WiFi DSL Modem Router Show Statistics Button On the Router Status screen, in the Internet Port pane, click the Show Statistics button to display the following screen: Figure 9. System up time and poll interval statistics System Up Time. The time elapsed since the modem router was last restarted.
-
Page 90: Wireless Settings (2.4 Ghz And 5 Ghz)
D6300 WiFi DSL Modem Router The Release button returns the status of all items to 0. The Renew button refreshes the items. The Close Window button closes the Connection Status screen. IP Address. The IP address that is assigned to the modem router. -
Page 91: View Logs Of Web Access Or Attempted Web Access
D6300 WiFi DSL Modem Router Wireless AP. Indicates whether the radio feature of the modem router is enabled. If this feature is not enabled, the Wireless LEDs on the front panel are off. Broadcast Name. Indicates whether the modem router is broadcasting its SSID. -
Page 92: Manage The Configuration File
D6300 WiFi DSL Modem Router Manage the Configuration File The configuration settings of the WiFi DSL Modem Router are stored within the modem router in a configuration file. You can back up (save) this file to your computer, restore it, or reset it to the factory default settings. -
Page 93: Erase
D6300 WiFi DSL Modem Router Upon completion, the modem router reboots. WARNING: Do not interrupt the reboot process. Erase Under some circumstances (for example, if you move the modem router to a different network or if you have forgotten the password), you might want to erase the configuration and restore the factory default settings. -
Page 94: Password Recovery
D6300 WiFi DSL Modem Router Password Recovery NETGEAR recommends that you enable password recovery if you change the password for the router’s user name of admin. Then you have an easy way to recover the password if it is forgotten. This recovery process is supported in Internet Explorer, Firefox, and Chrome browsers, but not in the Safari browser. - Page 95 Perform a DNS Lookup. A DNS (Domain Name Server) converts the Internet name (for example, www.netgear.com) to an IP address. If you need the IP address of a web, FTP, mail, or other server on the Internet, do a DNS lookup to find the IP address.
-
Page 96: Chapter 9 Advanced Settings
Advanced Settings Fi n e -t u n i n g your n e t wo rk This chapter describes the advanced features of your modem router. The information is for users with a solid understanding of networking concepts who want to set the modem router up for unique situations such as when remote access from the Internet by IP or domain name is needed. -
Page 97: Enable Wifi Radio
D6300 WiFi DSL Modem Router Enable WiFi Radio You can completely turn off the wireless portion of the modem router by clearing this check box. Select this check box again to enable the wireless portion of the modem router. When the wireless radio is disabled, other members of your household can use the modem router by connecting their computers to the modem router with an Ethernet cable. -
Page 98: Specify Wps Settings
D6300 WiFi DSL Modem Router The user name is admin. The default password is password. The user name and password are case-sensitive. The BASIC Home page displays. Select ADVANCED > Advanced Setup > Wireless Settings. The Wireless Settings page displays. -
Page 99: Use The Modem Router As A Wireless Access Point
D6300 WiFi DSL Modem Router (Optional) Select or clear the Keep Existing Wireless Settings check box. By default, the Keep Existing Wireless Settings check box is selected. NETGEAR recommends that you leave this check box selected. If you clear this check box, the next time a new wireless client uses WPS to connect to the modem router, the modem router wireless settings change to an automatically generated random SSID and security key. -
Page 100: Port Forwarding And Triggering
NETGEAR recommends that you use different wireless settings on each router. You can also turn off the wireless radio on the other router or gateway and use the D6300 only for wireless client access. Click the Apply button. The IP address of the router changes, and you are disconnected. - Page 101 D6300 WiFi DSL Modem Router Source port number. 5678, which is the browser session. Destination address. The IP address of www.example.com, which your computer finds by asking a DNS server. Destination port number. 80, which is the standard port number for a web server process.
-
Page 102: Port Triggering To Open Incoming Ports
D6300 WiFi DSL Modem Router Port Triggering to Open Incoming Ports In the preceding example, requests are sent to a remote computer by your modem router from a particular service port number, and replies from the remote computer to your modem router are directed to that port number. -
Page 103: Port Forwarding To Permit External Host Communications
D6300 WiFi DSL Modem Router inbound ports. You can usually determine this information by contacting the publisher of the application or user groups or newsgroups. Note: Only one computer at a time can use the triggered application. Port Forwarding to Permit External Host Communications In both of the preceding examples, your computer initiates an application session with a server computer on the Internet. -
Page 104: How Port Forwarding Differs From Port Triggering
D6300 WiFi DSL Modem Router To configure port forwarding, you need to know which inbound ports the application needs. Usually you can determine this information by contacting the publisher of the application or the relevant user groups and newsgroups. How Port Forwarding Differs from Port Triggering The following points summarize the differences between port forwarding and port triggering: •... -
Page 105: Add A Custom Service
D6300 WiFi DSL Modem Router The user name is admin. The default password is password. The user name and password are case-sensitive. The BASIC Home page displays. Select ADVANCED > Advanced Setup > Port Forwarding/Port Triggering. The Port Forwarding / Port Triggering page displays. -
Page 106: Edit Or Delete A Port Forwarding Entry
D6300 WiFi DSL Modem Router In the Type list, select the protocol. If you are unsure, select TCP/UDP. In the Start Port field, enter the beginning port number. • If the application uses a single port, enter the same port number in the End Port field. -
Page 107: Set Up Port Triggering
D6300 WiFi DSL Modem Router by your ISP. However, if you use a Dynamic DNS service, the remote user can reach your server by a user-friendly Internet name, such as mynetgear.dyndns.org. Set Up Port Triggering Port triggering is a dynamic extension of port forwarding that is useful in these cases: •... -
Page 108: Dynamic Dns
D6300 WiFi DSL Modem Router Select the Port Triggering radio button. The page adjusts. Clear the Disable Port Triggering check box if it is selected. Note: If the Disable Port Triggering check box is selected after you configure port triggering, port triggering is disabled. However, any port triggering configuration information you added to the modem router is retained even though it is not used. -
Page 109: Static Routes
D6300 WiFi DSL Modem Router host name that you configure in the modem router. Then, whenever your ISP-assigned IP address changes, your modem router automatically contacts the Dynamic DNS service provider, logs in to your account, and registers your new IP address. If your host name is hostname, for example, you can reach your modem router at http://hostname.dyndns.org. - Page 110 D6300 WiFi DSL Modem Router When you first configured your modem router, two implicit static routes were created. A default route was created with your ISP as the gateway, and a second static route was created to your local network for all 192.168.1.x addresses. With this configuration, if you attempt to access a device on the 134.177.0.0 network, your modem router forwards your...
-
Page 111: Remote Management
D6300 WiFi DSL Modem Router This value represents the number of modem routers between your network and the destination. Usually, a setting of 2 or 3 works, but if this link is a direct connection, set it to Click the Apply button. -
Page 112: Universal Plug And Play
D6300 WiFi DSL Modem Router Normal web browser access uses the standard HTTP service port 80. For greater security, enter a custom port number for the remote web management interface. Choose a number from 1024 through 65535, but do not use the number of any common service port. -
Page 113: Ipv6
IP address. Click the Apply button. Your settings are saved. IPv6 You can use this feature to set up an IPv6 Internet connection type if NETGEAR genie does not detect it automatically. To set up an IPv6 Internet connection type: ... -
Page 114: Traffic Meter
D6300 WiFi DSL Modem Router • If your Internet connection does not use PPPoE, DHCP, or fixed, but is IPv6, then select IPv6 auto config. Click the Apply button. Your settings are saved. Traffic Meter Traffic metering allows you to monitor the volume of Internet traffic passing through your modem router’s Internet port. - Page 115 D6300 WiFi DSL Modem Router Click the Apply button. Your settings are saved. Advanced Settings...
-
Page 116: Chapter 10 Troubleshooting
D i a g n os e a n d s olve p ro b le m s This chapter provides information to help you diagnose and solve problems you might have with your modem router. If you do not find the solution here, check the NETGEAR support site at http://support.netgear.com/general/contact/default.aspx for product and contact information. -
Page 117: Quick Tips
D6300 WiFi DSL Modem Router Quick Tips This section describes tips for troubleshooting some common problems. Sequence to Restart Your Network Be sure to restart your network in this sequence: Turn off and unplug the modem. Turn off the modem router and computers. -
Page 118: Troubleshoot With The Leds
Make sure that the power cord is securely connected to your modem router and that the power adapter is securely connected to a functioning power outlet. • Check that you are using the 12V DC, 5A power adapter that NETGEAR supplied for this product. •... -
Page 119: Internet Or Ethernet Port Leds Are Off
D6300 WiFi DSL Modem Router If all LEDs are still lit 1 minute after power-up: • Cycle the power to see if the modem router recovers. • Press and hold the Restore Factory Settings button to return the modem router to its factory settings. -
Page 120: Cannot Access The Internet
NETGEAR does not support such a configuration. • If you are attempting to set up your NETGEAR modem router as a replacement for an ADSL gateway in your network, the modem router cannot perform many gateway services, for example, converting ADSL or cable data into Ethernet networking information. -
Page 121: Troubleshoot Pppoe
D6300 WiFi DSL Modem Router If your modem router cannot obtain an IP address from the ISP, you might need to force your cable or DSL modem to recognize your new modem router by restarting your network, as described in Sequence to Restart Your Network on page 117. -
Page 122: Troubleshoot Internet Browsing
D6300 WiFi DSL Modem Router Select Administration > Router Status. Click Connection Status. If all of the steps indicate OK, then your PPPoE connection is up and working. If any of the steps indicate Failed, you can attempt to reconnect by clicking Connect. The modem router continues to attempt to connect indefinitely. -
Page 123: Changes Not Saved
D6300 WiFi DSL Modem Router Changes Not Saved If the modem router does not save the changes you make in the modem router interface, check the following: • When entering configuration settings, always click the Apply button before moving to another screen or tab, or your changes are lost. -
Page 124: Wireless Signal Strength
D6300 WiFi DSL Modem Router Note: Be sure to click Apply if you made changes. Wireless Signal Strength If your WiFi device finds your network, but the signal strength is weak, check these conditions: • Is your modem router too far from your computer, or too close? Place your computer near the modem router, but at least 6 feet away, and see whether the signal strength improves. -
Page 125: Test The Path From Your Computer To A Remote Device
D6300 WiFi DSL Modem Router Click OK. You should see a message like this one: Pinging <IP address > with 32 bytes of data If the path is working, you see this message: Reply from < IP address >: bytes=32 time=NN ms TTL=xxx... - Page 126 D6300 WiFi DSL Modem Router • Check that your cable or DSL modem is connected and functioning. • If your ISP assigned a host name to your computer, enter that host name as the account name in the Internet Basic Settings screen.
-
Page 127: Appendix A Supplemental Information
Supplemental Information Fa c to r y s e t t i n g s a n d te chni c al specifications This appendix provides factory default settings and technical specifications for the D6300 WiFi DSL Modem Router. •... -
Page 128: Factory Settings
D6300 WiFi DSL Modem Router Factory Settings You can return the modem router to its factory settings. Use the end of a paper clip or some other similar object to press and hold the Restore Factory Settings button on the back of the router for at least 5 seconds. -
Page 129: Technical Specifications
D6300 WiFi DSL Modem Router Table 11. Factory default settings (continued) Feature Default Behavior Wireless Wireless communication Enabled SSID name See router label Security Enabled Broadcast SSID Enabled Transmission speed Auto Country/region United States in the US; otherwise varies by region... - Page 130 D6300 WiFi DSL Modem Router Table 12. D6300 Router specifications (continued) Feature Description 10BASE-T or 100BASE-Tx, RJ-45 Wireless Maximum wireless signal rate complies with the IEEE 802.11 standard. See the footnote for the previous table. Radio data rates Auto Rate Sensing Data encoding standards IEEE 802.11n version 2.0...
-
Page 131: Index
Index CTS/RTS Threshold custom service (port forwarding) AC power adapter input access remote viewing logs dashboard accessing remote computer data packets, fragmented adding date and time custom services daylight savings time guest network default DMZ server priority rules default factory settings wireless devices default gateway address reservation... - Page 132 D6300 WiFi DSL Modem Router firmware, upgrading QoS for settings fragmentation length LAN ports fragmented data packets LAN setup front panel language setting large files, sharing lease, DHCP games, online, QoS for LEDs gateway IP address troubleshooting genie, NETGEAR verifying cabling...
- Page 133 D6300 WiFi DSL Modem Router one-line ADSL microfilter outgoing mail server scheduling keyword and service blocking secondary DNS security packets, fragmented security options Parental Controls security PIN passphrases, changing sending logs by email passwords services, blocking recovering Setup Wizard restoring...
- Page 134 D6300 WiFi DSL Modem Router USB port USB port LED user-defined services WAN IP address, troubleshooting WAN setup Wi-Fi Protected Setup (WPS) keep existing settings wireless channel wireless connections, troubleshooting wireless connectivity wireless devices, adding to the network Wireless LEDs...
Need help?
Do you have a question about the D6300 and is the answer not in the manual?
Questions and answers