Pitney Bowes dm60 series Operating Manual
Hide thumbs
Also See for dm60 series:
- Setup manual (26 pages) ,
- Quick reference manual (12 pages) ,
- Installation manual (9 pages)

Related Manuals for Pitney Bowes dm60 series


Summary of Contents for Pitney Bowes dm60 series
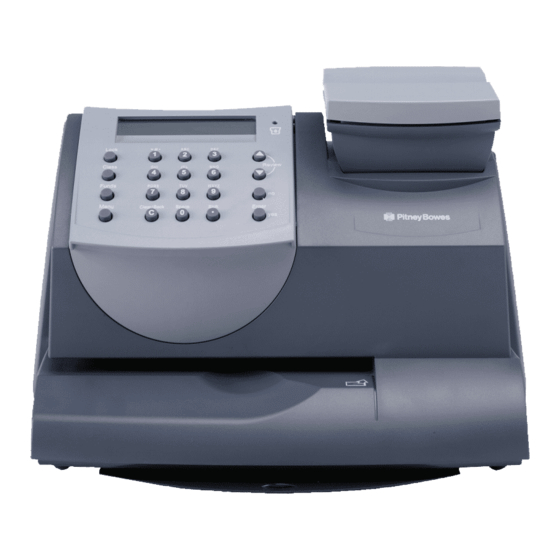
- Page 1 Shipping and Mailing Franking Machines Operating Guide DM60 Series Digital Mailing System (K700 series)
-
Page 3: Table Of Contents
Table of Contents 1 • Introduction About Your DM60 Series ................1-1 About Downloads to Your DM60 Series ..........1-2 Postal Requirements ..................1-3 Safety ........................1-4 Specifications ....................... 1-6 Equipment ...................... 1-6 Material ......................1-6 Meter Specifications ................. 1-7 2 •... - Page 4 Connecting Your System Using a LAN Connection ......5-1 Connecting Your System Using PC Meter Connect™ ..... 5-3 Checking the Funds (Postage) in Your DM60 Series ...... 5-3 Checking Your Account Balance in the Postage By Phone® System ........................5-4 Adding Postage to Your DM60 Series ............5-4...
- Page 5 Table of Contents Using the Text Ad Option ................6-8 What is a Text Ad? ..................6-8 Creating a new Text Ad ................6-8 Viewing a Text Ad ..................6-9 Edit a Text Ad ....................6-9 Delete a Text Ad ..................6-10 Other Settings ....................
- Page 6 Table of Contents 10 • Troubleshooting Getting Help ...................... 10-1 Error Messages ....................10-2 Display is Difficult to Read................10-2 Nothing Displays ..................... 10-3 Printing is Incomplete, Streaked, or Poor Quality ......10-3 Accidentally Printing the Wrong Postage .......... 10-3 Problems Connecting ...................
-
Page 7: Introduction
Mailmark™ compliant. NOTE: Although this guide describes all the features listed above, your DM60 Series is a configurable system and availability of the features will depend on your model and/or options purchased. Inclusion in this guide does not guarantee availability of a particular feature. -
Page 8: About Downloads To Your Dm60 Series
The IntelliLink® postage meter system technology gives you the ability to: Add postage funds conveniently You can add funds to your DM60 Series electronically via the Postage by Phone Data Centre. Download Postal Rate Updates The latest postal rates can be purchased and downloaded precisely when you need them. -
Page 9: Postal Requirements
• Your DM60 series is a Mailmark™ compliant system. At regular intervals defined by Royal Mail, it connects to the Pitney Bowes Data Centre to provide usage data to Royal Mail. The connection will normally happen in the background without you needing to do anything. -
Page 10: Safety
1 • Introduction Safety Follow the normal safety precautions for all office equipment: • Use only Pitney Bowes approved supplies, in particular aerosol dusters. Improper storage and use of aerosol dusters or flammable aerosol dusters can cause an explosive-like condition that could result in personal injury and/or property damage. Never use aerosol dusters labeled flammable and always read instructions and safety precautions on the duster label. - Page 11 1 • Introduction • Be certain the area in front of the wall receptacle into which the machine is plugged is free from obstruction. • Before clearing a stoppage, be sure machine mechanisms come to a stop. • When removing stalled material, avoid using too much force to protect against minor personal injury and damaging equipment. • To prevent overheating, do not cover any vent openings. • Operation of this equipment without periodic maintenance will inhibit optimum operating performance and could cause the equipment to malfunction. Contact your machine supplier for required service schedule.
-
Page 12: Specifications
1 • Introduction Specifications Equipment Size of Base Model: 213mm High x 351mm Long x 264mm Deep Size of Base Model with Optional Scale: 231mm High x 351mm Long x 264mm Deep Weight: 3.6kg without scale, 4.0kg with scale Power Requirements: 220-240 VAC, 50/60Hz. 0.25A Communications Ports: 1 USB;... -
Page 13: Meter Specifications
Postage by Phone Piece Count: Up to 8 digits (nonresettable) All Pitney Bowes postage meters are manufactured in accordance with An Post’s and Royal Mail’s Franking Machine Standards. This includes ascending register security, which will lock the ascending registers when the first frank takes the most significant digit of the ascending register to 9. - Page 14 1 • Introduction SDC2029B...
-
Page 15: Getting To Know Your Dm60 Series
1. Control Panel—allows you to enter and set up information on your meter. 2. LED—lights amber when your DM60 Series meter is low on ink (one blink indicates the DM60 Series meter is out of ink). 3. Scale—allows you to weigh a mail piece so you or the DM60 Series meter, can calculate the correct postage. -
Page 16: Control Panel
LCD. 2. Lock Key—prevents unauthorised use of your DM60 Series meter if the lock feature is set up and the DM60 Series meter is in "sleep mode". Entering your four-digit password unlocks (wakes- up) the meter. - Page 17 2 • Getting to Know Your DM60 Series 6. Clear/Back—allows you to clear or cancel an entry or return to the previous screen/level of menu. 7. Alpha/Numeric Keypad—allows you to type in numbers and letters for account names, postage values, and other information.
-
Page 18: Dm60 Series Digital Postage Meter-Rear
2 • Getting to Know Your DM60 Series DM60 Series Digital Postage Meter – Rear 1. Serial Port—allows you to connect the optional scale to weigh your mail piece. 2. USB Port—allows you to connect a USB cable and connect to IntelliLink®... -
Page 19: Running Mail
Section 3 Running Mail Before You Begin Before you run mail on your system, review the Checklist, Home Screen, and Applying Postage sections below and on the next page. Checklist • Make sure your mailing system is plugged into a properly grounded power receptacle. Always follow the safety precautions in Section 1, Introduction. -
Page 20: Selecting Postage
NOTES: • For applying postage, the DM60 Series does not have to be connected to your network/internet. However, when you need to add funds to your DM60 Series, it must be connected (see Section 5 - Adding Postage/Connecting to Data Centre for more information). • The meter automatically advances the date at midnight. -
Page 21: Weight Hold Mode
Weight Hold Mode Use this mode when the size of the mail piece covers the display screen. The DM60 Series holds the weight in memory until you select a class and finish the rating process. When using this mode: •... -
Page 22: Surcharge Payment Carrier
3 • Running Mail Surcharge Payment Carrier Occasionally, Royal Mail may need an additional payment (underpayment, etc). To produce a Frank for payment, press Class, then select the "Surch Pymnt" Carrier, followed by the "Surch Pymnt" class. You can now enter the value of underpayment required. Press Enter to confirm the amount and take a Frank in the normal way. -
Page 23: Envelope Messaging
Envelope Messaging can consist of a Graphic Ad or a Text Ad. NOTES: • Graphic Ads are available on all models. Some are preinstalled on your system and additional custom Graphic Ads can be ordered from Pitney Bowes. • Text Ads are an option only available on certain models. • Graphic Ads and Text Ads print in the same location and so cannot be printed together on a postal impression. -
Page 24: Advancing The Date Print
Changing the printed date does not change the DM60 Series meter's internally held date. • You can always return the printed date to the current date. • You cannot change the printed date to a date earlier than the DM60 Series meter's internally held date (in an effort to "backdate" the mail). • The number of days you can advance the print is limited to 30 days. This limit is set by Royal Mail. 1. Press Menu/Options. 2. Press the Review ▲▼ keys to scroll to “Change date and time settings?", then press Enter/yes. -
Page 25: Checking And Clearing The Batch Count
3. Press Clear/Back to return to the Home screen. Printing a Record of the Batch Count information The DM60 Series can print a Funds Report containing the batch information. Refer to Section 8, Reports for more information. Clearing the Batch Count CAUTION: Make sure you really want to clear the batch register;... -
Page 26: Printing Mail
Messaging, etc.) as described previously in this section. 2. Keeping the envelope or label sheet against the registration wall, slide it into the DM60 Series. The system prints the digital meter impression and indicates when to remove the mail piece. -
Page 27: Printing Options
Section 4 Printing Options Printing Options In addition to printing postage, your DM60 Series can print a Date and Time stamp or Envelope Messaging only onto incoming mail. NOTE: These options may be an added cost option on your model or may not be available. -
Page 28: Printing Envelope Messaging Only (No Meter Stamp)
'ad only' reminder. 4. Keeping the envelope against the registration wall, slide it into the DM60 Series. The system prints the Envelope Messaging and indicates when to remove the mail piece. Registration Wall NOTE: When you want to revert to normal printing, press Clear/ Back and answer Enter/yes at the "Return to Printing Postage"... -
Page 29: Adding Postage
(LAN connection) or using a PC connected to the internet with PC Meter Connect™ software installed. Connect Using LAN or PC Meter Connect™? Your Mailing System can connect to Pitney Bowes systems via the connection methods below. Pitney Bowes recommends a LAN connection is used where possible. - Page 30 5 • Adding Postage/Connecting to Data Centre 1. Connect the Communication Device to your network as shown. 2. Plug the AC adapter into LEDs the Communication Device and a power outlet. The left LED is lit yellow when it is on. 3.
-
Page 31: Connecting Your System Using Pc Meter Connect
Clicking this icon gives you access to PC Meter Connect's internet settings. Checking Funds (Postage) Available in your DM60 Series 1. Press Funds. The amount left (Unused) in the DM60 Series displays. 2. Press the Review ▲▼ keys for additional information on batch values. -
Page 32: Checking Your Account Balance In The Postage By Phone® System
Checking Your Account Balance in the Postage By Phone® System To check your Postage By Phone® system account balance: 1. Connect your DM60 Series to a LAN or via PC Meter Connect™. 2. Press Funds. The amount left (Unused) in the DM60 Series displays. -
Page 33: Connecting To The Data Centre (Other Than For Postage)
You can connect to the Data Centre to download a feature you ordered, comply with Postal Authority inspection regulations, etc. 1. Connect your DM60 Series to a LAN or via PC Meter Connect™. 2. Press Menu/Options. 3. Use the Review ▲▼ keys to scroll to "Connect to Pitney Bowes?", then press Enter/yes. - Page 34 Postal Inspection (mandatory) Your DM60 Series is a Mailmark™ compliant system. At regular intervals defined by Royal Mail, it connects to the Pitney Bowes Data Centre to provide usage data to Royal Mail. The connection will normally happen in the background without you needing to do anything.
- Page 35 5 • Adding Postage/Connecting to Data Centre Postal Rate Update (mandatory) Postal rates change periodically as defined by Royal Mail. If new rates are available, you can download them quickly and easily directly from the Data Centre. The new rates are normally available for download at least 7 days before the effective date.
- Page 36 5 • Adding Postage/Connecting to Data Centre SDC2029B...
-
Page 37: Machine Settings
Section 6 Machine Settings Machine Settings Machine Settings Machine settings allow you to customise your DM60 Series for the way you run your mail and add security to those features that are sensitive to your organisation. These settings include: •... -
Page 38: Using The Preset Feature
Envelope Messaging, no class is selected, and a postage amount is already on the screen, these are the conditions that will be recorded by your DM60 Series when you define the preset feature. -
Page 39: Storing A New Preset
Home screen displays. Storing a New Preset 1. Establish the proper settings on your DM60 Series meter that you want the preset to contain. Depending on the class and weight that is currently displayed on your machine and the options you have purchased, you may be able to store postage, class, weight, date and Envelope Messaging. -
Page 40: Viewing The Preset
6 • Machine Settings Viewing the Preset 1. Press Menu/Options. 2. Use the Review ▲▼ keys to scroll to "Change Setup?", then press Enter/yes to confirm. 3. Use the Review ▲▼ keys to scroll to "Use preset setup?", then press Enter/yes to confirm. 4. -
Page 41: Setting/Disabling The Lock Code
5. When finished, follow prompts to return to the Home screen. IMPORTANT INFORMATION Your DM60 Series contains postal funds and if you opt to use the 4-digit Lock Code to secure the funds, it is important that you do not allow your Lock Code to be compromised if the machine is used in an open area. -
Page 42: Setting Sleep Mode Activation Time
5. Press Clear/Back repeatedly to return to the Home screen. Activating Sleep Mode Manually You can set put the DM60 Series meter into "sleep mode" at any time. When the DM60 Series meter is in sleep mode, the display is blank (except for the time in the lower right corner of the display) and you can't process mail. -
Page 43: Setting The Low Funds Warning
The DM60 Series will warn you when your postage (funds) unused in the machine reaches an amount you specify. This warning acts as a reminder for you to add more postage to your DM60 Series (by connecting to the Data Centre and downloading funds). -
Page 44: Using The Text Ad Option
6 • Machine Settings Using the Text Ad option Text Ads are only available as an option on certain models of DM60 Series. What is a Text Ad? A Text Ad is a user defined message typed in via the machine’s keyboard that can be printed on your digital meter impression. -
Page 45: Viewing A Text Ad
6 • Machine Settings Viewing a Text Ad 1. Press Menu/Options. 2. Use the Review ▲▼ keys to scroll to "Change Setup?", then press Enter/yes to confirm. 3. Use the Review ▲▼ keys to scroll to "Use text Ad setup?", then press Enter/yes to confirm. -
Page 46: Delete A Text Ad
Text Ad, or press No and follow the screen prompts to return to the Home screen. Other Settings Within the menus of your DM60 Series you will see some other settings available. These should only be changed under instruction of a representative of your machine supplier. -
Page 47: Ink Maintenance
Your actual ink usage will vary, based on how frequently you use your DM60 Series, the graphic printed and environmental conditions. The DM60 Series display tells you when the ink supply is low or exhausted. “Low Ink" and amber LED lit - Replace the ink cartridge soon. If you don’t have a replacement cartridge on hand, you should order one... - Page 48 7 • Ink Maintenance Replacing the Ink Cartridge (continued) 4. Open the top cover and locate the ink cartridge (see white circle in illustration.) 5. Press the top of the ink cartridge latch (on the green "unlock" icon). 6. Tilt the old cartridge towards you and lift out.
-
Page 49: Printing Test Pattern
7 • Ink Maintenance Replacing the Ink Cartridge (continued) 10. Close the DM60 Series meter cover. Press Enter/yes. 11. Press Enter/yes to confirm the replacement. A print head initialisation occurs which lasts about 2-3 minutes. 12. When prompted, insert an envelope/label sheet to print a test pattern to confirm print quality. -
Page 50: Cleaning Printer Nozzles
6. At the "Is test pattern OK" prompt... If the print is OK, press Enter/yes. If the print still has missing lines, press no and the DM60 Series will perform another cleaning cycle. 7. When finished, follow the prompts to return to the Home screen. -
Page 51: Replacing The Print Head
7. When prompted, insert an envelope/label sheet to print a test pattern to confirm print quality. 8. If the test pattern looks good, press Enter/yes. If the print has missing lines, press no and the DM60 Series will perform another cleaning cycle. Good Test Print... -
Page 52: Replacing The Ink Tray
7 • Ink Maintenance Replacing the Ink Tray IMPORTANT: This procedure should only be done under the direction of or with the permission of a representative of your machine supplier. 1. Press Menu/Options. 2. Use the Review ▲▼ keys to scroll to "Use ink functions?", then press Enter/yes to confirm. -
Page 53: Reports
Section 8 Reports Reports Your DM60 Series allows you to view and print reports for funds usage, postage refills, postage tracked by account, and other valuable data. The printable reports are printed directly from your DM60 Series onto an envelope or label sheet. -
Page 54: Account Reports
8 • Reports Account Reports If you have the optional accounting feature on your DM60 Series, you can view and print your account totals at any time. You may want to do this before you clear or delete an account, such as at the end of a fiscal year. -
Page 55: Software Version Report
5. The report is printed. Follow the prompts to return to the Home screen or to print another report. View Software Versions (not printed) This report lists software information about your DM60 Series meter on the display; it is not printed. 1. Press Menu/Options. - Page 56 8 • Reports SDC2029B...
-
Page 57: Optional Departmental Accounting Feature
Optional Departmental Accounting Feature When you purchase the optional accounting feature, you can set up your DM60 Series to track postage costs incurred by individuals or departments in your organisation (e.g., Tom, Jane, Sales, A/R, etc.). Your DM60 Series stores the following information for each account: •... -
Page 58: Creating An Account
9 • Departmental Accounting Creating an Account You need to create an account before you can use the departmental accounting feature to track postage. 1. Press Menu/Options. 2. Use the Review ▲▼ keys to scroll to "Use Accounting functions?", then press Enter/yes to confirm. 3. -
Page 59: Editing An Existing Account
9 • Departmental Accounting Editing an Existing Account You can edit an account name and password if you wish. 1. Press Menu/Options. 2. Use the Review ▲▼ keys to scroll to "Use Accounting functions?", then press Enter/yes to confirm. 3. Use the Review ▲▼ keys to scroll to "Edit an existing Account?", then press Enter/yes to confirm. -
Page 60: Clearing All Or Some Of The Accounts
9 • Departmental Accounting Clearing All or Some of the Accounts You can clear the postage totals in an account when necessary (for example, at the end of a fiscal year). IMPORTANT: Make sure your really want to clear an account. Once you do, the account information is gone forever. -
Page 61: Deleting An Account
9 • Departmental Accounting Deleting an Account You can delete an account when necessary. IMPORTANT: Make sure your really want to delete an account. Once you do, the account information is gone forever. We suggest you print an accounting report first (see Section 8, Reports) before deleting. - Page 62 9 • Departmental Accounting SDC2029B...
-
Page 63: Troubleshooting
Details of how to contact your machine supplier will be either in a separate document supplied with your DM60 Series, on the back cover of this guide, or on a sticker applied to your DM60 Series. IMPORTANT INFORMATION The DM60 Series has been approved for use in the UK by Royal Mail. -
Page 64: Error Messages
10 • Troubleshooting Error Messages From time-to-time your DM60 Series may display an alert or error message. An alert tells you that something needs attention; an error message usually tells you about a DM60 Series condition you can fix. Message Description Action... -
Page 65: Nothing Displays
10 • Troubleshooting Nothing Displays 1. The DM60 Series meter may be in sleep mode. Press any key to wake it. 2. Is power cord plugged into both the DM60 Series meter and the wall outlet? Make sure the power cord is not connected to a switched wall outlet with the outlet turned off. -
Page 66: Problems Connecting
10 • Troubleshooting Problems Connecting Problem with PC Meter Connect™ Make sure that the USB cable is connected between the DM60 and your PC. Also check that your PC is able to connect to the internet. Problem with a LAN connection using the Communication Device If the right LED lights orange continuously (not blinking), Your Communication Device is not communicating with an active network port. -
Page 67: Supplies And Options
All supplies, accessories and options are available from your machine supplier. Contact details are given on a separate document supplied with your DM60 Series, on the rear page of this guide and/or on a 'sticker' applied to the machine. Supplies Your DM60 Series requires certain supplies to function properly. -
Page 68: Options
Options A number of flexible options are available so you can tailor your DM60 Series to meet your exact needs today, and expand it as your business grows tomorrow. Contact your machine supplier who will advise you about the options available on your model. -
Page 69: Enter Text
Appendix A Enter Text How to When is Text Entry Used? Text is entered for these functions: • Entering a Text Ad (optional feature) • Naming an Account (with optional Departmental Accounting) • International mail (selecting a country) How is Text Entry Done? Text entry is done via the numeric keypad in a fashion similar to mobile phone text entry. -
Page 70: Special Characters
Appendix A • How to Enter Text Special Characters Special characters are accessed by repeatedly pressing the “1” key. Special characters include: Symbol Name Comma & Ampersand Asterisk Period Colon Currency symbol Minus sign (dash) Question mark Forward slash Backward slash Open parenthesis Close parenthesis Exclamation point... -
Page 71: Glossary
Ascending Register (Used) — The total amount of postage used since the machine was placed in service. Batch Register — A part of the DM60 Series meter’s memory that stores the total postage spent and the number of pieces of mail processed. - Page 72 It also permits convenient postal inspection by phone. Preset — A DM60 Series setting you can call up at the push of a button. The preset can hold a postage amount, account, Envelope Messaging, inscription and class of service.
- Page 74 PB Form SDC2029A (1-15) © Pitney Bowes Limited, 2015 We have made every reasonable effort to assure the accuracy and usefulness of this guide, however we cannot assume responsibility for errors or omissions or liability for the misuse or misapplication of our products.
Need help?
Do you have a question about the dm60 series and is the answer not in the manual?
Questions and answers