
Related Manuals for Messoa UFD301


Summary of Contents for Messoa UFD301
- Page 1 1MP/3MP Flat Mini Dome Network Camera Quick Start Guide 1MP Fixed Lens Model 3MP Fixed Lens Model 201402 301.305 A1...
-
Page 2: Table Of Contents
Quick Start Guide Table of Content Product Overview Physical Characteristics Installation and Connection Package Content Installation 2.2.1 Connecting the Wires 2.2.2 Disassembling the Camera 2.2.3 Installing the Camera 2.2.4 Adjusting the Position 2.2.5 Sticking Desiccant 2.2.6 Completing the Installation Connection Network Topology Accessing the Camera for the First Time IP Finder... - Page 3 Quick Start Guide WARNING The 1MP Fixed Lens Model operates at PoE IEEE 802.3af Class 0. The 3MP Fixed Lens Model operates at DC 12V/ PoE IEEE 802.3af Class 0. Installation and service should be performed only by qualified and experienced technicians and comply with all local codes and rules to maintain your warranty.
-
Page 4: Product Overview
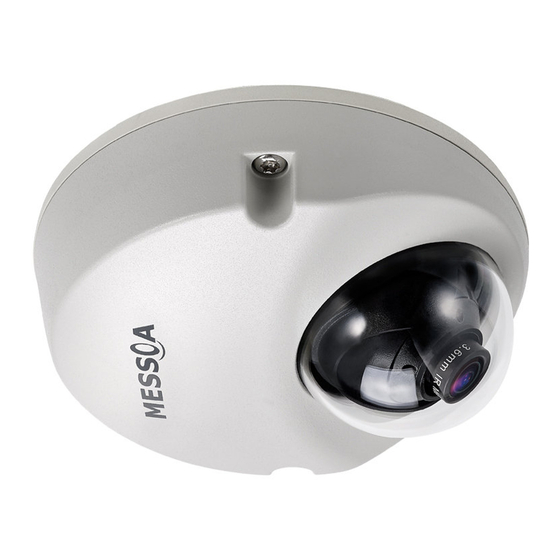
Quick Start Guide 1. Product Overview 1.1 Physical Characteristics 1MP Fixed Lens Model 3MP Fixed Lens Model Figure 1 - 1: Pictorial index Table 1 - 1: Pictorial Index Definition Index # Name Dome cover Unit body Micro SD card slot (3MP Fixed Lens Model Exclusive) -
Page 5: Installation And Connection
Quick Start Guide 2 Installation and Connection Package Content Check everything in the packing box matches to the order form and the packing slip. In addition to this manual, items below are included in the packing box. Fixed flat dome camera x 1 ... -
Page 6: Disassembling The Camera
Quick Start Guide 2.2.2 Disassembling the Camera Loosen the 2 screws on the cover by the supplied torx wrench. Remove the dome cover. Insert the optional micro SD card for file storage if necessary ( 3MP Fixed Lens Model Exclusive 1MP Fixed Lens Model 3MP Fixed Lens Model Figure 2 - 1: Disassembling the Camera... -
Page 7: Adjusting The Position
Quick Start Guide Mounting Template Plastic Anchors x 2 Flat Head Screws (Tapping Type) x 2 Figure 2 - 2: Installing the Camera 2.2.4 Adjusting the Position Loosen the two screws beside the lens as figure below. Adjust the lens to a desired shooting angle for suitable coverage. The lens can be adjusted vertically &... -
Page 8: Sticking Desiccant
Quick Start Guide 2.2.5 Sticking Desiccant Take out the desiccant from the package. Flip over the dome cover and stick desiccant to the rectangular recess as the figure shown below. Figure 2 - 4: Sticking Desiccant 2.2.6 Completing the Installation After mounting the unit body to the surface, attach the dome cover with extra care on direction. -
Page 9: Connection
Quick Start Guide 3 Connection Network Topology The unit, which is equipped with Ethernet RJ-45 network interface, can deliver video images and audio in real time via either Internet or Intranet. Please refer to the skeleton drawings shown below for understanding. Figure 2 - 6: Network Topology Accessing the Camera for the First Time The camera comes with a web-based setup utility, allowing you to view the video of the camera and configure... -
Page 10: Ip Finder
Quick Start Guide IP Finder IP Finder is a utility program that helps users to locate the unit in local area network that computer is connected to. Please note that IP Finder works only in Microsoft Windows XP, Microsoft Windows Vista, and Microsoft Windows 7. - Page 11 1MP/3MP 平顶迷你半球网络摄像机 快速安装指南 1MP 定焦镜头机型 3MP 定焦镜头机型 201402 301.305 A1...
- Page 12 快速安装指南 目录 产品概述 外形特征 摄像机安装 标准配备 安装 接线 2.2.1 拆卸摄像机 2.2.2 安装摄像机 2.2.3 调节摄像机位置 2.2.4 放置干燥剂 2.2.5 安装完成 2.2.6 连接摄像机 网络布局 首次访问摄像机 IP Finder...
- Page 13 快速安装指南 注意事项 1MP 定焦镜头机型使用 PoE 供电。 3MP 定焦经镜头机型可使用 DC 12V 电源或 PoE 供电。 请由专业技术人员安装和维修摄像机,确保符合当地规程并保证您的保修权限。 请勿将摄像机放置于雨水或潮湿的环境中,以免发生火灾或触电危险。 请使用柔软的干布清洁摄像机。如有顽固污渍,请用抹布蘸取少量中性洗涤剂清洁,然后擦干。 请勿使用苯或稀释剂,以免导致摄像机表面物质溶化或镜头雾化。 请勿将镜头长时间对准强光源(如照明器具) 。 避免在以下地点使用或存放摄像机: 极度潮湿、多尘、极热/冷的环境(运作温度超过推荐范围[-40° C ~ +50° C] ) 。 靠近强磁场或电磁辐射源。 靠近荧光灯或反光物体。 ...
-
Page 14: 产品概述
快速安装指南 1 产品概述 1.1 外形特征 1MP 定焦镜头机型 3MP 定焦镜头机型 图 1-1:图示索引 表 1-1:图示索引定义 索引 # 定义 半球外罩 摄像机机身 SD卡槽(仅限3M机型)... -
Page 15: 摄像机安装
快速安装指南 2 摄像机安装 标准配备 检查接收到的物品与订单和装箱单上所列的是否相符,除了此份使用手册,还应包含以下物品: 平顶迷你半球网络摄像机(x1) 塑胶壁虎(x2) 平头自攻螺丝(x2) 梅花扳手(x1) 定位贴(x1) 纸质快速安装指南(x1) 视频输出线(x1) CD-ROM(IP Finder/使用手册/快速安装指南) (x1) 干燥剂(x1) 如有任何部件遗失或损坏,请联系该摄像机的经销商。 安装 首次拆箱打开时,请检查摄像机及其配件外观是否有损坏。我们的包装均采用防护材料,防止运输过程中损伤 货物。根据“2.1 标准配备”中的装箱清单检查物品,然后去掉产品外部保护膜。 2.2.1 接线 选择一种电源,将摄像机电源线接至电源插头: DC 12V: (仅限 3MP 机型)12V(-)接直流 12V 电源负极,12V(+)接直流 12V 电源正极。 ... -
Page 16: 拆卸摄像机
快速安装指南 2.2.2 拆卸摄像机 使用梅花扳手拧松摄像机外壳上的两个螺丝。 取下半球外罩。 如有需要请插入 SD 卡,存储影像文件(仅限 3M 机型) 。 1MP 定焦镜头机型 3MP 定焦镜头机型 图 2-1:拆卸摄像机 2.2.3 安装摄像机 将定位贴置于墙壁或天花板上。 根据定位贴上孔洞位置钻取两个安装孔,插入塑胶壁虎。 再钻取一个直径为 30mm 的安装孔,将摄像机相关线缆穿过此安装孔。 使用 2 个平头自攻螺丝将摄像机机身固定到墙壁或天花板上。... -
Page 17: 调节摄像机位置
快速安装指南 定位贴 塑胶壁虎 x 2 平头自攻螺丝 x 2 图 2-2:安装摄像机 2.2.4 调节摄像机位置 拧松镜头两边的固定螺丝,如下图所示。 调节镜头至合适的视角。 两个镜头螺丝完全拧松后,可以水平或倾斜调节镜 头位置。 图 2-3:调节摄像机位置 注意 调节完成后请拧紧两个镜头固定螺丝。... -
Page 18: 放置干燥剂
快速安装指南 2.2.5 放置干燥剂 取出包装中的干燥剂。 翻转摄像机半球外罩,将干燥剂放置在下图所示的矩形凹槽中。 图 2-4:放置干燥剂 2.2.6 安装完成 摄像机机身固定到安装面上后,再安装回半球外罩(注意半球外罩的安装方向) 。 使用梅花扳手拧紧半球外罩的固定螺丝即可完成摄像机安装操作。 图 2-5:安装完成... -
Page 19: 连接摄像机
快速安装指南 3 连接摄像机 网络布局 该网络摄像机带有 RJ-45 以太网接口,可通过因特网或局域网实时传输视频影像或音频数据。请参考下面的结 构图了解摄像机和网络连接方式。 图 2-6:网络布局 首次访问摄像机 访问登录网络摄像机前,请根据以下步骤设置 IP 地址: 第一步:连接电脑和摄像机 初始化设置时,请先将网线一端接至摄像机的 RJ45 端口,另一端接至用户电脑的 LAN 端口。 第二步:设置用户电脑 IP 地址 摄像机的默认 IP 地址为 192.168.1.30,子网掩码为 255.255.255.0。请设置用户电脑 IP 地址,确保与摄像机连 接在同一网段中。 IP 地址:192.168.1.X,此处 X 应为 2~254 之间的任意数字,除了 30。 子网掩码:255.255.255.0 第三步:检查摄像机和电脑连接状态... -
Page 20: Ip Finder
快速安装指南 IP Finder IP Finder 可用于查找电脑所连接的局域网中的网络摄像机 。 请注意 IP Finder 只能安装在 Microsoft Windows XP, Microsoft Windows Vista, and Microsoft Windows 7 操作系统中。 双击 CD 光盘中的 IPFinder.exe,根据弹出的提示窗口安装软件。 安装完成后,打开 IP Finder,窗口中将显示出当前运行的摄像机,点击 FIND CAMERA 可查找当前网络中连 接的其他摄像机。双击所选摄像机,配置相应网络设置。设置完成后点击“保存”,保存所有设置,并点击“退 出”,退出 IP Finder 工具。 图 2-7:IP Finder...
Need help?
Do you have a question about the UFD301 and is the answer not in the manual?
Questions and answers