Table of Contents
Advertisement
Advertisement
Table of Contents

Related Manuals for CeraGem CGM MCB-1201


Summary of Contents for CeraGem CGM MCB-1201
- Page 2 Important safety issues This appliance is not intended for use by persons (including children) with reduced physical, sensory or mental capabilities, or lack of experience and knowledge, unless they have been given supervision or instruction concerning use of the appliance by a person responsible for their safety.
- Page 3 Important safety issues Warning In order to prevent injuries from burns, fires and electric shocks, one must connect to a socket that has a ground connection. Be certain of how to connect to the socket before using the product. 1. Only use the product if it is in mechanically complete condition. If damaged products are used, there is a possibility of injury or burns) 2.
- Page 4 Important safety issues - Immediately stop using the unit if you start to feel sick or uncomfortable, or if the massage seems too painful. - As of now, there is no evidence to suggest that this product interferes with or influences medications.
- Page 5 Ground connection method This product must be connected to a ground connection. The ground connection reduces resistance against electric currents in case there are any defects or breakdowns which may lead to electric shocks and damage. On the product, there are conductors and electric terminals where the power cord is located. The power cord has been installed to comply with regional laws;...
- Page 6 C o n t e n t s >> Important Safety Issues - Danger - Warning - Caution Ⅰ. Introduction of the product 1. Product’s characteristics 2. The name of each part Ⅱ. Installation and preparation 1. Check product’s composition 2.
- Page 7 MEMO...
- Page 8 Ⅰ. Introduction of the product 1. Product’s characteristics 2. The name of each part...
- Page 9 1. Product’s characteristics 1. Aesthetically Pleasing, Easy-To-Use Exterior Design The aesthetically pleasing, easy-to-use exterior design matches well with any home interior article. The folding design of the supporting mat requires minimum space and ensures convenience for the user. 2. Body sensing function The new body sensing function automatically measures the length of the spine of the user, offering optimal, customized compressive stimulation.
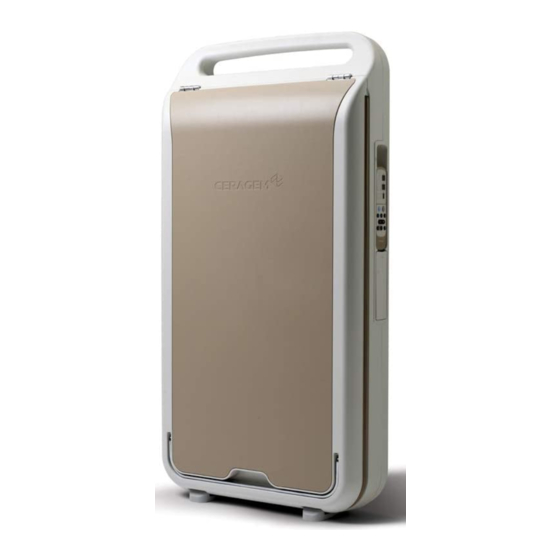
- Page 10 2. The name of each part External Projector (3-Sphere) (Applied part) Remote control Main body mat Main Heating (Applied part) Element Auxiliary Part Outer Fabric Internal Projector Remote Control External Projector Connector Connector Safety Latch Sensor for the opening of auxiliary part detection Supporting Frame Handle...
- Page 11 MEMO...
- Page 12 Ⅱ. Installation and preparation Check product’s composition Check before product installation Installation Check after installation...
- Page 13 1. Check product’s composition External projectors (3-Sphere) Easy to use on body parts such as the abdomen, shoulders, arms, legs and etc. Can be used with the main product or shared between two people. External projector cover It can be used while covering the external projector. Remote control Simple to operate and check the product’s status.
- Page 14 2. Check before product installation 1. Install where the ground is flat to avoid the risk of damaging the product. 2. Try and avoid installation where there is a lot of humidity or dust. (To avoid risking electric shocks or fire.) 3.
- Page 15 3. Installation Take out the product and components from the box. Components Accessaries 부속품 Lay the product where the ground is flat and unlock the safety latch. Open the product using the supporting frame. Take care not to insert any part of your body into the product when opening the product. (There is risk of injury.) Caution The supporting frame cannot open somewhat smoothly for safety reasons.
- Page 16 3. Installation Connect the outer fabric, remote control, and external projector properly. External Remote Projector Control Do not touch the connector pin. (Can cause bodily harm or mechanical failure.) Warning Connect the power cord onto the main body and plug into a socket. If the power cord is connected when the power switch is ”On”, it can cause mechanical failure.
- Page 17 4. Check after Installation Unfold the auxiliary part completely. (The remote control will not work unless you unfold the auxiliary part.) Turn on power at the side of the main body. (Turn off power when the product is not in use.) Press the power key of the remote control and check whether the display turns on.
- Page 18 Ⅲ. Using the Product 1. Remote control layout 2. How to use the remote control 3. How to use the product by mode 4. How to move the product...
- Page 19 1. Remote control layout Internal projector’s temperature symbol Internal projector position symbol External projector’s temperature symbol Manual mode symbol Semi-automatic Mode Symbol mode symbol Automatic mode button (Mode A) Power button Mode 2 button Mode button Mode 1 button (Mode 3~9) Up/Down button Manual mode button Semi-automatic...
- Page 20 2. How to use the remote control Turning on the Remote Control 1. Check the condition of the product connections and press the power key of the remote control. - Start the remote control after opening the auxiliary part. - Press the remote control for 2~3 seconds to turn it off. 2.
- Page 21 2. How to use the remote control Adjusting the Temperature The temperature of the internal projector and external projector can be adjusted when the mode is in use. 1. Check the current temperature. - If you press the Internal/External projectors button for selection, the setting temperature display for the projector will flash, and a buzzer sound will be emitted.
- Page 22 3. How to use the product (by mode) Automatic Mode (Mode A) (Mode Duration : Approx. 36 minutes 30 seconds) 1. Turn on the remote control power and check the display. - External projectors appear only when they are connected. - The current temperature is displayed, and the standby state is shown.
- Page 23 3. How to use the product (by mode) Automatic Mode (Mode 1) (Mode Duration: Approx. 36 minutes 30 seconds) 1. Turn on the remote control power and check the display. - External projectors appear only when they are connected. - The current temperature is displayed, and the standby state is shown. 2.
- Page 24 3. How to use the product (by mode) Automatic Mode (Mode 2) (Mode Duration: Approx. 18 minutes) 1. Turn on the remote control power and check the display. - External projectors appear only when they are connected. - The current temperature is displayed, and the standby state is shown. 2.
- Page 25 3. How to use the product (by mode) Modes 3~9 (Mode Duration: Approx. 36 minutes 30 seconds) 1. Turn on the remote control power and check the display. - External projectors appear only when they are connected. - The current temperature is displayed, and the standby state is shown. 2.
- Page 26 3. How to use the product (by mode) Semi-Automatic Mode (Mode Duration: Approx. 18 minutes) 1. Turn on the remote control power and check the display. - External projectors appear only when they are connected. - The current temperature is displayed, and the standby state is shown. 2.
- Page 27 3. How to use the product (by mode) Manual Mode (Mode Duration: Approx. 60 minutes) 1. Turn on the remote control power and check the display. - External projectors appear only when they are connected. - The current temperature is displayed, and the standby state is shown. 2.
- Page 28 * The massage patterns may be adjusted depending on the user's height. 3. How to use the product (by mode) Mode Pattern Scanning Thermal acupressure (88 seconds) Mode A Mode 1 (Mode Duration: Approx. 36 minutes 30 seconds) (Mode Duration: Approx. 36 minutes 30 seconds) Thermal acupressure (100 seconds) 10 seconds 10 seconds...
- Page 29 * The massage patterns may be adjusted depending on the user's height. 3. How to use the product (by mode) Mode Pattern Scanning Thermal acupressure (88 seconds) Mode 4 Mode 5 (Mode Duration: Approx. 36 minutes 30 seconds) (Mode Duration: Approx. 36 minutes 30 seconds) 10 seconds 10 seconds Standby...
- Page 30 * The massage patterns may be adjusted depending on the user's height. 3. How to use the product (by mode) Mode Pattern Scanning Thermal acupressure (88 seconds) Mode 8 Mode 9 (Mode Duration: Approx. 36 minutes 30 seconds) (Mode Duration: Approx. 36 minutes 30 seconds) 10 seconds 10 seconds Standby...
- Page 31 4. How to move the product Close the product using the supporting frame and lock the safety latch. Take care not to insert any part of your body into the product when closing the product. (There is risk of injury.) Caution Hold the handle and move the product using the casters.
- Page 32 Ⅳ. Management and matters that require attention 1. Self inspection 2. Management techniques and storage methods 3. Check before A/S request 4. Remote control error messages 5. Product specifications 6. Product warranty...
- Page 33 1. Self inspection Inspection Points Before Use 1. Is the power cord connected to the socket? 2. Did you check whether the main body’s power button is “ON”? 3. Is the remote control temperature displayed when the remote control power is “ON”? 4.
- Page 34 Management techniques and storage methods 1. Leather is an oil based product. Therefore it is crucial that it is not exposed to organic solvents such as acetone, ballpoint pen ink, gasoline, thinners, sweat, mousse, spray, and etc. 2. Where there is direct contact with the head or skin, wipe with a dry cloth. 3.
- Page 35 3. Check before A/S request Does the remote control not turn on? Q: Is the power switch at the bottom of the product turned on? A: Turn on the power switch. Q: Is the power cord properly connected? A: Reconnect the power cord. Q: Is the remote control properly connected? A: Reconnect the remote control.
- Page 36 4. Remote control error messages In case of error during operation, the following messages appear on the remote control display: Symbol Meaning When the internal projector’s temperature is over 75℃, the “E1” error appears on the temperature display of the internal projector, and all operations of the product stop.
- Page 37 5. Product specifications Model CGM MCB-1201 Article Automatic Thermal Massager Voltage 100-240V~, 50/60Hz Consumption 150VA Power Environment 10℃~40℃ temperature Recommended Height for Body 120cm~186cm Sensing When spread out : 2080mm x 600mm x 120mm(±5mm) Measurement When folded : 1170mm x 600mm x 175mm(±5mm) Weight 26kg(±2㎏)
- Page 38 Any other letters of warranty that have not been issued by Ceragem, letters that have been additionally issued by others, or letters that have passed the expiry date are exempt from the terms stated above.
- Page 39 MEMO...
- Page 40 Ⅴ. Service manual 1. Explanation of mark, delivery, and storage 2. Attached documents...
- Page 41 : Refer to instruction manual/booklet sign : Manyfacturer Mark : General prohibition sign The disposal of waste products / residues, etc. CERAGEM Do not disassemble and contact the customer service center when problem occurs with a fuse. Capacity of a fuse : AC 250V, T2AL...
- Page 42 - electromagnetic emission The Model CGM MCB-1201(CERAGEM CO., LTD. Automatic Thermal Massager)is intended for use in the electromagnetic environment specified below.The customer or the user of CGM MCB-1201 should assure that it is used in such an environment Emission test...
- Page 43 2. Attached documents Manufacturer’s declaration - electromagnetic immunity The CGM MCB-1201 is intended for use in the electromagnetic environment specified below. The customer or the user of CGM MCB-1201 should assure that it is used is such an environment. IEC 60601...
- Page 44 2. Attached documents is intended for use in the electromagnetic environment specified CGM MCB-1201 below. The customer or the user of the should assure that it is used in such an environment. CGM MCB-1201 Immunity IEC 60601 Compliance Electromagnetic environment -...
- Page 45 Recommended Separation Distances Between Portable and Mobile RF Communications Equipment and the CGM MCB-1201. The CERAGEM-CH is intended for use in an electromagnetic environment in which CGM MCB-1201 radiated RF disturbances are controlled. The user of the CERAGEM-CH can help...
- Page 46 2. Attached documents Manufacturer’s declaration - electromagnetic immunity is intended for use in the electromagnetic environment specified CGM MCB-1201 below. The customer or the user of the should assure that it is used in such an environment CGM MCB-1201 Immunity...
- Page 47 MEMO...
- Page 48 MEMO...
- Page 49 MEMO...
Need help?
Do you have a question about the CGM MCB-1201 and is the answer not in the manual?
Questions and answers
Здравствуйте. Скажите, пожалуйста, какой ток и напряжение подается на пульт управления кровати?
The voltage supplied to the control panel of the CeraGem CGM MCB-1201 bed is 100–240V~, and the current is 3.0 A.
This answer is automatically generated
@Mr. Anderson Скажите, пожалуйста, какое напряжение и ток на входе ДИСТАНЦИОННОГО ПУЛЬТА УПРАВЛЕНИЯ (на выходе кровати)?