Table of Contents
Advertisement
Available languages
Available languages
Quick Links
Advertisement
Table of Contents

Related Manuals for CeraGem CGM EB-1101


Summary of Contents for CeraGem CGM EB-1101
- Page 1 User Manual CGM EB-1101...
-
Page 3: Important Safety Issues
Important safety issues This appliance is not intended for use by persons (including children) with reduced physical, sensory or mental capabilities, or lack of experience and knowledge, unless they have been given supervision or instruction concerning use of the appliance by a person responsible for their safety. - Page 4 Important safety issues Warning In order to prevent injuries from burns, fires and electric shocks, one must connect to a socket that has a ground connection. Be certain of how to connect to the socket before using the product. 1. Only use the product if it is in mechanically complete condition. If damaged products are used, there is a possibility of injury or burns) 2.
- Page 5 Important safety issues - Immediately stop using the unit if you start to feel sick or uncomfortable, or if the massage seems too painful. - As of now, there is no evidence to suggest that this product interferes with or influences medications.
- Page 6 Ground connection method This product must be connected to a ground connection. The ground connection reduces resistance against electric currents in case there are any defects or breakdowns which may lead to electric shocks and damage. On the product, there are conductors and electric terminals where the power cord is located. The power cord has been installed to comply with regional laws;...
- Page 7 C o n t e n t s >> Important Safety Issues - Danger - Warning - Caution Ⅰ. Introduction of the product 1. Product’s characteristics 2. The name of each part Ⅱ. Installation and preparation 1. Check product’s composition 2.
- Page 8 MEMO...
- Page 9 Ⅰ. Introduction of the product 1. Product’s characteristics 2. The name of each part...
-
Page 10: Product's Characteristics
The different stimulation programs created based on the concept of alternative medicine allows users to select programs that best suit their needs. 5. Ceragem Sound Function The Ceragem Sound function offers psychological comfort during product use and helps promote the effects of the stimulation programs. 6. Slim, Easy-to-Use Remote Control The slim and light remote control has function keys in the form of icons for more convenient product operation and simpler manipulation. -
Page 11: The Name Of Each Part
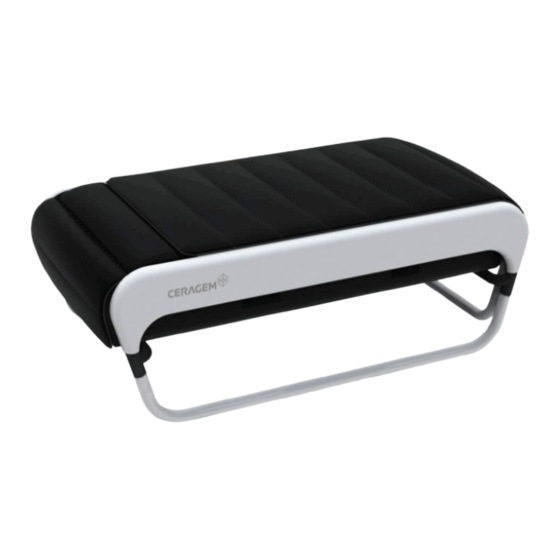
2. The name of each part Power switch (Located at the side of the main machine) Supporting frame Speakers Main frame Supporting mat (Heating element) (Applied part) Head cushion Outer fabric Main Heating Element Remote control Main body mat (Applied part) SD CARD Internal Projector... - Page 12 MEMO...
-
Page 13: Installation And Preparation
Ⅱ. Installation and preparation Check product’s composition Check before product installation Installation Check after installation... - Page 14 User manual Information on how to use the product. SD card Users may add their preferred music in addition to the Ceragem default sound. Outer fabric Protects against product contamination and burns; this detachable fabric makes washing easy. Head cushion This is attached to the top of the product.
- Page 15 2. Check before product installation 1. Install where the ground is flat to avoid the risk of damaging the product. 2. Try and avoid installation where there is a lot of humidity or dust. (To avoid risking electric shocks or fire.) 3.
-
Page 16: Installation
3. Installation Take out the product and its components from the box. accessories 프레임 조립 가이드 After fastening the supporting mat to the sliding rail, place the main body mat (which is attached to the head cushion and the outer fabric) onto the main body frame. (After moving the supporting frame to the middle of the main body, push in the main body mat completely.) Sliding rail Outer fabric... - Page 17 3. Installation Please connect the Remote Control, External Projectors and cable properly. 포장박스에서 제품 및 부속품을 꺼내세요. Assemble the remote control cradle onto the frame and place the remote control onto the cradle. Check the connectors for the SD card, remote control and the external projector and connect appropriately.
-
Page 18: Check After Installation
4. Check after installation Turn on the power at the side of the main body. (Please turn off the power when the product is not being used.) Head cushion Press the power key of the remote control and check whether the display turns on. -
Page 19: Using The Product
Ⅲ. Using the product 1. Remote control layout 2. How to use the remote control 3. How to use the product (by mode) 4. How to move the product... -
Page 20: Remote Control Button Layout
1. Remote Control layout Remote control button layout Power button Automatic Mode button Mode 2 button Mode 1 button Mode button(Mode 3~9) Up/Down button Semi-Automatic Mode button Strength button Manual Mode button Main Heating Element button External Projector button Auxiliary Heating Element button Internal Projector button Temp Start/Pause button... -
Page 21: How To Use The Remote Control
2. How to use the remote control Screen layout Body recognition, Displaying the operation time Once the body is recognized, the symbol rotates. When the mode is in operation, the time icon is turned on, displaying the operating time by having the blank disappeared one by one. Internal projector position symbol Lights up to show the position of the internal projector. -
Page 22: Turning On The Remote Control
2. How to use the remote control Turning on the remote control 1. Check the condition of the product connections and press the power key of the remote control. - To turn off the remote control OFF, press and hold the power key for more than 1 second. - Page 23 2. How to use the remote control Adjusting Strength The strength of the internal projectors can be adjusted before or during use. 1. Check the current strength level. - Pressing the strength key causes the set point to flash. 2. After pressing the strength key, adjust the temperature to the desired level using the Up/Down key.
-
Page 24: Adjusting Temperature
2. How to use the remote control Adjusting Temperature Depending on the mode in use, the temperature of the internal projector, external projector, main heating element, and the auxiliary heating element can be adjusted. 1. Check the current temperature. 2. Press the temperature key and set the temperature to the desired level using the Up/down key. -
Page 25: Adjusting Sound
2. Press the sound key and select the desired setting using the Up/Down key. Music Selection Volume Start/Pause Ceragem Sound : 1~10 0~10 User Sound : 11~100 3. Check the condition of the changed sound on the remote control display. - Page 26 What is Heatable sofa? This is a feature that allows you to sit in a warm temperature setting while the auxiliary part is closed. 2. How to use the remote control When the auxiliary part is closed When the auxiliary part is closed the external heating element and the Heatable sofa feature can be used.
-
Page 27: Automatic Mode
- The current strength and temperature are displayed. 2. Pressing the automatic mode key twice (once during the Manual mode) causes the Ceragem Sound to be played and body sensing to begin at the sound of the buzzer. Please lie down with correct body posture. - Page 28 2. Pressing the mode 1, 2, or 3 ~ 9 key twice (once for Manual mode) causes the Ceragem Sound to be played and body sensing to begin at the sound of the buzzer. Please lie down with correct body posture.
-
Page 29: Semi-Automatic Mode
* The duration of operation modes can vary depending on the body type of the user. 3. How to use the product (by mode) Semi-automatic Mode (Mode Duration: Approx. 18 minutes) 1. Turn on the remote control power supply and check the display. - External projectors appear only when they are connected. -
Page 30: Manual Mode
3. How to use the product (by mode) Manual Mode (Mode Duration: Approx. 60 minutes) 1. Turn on the remote control power supply and check the display. - External projectors appear only when they are connected. - The current strength and temperature are displayed. 2. - Page 31 The massage patterns may be adjusted depending on the user's height. 3. How to use the product (by mode) Mode Pattern Scanning Thermal acupressure (88 seconds) Automatic Mode Mode 1 (Mode Duration: Approx. 36 minutes 30 seconds) (Mode Duration: Approx. 36 minutes 30 seconds) Thermal acupressure (100 seconds) 10 seconds 10 seconds...
- Page 32 The massage patterns may be adjusted depending on the user's height. 3. How to use the product (by mode) Mode Pattern Scanning Thermal acupressure (88 seconds) Mode 4 Mode 5 (Mode Duration: Approx. 36 minutes 30 seconds) (Mode Duration: Approx. 36 minutes 30 seconds) 10 seconds 10 seconds Standby...
- Page 33 The massage patterns may be adjusted depending on the user's height. 3. How to use the product (by mode) Mode Pattern Scanning Thermal acupressure (88 seconds) Mode 8 Mode 9 (Mode Duration: Approx. 36 minutes 30 seconds) (Mode Duration: Approx. 36 minutes 30 seconds) 10 seconds 10 seconds Standby...
- Page 34 4. How to move the product Disconnect the power cord, remote control, and external projector from the main body. Then, lift the head cushion and close the supporting mat. (To open the supporting mat, pull forward and then lower it.) ②...
- Page 35 Ⅳ. Management and matters that require attention 1. Self inspection 2. Management techniques and storage methods 3. Check before A/S request 4. Remote control error messages 5. Product specifications 6. Product warranty...
-
Page 36: Self Inspection
1. Self inspection Inspection points before use 1. Is the power cord connected to the socket? 2. Did you check whether the main body’s power button is “ON”? 3. Is the remote control power and the LCD screen “ON”? 4. Did you check whether the projector’s temperature has been set to the appropriate level? 5. - Page 37 Management techniques and storage methods 1. Leather is an oil based product. Therefore it is crucial that it is not exposed to organic solvents such as acetone, ballpoint pen ink, gasoline, thinners, sweat, mousse, spray, and etc. 2. Where there is direct contact with the head or skin, wipe with a dry cloth. 3.
- Page 38 3. Check before A/S request Does the remote control turn on? Q: Is the power switch (located at the side of the product) turned on? A: Turn on the power switch. Q: Is the power cord connected properly? A: Connect the power cord again. Q: Is the remote control connected properly? A: Connect the remote control again.
- Page 39 4. Remote control error messages In case of error during operation, the following messages appear on the remote control display: Symbol Symbol Error location External Projector Internal Projector High temperature error Main Heating Element Auxiliary Heating Element Internal Projector Main Heating Element Faulty temperature sensor Auxiliary Heating Element External Projector...
-
Page 40: Product Specifications
5. Product specifications Model CGM EB-1101 Article Automatic Thermal Massager Voltage 220-240V~, 50/60Hz Consumption Power 240W Recommended Height 120cm~186cm for Body sensing SD card format type FAT32 Number of 100EA user use files MP3 Playable files 2.2W maximum power When spread out: 700㎜×2016㎜×450㎜(±5mm) Measurement When folde: 700㎜×1258㎜×450㎜(±5mm) -
Page 41: Product Warranty
Any other letters of warranty that have not been issued by Ceragem, letters that have been additionally issued by others, or letters that have passed the expiry date are exempt from the terms stated above. - Page 42 MEMO V~ :AC (alternating current) voltage source ㅣ :On (power: connectino to the mains) :Off (power: disconnection from the mains) :Load Way Mark :Handle with Care(Wet) :Handle with Care(Open) :Handle with Care(Fragile) :Attention, consult Accompanying documents...
-
Page 43: Medidas Importantes De Seguridad
Medidas importantes de seguridad Este producto no está diseñado para ser utilizado por personas (incluidos los niños) que tengan capacidades físicas, sensoriales o mentales reducidas o que no tengan la suficiente experiencia y conocimiento, a menos que hayan recibido instrucciones en relación con el uso del producto por parte de una persona responsable por su seguridad. - Page 44 Medidas importantes de seguridad Advertencia Para evitar lesiones por quemaduras, incendios y choques eléctricos, se debe ‘conectar a un enchufe con conexión a tierra. Asegúrese de conectar correctamente al enchufe antes de utilizar el producto. 1. Utilice el producto solamente si tiene todas sus partes mecánicas. (Si se utilizan productos dañados existe la posibilidad de lesiones o quemaduras) 2.
- Page 45 Medidas importantes de seguridad - Al momento, no existe evidencia que sugiera que este producto interfiere con medicamentos ni que los altera. Aquellas personas que toman medicamentos recetados deben consultar a su médico antes de utilizar este producto. - No se duerma mientras utiliza la unidad. - No utilice la unidad luego de ingerir alcohol.
- Page 46 Método para la conexión a tierra Este producto debe estar conectado a una toma a tierra. La conexión a tierra reduce la resistencia contra corrientes eléctricas en el caso de que se produzcan defectos o roturas que puedan ocasionar daños y choques eléctricos. En el producto, hay conductores y terminales eléctricos donde se ubica el cable de alimentación.
- Page 47 C o n t e n i d o >> Medidas importantes de seguridad - Peligro - Advertencia - Precaución Ⅰ. Introducción al producto 1. Características del producto 2. El nombre de cada parte Ⅱ. Instalación y preparación 1. Comprobar la composición del producto 2.
- Page 48 MEMO...
-
Page 49: Introducción Al Producto
Ⅰ. Introducción al producto 1. Características del producto 2. El nombre de cada parte... -
Page 50: Características Del Producto
5. Función de sonido de Ceragem La función de sonido de Ceragem ofrece alivio psicólogo durante el uso del producto y ayuda a fomentar los efectos de los programas de estimulación. - Page 51 2. Partes de la camilla Interruptor de encendido (Ubicado en el costado de la máquina principal) Soporte Parlantes Caja principal Protector de soporte Almohadón para (parte instalada) Tela exterior la cabeza Elemento de calentamiento principal Control remoto Colchón principal (parte instalada) SD CARD Proyector interno...
- Page 52 MEMO...
-
Page 53: Instalación Y Preparación
Ⅱ. Instalación y preparación 1. Comprobar la composición del producto 2. Comprobación antes de la instalación del producto 3. Instalación 4. Comprobación luego de la instalación... - Page 54 Manual del usuario Información sobre cómo utilizar el producto. Tarjeta SD Además del sonido predeterminado de Ceragem, los usuarios pueden agregar la música que prefieran. Tela exterior Protege contra las quemaduras y la contaminación del producto. La tela puede quitarse, lo cual facilita el lavado.
- Page 55 2. Comprobación antes de la instalación del producto 1. Instálelo en un lugar plano para evitar el riesgo de dañar el producto. 2. Evite instalarlo en un lugar muy húmedo o donde haya polvo. (Para evitar el riesgo de incendios o choques eléctricos). 3.
-
Page 56: Instalación
3. Instalación Retire el producto y los componentes de la caja. accesorios 프레임 조립 가이드 Coloque el soporte del colchón principal en la parte superior de la caja del colchón principal. Luego conecte la tela exterior y el almohadón para la cabeza. Conecte el soporte al rail deslizante. (Deslice el soporte inferior hasta la mitad del colchón principal y después deslice el colchón principal hasta el fondo) Rail deslizante Tela exterior... - Page 57 3. Instalación Conecte el control remoto, los proyectores externos y el cable en forma apropiada. Arme el soporte del control remoto sobre la caja y coloque el control remoto sobre el armazón. Compruebe los conectores para la SD card, el control remoto y el proyector externo y conéctelos en forma apropiada.
-
Page 58: Comprobación Después De La Instalación
4. Comprobación después de la instalación Encienda el aparato desde el costado del colchón principal. (Apáguelo cuando no utilice el producto.) Almohadón para la cabeza Oprima la tecla de encendido del control remoto y compruebe que se encienda la pantalla. Temp *Consulte la página 20 para la descripción de la pantalla del control remoto. -
Page 59: Uso Del Producto
Ⅲ. Uso del producto 1. Disposición para el control remoto 2. Cómo utilizar el control remoto 3. Cómo utilizar el producto (por modo) 4. Cómo mover el producto... - Page 60 1. Disposición del control remoto Disposición de los botones del control remoto Botón de encendido Botón de modo automático Botón Modo 2 Botón Modo 1 Botón Modo (Modo 3~9) Botón Up/Down Botón de modo semi-automático Botón de fuerza Botón de modo manual Botón del elemento de calentamiento principal Botón del proyector externo Botón del elemento de calentamiento auxiliar...
-
Page 61: Cómo Utilizar El Control Remoto
2. Cómo utilizar el control remoto Disposición de la pantalla Reconocimiento del cuerpo, mostrando el tiempo de funcionamiento Una vez que se reconoce el cuerpo, el símbolo gira. Cuando está en modo de funcionamiento, el ícono de tiempo se activa, mostrando el tiempo de funcionamiento haciendo que el blanco desaparezca uno por uno. - Page 62 2. Cómo utilizar el control remoto Encendido del control remoto 1. Compruebe el estado de las conexiones del producto y oprima la tecla de encendido del control remoto. - Para apagar el control remoto, mantenga oprimida la tecla de encendido durante más de 1 segundo 2.
-
Page 63: Ajuste De La Intensidad
2. Cómo utilizar el control remoto Ajuste de la intensidad La intesidad de los proyectores internos puede ajustarse antes o durante el uso. 1. Compruebe el nivel de intesidad actual. - Cuando se presiona la tecla de intesidad, el valor predeterminado parpadea. 2. -
Page 64: Ajuste De Temperatura
2. Cómo utilizar el control remoto Ajuste de temperatura Según el modo que se esté utilizando, se puede ajustar la temperatura del proyector interno, del proyector externo, del elemento de calentamiento principal y del elemento de calentamiento auxiliar. 1. Compruebe la temperatura actual. 2. -
Page 65: Ajuste Del Sonido
2. Oprima la tecla del sonido y seleccione el parámetro deseado utilizando la tecla Up/Down. Selección de música Volumen Start/Pause Sonido Ceragem : 1~10 0~10 Sonido del usuario : 11~100 3. Compruebe el estado del sonido modificado en la pantalla del control remoto. - Page 66 Qué es el sofá calentable? Esta es una característica que le permite sentarse con una configuración de temperatura tibia mientras la parte auxiliar está cerrada. 2. Cómo utilizar el control remoto Cuando la parte auxiliar está cerrada Cuando la parte auxiliar está cerrada se puede utilizar el elemento de calentamiento externo y la función de sofá...
-
Page 67: Modo Automático
- Se muestran la temperatura y la intensidad actual. 2. Cuando pulse 2 veces el botón de modo auto(cuando está en modo manual, pulsar 1 vez) suena la musica ceragem, y después de un pitido empieza el escaneo por lo que debe tumbarse correctamente. - Page 68 - Se muestran la temperatura y la intensidad actual. 2. Cuando pulse 2 veces el botón de modo auto(cuando está en modo manual, pulsar 1 vez) suena la musica ceragem, y después de un pitido empieza el escaneo por lo que debe tumbarse correctamente.
- Page 69 * La duración de los modos operativos puede variar según el tipo de cuerpo del usuario. 3. Cómo utilizar el producto (por modo) Modo semi-automático (Duración del modo: aprox. 18 minutos) 1. Encienda la alimentación del control remoto y compruebe la pantalla.
-
Page 70: Modo Manual
3. Cómo utilizar el producto (por modo) Modo manual (Duración del modo: aprox. 60 minutos) 1. Encienda la alimentación del control remoto y compruebe la pantalla. - Los proyectores externos solo se muestran cuando están conectados. - Se muestran la temperatura y la intensidad actual. 2. - Page 71 Los patrones de masaje pueden ajustarse según la altura del usuario. 3. Cómo utilizar el producto (por modo) Patrón del modo Escaneo Acupresión térmica (88 segundos) Modo automático Modo 1 (Duración del modo: aprox. 36 minutos, 30 segundos) (Duración del modo: aprox. 36 minutos, 30 segundos) Acupresión térmica (100 segundos) 10 segundos 10 segundos...
- Page 72 Los patrones de masaje pueden ajustarse según la altura del usuario. 3. Cómo utilizar el producto (por modo) Patrón del modo Escaneo Acupresión térmica (88 segundos) Modo 4 Modo 5 (Duración del modo: aprox. 36 minutos, 30 segundos) (Duración del modo: aprox. 36 minutos, 30 segundos) 10 segundos 10 segundos Espera...
- Page 73 Los patrones de masaje pueden ajustarse según la altura del usuario. 3. Cómo utilizar el producto (por modo) Patrón del modo Escaneo Acupresión térmica (88 segundos Modo 8 Modo 9 (Duración del modo: aprox. 36 minutos, 30 segundos) (Duración del modo: aprox. 36 minutos, 30 segundos) 10 segundos 10 segundos Espera...
- Page 74 4. Cómo mover el producto Desconectar el cable de alimentación, mando, proyector exterior, subir la almohadilla y después cerrar la colchoneta auxiliar levantando la parte del extremo. (Para abrir la colchoneta auxiliar, abrir subiendo la parte del extremo y una vez abierta dejar en el suelo) ②...
- Page 75 Ⅳ. Administración y asuntos que requieren atención 1. Auto evaluación 2. Técnicas de mantenimiento y métodos de almacenamiento 3. Comprobación antes de solicitar el servicio posventa 4. Mensajes de error del control remoto 5. Especificaciones del producto 6. Garantía del producto...
- Page 76 1. Auto evaluación Puntos a evaluar antes de su uso 1. ¿Está encendido el interruptor de encendido? (Se encuentra a un lado del producto) 2. ¿Comprobó que el botón de encendido del colchón principal esté en “ON”? 3. ¿Están en "ON" la pantalla LCD y la alimentación del control remoto? 4.
- Page 77 Técnicas de mantenimiento y métodos de almacenamiento 1. El cuero es un producto oleoso. Por lo tanto, resulta esencial que no se exponga a solventes orgánicos como la acetona, tinta de lapiceras, gasolina, diluyentes, sudoración, mousse, spray, etc. 2. Limpie con un paño seco los lugares en donde haya contacto directo con la cabeza o la piel. 3.
- Page 78 3. Comprobación antes de solicitar el servicio posventa ¿Se enciende el control remoto? P: ¿Está encendido el interruptor de encendido (Se encuentra en la parte inferior del producto)? R: Encienda el interruptor de encendido. P: ¿El cable de alimentación está conectado en forma apropiada? R: Conecte nuevamente el cable de alimentación.
- Page 79 4. Mensajes de error del control remoto En el caso de producirse un error durante el funcionamiento se muestran los siguientes mensajes en la pantalla del control remoto: Símbolo Descripción Ubicación del error Proyector externo Proyector interno Error de alta temperatura Elemento de calentamiento principal Elemento de calentamiento auxiliar Proyector interno...
-
Page 80: Especificaciones Del Producto
5. Especificaciones del producto Modelo CGM EB-1101 Masajeador térmico automático Artículo Voltaje , 50/60Hz 220-240V~ Consumo de energía 240W Altura recomendada para 120cm~186cm detección del cuerpo Tipo de formato de la SD Card FAT32 Cantidad de archivos 100EA para uso del usuario Archivos reproducibles con MP3 2.2W... -
Page 81: Garantía Del Producto
* Ceragem ofrece una garantía de sus productos según la Ley de protección al consumidor. * Si compra un producto que tiene la aprobación de Ceragem, la garantía dura 1 año y los servicios y las reparaciones del componente se proveen sin cargo. - Page 82 MEMO Conformite Europeenne Mark. Este símbolo que se muestra en el producto o en sus documentos indica que no debería descartarse junto con otros desechos domésticos al finalizar su vida útil. Para evitar un posible daño al medioambiente o a la salud de las personas a causa del desecho no controlado, separe este producto de otros tipos de desechos y recíclelo de manera responsable para promover la reutilización sostenible de los recursos materiales.
- Page 84 Head Office 177-14 Osaekdang-ri, Seonggeo-eup, Seobuk-gu Cheonan-si, Chungcheongnam-do, Korea / Factory TEL : (82)41-523-2550 FAX : (82)41-523-2560 Homepage http://www.ceragem.net...
Need help?
Do you have a question about the CGM EB-1101 and is the answer not in the manual?
Questions and answers