Quantum Scalar i6000 Manual
Hide thumbs
Also See for Scalar i6000:
- User manual (738 pages) ,
- Installation manual (384 pages) ,
- Planning manual (92 pages)
Advertisement
Quick Links
Download this manual
See also:
User Manual
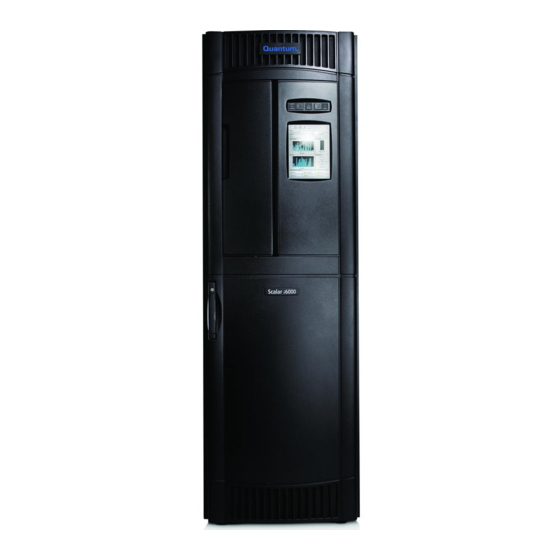
Scalar i6000
Installing a Multi-Module Library – Gen 2 Dual
Robot Configuration
This is an excerpt from the Scalar i6000 Installation Guide (6-66881-03 Rev
A), enhanced with notes, extra images, and video links.
This is a training document and is not meant to be used in place of the
current Installation Guide.
Advertisement

Related Manuals for Quantum Scalar i6000


Summary of Contents for Quantum Scalar i6000
- Page 1 Installing a Multi-Module Library – Gen 2 Dual Robot Configuration This is an excerpt from the Scalar i6000 Installation Guide (6-66881-03 Rev A), enhanced with notes, extra images, and video links. This is a training document and is not meant to be used in place of the...
-
Page 2: Parts List
Introduction Training Introduction Caution: This document is intended to be reviewed before an installation, it is not intended to substitute for the relevant technical publications. This is a training document. It is not intended to take the place of the Installation Guide, its purpose is to provide additional information about a Gen 2 Dual Robot installation for service personnel who have installed Gen 1 systems, but who have not yet installed a Gen 2 system. -
Page 3: Required Tools
Training Note: The installation procedure assumes that the system has been unpacked according to the Scalar i6000 Unpacking and Removal Instructions. The robots are shipped in the modules. The robots and the modules must be unpacked and prepared according to the instructions to ensure the installation goes smoothly. - Page 4 Aligning and Bolting the Frames (Same as Gen 1 Task) Using the corner edges of the frames as a rough alignment, position the frames together so the attachment bolt holes are aligned. Verify that the attachment holes are aligned. If necessary, adjust the frame legs to better align the attachment bolt holes.
- Page 5 Positioning the System Unit (Same as Gen 1 Task) For more information on location specifications, see the Scalar i6000 Planning Guide. Verify the placement of the system unit. The left parking module is at the left end of a dual-robotics multi-module Note library.
- Page 6 Lowering the System Unit Leveling Legs (Same as Gen 1 Task) Required tools: 24 mm open end wrench, 6 mm hex wrench or 16 mm open end wrench. On only the four outer edge corner legs of the system unit, use the 24 mm open end wrench to loosen the four locking nuts.
- Page 7 Be sure to set the level in the exact spot as in Step 1. Wait 10 seconds for the level to completely settle and take note of the angle on the display. Scalar i6000 Installation Guide Super Doc...
- Page 8 0.1 degree, you must re-calibrate the level. For more information, see "Calibrating the Digital Level" in the Scalar i6000 Installation Guide. If the variance between the readings are within the 0.1 degree limit, the level is within compliance and is ready to be used.
- Page 9 Make sure the digital level is not resting on any frame welds or debris that Note would cause an inaccurate reading. To find the small circular frame welds, run your finger tips over the spot where you are going to place the level. Scalar i6000 Installation Guide Super Doc...
- Page 10 service door digital level position #2 front to back access door digital level position #1 left to right Place the level on the left side inside the control module access door (position 2). Use the following rules when leveling from front to back: •...
- Page 11 Best Setting the Leg Lock Nuts (Same as Gen 1 Task) Required tools: 24 mm open end wrench Verify that all leveling legs are carrying load and that the system unit does not rock. Scalar i6000 Installation Guide Super Doc...
- Page 12 Use the 24 mm open end wrench to raise the leveling leg lock nuts to the top and tighten them against the welded nut. Ensure that you do not take the leveling legs out of adjustment during this Note process. Step 2: Installing the Gen 2 Hardware Once all the frames are bolted together and level, there are a few pieces of hardware to install.
- Page 13 Connect the power connectors on all adjacent power rails. There are two power connectors on each side of each rail — a 4-pin connector and a 3-pin connector. The right-most connectors in the right parking module will not have anything plugged into them. See Figure 2 on 15. Scalar i6000 Installation Guide Super Doc...
- Page 14 Figure 1 Power Rail Position in Module Two bridge clamps connect adjacent rails Introduction...
- Page 15 Figure 2 Power Rail, Front 4-pin and 3-pin connectors Scalar i6000 Installation Guide Super Doc...
- Page 16 Figure 3 Power Rails and Bridge Clamps Power Rail Connectors Bridge Clamps Power Rails Installing the Catch Trays Catch trays are installed on the floor of the library. Each tray straddles the junction between modules. Training Note: These trays are to catch the carbon that wears off the collectors as they pass over the gap between the power rail bridges.
- Page 17 Screw B screws and T-nuts should be pre-assembled. If they are not, install a T-nut on each screw in the Screw B bag. Make sure the wider end of the T-nut faces toward the screw head. Screw B M4X6 screw M4 T-nut Scalar i6000 Installation Guide Super Doc...
- Page 18 Install two T-nut screws through the catch tray into the bottom rack supports. Install two T-nut screws Introduction...
- Page 19 Screw B, M4X6 socket head cap screws (low profile), with M4 T-nut attached — For middle and bottom racks, 3 per half rack, 4 per full rack • Screw C, M4X6 socket head cap screws (low profile) — For top racks, 3 per half rack, 4 per full rack Scalar i6000 Installation Guide Super Doc...
- Page 20 Figure 5 Types of X-axis Gear Racks Half Rack, Left Load Position — First position on the left. Contains cutouts for the left robot’s wheels to fit through during robot installation. These racks are pre-installed in the left parking module. cutouts Full Rack, Standard —...
- Page 21 Lay down the Standard Full Racks, from left to right. The ends of the racks snap together in a tongue-and-groove configuration. Snap each one into the previous one as you go, making sure all the gear racks lie flat. Scalar i6000 Installation Guide Super Doc...
- Page 22 Lay down the Full Rack, Load Position between the right parking module and the module to its left. Training Note: If the library was unpacked according to the Scalar i6000 Unpacking and Pallet Removal Instructions document, the right X-Axis half racks have been removed, but the left parking module half racks are still installed.
- Page 23 Figure 6 Installing Bottom and Middle Racks Scalar i6000 Installation Guide Super Doc...
- Page 24 Figure 7 Middle X-Axis Gear Rack Introduction...
- Page 25 Use three screws for half racks and four screws for full racks. Figure 8 i. Tighten all the screws from left to right. Scalar i6000 Installation Guide Super Doc...
- Page 26 Figure 8 Installing Top X-Axis Gear Racks Install screws through the slots in the top rack supports and up through the underside of the top X-axis gear racks. j. Use a 2.5 mm hex wrench to fully tighten the four screws that secure the Right Robot Loader Bracket (you partially installed these earlier;...
- Page 27 Robot Loader Bracket and Loader Bracket Adapter Screws The X-axis gear rack has been cut away in this illustration to show the screw Note locations. Tighten these six screws once the X-axis gear rack is screwed down Scalar i6000 Installation Guide Super Doc...
- Page 28 Removing the Control Module Cover Plates Required tools: #2 Phillips screwdriver From the control module, remove the following (see Figure 10 ). Save the cover plates to reinstall later. • LBX/IEX cover plate — Loosen two thumbscrews. • Service port panel — Loosen two thumbscrews. You can leave the panel dangling or remove it. •...
- Page 29 • Large cover plate above the power chassis. Loosen two thumbscrews. Figure 11 Removing a Cover Plate from the Left Parking Module Cover plate above power chassis Remove This Cover Cover Plate Removed Plate Scalar i6000 Installation Guide Super Doc...
- Page 30 Connecting the Door Switch Loop Cable In all modules except for the left parking module, the door interlock switch is connected via a cable to that module’s LBX board. Since the left parking module does not have an LBX board, its door interlock switch shares the connection with the control module’s door interlock switch.
- Page 31 Connect the free end of the door switch loop cable into the left parking module’s door interlock switch. Secure both cables with the two clips on top of the lower drive bay in the control module. Scalar i6000 Installation Guide Super Doc...
- Page 32 Figure 14 Securing the Door Switch Loop Cable Cable clips CM door interlock cable LPM door switch loop cable Introduction...
- Page 33 Route the cable into the control module through the rectangular cutout in the left parking module wall, then up and over the lower drive bay in the control module. Plug the cable into the lower right connector on the SPA/SCC Mount Assembly (see Figure 16 Scalar i6000 Installation Guide Super Doc...
- Page 34 Figure 16 Aisle Cable Assembly Connected to SPA/SCC Mount Assembly Connect the aisle cable assembly here Introduction...
- Page 35 You must route them through the hole in the bulkhead to either the control module or previous expansion module. On the back of the existing control module or last expansion module, do the following: Scalar i6000 Installation Guide Super Doc...
- Page 36 a. Loosen the thumbscrew on the LBX/IEX cover plate and remove the plate. LBX/IEX cover plate thumbscrew b. Use a #2 Phillips screwdriver to remove the four thumbscrews that retain the cover plate between the top and bottom drive positions. thumbscrews Introduction...
- Page 37 On the new expansion module, loosen the thumbscrew on the LBX/IEX cover plate and remove the plate. LBX/IEX cover plate thumbscrew Locate the W1 and W2 cables on the new expansion module. W2 cable (Ethernet) W1 cable (large ribbon cable) Scalar i6000 Installation Guide Super Doc...
- Page 38 Route the W1 and W2 cables from the new expansion module through the opening in the left bulkhead of the control module or last expansion module in the existing configuration. route the W1 and W2 cables through opening in the left bulkhead Connect the W1 ribbon cable to the J2 connection on the LBX board on the control module or last expansion module in the existing configuration....
- Page 39 Install the LBX terminator into the J17 connection on the LBX board in the last expansion module. J17 connection LBX terminator Use the cover plate thumbscrew to replace the LBX/IEX cover plates on the modules. LBX/IEX cover plate thumbscrew Scalar i6000 Installation Guide Super Doc...
- Page 40 Use a #2 Phillips screwdriver to replace the cover plate between the drive positions. thumbscrews Introduction...
- Page 41 Instead, lay the robot down horizontally with the yellow handle facing UP. Figure 18 Robot Handle and Lift Area “Mushroom button” for installing robot (appears loose and wobbly) Robot lift area Robot handle Robot shipping restraint Collector door Rear view Front view Collectors Scalar i6000 Installation Guide Super Doc...
- Page 42 Make sure the collector door is closed. If it is not, close the door and tighten two thumbscrews in the collector door to keep it closed (see Figure 19 Figure 19 Closing/Opening the Collector Door (view shows robot lying on side with handle facing UP) Robot handle facing UP Tighten these thumbscrews...
- Page 43 • If this is the right-side robot, slide the thumbscrews and bracket all the way toward the top of the robot. On the video, this step can be found from 1:23 to 2:22 Scalar i6000 Installation Guide Super Doc...
- Page 44 Figure 20 Setting the Power Rail collectors Brackets Bracket position - left side robot Bracket position - right side robot Loosen the two captive thumbscrews in the collector door so that the door opens (see Figure 19 Set the X-preload tensioner by pushing the retaining pin up into a hole on the drive gear (see Figure 21 ).
- Page 45 X-Preload Tensioner – Inserting Pin Into Hole Push gear in this direction Hole (retaining pin is not in hole yet) Pull drive shaft in this direction Push retaining pin up to engage in hole Scalar i6000 Installation Guide Super Doc...
- Page 46 Engage the robot kickstand as follows: a. Using the yellow picker handle (see Figure 22 ), pull the picker toward the top of the robot just enough so that the yellow locking lever clears the bar halfway up the vertical length of the robot. b.
- Page 47 Insert the bottom of the robot into the library first, setting it down gently and carefully on the floor of the library for just a moment. d. Swing the top of the robot into the library. e. Make sure the robot is vertical and directly underneath the loader bracket. Scalar i6000 Installation Guide Super Doc...
- Page 48 Lift the robot up and insert the “mushroom button” into the big hole of the loader bracket (see “insertion point” in Figure 24 ). Slide the robot back slightly until it hangs freely (not all the way back). Training Note: It's important that you let the robot hang free. Gravity will help align the robot into the proper orientation.
- Page 49 Figure 25 Position of Robot Wheels on Middle and Bottom Racks Rollers engaged on middle X-axis gear rack Rollers engaged on bottom X-axis gear rack Scalar i6000 Installation Guide Super Doc...
- Page 50 13 Pull out the pin in the pre-load mechanism that you inserted earlier. Pull downward on the pin until it disengages (see Figure 26 ). This may have already occurred when you slid the robot into place; if so, it’s OK. Figure 26 Gear Pre-load Mechanism - Load Position, Pin Disengaged (Not in Hole) Pin disengaged (not in hole)
- Page 51 Figure 27 Verifying Robot is Vertical by Checking Scribe Lines Scribe line locations in Scribe line locations in left parking module right parking module Scalar i6000 Installation Guide Super Doc...
- Page 52 15 Slide the robot an inch or two to the left until the collectors are positioned in front of the power rail load guides (see Figure 28 Figure 28 Power Rail Load Guides Power rail load guides 16 Close the collector door and tighten the two captive thumbscrews (see Figure 19 on 42).
- Page 53 Position 4 Position 5 Position 6 Position 7 Figure 30 Robot Collectors Engaged in Power Rails – Right Side Robot Position 1 Position 2 Position 3 Position 4 Position 5 Position 6 Position 7 Scalar i6000 Installation Guide Super Doc...
- Page 54 18 Verify robot motion: Push or pull on the robot handle to move the robot toward the center of the library just far enough so that it passes over the first junction in the gear racks. Training Note: This step is more important than it might seem. If the robot is binding as you slide it, it's possible the collectors are crossed on the power rails.
- Page 55 Check for tickets on the UI and troubleshoot. Resolve and close all tickets before proceeding. Select Monitor > System from the LMC. The System Status screen appears. Click the Robot tab to display the robot system status table. Scalar i6000 Installation Guide Super Doc...
- Page 56 Run IVT on the currently active robot by following all of the instructions in the chapter "Installation Testing and Verification" in the Scalar i6000 Installation Guide. If any problems or tickets occur, troubleshoot and retest until all tests pass. Then return here.
- Page 57 Click Tools > Library > Robot Failover. b. If the left robot is not the active robot, click Failover to make it the active robot. (If the left robot is already the active robot, click Cancel.) Scalar i6000 Installation Guide Super Doc...
- Page 58 Reinstalling the Cover Plates Replace all cover plates you removed earlier. Required tools: #2 Phillips screwdriver From the control module, reinstall the following (see Figure 32 • LBX/IEX cover plate — Tighten two thumbscrews. • Service port panel — Tighten two thumbscrews. •...
Need help?
Do you have a question about the Scalar i6000 and is the answer not in the manual?
Questions and answers