Table of Contents
Advertisement
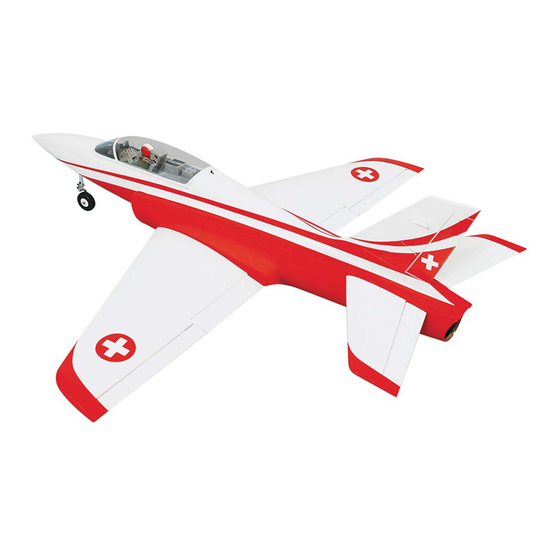
I n s t r u c t i o n M a n u a l
SPECIFICATION
- Wingspan: 1400mm (55.1 in)
- Length: 1540mm (60.6 in)
- Flying weight: 4.8-5.2 kg
- Wing area: 40dm2
- Wing loading: 125g/dm2
- Wing type: Naca airfoils
- Covering type: Genuine ORACOVER®
- Retract gear type: Electric retract gear (not
included); CNC Suspension Metal Struts (included)
- Radio: 6 - 9 channel . 8 mini hi-torque servo:
2 aileron; 2 flap; 2 elevator; 1 rudder;
1 steering nose; (not included)
- Servo mount : 12mm x 24mm
- Engine: edf 90mm with minimum thrust up 4 kg ;
8-12 cells (not included)
- Gravity CG: 165-170 mm (6.2-6.7 in) Back from
the leading edge of the wing, at the fuselage
- Control throw Ailerons: Low: 8mm up/down,
10% expo; High: 10mm up/down, 10% expo
- Control throw Elevators: Low: 8mm up/down,
12% expo; High: 10mm up/down, 12% expo
- Control throw Rudder: Low: 20mm right/left,
15% expo; High: 20mm right/left, 15% expo
- Control throw Flaps: Mid: 15mm down;
Landing: 20mm down
- Experience level: advanced
RECOMMENDED EDF AND BATTERY SET UP
- EDF: 90mm, Minimum thrust 4 kg. Midi-Fan evo/
HET 650-68-1130 WeMoTec (not included)
- Lipo cell: 8-12 cells / 4000mAh 60C (not included)
- Esc 120-160 A Phoenix Castle (not included)
Advertisement
Table of Contents

Subscribe to Our Youtube Channel
Related Manuals for Phoenix Model Preceptor ARF EDF 90mm


Summary of Contents for Phoenix Model Preceptor ARF EDF 90mm
- Page 1 I n s t r u c t i o n M a n u a l - Gravity CG: 165-170 mm (6.2-6.7 in) Back from SPECIFICATION - Wingspan: 1400mm (55.1 in) the leading edge of the wing, at the fuselage - Length: 1540mm (60.6 in) - Control throw Ailerons: Low: 8mm up/down, - Flying weight: 4.8-5.2 kg...
-
Page 2: Tools And Supplies Needed
Instruction Manual PRECEPTOR 90MM PREPARATIONS TOOLS AND SUPPLIES NEEDED Remove the tape and separate the ailerons • 2 bender plier • Medium C/A glue from the wing and the elevators from the stab. • 30 minute epoxy • Wire cutters Use a covering iron with a covering sock on •... -
Page 3: Installing The Aileron Servos
Instruction Manual PRECEPTOR 90MM INSTALLING THE AILERON SERVOS 5. Place the aileron servo tray / hatch into the servo box on the bottom of the wing and drill 1. Install the rubber grommets and brass eyelets pilot holes through the tray and the servo box onto the aileron servo. -
Page 4: Installing The Aileron Linkages
Instruction Manual PRECEPTOR 90MM C.A glue 2. Attach the clevis to the outer hole in the control 3. Repeat step # 1 - # 2 to install the control horn horn. Install a silicone tube on the clevis. on the opposite aileron. 3. -
Page 5: Installing The Landing Gear
Instruction Manual PRECEPTOR 90MM 1. The retract set (Electric retract not included with the kit). Not included 2. Remove the covering. Remove the covering INSTALLING THE LANDING GEAR In case you want to use with the. Electric retract 3. Trim the plastic cover. (not included with the kit), please pay attention with the dimension as picture below. -
Page 6: Installing The Horizontal Stabilizer
Instruction Manual PRECEPTOR 90MM 9. Secure the wooden plate. 5. Secure the retract to the wing. Screw 6. Install and secure the wheel. Machine screw Screw INSTALLING THE HORIZONTAL STABILIZER 7. Secure the strut to the retract. 1. Repeat these step from the installing aileron for the installing elevator. - Page 7 Instruction Manual PRECEPTOR 90MM 3. Install the servo. 7. Install and glue the elevator control horn. Screw C.A glue 4. Secure the servo plate. 8. Repeat these step from installing the aileron linkages to install the elevator linkages. 5. Make the same way for the second stabilizer. 6.
-
Page 8: Installing The Vertical Stabilizer
Instruction Manual PRECEPTOR 90MM Epoxy glue Remove the covering INSTALLING THE VERTICAL STABILIZER Install the horizontal stabilizer and glue it using epoxy glue. 1. Repeat these step from the installing aileron for the installing rudder. Servo lead C.A glue 2. Remove the covering. Remove the covering 3. - Page 9 Instruction Manual PRECEPTOR 90MM 8. Remove the covering. 4. Secure the servo plate. Remove the covering 5. Remove the covering. Remove the covering Remove the covering 9. Install the vertical stabilizer and glue it using epoxy glue. 6. Install and glue the rudder control horn. Servo lead C.A glue 7.
- Page 10 Instruction Manual PRECEPTOR 90MM 4. Secure the strut to the electric retract and slide the two cable to the steering plate. Crimp INSTALLING THE STEERING NOSE gear 1. Install the steering nose servo into the servo 5. Install the nose retract. tray in the fuselase.
- Page 11 Instruction Manual PRECEPTOR 90MM INSTALLING THE EDF (Electric ducted fan) 3. Slide the air inlet to the fuselage. system Air inlet Air outlet 4. Tie down the sponge (included with the kit) to the EDF,(Must fit with the air inlet) and fix it with the tape. 1.
- Page 12 Instruction Manual PRECEPTOR 90MM 6. Wooden belt for EDF (Included with the kit). 10. Fix the air outlet. C.A glue 7. Secure the belt to the fuselage. 11. Cut the hole on the fuselage for air inlet. Remove the covering Screw 8.
-
Page 13: Lateral Balance
Instruction Manual PRECEPTOR 90MM OPEN AND CLOSE the canopy LATERAL BALANCE After you have balanced a plane on the C.G. You should laterally balance it. Doing this will help the airplane track straighter. 5. Turn the airplane upside down. Attach one loop Open and Close of heavy string to the engine crankshaft and one to the tail wheel wire. -
Page 14: Flight Preparation Pre Flight Check
Instruction Manual PRECEPTOR 90MM FLIGHT PREPARATION PRE FLIGHT CHECK Hi RATE Ailerons : 10mm up 10mm down 1. Completely charge your transmitter and receiver Elevator : 10mm up 10mm down batteries before your first day of flying. Rudder : 20mm right 20mm left 2. - Page 15 I/C FLIGHT WARNINGS Always operate in open areas, away Keep all onlookers (especially small from factories, hospitals, schools, THE PROPELLER IS DANGEROUS children and animals) well back from buildings and houses etc. NEVER fly Keep fingers, clothing (ties, shirt the area of operation. This is a flying your aircraft close to people or built sleeves, scarves) or any other loose aircraft, which will cause serious...
- Page 16 I/C FLIGHT GUIDELINES Operate the control sticks on the When ready to fly, first extend the transmitter and check that the control transmitter aerial. surfaces move freely and in the ALWAYS land the model INTO the CORRECT directions. wind, this ensures that the model lands at the slowest possible speed.
Need help?
Do you have a question about the Preceptor ARF EDF 90mm and is the answer not in the manual?
Questions and answers