Advertisement
Dear customer!
Instructions for use
Instructions for
connection
Rating plate
This electric integrated gas cooker is manufactured for household use.
Our appliances are packed in the environmentally friendly materials which may be
recycled, deposited or destroyed without any hazard to the environment. Such
packaging materials are also labeled accordingly.
Once the life cycle your appliance is over, make sure not to pollute the environment,
and deliver it to the authorized collectors of old household appliances.
Instructions for use have been prepared for the user, and describe the appliance and
the way it is handled. These instructions are intended for various types of the
appliance, so you may find some descriptions for the functions that your
particular appliance may not have.
These instructions are only valid of the country symbol is indicated on the appliance.
If there is NO county symbol in the appliance, technical instructions should be
observed for adapting the appliance to comply with the requirements and regulations
for use in your country.
The appliance must be connected in compliance with the instructions attached to it,
as well as in compliance with relevant regulations and standards. The connection
may only be performed by a qualified person.
The rating plate indicating the basic information on the appliance is attached to the
lower side of the hob.
Important warnings
Installation
Connecting the appliance to the power mains
Connecting the cooking hob to the gas supply
Nozzle table
Technical information
Appliance description
Cleaning and maintenance
Special warnings and fault reporting
2
3
4
5
6
8
8
10
12
14
Advertisement
Table of Contents

Subscribe to Our Youtube Channel
Related Manuals for Gorenje G640UX


Summary of Contents for Gorenje G640UX
- Page 1 Dear customer! This electric integrated gas cooker is manufactured for household use. Our appliances are packed in the environmentally friendly materials which may be recycled, deposited or destroyed without any hazard to the environment. Such packaging materials are also labeled accordingly. Once the life cycle your appliance is over, make sure not to pollute the environment, and deliver it to the authorized collectors of old household appliances.
- Page 2 TECHNICAL INSTRUCTIONS AND INSTALLATION Important warnings • Installation of the appliance into a kitchen worktop and its connection to the power mains and the gas supply may only be performed by an adequately qualified technician. • When the appliance is in use, additional heat and moisture are emitted into the room.
-
Page 3: Installation
• Cooking hobs can be installed into worktops that are 25 to 40 mm thick. The front part must have an opening of no less than 5 mm. A (mm) B (mm) C (mm) D (mm) E (mm) F (mm) G (mm) G640UX GTW641UB GT641UW GW761UX GTW951UB GW951UX GW961UX-SA GTW751UB GT641UB... -
Page 4: Connecting The Appliance To The Power Mains
The gasket should be attached to the appliance in the following way: - Remove the protective film from the gasket. - Then, attach the gasket to the lower side of the glass, approximately 2-3 millimetres from the edge (as shown in the figure). The gasket must be attached along the entire length of the glass edge and should not overlap at the corners. - Page 5 WARNING! • Before any intervention, disconnect the appliance from the power mains. Connect the appliance in compliance with the electric connections diagram supplied; make sure the relevant network voltage is observed! The ground wire (PE) should be connected to the clip indicated by the earthing symbol. •...
- Page 6 • When connecting, the knee R1/2 should be held firmly to prevent it from rotating. • For sealing of the connection joints, use a non-metal approved gaskets and approved sealants. • The gaskets should only be used once. The thickness of the flat non-metal gaskets should not be deformed more than by 25 percent.
-
Page 7: Technical Information
Category Gas usage G20 = 20mbar , G30 = 30mbar , G20 = 13mbar Total Power (W) 11300 7500 11300 GW951UX GTW641UB G640UX GW961UX-SA GTW951UB Appliance dimension (mm) Operating voltage 220-240 V~, 50/60 Hz Front left Rear left Front central... -
Page 8: Important Warnings
• The gas burners are fitted a candle as flame failure device. If the burner flame Important warnings is extinguished accidentally or unintentionally (e.g. when some liquid boils over or when there is draught in the room): • gas supply is automatically cut off, thus preventing the gas from being emitted into the room. -
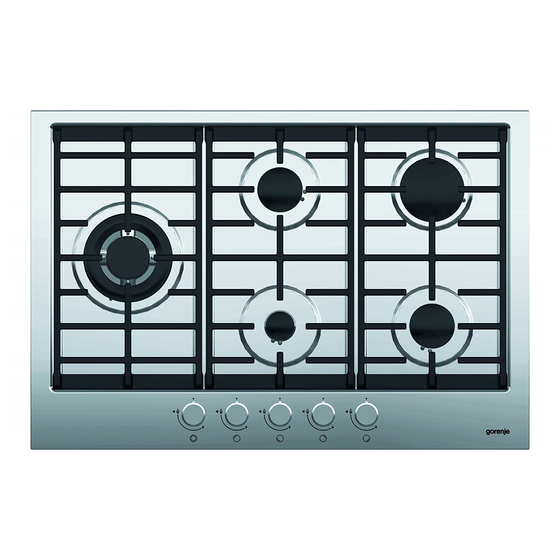
Page 9: Appliance Description
INSTRUCTIONS FOR USE AND MAINTENANCE APPLIANCE DESCRIPTION 1. Gas cooking zone front left 2. Gas cooking zone rear left 3. Gas cooking zone rear right 4. Gas cooking zone front right 5. Gas cooking zone rear central 6. Gas cooking zone front central 7. - Page 10 • For models with a safety tap (which interrupt the gas flow should the flame accidentally go out) the burners are ignited as described above, but ensure the knob is pressed in for 5 to 6 seconds after the flame has ignited. After this time, which gives the safety device enough time to cut-in, the flame will be on permanently.
-
Page 11: Cleaning And Maintenance
CLEANING AND MAINTENANCE Do not use a steam cleaning appliance to clean this appliance. The steam could reach the electrical components and cause a short circuit. The appliance should be cleaned regularly, preferably after each use, after cooling • down. To avoid water marks and limescale deposits, use a soft cloth to dry surfaces that •... -
Page 12: Ceramic Glass Surface
After each use of the glass-ceramic hob, wait for it to cool down and clean it; Ceramic glass surface otherwise, even the smallest food residue will be burnt onto the hot surface next time you use the appliance. For regular cleaning and maintenance of the glass-ceramic surface, use special conditioning agents which form a protective layer on the surface, shielding it from dirt. - Page 13 SPECIAL WARNINGS AND FAULT REPORTING Important ▪ During the warranty period, only a service center authorized by the manufacturer may carry out any repairs. ▪ Before making any repairs, make sure the appliance is disconnected from the power mains either by removing the fuse or by disconnecting the power plug from the wall outlet.
Need help?
Do you have a question about the G640UX and is the answer not in the manual?
Questions and answers