
Subscribe to Our Youtube Channel
Related Manuals for Braun Perfusor Space

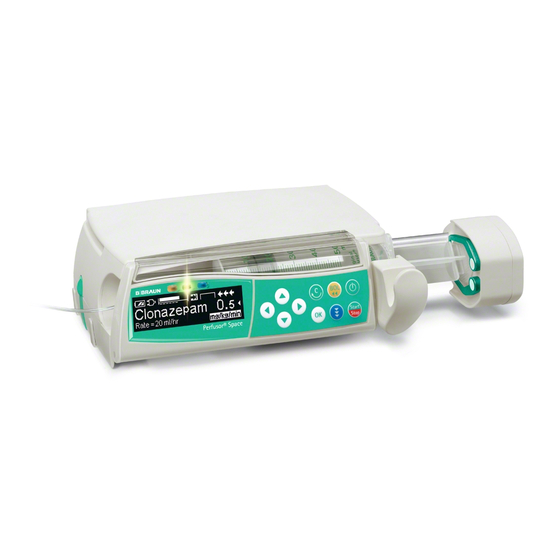
Summary of Contents for Braun Perfusor Space
- Page 1 Perfusor® Space and Accessories Instructions for Use It is recommended that all pumps at your care unit are equipped with the same software version. Valid for software 688M...
-
Page 2: Table Of Contents
CONTENTS Perfusor® Space Overview...........................3 Symbols on Product ............................5 Patient Safety ............................6 Menu Structure / Navigation........................11 Chapter 1 Operation ..........................14 1.1 Start of Infusion .........................14 1.2 Entry With Different Combinations of Rate, VTBI (= Volume To Be Infused) and Time............................15 1.3 Bolus Application ........................16 1.4 Syringe Change and New Therapy Start ................17 1.5 End of Infusion..........................18 1.6 Standby Mode ..........................18... -
Page 3: Perfusor® Space Overview
PERFUSOR SPACE® OVERVIEW P E R F U S O R ® S PA C E O V E R V I E W Arrow up and -down Press to reset single values Drive head with Scroll through menus, change setting of numbers from 0-9,... - Page 4 For vertical fixation of PoleClamp push lever down and rotate either way until lever clicks into notch. Push lever for rotation. Caution: A maximum of three B. Braun Space pumps can be stacked together when used with the PoleClamp SP.
-
Page 5: Symbols On Product
SYMBOLS ON PRODUCT S Y M B O L S O N P R O D U C T Symbol Explanation Mandatory action: see instruction for use. See accompanying documents. Type CF unit with defibrillation protection Protection class II device Symbol indicating separate collection for electrical and electronic equipment (2002/96/EC) CE mark compliant to Directive 93/42/EEC... -
Page 6: Patient Safety
Operation • The initial training of the Perfusor® Space is to be performed by B. Braun sales personnel or other authorized persons. After each software update, the user is required to inform himself of the changes to the device and accessories by referring to the Instructions for Use. - Page 7 PATIENT SAFETY • Only connect to patient once the syringe has been inserted correctly and there is proper fixation of the syringe pressure plate by the claws of the drive head. Interrupt connection during syringe change to prevent incorrect dose delivery.
- Page 8 PATIENT SAFETY Enteral Nutrition The Perfusor® Space may be used for enteral nutrition. Do not use enteral fluids for intravenous infusion as this may harm your patient. For this reason only use disposables dedicated and labeled for enteral nutrition. Other components •...
- Page 9 TCI and properly trained in using the present device. • The use of TCI with B. Braun Space does not limit the responsibility of the anaesthetist for administration of drugs. They need to be fully aware of the available literature for any parameter set used in association with a drug and need to refer to the prescribed information for rate and dosing limits.
- Page 10 PATIENT SAFETY • While using TCI an appropriate patient monitoring is mandatory. • Take care of using the right dilution/concentration of the drug and make sure the right dilution is selected at the pump. • Never administer Propofol or Remifentanil by a second infusion as long as you use TCI.
-
Page 11: Menu Structure / Navigation
MENU STRUCTURE / NAVIGATION MENU STRUCTURE / NAVIGATION Cutline On/Off button OK button Start/Stop button Keypad with arrow up, -down, -left, -right button Bolus button Connection button Clear button All display screen shots are examples and may be different when related to an individual patient and individualized therapy. - Page 12 MENU STRUCTURE / NAVIGATION Display Meaning All status information is available in the bottom line of the dislplay. The desired information can be selected by using and will be displayed permanently thereafter (e. g. drug long name, time until syringe empty, current system pressure etc.).
- Page 13 MENU STRUCTURE / NAVIGATION Start Up Main Special Options Status Menu Menu Functions Menu Menu Syringe Dose Rate Occlusion Intermediate Dose selection Calculation Pressure volume Intermediate Prime ? Concentration Drug Library OccluGuard amount Change-over Use last Pressure Intermediate Weight therapy ? from Leap/Drop time...
-
Page 14: Chapter 1 Operation
OPERATION Chapter 1 OPERATION 1.1 Start of Infusion • Ensure correct installation of the pump device. If the pump is connected to mains, the display states information such as the battery status, the mains connection symbol and the last therapy. •... -
Page 15: Entry With Different Combinations Of Rate, Vtbi (= Volume To Be Infused) And Time
OPERATION Chapter 1 • Press to commence infusion. Running arrows on display and green LED above display indicate pump is infusing. Note: Stop the infusion at any time by pressing . The pump can be turned off at any time by pressing for 3 sec (Exception: Data lock level 2) and as long a disposable is inserted. -
Page 16: Bolus Application
OPERATION Chapter 1 a) Target symbol is placed in front of VTBI: • Change of VTBI => Adjustment of time. Old and new target: VTBI • Change of time => Adjustment of rate. Old and new target: VTBI b) Target symbol is placed in front of time: •... -
Page 17: Syringe Change And New Therapy Start
OPERATION Chapter 1 1.4 Syringe Change and New Therapy Start Note: To avoid incorrect dosing, always disconnect the pump from the patient when changing the syringe. Never leave the pump device unattended during syringe change. Before inserting a new syringe check if the axial fixation is properly working. •... -
Page 18: Standby Mode
OPERATION Chapter 1 • Open pump cover. Remove the syringe, move the syringe holder into an upright position and close the front door. • Press for 3 sec. to switch the pump off. The drive moves into parking position. Note: The settings will be permanently saved by the switched off device. -
Page 19: Chapter 2 Advanced Operations
OPERATION Chapter 1 ADVANCED OPERATIONS 2.1 Status Request of Pump when Infusion is Running Press to switch between run display and Main Menu while the device is infusing. Navigate through the menu using to check parameters. In order to check the menu parameters in the Status-/Options Menu, select "Status"... -
Page 20: Chapter 3 Special Functions
ADVANCED OPERATIONS Chapter 2 SPECIAL FUNCTIONS 3.1 Dosing Units and Dose Rate Calculation (Overview) The following list shows the units used in the pump: Gram family: ng, mcg, mg, g Unit family: mIU, IU, kIU, MIU Equivalents family: mEq Mole family: mmol Kilocalorie family: kcal Millitliter family:... -
Page 21: Dose Rate Calculation (Operation)
SPECIAL FUNCTIONS Chapter 3 3.2 Dose Rate Calculation (Operation) a Select dose rate calculation with l. a Select the unit of the active ingredient with and confirm it with l. a Enter the concentration by entering the amount of the active ingredient and the volume. - Page 22 SPECIAL FUNCTIONS Chapter 3 On the one hand, a drug name including the according therapy data can be taken from the drug library. On the other hand, if a rate, VTBI and/or time were already defined in the Main Menu, the drug name and the adjusted values of the data set will be loaded.
- Page 23 SPECIAL FUNCTIONS Chapter 3 • Select the desired drug with and press l. Before the initial bolus begins, the bolus menu is displayed to allow editing the bolus with q. • Check the parameter and start infusion with Hard Limits: If the set rate/dose/bolus volume and bolus rate exceed the values stored in the drug library (hard limits), the drug will be rejected, a hint will be displayed and the pump will fall back into the drug selection.
-
Page 24: Patient Controlled Analgesia (Pca) (Optional)
SPECIAL FUNCTIONS Chapter 3 The Drug Library Upload starts as soon as the pump is in Passive mode. You can cancel the upload by pressing c. Note: Please contact your local sales represantative in case you like to use Remote Drug Library update. - Page 25 SPECIAL FUNCTIONS Chapter 3 In this state the patient is allowed to demand boli. Depending on the status of the therapy these are either administered or denied. Changing the syringe is also possible by using the code for level 1 or level 2. Altering the settings for PCA or other therapies however is only possible with the code for level 3.
-
Page 26: Target Controlled Infusion (Tci) (Optional)
The pharmacokinetic model and its parameters are schematically depicted by the following illustration: B. Braun Space is offering two modes for TCI: • TCI by targeting the plasma concentration In this mode the user selects the desired concentration of a drug in the... - Page 27 TCI. A pharmacokinetic model modi- fied in such way is schematically depicted by the illustration on the next page. TCI with B. Braun Space is possible with two drugs: Propofol and Remifentanil. For Propofol the user can choose between two parameter sets. The parameter...
- Page 28 SPECIAL FUNCTIONS Chapter 3 Drug / Parameter Propofol Remifentanil [Litre] 0,228 * Weight 4,27 5,1 - 0,0201 * (Age - 40) + 0,072 * (LBM - 55) [min 0,119 0,443 + 0,0107 * (Weight - [2,6 - 0,0162 * (Age - 40) + 77) - 0,0159 * (LBM - 59) + 0,0191 * (LBM - 55)] / [5.1 - 0,0062 * (Height - 177)
- Page 29 Chapter 3 Important note: Before installing an additional drug list please contact your local B. Braun representative! Setting up the pump For TCI a drug list with at least one drug activating the profile TCI is necessary. The drug list in this version is pre-defined. By this the conditions for an effective and safe therapy are defined.
- Page 30 SPECIAL FUNCTIONS Chapter 3 Important notes: • Be sure to enter the data corresponding to the respective patient. • Once the TCI is started patient data can not be altered! Editing a target and starting TCI The editor window for setting the target comes up with the default value from the drug list.
- Page 31 SPECIAL FUNCTIONS Chapter 3 Useful information while pump is running By pressing additional information can be requested. Pressing a second time is offering a graphical overview. The line describes the course of Cp over the time and the area describes the course of Ce over the time.
-
Page 32: Barcoding
SPECIAL FUNCTIONS Chapter 3 Barcoding The barcoding functionality is included but initially not activated. Please contact your local sales representative in case you like to use barcoding. Ramp and Taper Mode The Ramp and Taper Mode is designed to deliver infusions with gradual ramp up and taper down rates. - Page 33 SPECIAL FUNCTIONS Chapter 3 Set Profile Parameters: The therapy can be started directly via the drug library or via the Main Menu/Special functions. Starting Ramp and Taper via Drug Library: Note: Ramp and Taper settings have been configured in the Drug List Manager before and have been uploaded into the pump.
-
Page 34: Program Mode
SPECIAL FUNCTIONS Chapter 3 Taper phase The pump linearly decreases the rate in the predefined time until it reaches the KVO rate Note: After starting infusion it is only possible to change rates, time and VTBI in the continuous phase. By editing (increasing/decreasing) the plateau rate, the therapy is recalculated. - Page 35 SPECIAL FUNCTIONS Chapter 3 Example: Program Mode should only be performed by an experienced user being familiar with the principles of the Program Mode function and properly trained in using the present device. Note: The active Program Mode function always displays this icon in the Display Note: Bolus function is disabled for Program Mode.
-
Page 36: Intermittent Mode
SPECIAL FUNCTIONS Chapter 3 The pump can be started now by pressing Starting Program Mode via Special Function Menu: • Switch on pump with and wait until self-check is finished. • Insert disposable. • Go to Special Functions Menu and select Program Mode. •... - Page 37 SPECIAL FUNCTIONS Chapter 3 Example: Intermittent Mode should only be performed by an experienced user being familiar with the principles of the Intermittent Mode and properly trained in using the present device. Note: The active Multi Dose Mode function always displays this icon in the Display Note: Regular Bolus function is disabled for Intermittent Mode.
- Page 38 SPECIAL FUNCTIONS Chapter 3 Starting Intermittent Mode via Special Function Menu: • Switch on pump with and wait until self-check is finished. • Insert disposable. • Go to Special Functions Menu and select Intermittent Mode. • Press to enter parameters and to confirm.
-
Page 39: Dose Over Time
Note: The feature Dose Over Time always requires the usage of dosing units (i.e., mg or mg/kg patient weight). Before using Dose Over Time contact your local B. Braun representative! Starting Dose Over Time via Drug Library: Note: Dose Over Time settings have been configured in the Drug List Manager before and have been uploaded into the pump. - Page 40 SPECIAL FUNCTIONS Chapter 3 • Insert disposable and use the drug library according to the Instructions for Use. • Select a drug by using and press l. The pump now offers the possible therapy profiles. Select “Dose over Time” with press l.
-
Page 41: Take Over Mode (Tom) (Optional)
SPECIAL FUNCTIONS Chapter 3 3.11 Take Over Mode (TOM) Take Over Mode is a feature to support the user during syringe changes by auto- matically starting a second Perfusor® Space pump when the first has run empty. The second pump automatically takes over the infusion rate from the first pump. Activation: •... - Page 42 SPECIAL FUNCTIONS Chapter 3 • Navigate through the list with and select in alphabetical order (all drugs) or within a category with l. The drug selected in the second pump must be the same as the first. • Navigate through the list with and select a concentration with l.
- Page 43 SPECIAL FUNCTIONS Chapter 3 Note: Start-up behaviour is not influenced by TOM. See Chapter Start Up Graphs and Trumpet Curves. Note: Please use a seperate patient connection for Take Over Mode infusion (e.g. smallbore extension set) or use a back check valve for lines at the same access which are not used for Take Over Mode.
- Page 44 SPECIAL FUNCTIONS Chapter 3 Recommendation Ensure first Perfusor® Space pump is infusing Ensure first Perfusor® Space pump must be running in ‘continuous mode’ (i.e. ml/h or a dose rate; not KVO, PCA etc.) Deactivate Data Lock Data connection must be active between pumps –...
- Page 45 SPECIAL FUNCTIONS Chapter 3 Changes in TOM system: Change Reaction Rate changed in pump No user interaction necessary, will start infusion at new rate when syringe is empty. pump is stopped pump shows “connection lost – TOM aborted” alarm. TOM may be reactivated by pump is put in standby pressing and then...
-
Page 46: Chapter 4 Autoprogramming
AUTOPROGRAMMING Chapter 4 A U TO P R O G R A M M I N G Note: All normal pump functions remain in place when orders are received via autoprogramming. The pump can accept drug orders wirelessly from the EHR system or from SpaceStation with SpaceCom. - Page 47 AUTOPROGRAMMING Chapter 4 Note: Order may be cancelled prior to confirming order. • Once all values are confirmed, the Main Menu is displayed. Note: Soft Limit alert will be issued if value exceeds any soft limits set in drug library, soft limit may be overridden or value re-programmed per institutional policy.
- Page 48 AUTOPROGRAMMNG Chapter 4 • Follow prompt, pressing to accept order or key to cancel and hold order for later. New Primary Infusion: • To accept a new PRIMary order, stop infusion and clear current PRIMary infusion by pressing key and responding “yes” to clear current infusion. PIGGYback Orders: Orders received after PRIMary has been set will be for PIGGYback infusions, follow prompts on screen to stop the PRIMary to accept the PIGGYback order.
- Page 49 AUTOPROGRAMMING Chapter 4 Note: Changing values on any incoming order may only be done after confir- ming all values. Once all values are confirmed you may scroll to any value and open editor with to change value. Alternately, order may be cancelled and request made for revised order to be sent.
-
Page 50: Chapter 5 Options
OPTIONS Chapter 5 OPTIONS The options functions may be selected and changed while the pump is infusing or stopped. To edit a menu item, select “Options” in the Main Menu and press l. Then select desired function with and follow the Instructions for Use as described. 5.1 Occlusion Pressure The higher the pressure level is set at, the higher the pressure level must rise before triggering an occlusion pressure alarm. - Page 51 OPTIONS Chapter 5 OccluGuard activation / deactivation from the Main Menu • Go to Options Menu and press l. • Navigate through the list with and select OccluGuard. • OccluGuard can be activated with and deactivated with d. Pressure Leap/Drop detection The pressure leap/drop software detects sudden increases and decreases in infu- sion pressure respectively which can be caused by problems in IV access, or changes in pump position in the SpaceStation.
- Page 52 OPTIONS Chapter 5 OccluGuard Meaning Recommendation Symbol OccluGuard is active. Infusion is running stably Pending – OccluGuard has not enough data OccluGuard will automatically reactivate as soon as infusion rate OccluGuard Inactive drops below threshold levels – see above. Confirm alarm and check IV access, IV setup and syringe for cause of Occlusion has been occlusion.
-
Page 53: Data Lock
OPTIONS Chapter 5 When a change is made to the infusion system (e.g. addition or removal of a pump to a SpaceStation, a change of infusion rate, a bolus application) the OccluGuard and pressure leap/drop are temporarily set to ‘pending’ ( ) to allow the system to reach a hydrostatic balance, and so prevent false alarms. -
Page 54: Bolus Rate
OPTIONS Chapter 5 Activation of the function: • Open data lock in Options Menu with l. • Select between level 1, 2 or 3 (if activated) with and confirm with k. • Enter code with and press in order to activate data lock. Changes to the protected values and the bolus function which are marked withy are only possible after entering the code. -
Page 55: Alarm Volume
OPTIONS Chapter 5 5.7 Alarm Volume Chose between 9 different alarm volume levels. • Open alarm volume in Options Menu with l. • Set volume with and confirm entry with k. 5.8 Date / Time • Open date/time in Options Menu with l. •... -
Page 56: Chapter6 Alarms
ALARMS Chapter 5 ALARMS The Perfusor® Space is equipped with a audible and optical alarm signal. Audible Alarm- Optical signal Staff call User confirmation type signal Red LED Yellow LED Text Device flashes device Press and follow Alarm alarm and the instruction on the alarm code display. - Page 57 ALARMS Chapter 6 Display message Pre-alarm reason “Syringe nearly empty“ Very little fluid is left in syringe. “VTBI near end“ The preselected volume is nearly infused. “Time near end“ The preselected time is almost over. “Battery nearly empty“ The battery is almost discharged. “KVO mode“...
- Page 58 ALARMS Chapter 6 the alarm message, and the staff call (optional) are all cleared by pressing k. Corrections should be made in accordance with the alarm reason. Display message Alarm reason “Syringe empty“ There is no fluid left in the syringe. Due to varying syringe tolerances of syringes from other manufacturers, some fluid may be left inside the syringe.
- Page 59 ALARMS Chapter 6 “Calibrate device“ Pump calibration data have changed (e.g. after an update). Recalibrate device via the service program. “Claw malfunction“ The emergency release button was pressed and the claws manually opened. Take out syringe and contact technical service department. “Plunger plate not prop.
-
Page 60: Reminder Alarms
ALARMS Chapter 6 6.3 Reminder Alarms Reminder alarms only occur in two cases: 1. A syringe is inserted, the pump doesn’t administrate, no value is being edited and the device is not operated for two minutes. An acoustic tone sounds, the yellow LED is constantly on and a staff call is activated. -
Page 61: Battery Operation And Maintenance
BATTERY OPERATION AND MAINTENANCE Chapter 7 BATTERY OPERATION AND MAINTENANCE The battery has an operating lifetime of 8 hours at 25 ml/h when new. For optimal treatment of the battery, the device is equipped with protection against overcharge and deep depletion. The battery pack is charged by the pump during connection to mains. - Page 62 BATTERY OPERATION AND MAINTENANCE Chapter 7 • If a battery, which is not completely discharged, is charged several times, its capacity can be reduced. • Under normal temperature conditions a battery can be charged and discharged approx. 500 times before its lifetime decreases. •...
-
Page 63: Chapter 8 Compatible Syringes
) to ensure specific syringe brand compatibility. The Time to Occlusion alarm has been measured at 5 ml/h. The measured data are typical values which may vary because of possible syringe tolerances. Manufacturer: B. Braun Syringe Type Omnifix Omnifix Omnifix Omnifix Omnifix B. - Page 64 COMPATIBLE SYRINGES Chapter 8 Manufacturer: TYCO USA Syringe Type Monoject Monoject Monoject Monoject Monoject Monoject 3 ml 6 ml 12 ml 20 ml 35 ml 50/60 ml TYCO USA Mat. No. 8881- 8881- 8881- 8881- 8881- 8881- 513934 516937 512878 520657 535762 560125...
- Page 65 COMPATIBLE SYRINGES Chapter 8 Manufacturer: TERUMO Syringe Type 3 ml 5 ml 10 ml 20 ml 30 ml 50 ml 60 ml TERUMO EU/USA/JAP Mat. No. 3SS*03L 3SS*05L 3SS*10L 3SS*20L 1SS*30LZ1 2BS-50LG 3SS*60L 1SS*05LZ1 1SS*10LZ1 SS*20ES typ. typ. typ. typ. typ.
- Page 66 COMPATIBLE SYRINGES Chapter 8 Manufacturer: Becton-Dickinson Syringe Type BD Precise BD Precise B-D Precise 50 ml A/P 20 ml A/P Mat. No. 300144 300141 Time to Occl. [mm:ss] 03:17 01:11 [mm:ss] 16:36 05:03 Manufacturer: Polfa Syringe Type Polfa 50 ml Mat.
- Page 67 COMPATIBLE SYRINGES Chapter 8 Syringes not specified in IEC/EN 60601-2-24 Nutrition pumps, in contrast to infusion pumps, are not classified as Class IIa according to the infusion pump norm IEC/EN 60601-2-24. There are therefore no direct guide- lines concerning the technical characteristics (accuracy of infusion rate, alarm parameters etc) of the relevant disposables.
-
Page 68: Start Up Graphs And Trumpet Curves
START UP GRAPHS AND TRUMPET CURVES Chapter 9 START UP GRAPHS AND TRUMPET CURVES Start Up Curves Trumpet Curves The graphs show the accuracy/uniformity of flow in relation to time. They allow for the following: The delivery behaviour or delivery precision is essentially influenced by the type of (disposable syringe) used. -
Page 69: Is Depending On Chapter10 Technical Data
Moisture protection IP 22 (fluid protected for horizontal usage) External power supply: • Rated voltage Via B. Braun SpaceStation or optional mains adaptor (rated voltage 100 … 240 V AC~, 50/60 Hz) for stand alone operation • External low voltage 11 …... - Page 70 Delivery rate 1 ml/h: KVO-rate = set rate (default setting 0.1 ml/h) Computer connection USB connection in combination with B. Braun interface lead CAN SP (8713230) including electrical insulation. Please pay attention to safety notices. History protocol < 3000 last history entries.
- Page 71 TECHNICAL DATA Chapter 10 • Only use combined with approved devices/accessories by the manufacturer, otherwise this may lead to higher emission or reduced immunity. • Use only compatible combinations of equipment, accessories, working parts and disposables with luer lock connectors. Essential Performance for Infusion pumps: •...
- Page 72 TECHNICAL DATA Chapter 10 EMC (ELECTROMAGNETIC COMPATIBILITY)
- Page 73 TECHNICAL DATA Chapter 10...
- Page 74 TECHNICAL DATA Chapter 10...
- Page 75 TECHNICAL DATA Chapter 10...
-
Page 76: Warranty / Tsc* / Service / Training / Cleaning / Disposal
• the Technical Safety Checks are carried out regularly. Warranty The CE mark confirms that this B. Braun provides 24 months warranty, as from the date of delivery, for every medical product Perfusor® Space (12 months for every Battery-Pack SP). This covers repair or complies with the replacement of parts damaged as a result of design/manufacturing errors or "Council Directive... - Page 77 Note: Do not use Hexaquart® or other alkylamine containing disinfectants. Recommended: disinfectant for wiping available from B. Braun: Meliseptol® Foam pure, Melsitt 10% and Melsept SF 10%. Note: Keep instrument upright and do not allow any part of instrument to become saturated with or submersed in fluid during cleaning operation.
- Page 78 Disposal The pumps as well as battery packs can be returned to B. Braun for further disposal. When taking care of disposing of disposables as well as infusion soluti- ons, please consider the applicable hygiene and disposal regulations.
-
Page 79: Instructions For Use Accessory
Comfort additionaly includes a central alarm management and alarm LEDs. PoleClamp SP (8713130) A maximum of three B. Braun Space pumps and one SpaceControl can be stacked together when used with the PoleClamp SP. For detailed instructions on secure fixation of the PoleClamp SP please refer to "Overview Perfusor® Space"... - Page 80 INSTRUCTIONS FOR USE ACCESSORY Chapter 12 3.) Push plug of Connection Lead SP into 12 V connector. Note: A maximum of three plugs can be stacked upon each other in socket P2. Battery-Pack SP (NiMH) (8713180) Battery-Pack SP (NiMH) incl. Pin (8713180A) For further information on the Battery-Pack SP (NiMH) see “Battery Operation”.
- Page 81 INSTRUCTIONS FOR USE ACCESSORY Chapter 12 Connection Lead SP (12 V) (8713231) Install the Connection Lead SP (12 V) in the following way: 1.) Connect plug to socket P2 on back of pump or F3 on SpaceStation respectively. 2.) Put the connection lead into the car socket. 3.) If necessary, remove red adaptor of motor vehicle connector by slightly turning and simultanously pulling.
- Page 82 INSTRUCTIONS FOR USE ACCESSORY Chapter 12 Caution: The user should always closely observe the local pump alarms as well. Note: A maximum of three plugs can be stacked upon each other in socket P2. Technical Data Connecting Wire white and green white and brown Alarm disconnected...
- Page 83 INSTRUCTIONS FOR USE ACCESSORY Chapter 12 P C A - A c c e s s o r i e s • Space PCA-Kit (REF 8713554) consisting of: : - Demand button - Hook and loop tape for fixation of the demand button at the patient s arm - Line fixation connection between hook and loop tape...
-
Page 84: Ordering
ORDERING Art. No. B. Braun Perfusor® Space (100 – 240 V) ..........871 3030 Recommended accessories for the B. Braun Perfusor® Space: SpaceStation ....................871 3140 SpaceCover Standard ..................871 3147 SpaceCover Comfort ..................871 3145 PoleClamp SP.....................871 3130 Power Supply SP EU III ...................871 3110D Power Supply SP EU III 3.0m.................871 3123D... - Page 85 ORDERING 50ml, yellow inked cylinder and aspiration needle.......87 28801 F 50ml, yellow inked cylinder, aspiration needle and 15 µm particle filter ................872 8800 F 50ml, black, aspiration needle and particle filter........872 8828 F Omnifix® syringes Omnifix® 50/60 ml Luer Lock...............461 7509F Omnifix®...
- Page 86 ORDERING Type PCA, PVC tube 1,5 mm, 150 cm, Luer Lock ........872 6019 with 0.2 µm Sterifix filter, PVC tube 1,5 mm, 200cm, Luer Lock .....................872 3001 with SafeSite valve, PVC tube 1,5 mm, 150 cm, Luer Lock....................872 2820...
- Page 90 Manufactured by: B. Braun Melsungen AG B. Braun Melsungen AG Sparte Hospital Care 34209 Melsungen 34209 Melsungen Germany Germany Tel +49 (0) 56 61 71-0 Tel.: +49 (0) 56 61 71-0 Fax: +49 (0) 56 61 71-20 44 38916517 • Drawing No. I0688700201 Printed on pulp bleached 100 % chlorine-free www.bbraun.com...
Need help?
Do you have a question about the Perfusor Space and is the answer not in the manual?
Questions and answers