Table of Contents
Advertisement
Quick Links
Advertisement
Table of Contents

Summary of Contents for Bodyworx KR800
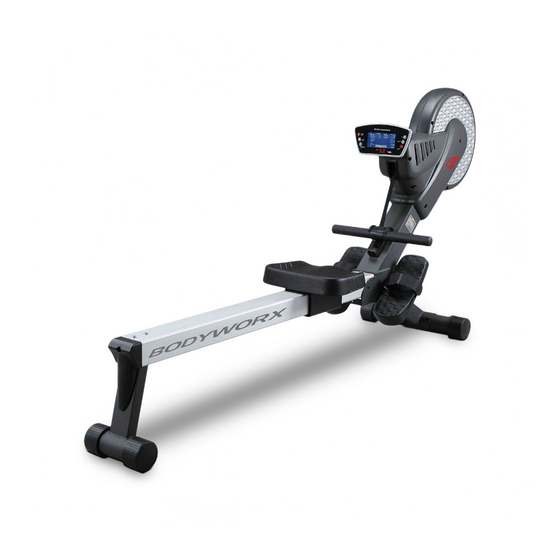
- Page 1 MAG. AIR ROWER – MOTORIZED Model No. KR800 Owner’s Manual...
-
Page 3: Safety Instructions
Safety Instructions • To ensure the best safety of the exerciser, regularly check it on damages and worn parts. • If you pass on this exerciser to another person or if you allow another person to use it, make sure that that person is familiar with the content and instructions in these instructions. - Page 4 Warming up: 15 seconds for each 20 seconds 20 seconds 25 seconds 20 seconds 20 seconds 30 seconds 25 seconds for each leg 30 seconds 20 seconds 5 seconds x 3 times 20 seconds 20 seconds for each leg 5 times 15 seconds...
-
Page 5: Hardware Packing List
Hardware Packing List HARDWARE IDENTIFICATION CHART This chart is provided to help identify the fasteners used in the assembly process. Place the washers or the ends of the bolts or screws on the circles to check for the correct diameter. Use the small scale to check the length of the bolts and screws. -
Page 6: Assembly Instruction
Assembly Instruction STEP 1. STEP 2. - Page 7 Assembly Instruction STEP 3. STEP 4.
- Page 8 Assembly Instruction STEP 5. STEP 6.
- Page 9 Assembly Instruction STEP 7. STEP 8.
-
Page 10: Console Instructions
Console Instructions FUNCTION BUTTONS: ENTER : Press to confirm the selected Program 1 to Program 12 and the preset values. START/STOP : Press to start the selected program. Press the START / STOP button to stop the program. You can press the START / STOP button again to continue to run the current buttons to select a new program. - Page 11 LCD DISPLAY INSTRUCTIONS START : Indicates the program selected has started. STOP : Indicates the program selected has stopped. You must be in the “STOP” mode to setup the programs. PROGRAM : Displays flashing “1” for program selection during setup from Program 1 to Program 12.
- Page 12 WATT : Displays the amount of power being exerted from zero to 999 watt. PULSE : Displays the heart rate, from 40 to 240 beats per minute. NOTE: To use this function, you must wear the HEART RATE TRANSMITTER(98) around your chest so the receiver which is built into the rower registers your heart rate from the HEART RATE TRANSMITTER(98) for displaying.
-
Page 13: Heart Rate Monitoring
TARGET HEART RATE CONTROL PROGRAM: To use this program, you must wear the HEART RATE TRANSMITTER(98) around your chest so the receiver which is built into the rower registers your heart rate from the HEART RATE TRANSMITTER(98) for working with this program. Once Program 8 is selected, the PULSE window displays flashing “90”... -
Page 14: Step 1: Power On
USER SETTING PROGRAMS: Program 9 to Program 12 are the automatic programs that allow the user to manually preset each of the 10 intervals. Under STOP mode, use “ “ and “ENTER” buttons to edit the program profile. The program profile will be stored in the memory after setup. -
Page 15: Step2:Select Program
STEP 4 : START TO WORKOUT Now you are ready to begin exercising. The program will not start until you press the START / STOP button. B. HEART RATE CONTROL PROGRAMS (PROGRAM 8) NOTE: To use this program, you must wear the HEART RATE TRANSMITTER(98) around your chest. -
Page 16: Operation Descriptions
Time (5:00 to 99:00) Count (0 to 9990 rows) Distance (0 to 999 mile) Calories (0 to 990 Kcal) (Note: You can only preset the “TIME” or “DISTANCE” for the program.) STEP 4 : EDIT THE PROGRAM PROFILE Press the ENTER button, interval 1 will begin flashing. Use “ “... -
Page 17: Power Source
F1.0 = Excellent F2.0 = Good F3.0 = Fair F4.0 = Below Average F5.0 = Not Good F6.0 = Poor The readout should only be used as a comparison between workouts. It can be used right after any aerobic exercise. Stop exercising before starting this function. To start the pulse recovery function, your heart rate will be displayed approximately five (5) seconds after the heart symbol is displayed. -
Page 18: Exploded Drawing
Exploded drawing... -
Page 19: Part List
Part List Description Quantity Front Stabilizer Endcap (76mm) Moving Wheel Bolt, Hex Head (M8 x 1.25 x 40mm) Nylock Nut (M8 x 1.25) Washer (ø8.5 x ø16 x 1.5mm thick) Acorn Nut (M8 x 1.25) Carriage Bolt (M8 x 1.25 x 90mm) Seat Seat Carriage Bolt, Round Head (M6 x 1 x12mm) - Page 20 Description Quantity Right Chain Cover Screw, Round Head (M4 x 16mm) Screw, Round Head (M5 x 0.8 x 12mm) Magnetic System V-Ribbed Belt Idler Wheel Idler Arm Tension Spring Bolt, Button Head (M8 x 1.25 x 45mm) Thin Nut (3/8”-26, 6mm thick) Thin Nut (3/8”-26, 3mm thick) Control Motor Tension Cable...
- Page 21 Description Quantity Lower Protaction Ring Pulley Strap Magnet Bearing (6000zz) Spacer (ø10.1 x ø15 x 8mm) Thin Nut (3/8”-26 x 5mm thick) Washer (ø10 x ø15 x 1mm thick) Flang Nut (3/8”-26) Axle Strap Roller Spacer (ø10 x ø14 x 19.4mm) Spacer (ø10 x ø14 x 28.2mm) Bolt, Hex Head (3/8”-26 x 108mm) Nylock Nut (3/8”-26)
- Page 22 Model No: # KR800 To register your warranty, please go to www.gpisports.com.au Distributed Exclusively by : GPI Sports & Fitness 275 Wellington Road Mulgrave, VIC, 3170 Australia.


Need help?
Do you have a question about the KR800 and is the answer not in the manual?
Questions and answers