
Related Manuals for Bodyworx ASB500


Summary of Contents for Bodyworx ASB500
- Page 1 INDOOR CYCLE Model No: ASB500 Retain this owner’s manual for future reference. Read and follow all instructions in this owner’s manual.
- Page 2 GPI Sport & Fitness Warranty Registration Form Congratulations on purchasing your product, we at GPI believe that our product range is of the highest quality and represents great value for money. We back our product range up with our industry leading warranty. Please see below for the step by step instructions on how to register your product warranty on- line.
-
Page 3: Table Of Contents
CONTENT PAGE WARRANTY REGISTRATION FORM IMPORTANT SAFETY INSTRUCTIONS SAFETY GUIDELINES FEATURES PART LIST EXPLODED DIAGRAM HARDWARE PARTS LIST ASSEMBLY INSTRUCTION 11-13 PEDALS & CRANKS WARNING EXERCISE INSTRUCTIONS 15-16... -
Page 4: Important Safety Instructions
IMPORTANT SAFETY INSTRUCTIONS Before beginning any fitness program, you should obtain a complete physical examination from your physician. This exercise equipment is designed and built for optimum safety for home use. However, certain precautions always apply whenever you operate any exercise equipment. Be sure to read the entire manual before assembly and operation of this machine. -
Page 5: Safety Guidelines
SAFETY GUIDELINES Successful fitness training programs have one prominent feature in common...safety. Fitness training has some inherent dangers, as do all physical activities. The chance of injury can be greatly reduced or completely removed by using correct techniques, proper breathing, maintaining equipment in good working condition, and by wearing the appropriate clothing. -
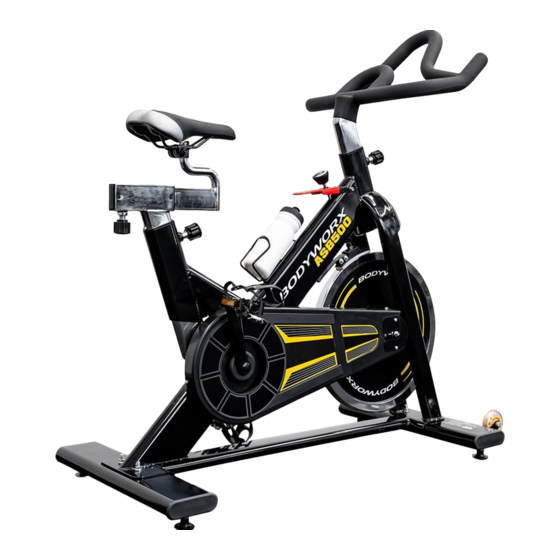
Page 6: Features
FEATURES F E A T U R E S Emergency Brake Saddle Tension Control Seat Slider Adjustable Knob Seat Post Heavy Flywheel Transportation Wheel Durable Crank Belt Driven... - Page 7 Adjustable Knob Easy to adjust the height of both seat post & handlebar Heavy Flywheel High-inertia flywheel creates the high momentum Transportation Wheel Anyone can move this machine using the 2 wheels Durable Crank Ensure the best durability when in big force Belt Driven Most comfortable and less noisy Seat Post...
-
Page 8: Part List
PARTS LIST BILL OF MATERIAL DESCRIPTION DESCRIPTION Q'TY/BIKE Q'TY/BIKE Frame Outer Chain Guard Long Sleeve Belt Adjustable Knob Big Pulley Allen Bolt Bottom Bracket Allen Nut 40-1 Tension Control Crank Bolt 40-2 Square Washer Crank (R ) Helical Compression Spring Crank (L) Square Nut Crank Cap... -
Page 9: Exploded Diagram
EXPLODED DIAGRAM EXPLODED DRAWING... -
Page 10: Hardware Parts List
HARDWARE ASSEMBLY INSTRUCTION PARTS LIST PARTS LIST Q’TY DESCRIPTION SPECIFICATION Multi-Wrench Chrome & dipping Handlebar Saddle With 2 hex nuts Pedal ( R ) Right Threaded Pedal ( L ) Left Threaded Carriage Bolt M8*50 φ16*φ8.5*1.6 Washer Flange Nut Front Stabilizer with 2 wheels Rear Stabilizer without wheels... -
Page 11: Assembly Instruction
ASSEMBLY INSTRUCTION Assembly Step A Attach the Rear stabilizer (#57) to the frame using two Carriage Bolts (#51) and two Flange Nuts (#54) and two Washers(#52), and secure firmly using the Multi-Wrench (#15). Assembly Step B Attach the Front stabilizer (#56) to the frame using two Carriage Bolts(#51) and two Flange Nuts (#54) and two Washers(#52), and secure firmly using the Multi-Wrench (#15). - Page 12 Assembly Step C Thread the right pedal (#42R) that has "R" on spindle to the right side arm of the bike using the Multi-Wrench (#15) . Please note that the R pedal is right-hand threaded which must be turned clockwise to tight. Thread the left pedal (#42L) that has "L"...
- Page 13 Assembly Step E Attach the Seat ( #28 ) to the Seat slider with two M8 Hex Nuts, and secure firmly using the Multi-Wrench (#15). Make sure that the nose of the Seat is pointing straight ahead before you tighten the Hex Nuts. Note: The M8 Hex Nuts may be pre-attached to the seat clamp.
-
Page 14: Pedals & Cranks Warning
WARNING PEDALS & CRANKS (A117BB, ASB500, ASB700 & ASB800) Given the design and usage of Indoor Cycles it is very important to ensure correct assembly and ongoing maintenance for optimum performance and your safety. Supplied with the bike is a pedal wrench for your initial assembly. -
Page 15: Exercise Instructions
EXERCISE INSTRUCTIONS Using your exerciser will provide you with several benefits, it will improve your physical fitness, tone muscle and in conjunction with a calorie controlled diet help you lose weight. 1. THE WARM UP PHASE This stage helps get the blood flowing around the body and the muscles working properly. It will also reduce the risk of cramp and muscle injury. - Page 16 EXERCISE INSTRUCTIONS 3. THE COOL DOWN PHASE This stage is to let your Cardio Vascular System and muscles wind down. This is a repeat of the warm up exercise e.g. reduce your tempo, continue for approximately 5 minutes. The stretching exercises should now be repeated, again remembering not to force or jerk your muscles into the stretch.
- Page 17 INDOOR CYCLE Model No: ASB500 To register your warranty, please go to www.gpisports.com.au DISTRIBUTED EXCLUSIVELY BY 275 Wellington Road Mulgrave, VIC, 3170 Australia...
Need help?
Do you have a question about the ASB500 and is the answer not in the manual?
Questions and answers