Table of Contents
Advertisement
Quick Links
Advertisement
Table of Contents

Subscribe to Our Youtube Channel
Summary of Contents for Primotech MAT
- Page 1 Instruction Manual Primotech Upright Microscope...
-
Page 2: System
Primotech Upright Microscope Carl Zeiss Microscopy GmbH Königsallee 9-21 37081 Göttingen Germany microscopy@zeiss.com www.zeiss.com/microscopy Document name: Instruction Manual Revision: en 01 Effective from: March 2014 © Göttingen 2014 by Carl Zeiss Microscopy GmbH - all rights reserved 430055-9044-008 This document or any part of it must not be translated, reproduced, or transmitted in any form or by any means, electronic or mechanical, including photocopying, recording, or by any information or retrieval system. -
Page 3: Table Of Contents
Using Oblique Reflected Illumination 22 3.6.4 Adjusting the Transmitted Illumination Size 23 3.7 Adjusting the Resolution and Depth of Field 23 3.8 Imaging with Primotech and Matscope 25 Adjusting the Condenser Settings 27 4.1 Overview 27 4.2 Specifying the Condenser Position 27... - Page 4 9.3 Environmental Requirements 55 9.4 Scope of Delivery 56 9.4.1 Primotech MAT (430055-9000-100) 57 9.4.2 Primotech D/A MAT (430055-9010-100) 58 9.4.3 Primotech D/A POL (430055-9020-100) 59 9.4.4 Primotech D/POL Conoscopy (430055-9030-100) 60 Index 61 Primotech | Document 430055-9044-008 V.1.0; 03 / 2014...
-
Page 5: Introduction
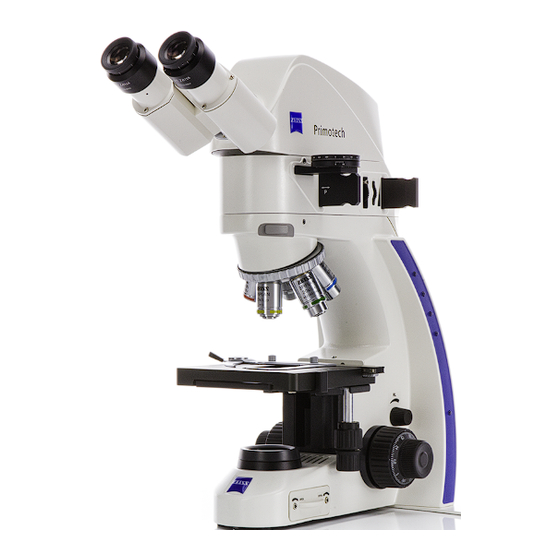
Primotech is the new family of upright microscope from ZEISS. Its design and intuitive controls result in a simple, robust, easy-to-use yet powerful microscope that helps you inspect a wide range of samples. Primotech microscopes can also be connected to an iPad to process and analyze images. Connecting the microscope to a WLAN network even enables multiple users to view a sample simultaneously. -
Page 6: Primotech Features
1 Introduction | 1.2 Primotech Features 1.2 Primotech Features Four types of Primotech microscope are available. The different microscopes have different features and are suitable for different applications: Feature Primotech MAT Primotech D/A Primotech D/A Primotech D/POL Conoscopy Reflected light Transmitted light Condenser Köhler... -
Page 7: Overview Of This Document
Chapter 5 only applies to: – Primotech D/A POL – Primotech D/POL Conoscopy ¢ All topics related to reflected light do not apply to Primotech D/POL Conoscopy. Individual details that are only specific to a certain microscope are indicated within each topic. -
Page 8: Intended Use
INFO The Safety Information document is also considered to be part of the Primotech microscope. You must follow all the instructions provided in this document. Primotech microscopes have been designed, produced, and tested in compliance with the standard DIN EN 61010-1 (IEC 61010-1) “Requirements for Electrical... -
Page 9: System Overview
2 System Overview | 2.1 Overview 2 System Overview 2.1 Overview This chapter describes the main components and controls of Primotech microscopes, as well as the types of illumination supported. 2.2 Types of Illumination Primotech microscopes support both transmitted light and reflected light illumination. -
Page 10: Main Components
2 System Overview | 2.3 Main Components 2.3 Main Components Primotech microscopes consist of the following main components. For a detailed list of the components of your microscope, see Scope of Delivery [} 56]. Eyepieces Intermediate tube Objectives Stage Condenser and aperture diaphragm... -
Page 11: Components And Controls
2 System Overview | 2.4 Components and Controls 2.4 Components and Controls Primotech microscopes consist of various components and controls. The exact configuration depends on your microscope. For more information, see Scope of Delivery [} 56]. The stand contains the following components and controls:... -
Page 12: Intermediate Tubes
Slot for polarizer (reflected light) Slot for filters (e.g. color) Aperture diaphragm (reflected light) Oblique illumination slider The intermediate tube with Bertrand lens is supplied with Primotech D/POL Conoscopy. Tube mounting screw Bertrand lens focus Slot for analyzer (transmitted light) -
Page 13: Stages
Move sample along y axis Move sample along x axis The rotatable stage is supplied with the following microscopes: ¢ Primotech D/A POL ¢ Primotech D/POL Conoscopy Move sample on stage Object guide Stage rotation lock 45° click-stop Primotech | Document 430055-9044-008 V.1.0; 03 / 2014... -
Page 14: Condenser
Primotech D/A MAT ¢ Primotech D/A POL ¢ Primotech D/POL Conoscopy Adjust condenser position Rotatable polarizer (transmitted light) Not available for Primotech D/A MAT. Luminous field diaphragm Aperture diaphragm (transmitted light) Condenser centering screws Primotech | Document 430055-9044-008 V.1.0; 03 / 2014... -
Page 15: First Steps
3 First Steps | 3.1 Overview 3 First Steps 3.1 Overview This chapter describes how to get started with your Primotech microscope, from assembling it and performing general one-off calibrations, through to acquiring your first image. 3.2 Assembling the Microscope The Primotech microscope stand is supplied with the following standard components already attached: ¢... - Page 16 – 12 V power cable between the power socket of the tube and the rear of the microscope stand This does not apply to Primotech D/POL Conoscopy. Plug the microscope into a power socket and press the power switch. The lowest LED on each side of the stand illuminates.
-
Page 17: Inserting The Sample
3 First Steps | 3.3 Inserting the Sample 3.3 Inserting the Sample Primotech microscopes are suitable for a wide range of samples, for example material or mineral samples. The samples should be prepared according to your standard company or institution guidelines and be within the guidelines specified in the technical data (see Physical Dimensions and Key Specifications [} 54]). -
Page 18: Adjusting The Eyepieces
Rotation of the To rotate the crosshair, rotate the entire crosshair eyepiece. Eyepieces with a Only Primotech D/A POL and Primotech D/ crosshair are indicated POL Conoscopy are supplied with an by the additional red eyepiece with a crosshair Use with glasses Turn the ring of each eyepiece so that it is in the zero position. - Page 19 The sample should now be in focus when you look at it with both eyes. Once you have adjusted the eyepieces, you should subsequently only change the focus of a sample by turning the focus wheel. For more information, see Selecting Objectives and Focusing [} 20]. Primotech | Document 430055-9044-008 V.1.0; 03 / 2014...
-
Page 20: Selecting Objectives And Focusing
Ensure the nosepiece is rotated to a click-stop position. Ensure the sample is sufficiently far below the objective that they do not collide. For Primotech D/A POL and Primotech D/POL Conoscopy, ensure the objective is centered. For more information, see Centering the Objectives [} 33]. -
Page 21: Adjusting The Illumination Properties
Color of reflected illumination ¢ Oblique illumination for reflected illumination INFO Reflected illumination is not available for Primotech D/POL Conoscopy. 3.6.1 Adjusting the Illumination Brightness You can freely adjust the brightness of either the reflected light or transmitted light (if available):... -
Page 22: Adjusting The Color Of Reflected Illumination
3.6.2 Adjusting the Color of Reflected Illumination Primotech microscopes come with the conversion filters to change the color temperature or profile of the reflected illumination. Conversion filters can be used, for example, to make the color profile of the LED light similar to that of a halogen light. -
Page 23: Adjusting The Transmitted Illumination Size
The resolution is inversely proportional to the depth of field and contrast: ¢ Opening the diaphragm increases the resolution but decreases the depth of field and contrast. ¢ Closing the diaphragm decreases the resolution but increases the depth of field and contrast. Primotech | Document 430055-9044-008 V.1.0; 03 / 2014... - Page 24 To change the brightness, adjust the illumination or insert a filter. For more information, see Adjusting the Illumination Properties [} 21]. ¢ If you select a different objective you need to subsequently re-adjust the corresponding aperture diaphragm. Primotech | Document 430055-9044-008 V.1.0; 03 / 2014...
-
Page 25: Imaging With Primotech And Matscope
3 First Steps | 3.8 Imaging with Primotech and Matscope 3.8 Imaging with Primotech and Matscope You can connect Primotech microscopes that include a camera to a network. If the network has wireless capabilities, you can then connect to the microscope using an iPad and the free Matscope app. - Page 26 3 First Steps | 3.8 Imaging with Primotech and Matscope Procedure 1 Connect the MNA to the network via a standard Ethernet cable. If you do not have an MNA, you can connect the camera directly to the network via a standard Ethernet cable.
-
Page 27: Adjusting The Condenser Settings
Procedure 1 To raise or lower the condenser, turn the condenser vertical adjustment knob. Raise the condenser carefully and ensure that it does not collide with the bottom of the sample. Primotech | Document 430055-9044-008 V.1.0; 03 / 2014... - Page 28 Loosen the condenser clamp screw. Look at the stage from above and carefully raise the condenser until the tip is just below the sample. Tighten the condenser clamp screw. The condenser cannot move above this upper limit. Primotech | Document 430055-9044-008 V.1.0; 03 / 2014...
-
Page 29: Adjusting The Köhler Illumination
Open the luminous field diaphragm and the aperture diaphragm fully. Raise the condenser to its maximum vertical position. Close the luminous field diaphragm until the bright area is half the size of the field of view. Primotech | Document 430055-9044-008 V.1.0; 03 / 2014... - Page 30 Open the luminous field diaphragm until the edge just disappears out of the field of view. Remove one of the eyepieces and look directly into the eyepiece tube. This enables you to see the edges of the aperture diaphragm in focus. Primotech | Document 430055-9044-008 V.1.0; 03 / 2014...
- Page 31 Close the aperture diaphragm until the image has the optimal contrast. This is typically the case when the bright area fills approximately 2/3 of the field of view. Reinsert the eyepiece. The sample should now have the highest possible contrast. Primotech | Document 430055-9044-008 V.1.0; 03 / 2014...
-
Page 32: Polarization And Conoscopy
Polarization and conoscopy can be performed with the following microscopes: ¢ Primotech D/A POL ¢ Primotech D/POL Conoscopy If you purchase optional polarizers, you can then also perform polarization with Primotech MAT and Primotech D/A MAT. For more information, contact your ZEISS representative. Primotech | Document 430055-9044-008 V.1.0; 03 / 2014... -
Page 33: Centering The Objectives
When viewing a sample on the rotating stage, it is important that the objective is located exactly above the center of rotation of the stage. Therefore, the objectives of Primotech D/A POL and Primotech D/POL Conoscopy can be centered. The centering procedure should also always be performed after changing an objective. - Page 34 Turn the screws to move the object half the way back to the center of the crosshair. Repeat the steps above until the object no longer moves when the stage is rotated. INFO Each objective needs to be centered individually. Primotech | Document 430055-9044-008 V.1.0; 03 / 2014...
-
Page 35: Polarization Examinations
Rotating the sample, polarizer, or analyzer alters the amount – and color – of the light received in the eyepiece. Thus it is possible to deduce properties of the sample, for example the orientation of the crystals within it or their refractive index. Primotech | Document 430055-9044-008 V.1.0; 03 / 2014... - Page 36 Compensators Compensators enhance the intensity of colors in a sample making it easier to identify and differentiate samples. Various compensators are available for Primotech microscopes. Each increases the path difference of beams polarized in a certain direction by a multiple of the wavelength (λ) of visible light. The following compensators are suitable for transmitted light.
-
Page 37: Performing Polarization Examinations With Transmitted Light
5 Polarization and Conoscopy | 5.4 Performing Polarization Examinations with Transmitted Light 5.4 Performing Polarization Examinations with Transmitted Light ¢ Prerequisites You are using Primotech D/A POL or Primotech D/POL Conoscopy ¢ The sample is illuminated by transmitted light only ¢ No polarizers or analyzers are in the beam path ¢... -
Page 38: Conoscopy Examinations
Conoscopy refers to the examination of interference patterns caused by such samples. Conoscopy can only be performed with Primotech D/POL Conoscopy as it contains a Bertrand lens which can be inserted into the beam path. The Bertrand lens causes the interference patterns to be in focus when looking through the eyepieces rather than the sample itself. - Page 39 You can rotate the stage to change the orientation of the sample. If desired, insert a compensator into the 45° slot of the stand to further investigate and analyze the properties of the sample. Primotech | Document 430055-9044-008 V.1.0; 03 / 2014...
-
Page 40: Changing Components
Screw the objective into the protective tube. Unscrew the new objective from its protective tube. Screw the new objective into the nosepiece. If you are using Primotech D/A POL or Primotech D/POL Conoscopy, center the objective. For more information, see Centering the Objectives [} 33]. -
Page 41: Changing The Tube
– 12 V power cable between the power socket of the tube and the rear of the microscope stand This does not apply to Primotech D/POL Conoscopy. Use the 2.5 mm hex key to loosen the tube mounting screw on the right side of the tube. - Page 42 – Network cable between the network port of the tube and the top of the – 12 V power cable between the power socket of the tube and the rear of the microscope stand This does not apply to Primotech D/POL Conoscopy. Primotech | Document 430055-9044-008 V.1.0; 03 / 2014...
-
Page 43: Replacing The Light Source
Grip the handle of the light source and slide it out of the stand. Slide in the replacement light source. Use cotton gloves to avoid fingerprints on the new light source. Use the 2.5 mm hex key to tighten the two hexagonal bolts. Primotech | Document 430055-9044-008 V.1.0; 03 / 2014... -
Page 44: Changing The Microscope Network Adapter
Use the 2.5 mm hex key to tighten the four hexagonal bolts of the MNA. Attach the cables to the MNA: – Network cable from the camera to the MNA – Network cable from the MNA to the router Primotech | Document 430055-9044-008 V.1.0; 03 / 2014... -
Page 45: Maintenance And Disposal
– To avoid scratches, do not use dry lens paper or a dry cloth. – Make sure that no fluid enters the system. Once the optical surfaces have dried, reinsert the component into the microscope. For more information, see Assembling the Microscope [} 15]. Primotech | Document 430055-9044-008 V.1.0; 03 / 2014... -
Page 46: Corrective And Preventive Maintenance
Such actions will render all warranty claims invalid. 7.2 Corrective and Preventive Maintenance To maintain the availability and performance of your Primotech system at a fully predictable budget we recommend you enter into a Protect service agreement with your ZEISS representative. -
Page 47: Support
Screw the dustcap labeled 1 into the nosepiece. Repeat these steps for the other objectives. Remove the eyepieces from the tube and place the protective caps on the tube. Place the eyepieces in the corresponding protective packaging. Primotech | Document 430055-9044-008 V.1.0; 03 / 2014... -
Page 48: Disposal Of Primotech
This invalidates all warranty claims. With the exception of the work specified in this manual, no maintenance or repair of Primotech may be undertaken. Repairs may only be performed by a ZEISS representative. Should any defect occur with the instrument, please contact your ZEISS representative. -
Page 49: Troubleshooting
8 Troubleshooting 8 Troubleshooting The following table lists possible issues with Primotech and corresponding remedies. If the suggestions do not resolve the issue, search the Online Help or contact your ZEISS representative. Category Symptom Remedy Illumination Image is too dark Check the desired illumination type is on. - Page 50 10 seconds (using a bent paper clip, for example). The camera will reset itself and restart - this may take up to three minutes. Primotech | Document 430055-9044-008 V.1.0; 03 / 2014...
-
Page 51: Technical Data And Conformity
9 Technical Data and Conformity | 9.1 Power Requirements and Operating Data 9 Technical Data and Conformity 9.1 Power Requirements and Operating Data The Primotech system must be connected to the AC network via the central power supply by a country-specific mains power cable. Property... - Page 52 Analogous brightness 5x to 100x approx. 15 to 100% adjustment LED lifetime 10 000 hours Tube 30°/20 Property Value Viewing angle 30° Viewing height 380 - 415 mm Interpupillary distance Adjustable, 48 - 75 mm Primotech | Document 430055-9044-008 V.1.0; 03 / 2014...
- Page 53 3 MP / 2048 x 1536 pixels, YUV color Auto white balance Yes (Auto/Lock) ¢ Electrical interfaces 12 V DC power input (provided by the microscope via interconnection cable) ¢ Network (RJ45), 100 Mbit/s Buttons Reset button (backside) Primotech | Document 430055-9044-008 V.1.0; 03 / 2014...
-
Page 54: Physical Dimensions And Key Specifications
ø = 160 mm ø = 160 mm surface size 135 mm 135 mm Maximum 500 g 500 g 500 g 500 g sample weight Maximum 34 mm 17 mm 17 mm 17 mm sample height Primotech | Document 430055-9044-008 V.1.0; 03 / 2014... -
Page 55: Environmental Requirements
9 Technical Data and Conformity | 9.3 Environmental Requirements 436.8 79.5 279.2 309.9 191.6 9.3 Environmental Requirements Primotech must be installed and operated in an enclosed space. Category Property Value Transport (in Permissible ambient temperature -40 to +70 °C packaging) Storage Permissible ambient temperature +10 to +40 °C... -
Page 56: Scope Of Delivery
– Quick start guide (printed) – Instruction manual (on USB stick) Furthermore, an optional case for transport and storage (434002-9000-000) is available for all stands. The following sections list the standard and optional components of each stand. Primotech | Document 430055-9044-008 V.1.0; 03 / 2014... -
Page 57: Primotech Mat (430055-9000-100)
Other (not shown): Leveling press, w. starter kit Optional components: Objectives: Epiplan 10x/0.23 W0.8 (442030-9903-000) Epiplan 100x/0.8 W0.8 (442080-9901-000) Analyzer slider D/A rotat. 360° (428108-9020-000) Polarizer slider A, fixed (428108-9030-000) Advanced microscope network adapter (430055-9110-000) Primotech | Document 430055-9044-008 V.1.0; 03 / 2014... -
Page 58: Primotech D/A Mat (430055-9010-100)
9 Technical Data and Conformity | 9.4 Scope of Delivery 9.4.2 Primotech D/A MAT (430055-9010-100) Standard components: Eyepiece E-PL 10x/20 Br.foc. Object guide ESD stage Köhler condenser incl. aperture diaphragm Tube 30°/20 with integrated 3 MP camera Intermediate tube, reflected light illumination... -
Page 59: Primotech D/A Pol (430055-9020-100)
W0.8" (441043-9900-000) A-Plan 40x/0.65 Pol W0.8" (441053-9900-000) Microscope network adapter (430055-9100-000) Transmitted light illumination Optional components: Object guide (432338-9000-000) Compensator λ/4, 6x20 (427900-9010-000) Compensator wedge 0-4 λ, 6x20 (427900-9020-000) Advanced microscope network adapter (430055-9110-000) Primotech | Document 430055-9044-008 V.1.0; 03 / 2014... -
Page 60: Primotech D/Pol Conoscopy (430055-9030-100)
Objectives: A-Plan 5x/0.12 Pol W0.8" (441023-9900-000) A-Plan 40x/0.65 Pol W0.8" (441053-9900-000) A-Plan 63x/0.8 Pol W0.8" (441063-9900-000) Transmitted light illumination Optional components: Object guide (432338-9000-000) Compensator λ/4, 6x20 (427900-9010-000) Compensator wedge 0-4 λ, 6x20 (427900-9020-000) Primotech | Document 430055-9044-008 V.1.0; 03 / 2014... -
Page 61: Index
Centering objectives 33 Dots on eyepiece 19 Changing Dust cover 56 Light source 43 Microscope network adapter (MNA) 44 Objectives 40 Error troubleshooting 49 Tube 41 Eyepieces 18 Cleaning 45 Collisions Preventing 28 Color of reflected light 22 Fault troubleshooting 49 Filters 22 Fine focus 20 Fixed polarizer 35 Focus 20 Primotech | Document 430055-9044-008 V.1.0; 03 / 2014... - Page 62 Polarizers 35 Replacing 43 Power indicators 21 Luminous field diaphragm Preventative maintenance 46 Adjusting 23 Primotech Assembling 15 Disassembling 47 Magnification 20 Disposal 48 Maintenance Overview 10 By the Customer 45 Scope of delivery 56 Corrective and preventative 46 Stands 6, 56 Replacement parts 46 Storage 47 Support 47 Quartz wedge 36 Primotech | Document 430055-9044-008 V.1.0; 03 / 2014...
- Page 63 WLAN 25 Scope of delivery 56 Separation of eyepieces 18 Stands 6, 56 ZEISS representative 47 Storage 47 Support 47 System overview 10 Technical data Dimensions 54 Environmental requirements 55 Operating Data 51 Power Requirements 51 Specifications 54 Transmitted light Adjusting 21 Replacing light source 43 Troubleshooting 49 Tubes Changing 41 Primotech | Document 430055-9044-008 V.1.0; 03 / 2014...
Need help?
Do you have a question about the MAT and is the answer not in the manual?
Questions and answers