Table of Contents
Advertisement
Advertisement
Table of Contents

Subscribe to Our Youtube Channel
Related Manuals for Lada Kalina


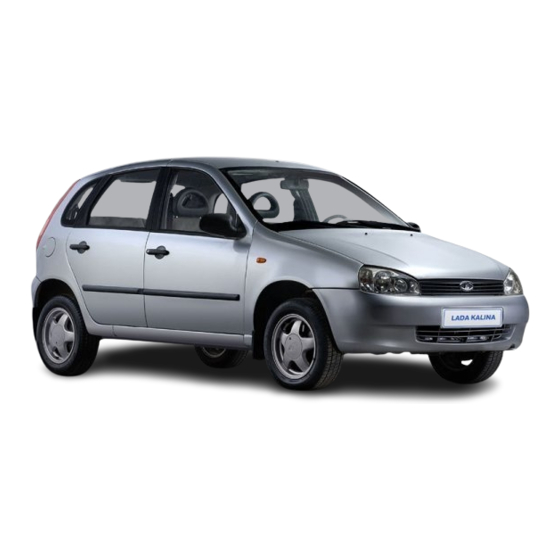
Summary of Contents for Lada Kalina
- Page 1 USER MANUAL LADA KALINA AND ITS VERSIONS...
- Page 3 Ф. 594-1 USER MANUAL LADA KALINA AND ITS VERSIONS JSC «AVTOVAZ» • TOGLIATTI • RUSSIA...
-
Page 4: Table Of Contents
TECHNICAL MAINTENANCE Instrument panel ....33 for operation of LADA KALINA vehicle AND OPERATING REPAIR Instrument cluster ....37 and its versions . -
Page 5: For Your Attention
Thank you for your choice and de- tion, consumer properties and ability to roads or hobs it is recommended to use in accordance to its purpose within cision to purchase LADA. choose the mode that: the vehicle life period specified by the Before operating your vehicle, manufacturer. - Page 6 comply with the timeliness and ity gasolines and motor oils, otherwise the vehicle log book. Certified SSNEs completeness of all maintenance it will result in bulk deposits on engine have the list of additional equip- work described in the vehicle log parts, failure of control system and ment approved for installation by book, as well as all the necessary...
- Page 7 more information about your vehicle, please contact your vendor. Do not switch off the speed sen- sor and do not change data on operational kilometres odometer readings without an authorization as it will result in the loss of the manufacturer's warranty and possible failure of the vehicle.
-
Page 8: Vehicle Description
VEHICLE DESCRIPTION I. BODY AND PASSENGER COMPARTMENT Fig. 1а. Vehicle keys Fig. 1b. Vehicle keys KEYS (in the design variant) The vehicle comes with two igni- tion keys (Fig. 1a) with special en- key with remote control console (Fig. ATTENTION! coders built in the key head. -
Page 9: Remote Control System (In The Design Variant)
REMOTE CONTROL SYSTEM Remote control system (in the design variant) operation The remote control system by 1. Locking side doors and power pack is designed for: switching on protection mode – remote locking (unlocking) of (in the design variant) with the side doors with simultaneous switch- help of remote control console. - Page 10 Unlocking side doors of the vehi- If the buzzer gives one horn, there for 25 seconds. If during this time the cle with the help of remote control is set the mode of side doors' simul- tailgate has not been opened, it is console can be carried out in two taneous unlocking, if the buzzer automatically included into the pro-...
- Page 11 the last executed command is always unlocking rear doors is possible in the protection mode. Protection an unlock command. both with the door closed and mode is turned off after pressing 5. Central locking/unlocking opened). unlock button on the console. of side doors from outside with 7.
-
Page 12: Immobilizer
If pressing buttons on the console out at the vehicle presales train- For LADA vehicles there is used an ing points or at the certified beyond the reach of the radio chan- electronic immobilizer (implemented SSNEs in the presence of the nel, «floating»... - Page 13 Immobilizer has a LED an alarm sounder (a buzzer) in the instrument cluster. The LED indicates the state of the immobilizer: – if after switching the ignition the LED does not light and flash, it means the immobilizer is OK, engine start is allowed;...
-
Page 14: Side Doors
SIDE DOORS Side doors can be locked /unlocked from inside the vehicle by pressing buttons respective- ly in the switch box (See Fig. 6а) or (in the design variant) by pressing button in the driver's door mod- ule (Fig. 6b); pressing this button you change the state of doors' locks. - Page 15 Fig. 6а. Switchbox Fig. 6b. Driver's door module (in the design variant) Power windows' control features Window regulators stop operating Select button 2 ( ) – if you want to with control buttons in the doors if control the left-hand mirror or button the ignition is off after opening any ) –...
- Page 16 Automatic mode of rolling Rolling up/down windows with the Warning up/down windows with DDM button in the passenger's door is When closing windows with buttons* similar to the work of DDM buttons power windows you can pinch with the following restrictions: your fingers and other body parts If press driver's window control –...
-
Page 17: Foot Pedals Location Area
will give the horn, but in a differ- ent tone, if you remove the igni- tion key and leave tail lights switched on. Do not lean out of open win- dows of the vehicle, make sure that the children do not do it. Rear doors are locked both with the door opened and closed. -
Page 18: Seats
SEATS Front seats. To adjust front seats in the longitudinal direction, pull locking lever 1 (Fig. 9) up. After installing the seat in a comfortable position pull the lever down, and by shifting movement of the seat back and forth, fix it reliably. Front seat height adjustment Fig. - Page 19 Fig. 11c. Rear headrest Fig. 10. Front seat heating Fig. 11a. Head restraint switches transport goods, only one passenger can be in the remaining part. Before rear seat (or its parts) spreading it is necessary to pass the bands of 2 rear side belts (fig.11d) through the retainers of 1 band (in the design variant), remove the central belt tongue from the mini-...
-
Page 20: Steering Wheel Adjustment
Fig. 12. Folding the rear seat Rear seat should be folded in the STEERING WHEEL Fig. 13. Steering wheel following sequence: ADJUSTMENT adjustment – remove the head restraints from the seat back (in the design vari- The vehicle is equipped with tilt ant);... - Page 21 Fig. 14. Stretching the seat belt Fig. 15а. Fastening the seat belt Fig. 15b. Fastening the seat belt in the mini-lock of back middle seat passenger To unfasten the belt press the red Front seat belts are adjustable the driver and front passenger in a frontal crash.
-
Page 22: Air Bags
Warning AIR BAGS When driving be sure to fasten The vehicle is equipped with fron- your seat belt and do not carry tal system of driver's air bag (ABS), unbelted passengers! in the design variant of front pas- Pregnant women should never senger's air bag, side air bags of the put the lower band of the belt to driver and front passenger, as well as... - Page 23 – air bag modules in the front seats; – seat belts with pretensioner and Impact with curb, or footpath Falling or shaking on the load limiter; edge, or solid material deep potholes – rotating device mounted on the connector of understeering switch (for connecting horn switch and air bag module to the vehicle circuit);...
- Page 24 moved as back as possible to the you the safest sitting position in 7. After actuating air bags, which the air bag can provide the driver, in order to have a possibility to some elements of the system may most effective protection. hold the steering wheel in hands be of high temperature.
- Page 25 Side air bag is used as an addi- gerous and cause injury in the tional installation to seat belts of event of actuating side air bag. the driver and the passenger. To prevent unexpected side air Therefore, during driving always bag deployment that can lead to injury, avoid impacts with side wear seat belts.
-
Page 26: Installation Of Child Restraints
INSTALLATION Ta b l e 1 OF CHILD RESTRAINTS Scheme of child restraints installation In your vehicles are used standard Seats in vehicle seat belts of adult passengers to fas- front passenger seat rear seats of passengers Weight of child Type of child seat ten child restraints. - Page 27 Child seat installation with ISOFIX Ta b l e 1 a system and mounting of ISOFIX Scheme of ISOFIX child restraints installation upper safety belt Places of fastening system ISOFIX in vehicle Weight Your vehicle is equipped with ISOFIX dimensional class of child fastener system ISOFIX, located right place...
-
Page 28: Passenger Compartment Equipment
PASSENGER COMPARTMENT EQUIPMENT Exterior mirrors Exterior mirrors are adjusted with handle 1 (Fig. 18). Before driving en- sure optimum visibility to the rear. In the design variant there is no handle 1, and exterior mirrors are adjusted with switch 1 (see Fig. 6b) in the driver's door module (see the Fig. - Page 29 Fig. 20а. Interior roof lighting Fig. 20b. Interior lighting unit – goes out smoothly when ignition Operation mode of the interior In the design variant vehicles lighting unit depends on the position have power save function for interior of switch 2: –...
- Page 30 Fig. 23а. Socket for additional Fig. 22а. Side glove box Fig. 22b. Main glove box electrical equipment (in the design variant) Glove boxes 23а), which is used to connect only out the spiral. In this case, 12-volt electrical appliances with bimetallic fuse of the cigarette To open side glove box, you need power output of at most 120 W.
- Page 31 Fig. 23b. Cigarette lighter Fig. 23c. Electrical device (in the design variant) connector in the cigarette lighter socket unit) can be also used to connect the driver and passengers leave only 12-volt electrical appliances the vehicle or the vehicle is with power output not exceeding parked for a long period of time 120 W.
-
Page 32: Bonnet
BONNET To access to the engine compart- ment pull handle (Fig. 24), lo- cated on the left side of the instru- ment panel, raise the bonnet and through the air space push the pro- tective hook tab to the right (Fig. 25). -
Page 33: Tailgate
Fig. 28. Tailgate actuator switch Fig. 26. Opening the bonnet Fig. 27. Opening the tailgate (in the design variant) TAILGATE The function is not used for «stan- ATTENTION! dard» version. Do not use the key as a handle Tailgate is unlocked by turning the With the tailgate opened and for opening and closing the tail- key in the lock cylinder clockwise... -
Page 34: Fuel Tank Plug
FUEL TANK PLUG To access plug 1 (Fig. 29) of the fuel tank, open cap 3, which is locat- ed on the right side of the vehicle. The plug is opened by turning it counterclockwise. The plug should be closed in a clockwise direction until it clicks. -
Page 35: Instruments And Controls
II. INSTRUMENTS In case you ignore our recom- When restarting the engine – heating AND CONTROLS mendation on sound signal cor- function is restored without pressing rect activation the manufacture is the switch button. INSTRUMENT PANEL Check light indicator on the switch not responsible for further condi- button will light orange during opera- tion and operating characteris-... - Page 36 Fig. 30а. Instruments and controls (in the design variant)
- Page 37 Fig. 30b. Instruments and controls (in the design variant)
- Page 38 11 – dipped beam adjuster (See ATTENTION! After engine start the electronic sta- bility control function (ESC) and anti- the section «Light engineering con- For brake pads not to be skidding function are activated auto- trol module and headlight adjuster»). adhered and frozen to drums matically.
-
Page 39: Instrument Cluster
INSTRUMENT CLUSTER 1 – tachometer. It indicates the speed of the engine shaft (x1000 If the tachometer needle is in the area of red scale it warns of in- creased engine speed. To prevent damage to the engine its maximum speed is limited with electronic en- gine control system programme. - Page 40 buzzer indicate the lack of pressure onds to confirm good condition of With engine running, in the engine lubrication system. the alarm. If the alarm does not light switching of the LED is duplicated or it is turned on in the intermittent with short intermittent horn of the ATTENTION! buzzer.
- Page 41 12 – ESC (in the design variant). 15 – rear fog light indicator. It ton on the front panel of the instru- lights orange when switching on the ment cluster or press no buttons on Electronic Stability Program LED the understeering switch for more rear fog lights.
- Page 42 ing on the ignition and after engine indicator does not light up in the self- puter without displaying the outside start it goes out. test mode; this indicates a malfunc- temperature: – OverDrive indicator, ABS, trans- tion of the system, in this case, you ATTENTION! mission fault, tire fault, unclosed should contact any certified SSNE as...
-
Page 43: Liquid Crystal Display (Lcd)
LIQUID CRYSTAL DISPLAY (LCD) LCD indications for «Standard» and «Norm» LCD indication Numeric display: LCD display indication mode – top line displays current time, or minimal maximal (in the design variant) gear- Distance covered, km change prompting display mode, as well as automatic transmission dis- Daily run, km play mode;... - Page 44 LCD indications for «Luxe» (cont.) LCD indication LCD display indication mode minimal maximal Current time, hours: minutes Travelling time, hours: minutes Gear-change prompt Car-system voltage, V Current fuel rate, l/100 km Average fuel rate, l/100 km Fuel used, l Gear-change prompt tone on/off Residual fuel distance, km Automatic transmission operation Fuel level...
-
Page 45: Gearshift Prompter Function
GEARSHIFT PROMPTER LCD reading in «norm» version FUNCTION LCD reading LCD reading mode Gearshift prompter (GP) – func- minimal maximal tion that determines the necessity to Gearshift prompt change gear for higher or lower gear (for guarantee the engine most economy mode) and informs the Recommended gear shift indication driver of it. -
Page 46: Trip Computer Control (In The Design Variant)
TRIP COMPUTER CONTROL (in the design variant) Trip computer control buttons are located on the wiper lever and shown in Figure 33. Button 1 – reset of trip computer readings, gear-change prompt tone on/off. Button 2 (when pressing upper arrow key) – switching the selection mode of trip computer's functions Fig. - Page 47 when the ignition is on. Remember If necessary, adjust dipped beam with the automatic control system by turning the handle to align the of exterior lighting on (exterior that when the lighting system works handle mark with one of the marks light switch is in position –...
-
Page 48: Light Alarm Switch
LIGHT ALARM SWITCH I (Fig. 35) – neutral position. Dipped beam is on if headlight beam is switched on with the exterior light switch. II – left turn indicators are on. Non-fixed position. III – left turn indicators are on. Fixed position. - Page 49 matically. It depends on whether rain sensor sensitivity switch to posi- ATTENTION! there are raindrops on the wind- tion 0 (extreme left position). In this 1. To prevent damage, do not shield. mode the manual control of wiper turn on the windshield wiper with The cleaning system only works lever assembly to appropriate posi- the bonnet opened.
-
Page 50: Rain And Light Sensors
RAIN AND LIGHT SENSORS and then they will be switched on or off depending on the number of rain- drops on the windshield. In the design variant vehicles If the cleaning system has already are equipped with a combined rain been enabled, when switching on the and light sensor, which is located on ignition the wiper blades also make... - Page 51 In case you stay the wiper switch wipers in dry window always use the window washer. lever not in the position I and switch 3. If wiper blades are frozen to the ignition off for more than 1 the window, before switching on minute, then after switching the igni- the wiper you should first switch tion on the wiper doesn’t work till the...
-
Page 52: Ignition Starter Switch
IGNITION STARTER SWITCH If the ignition is off and the key is left in the ignition switch, then when opening the driver's door the buzzer 0 (Fig. 38) – off. Fixed position. gives an intermittent horn, warning of The key is not removed. leaving the key in the ignition switch. -
Page 53: Gear-Change Lever In Manual Transmission
GEAR-CHANGE LEVER While driving, do not keep your IN MANUAL TRANSMISSION arm on the gear-change lever, this may result in damage and premature wear of gear-change parts (make no effort to the gear- Chart for gear-change lever posi- change lever). tions in manual transmission is applied on the top of its handle (Fig. -
Page 54: Gear-Change Lever In Automatic Transmission (In The Design Variant)
GEAR-CHANGE LEVER IN AUTO- MATIC TRANSMISSION (in the design variant) Switching automatic transmission (AT) modes is carried out by moving the gear-change lever in the longitu- dinal direction (Fig. 40a), depending on the desired direction of travel. To unlock the lever from positions R, N, D, 2 press lock button 1 on the gear- Fig. -
Page 55: Ventilation And Heating System Control
when overtaking, you need to press VENTILATION AND HEATING the accelerator pedal. This will SYSTEM CONTROL increase engine speed. If the press is intense enough, the gearbox will be In the design the vehicle can be automatically switched to lower gear equipped either with heating and to be selected depending on the cur- ventilation system or with climate... - Page 56 mum speed of air supply in the pas- nal air supply into the passenger through the windshield demister senger compartment, position «4» – compartment is locked (recirculation nozzle and the side window demister mode). This mode can be used when nozzle.
- Page 57 Fig. 42. The direction of air flow out of deflectors and ducts...
-
Page 58: Ventilation And Heating Modes
VENTILATION AND HEATING Prevention of weeping Cleaning the windows of snow MODES and ice When air moisture is high, for example, during periods of heavy Interior ventilation For quick cleaning of the wind- rain, car windows can weep. To pre- shield and front door windows of For interior ventilation (supply of vent weeping of the windshield and... - Page 59 Quick heating of passenger has reached the desired level, it is compartment recommended to do the following: – by rotating handle 2 set the For quick heating of passenger desired temperature; compartment it is recommended to – handle 4 should be set to posi- set the ventilation and heating sys- tion tem control unit to the following posi-...
- Page 60 tion and heating system, are also ing all the operation of the air condi- In the position of handle 4 valid for the climatic system. In addi- tioner. at least one of nozzles 1 and 4 tion, the climatic system can provide 4.
- Page 61 ATTENTION! Maximal cooling quality becomes poor because of people's breathing. This can lead The recirculation mode can be Used for the most intensive air to drowse of the driver and pas- turned on only for a short time, as sengers. cooling in the passenger compart- fresh air does not enter the pas- ment in hot weather or after long...
- Page 62 heating, turn off the air condi- ically maintain interior air tempera- – turn on the air conditioner (green LED will light tioner. Otherwise, it may lead to ture you should turn on the air condi- – at the same time enable maxi- damage or total failure of the en- tioner (see above «Interior air condi- mum air heating mode;...
-
Page 63: Multimedia System Use Characteristics And Features
pressure. Trouble-shooting in the MULTIMEDIA SYSTEM USE system is not allowed. Contact any CHARACTERISTICS AND FEATURES certified SSNEs. In the variant design the vehicle Windshield electric heating is equipped with multimedia system (WEH) (hereinafter MMS), which consists of: – control unit; In the design variant the vehicle –... - Page 64 If press briefly: In Contacts you may place a call or answer an in- coming call. In other cases you may move to «Phone». If press and hold: In Contacts you may place a call or answer an in- coming call. In other cases you may move to the phonebook.
- Page 65 7 – move to play back the next cies radio station 18 – mode selection: «Radio»/ file (audio, video, images) or band switching/move to «Radio received/receive local/remote radio station. settings». radio stations (AF). If press briefly In the lists of files played (video, If press briefly: in the «Radio»...
- Page 66 1 (see Fig. 45а). To switch off the system press and hold button 1 for more than two seconds. To restart hold button 1 until the LADA logo appears on the display. You may control the multimedia system with the buttons on the con- trol panel, as well as with the touch buttons on the display (Fig.
- Page 67 5 – buttons for stations memo- rized; 6 – FM2/FM3/FM4 – buttons to turn on the FM2-FM4 band; 7 – button to switch stereo- mono mode; 8 – FM1 – button to turn on the FM1 band; 9 – AM – button to turn on the AM band;...
- Page 68 Buttons AM, FM1, FM2-FM4 (see Fig. 45d) allow you to select the desired operating range: – button FM1 switches the radio receiver in the range of (65 – 74) MHz; – button FM2-FM4 switches the radio receiver in the range of (87.5 – 108) MHz;...
- Page 69 tions the MMS will be automatically Searches for stations by type of – connect the SD-card when the switched to listening mode to the broadcasting programmes USB-stick is not connected; first memorized radio station. – connect the USB-stick when the To stop the auto memorizing To select the type of programmes SD-card is not connected;...
- Page 70 audio file allows you to play back this file; also, you may use the repeat play button (button 7); – pressing the audio playback button (button 6) allows you to play back all the audio files available in the list (10); –...
- Page 71 and then press the return button (button 2), you will go to the main menu, and the pause indication (indication 8) will appear on the Audio button (button 4, see Fig. 45b). This mode allows you to con- tinue playing of the audio file from the position that was paused.
- Page 72 VIDEO mode Switching to the video playback mode can be carried out in the fol- lowing ways: – connect the SD-card (with no audio files), when the USB-stick is not connected; – connect the USB-stick (with no audio files), when the SD-card is not connected;...
- Page 73 file; also, you may use the repeat play button (button 6); – pressing the video playback button (button 6) allows you to play back all the video files available in the list (9); – selecting a folder by a single click on the folder icon in the list (9), and then pressing the video...
- Page 74 7 –4 I button to play back the next video file; 8 – full-screen play button; 9 – button to move to the Video setting window; 10 – button to move to the Audio setting menu; 11 – move to the next folder to play back video files;...
- Page 75 4– button to select the USB card as the source; 5 – playback button; 6 – repeat play button; 7 – random play button; 8 – scan play button; 9 – list of files with the cursor on the selected file, sorted in alphabeti- cal order.
- Page 76 2 – I button to play back the previous image file; 3 – II /4 stop /play (pause) but- ton. If you press the button the posi- tion played will be memorized. And when you return to this page the playback will continue from the posi- tion memorized;...
- Page 77 7 – button to move to the phone- book; 8 – button to redial a call (redial button); 9 – button to delete the last en- tered character (delete button); 10 – subscriber's number display field; 11 – dialling keypad. Press button 6 (Fig.
- Page 78 Fig. 45m. Phonebook window set) on the control panel; to end a the phone book (Fig. 45m), then the call, press button 8. phone connection window will appear (see Fig. 45l). To move to the phonebook, press To call one of the contact num- button 7 (see Fig.
- Page 79 Playbacking audio files via the phone In Bluetooth mode, if «A2DP» pro- tocol is supported by the phone, you may listen to audio files played on the cellular phone via the car audio system. 1 – button to return to the file se- lection menu;...
- Page 80 INFO mode The screen displays information about versions of the software used in the product. 1 – button to move to the main menu. When press button 9 (INFO) on the control panel (see Fig. 45а) you may move to «Info» mode. Fig.
- Page 81 SETTINGS mode 1 – button to move to the main menu; 2 – button to move to the general settings menu; 3 – button to move to the Phone setting menu; 4 – button to move to the Audio setting menu; 5 –...
- Page 82 General settings mode 1 – button to return to the previ- ous menu; 2 – button to set a screen saver; 3 – factory setting button; 4 – indicator and language setting buttons; 5 – indicator and date setting but- tons;...
- Page 83 Display setting mode 1 – button to return to the previ- ous menu; 2 – buttons to switch the display light mode; 3 – buttons to adjust display im- age settings; 4 – button to move to the touch screen calibration mode. For better readability of the dis- play, depending on time of day, you may set display operation modes:...
- Page 84 Fig. 45s. Audio setting window Audio setting mode To set audio quality you need, use preset-tuning buttons 2 or equalizer 1 – button to return to the previ- buttons 4 after turning on the cus- ous menu; tom setting with button 3 (Fig. 45s). 2 –...
- Page 85 Receiving RDS-stations is avail- able in FM2 (87-108) MHz. Availability of RDS functions depends on a spe- cific RDS station. Switching on alternative frequency receive mode If a signal level of the received sta- tion is poor (for example, when mov- ing from one area to another), the RDS system is automatically tuned to other RDS stations with a high signal...
- Page 86 Enabling traffic control information receive mode Press button TP to enable the dis- play mode of receiving messages about traffic control. The Radio win- dow will show symbol TP (see Fig. 45d). When receiving a message on the traffic control it will be repainted in a lighter colour.
- Page 87 Image view settings 1 – button to return to the previ- ous menu; 2 – slider to set time for one frame display; 3 – buttons to switch on the effect of jump between frames; 4 – image display setting buttons. By selecting one of the buttons 4 (Fig.
- Page 88 windows: main menu, phone, radio, audio, video, images, settings, infor- mation. Button Automatic connection is designed to restore phone connec- tion, after losing Bluetooth-signal from the mobile device. Button Auto reply is designed for automatic receiving of an incoming call. The MMS at the same time can work only with one phone.
- Page 89 The list of types of radio programs transmitted by the RDS system Search function parameters of the receiver when the RDS modes are on No. Program type Display image 1 News NEWS When you activate the RDS mode (A F, 2 Current affairs CURRENT AFFAIRS PTY light on the display) the auto search is...
- Page 90 Video conversion instructions To convert video files it is recom- mended to use Free-make Video Converter, available for download at http:/www.freemake.com/ Video parameters should be the following: – frame width should be 320 pix- els, frame height should be 240 pix- els.
-
Page 91: Vehicle Operation
Safety precautions when VEHICLE OPERATION driving Do not exceed the vehicle load specified in the manual. Overloading causes damage to suspension com- ponents, premature tire wear and NUMBER PLATE INSTALLATION loss of stability of the vehicle. Do not drive fast on roads with Front number plate 4 (Fig. - Page 92 To keep the engine from very high The vehicle is equipped with the able connection. Note that corrosion clutch cable with the clutch lining of terminals and clamps as well as speed when driving change gears in wear compensation mechanism, due their poor connection cause poor time.
- Page 93 not leave the key in the ignition – driving modes – sudden start- 3. Check levels of coolant, brake ing, including starting with the hand- switch for a long time. and washer fluids and if necessary, brake on, turn while skidding front Do not open the doors sharply.
- Page 94 tion. Correct driving position – pump has time to raise the pressure in 5. If the second start attempt was the driver bears on the seat back the fuel rail to the working value. unsuccessful, the third attempt tightly enough, his/her legs are should be made not earlier than in 40 ATTENTION! seconds with the accelerator pedal...
- Page 95 Operation features of the vehicle misfires in the engine cylinders high operating temperature, with the fuel injection system (external manifestations – engine that's why it is strictly prohibited conks and jerks when driving), as to place and store flammable If «Engine» alarm lights (see the unburned fuel in the cylinders will materials and objects (cloth, section «Instrument cluster») with...
-
Page 96: Features Of Vehicle Operation With Daytime Running Lights
steering box you should control FEATURES OF VEHICLE VEHICLE DRIVING the rotation speed of the steering OPERATION WITH DAYTIME wheel in extreme positions and RUNNING LIGHTS Start driving the vehicle only after apply no force when the rack cleaning windows of ice, snow and rests against the limiter. - Page 97 Driving technique of front drive Also, fuel consumption is increa- long driving on wet roads when water vehicle is specific and slightly differ- sed when towing a trailer. In addition, enters the brake system, brake ent from driving technique of rear when towing the trailer the loads on smoothly several times to dry discs, drive vehicle, especially when cor-...
- Page 98 Warning the wiper blades are not completely steer in the direction of skid and thawed. align the vehicle by operating the Do not overtake in rain, if water When driving in snow, if the wiper steering wheel and the gas pedal cloud made with wheels of the cannot remove snow from the wind- smoothly.
-
Page 99: Braking And Parking
brake fluid boiling temperature BRAKING AND PARKING Sitting down behind the wheel of the vehicle for the first time, check decreases. Boiling the brake fluid the brakes at moderate speeds to Warning in the wheel cylinders means a acquire first skill of braking. complete failure of the service Learn how to brake smoothly, brakes –... - Page 100 with the parking brake on, if not dry modes of braking and even in case of switching on the ignition, it means the brakes by smooth braking when failure of the main function of the ABS a failure of ABS function. In this driving to the parking lot.
-
Page 101: Vehicle Towing
tion and performs the antiskid func- HHC triggering is accompanied by tion that optimizes wheel slipping specific noise of actuators. when starting off and picking up due HHC doesn’t work when using the to snubbing the wheels and, if neces- parking brake or ESC malfunction. -
Page 102: Defensive Parking System
DEFENSIVE PARKING SYSTEM ATTENTION! Parking system is an auxiliary In the design variant vehicles system that helps the driver to are equipped with the parktronic judge the distance to the detect- defensive parking system. Due to ed obstacle. this system you may avoid minor Backing run is considered to be a accidents that involve material costs. -
Page 103: Automatic Transmission Driving Features
– if the left sensor is faulty (in the terminals of which are near the AUTOMATIC TRANSMISSION direction of travel), the system indi- left rear lamp. DRIVING FEATURES cates a faulty sensor with a low Note. Tow hitch fitted to the vehicle chime;... - Page 104 Warning matically switched to lower gear to ATTENTION! be selected depending on the cur- If it is necessary to carry out Long wheel slip when starting rent speed of the vehicle and press off or picking up could cause seri- the work on the vehicle with the intensity.
- Page 105 D, if necessary, to drive in economy Short stop If short stop on the grade is nec- mode in country. Overdrive gear will essary (drive control in position D) At short stop, for example, at traf- not be turned on when the engine hold on the vehicle with the engine fic lights, it is not necessarily to move has not been warmed up to operat-...
- Page 106 vehicle with the service or parking Unlocking the gear-change port of the leading wheels or by the lever in the gearbox method of complete loading of the brake. Conversely, on high grade vehicle to a vehicle carrier with a when driving in reverse (the gear- When the storage battery is dis- platform.
-
Page 107: Technical Maintenance And Operating Repair Of The Vehicle
TECHNICAL ENGINE LUBRICATION SYSTEM MAINTENANCE AND OPERATING REPAIR OF THE VEHICLE Fig. 49b. Checking the oil level in the 16-valve engine case Fig. 49а. Checking the oil level This section provides a brief de- in the 8-valve engine case scription of some kinds of works on technical maintenance and operat- ing repair of the vehicle. -
Page 108: Air Intake
level properly you should insert indi- GEARBOX cator 1 to its location hole until it stops. Manual transmission ATTENTION! Check the oil level in the mecha- Do not exceed the oil level in nical transmission in the cooled the engine case above MAX mark gearbox. -
Page 109: Engine Cooling System
ENGINE COOLING SYSTEM BRAKING SYSTEM Check the coolant level in expan- sion chamber 1 (Fig. 51) only in the cold engine. The coolant level must be between MIN and MAX marks applied on the housing of the expan- sion chamber, which is made of translucent material providing visual control of the flied level. -
Page 110: Window Washer System
brake shoe linings. Fluid level lower- WINDOW WASHER SYSTEM ing to MIN mark indirectly indicates their extreme wear. In this case it is The windshield and rear window necessary to check the state of lin- washer reservoir (Fig. 53) should ings, and it is not necessary to top up always be filled with window-washer the brake fluid in the reservoir,... -
Page 111: Accumulator Battery
example, with remains of insects ACCUMULATOR BATTERY (adhering to the window), road salt, elements of the road surface To follow the level of electrolyte in you should clean outer face of the battery; electrolyte level must be window and blade with a soft between marks MIN and МАХ... -
Page 112: Tires And Wheels
You use vehicle at low ambient tion of the terminals and clamps, as TIRES AND WHEELS well as loose connections cause arc- temperatures. When the temperature ing in the place of unreliable contact Periodically check tire air pres- decreases, battery capacity decrea- sure with pressure gage. - Page 113 the pressure in one or several tires. detect or indicate low pressure in Continuation of driving with such a the tires as it is aimed for. The low pressure in the tires could lead to failure in TPMS system could be their overheating and mechanical caused by different reasons destruction.
- Page 114 Ta b l e 2 Acceptable typical sizes of tires, wheels and air pressure in tires Air pressure in tires, front / rear, Wheel dimensions Tire dimensions MPa (kgf / cm Modification and version with load and of the vehicle rim width offset partial...
-
Page 115: Remote Control Battery Replacement
Fig. 57. Packing the spare wheel Fig. 58. Replacing the remote control battery REMOTE CONTROL BATTERY – remove screw 2 (Fig. 58) from FUSE PLUG’S REPLACEMENT the side of the case, opposite to the REPLACEMENT When replacing fuse plugs and control buttons;... - Page 116 Ta b l e 3 Electrical circuits protected by fuse plugs, placed at the fuse and relay block of interior the «norm», «luxe»* version vehicle Fuse No Protected circuit Current force 15А Ignition coil Fuse injectors Engine management system control unit 30 А...
- Page 117 Extension of table 3 Fuse No Current force Protected circuit 10А Rear window washer Rear window wiper 5А Driver’s door module 10А Main beam, headlight RH 10А Main beam, headlight LH 10А Right fog light 10А Left fog light 15А Front seats heating 5А...
- Page 118 Extension of table 3 Fuse No Current force Protected circuit 50А Automated transmission controller 30А Heater electric fan Climate unit automatic control system controller 25А Rear seat heating * The specified set of fuses for high line version «luxe» (depending on options’ set some fuses from this set can be not used in other versions). Ta b l e 4 Electrical circuits protected by fuse plugs, placed at the fuse and relay block of interior the «standard»...
- Page 119 Extension of table 4 Fuse No Protected circuit Current force 7,5А Mass airflow sensor/pressure sensor Oxygen sensor 7,5А Turn indicators 5А Right board tail lights 5А Left board tail lights Lighted instruments and keys Number-plate light Luggage compartment light Side glove box light 5А...
- Page 120 Extension of table 4 Fuse No Current force Protected circuit 20А Windscreen washer 7,5А A/C compressor clutch Climate unit automatic control sustem controller 7,5А Brake lights Interior light 25А Anti-lock braking system control unit 5А Instrument cluster Data link connector Body electronics central box 10А...
- Page 121 Ta b l e 5 Relay, placed at the fuse and relay block of interior the «norm» and «luxe»* version vehicle Relay Relay No Switched circuit output capacity 50А Discharging relay 30А Starter additional relay 40А Cooler electric fan relay 30А...
- Page 122 Ta b l e 6 Relay, placed at the fuse and relay block of interior the «standard» version vehicle Relay Relay No Switched circuit output capacity 50А Discharging relay 30А Starter additional relay 30А Wiper relay 30А Cooler electric fan relay 30А...
- Page 123 Fig. 59a. Fuse block and salon relay...
- Page 124 Battery Fig. 59b. Opening the fuse box Fuse block (without cover) Fig. 60. Fuse block of the engine compartment To access the fuse box with fuse variant) and for binding of the wires. plugs (Fig. 59b) pull the upper left In case of repeated failure of the edge of the cover and release the left fuse to spot and eliminate the cause...
-
Page 125: Bulb Replacement
BULB REPLACEMENT For normal operation of the light- ing and light warning system, use the bulbs as defined in Annex 2. ATTENTION! Before replacing any bulb, make sure that the appropriate signalling and lighting unit is turned off. Fig. 61. Headlight unit Headlight unit Dipped light bulb replacement: Main beam bulb replacement:... - Page 126 – remove the socket with the bulb from the headlight housing; – turn the bulb counterclockwise until it stops, by pressing it; – remove the bulb from the socket. The installation of the new bulb should be carried out in reverse or- der.
- Page 127 Interior roof lighting To replace the bulb in the interior roof light you should remove head- light glass 1 (Fig. 65) from the light frame. The roof light is held with metal retaining spring and hooks in the back of the frame seat. To re- move the roof light you should insert a flat screwdriver into the chase on the right side of the roof light (on the...
- Page 128 Fig. 67. Luggage compartment light and side glove box light Fig. 65. Interior roof lighting Luggage compartment light and side glove box light To replace bulb 3 (Fig. 67) in the luggage compartment light and side glove box light you should remove the light from the sear, for this insert the screwdriver into chase 2 from the right side of the light and carefully...
-
Page 129: Body
Fog light BODY Body is the basic and the most Remove the inoperative bulb from the fog light (Fig. 68). Turn socket 1 costly component of the vehicle. It is counterclockwise and remove it from made of advanced materials and the reflector, disconnect the terminal protected against corrosion with block from the bulb. - Page 130 soft sponge and car shampoos that form spots. In winter, after washing ATTENTION! create protective films against the the vehicle in a warm room before The manufacturer of the prod- driving out clean the body and door environment influence. ucts ensures that no signs of per- seals dry, as water droplets freezing foration corrosion are on the vehi- ATTENTION!
- Page 131 To improve corrosion resistance coatings in a timely manner and body with corrosion products during restore damaged areas. wet with dew. Red pimple may be of the body, closed box-shaped cav- To keep gloss of painted surfaces removed with 5% solution of oxalic ities of sills, side members, cross of the vehicle (especially for vehicles acid and detergent followed by...
-
Page 132: Exterior Light And Exterior Light Alarm Instruments
EXTERIOR LIGHT AND EXTERIOR Removing condensate water requi- VEHICLE STORAGE res no special measures. The disap- LIGHT ALARM INSTRUMENTS In operation, pay great attention pearance of condensate water to the conditions of storage of the should occur during operation of the Vehicles are equipped with lights vehicle. -
Page 133: Vehicle Technical Specification
VEHICLE TECHNICAL SPECIFICATION Ta b l e 8 Main parameters and characteristics of 2192 «hatchback» vehicle Norm Luxe Version Engine model 11186 21126 21126 21126 Transmission type МКП МКП МКП АКП Number of doors Number of seats, pers. 5 (first line – 2, second line – 3) Number of seats in the fully folded rear seats, pers. - Page 134 Extension of table 8 Norm Luxe Version Engine model 11186 21126 21126 21126 Unladen weight, kg: – Min, kg 1005 – Max, kg 1065 Gross Vehicle Weight Rating (GVWR), kg 1540 Road clearance at full load under the engine not less 160 case, mm Road clearance at full load under the transmission not less...
- Page 135 Fig. 69. Overall (reference) dimensions of «hatchback» vehicle...
-
Page 136: Main Parameters And Character- Istics Of 2194 «Station Wagon
Ta b l e 9 Main parameters and characteristics of 2194 «station wagon» vehicle Version Luxe Cross Norm Cross Norm Luxe Engine model 21126 21126 11186 11186 21126 21126 21126 Transmission type МКП МКП МКП МКП МКП МКП АКП Number of doors Number of seats, pers. - Page 137 Extension of table 9 Version Luxe Cross Norm Cross Norm Luxe Engine model 21126 21126 11186 11186 21126 21126 21126 Unladen weight, kg – Min, kg 1025 – Max, kg 1085 Gross Vehicle Weight Rating (GVWR), kg 1560 Road clearance at full load under the engine not less 182 not less 160 case, mm...
- Page 138 Fig. 70. Overall (reference) dimensions of «station wagon» vehicle * For the version with roof rails.
- Page 139 Fig. 71. Overall (reference) dimensions of vehicle 2194 Cross * For the version with roof rails.
-
Page 140: Filling Values
Ta b l e 1 0 Filling values, l Fuel tank Engine lubrication system with MT: – dry engine fuelling – oil and filter replacement Engine lubrication system with AT: – dry engine fuelling – oil and filter replacement Engine cooling and interior heating system* 7,84 Manual transmission Automatic transmission... -
Page 141: Passport Details
PASSPORT DETAILS last seven numbers – chassis num- ber, for passenger car it corresponds to body number. According to techni- cal requirements «On wheeled trans- port safety» model year is defined as a conventional year indicated by the manufacturer. In JSC AVTOVAZ the model year starts from July, 1 of cal- endar year. - Page 142 Fig. 72. Vehicle data. Installation site of name plate – center pillar, RH...
-
Page 143: Appendices
A P P E N D I C E S A p p e n d i x 1 FUELS AND LUBRICATIONS APPROVED AND RECOMMENDED FOR USE OF LADA KALINA AND ITS VERSIONS MOTOR GASOLINES Ta b l e 1... - Page 144 Ta b l e 2 ENGINE OIL Based on the table below, determine the level of quality If necessary – change the oil. For this purpose refer to the and oil viscosity grade, prescribed for your vehicle in accor- authorized service center. dance with the existing operating temperature range.
-
Page 145: Vehicle Bulbs
Appendix 2 VEHICLE BULBS Installation site Bulb category Headlight* – main beam bulb – dipped light bulb Н7 – direction indicator bulb РY21W –daytime running light and tail light bulb W21/5W Rear light* – stop signal bulb P21W – backing light bulb (for «hatchback» vehicles) R10 W –... -
Page 146: Heating Plugs
A p p e n d i x 3 HEATING PLUGS* Engine type Spark plug type 8-valve engine А17ДВРМ JSC «Robert Bosch Saratov» LR15YC-1 BRISK WR7DCX Bosch 16-valve engine АУ17ДВРМ JSC «Robert Bosch Saratov» DR15YC-1 BRISK FR7DCU Bosch *Spark plug gap should be in the range of 1...1.15 mm. A p p e n d i x 4 USER’S MANUAL FOR RADIO AND AUDIO FILE PLAYER (optional design) - Page 147 1. Description of radio 1.1 Appearance 1.1.1 Fig.1 shows appearance of outside panel of the radio and sound file player 2192-7900010-00 is pre- sented. 1.2 Description of control panel 1.2.1 Control panel with relevant figures on Fig. 2 is described in Table 1.
- Page 148 Ta b l e 1 № Name of control device Symbol of control device Microphone SD memory card slot Sound off button MUTE Radio On/Off switch Multifunction button Rotary encoder switch, multifunction Display Multifunction button Multifunction button DISP Phone switch, accept incoming call USB Flash drive slot Reset button.
- Page 149 1.3 Description of display Ta b l e 2 Setting Parameter Appearance of display is present- ed on Fig. 3: Clock time After reset it will be automatically synchronized by CT 1 – folder number indicator; 2 – track played indicator; СТ...
- Page 150 1.4.2 To remove a memory card, push it. The card will come outside. 1.5 Inserting and removing USB flash drive 1.5.1 To insert USB flash drive, put it into USB Flash drive slot (Fig. 2, pos. 11). 1.5.2 To remove USB flash drive, it is necessary to quit sound file play- ing mode and remove it from USB Flash drive slot with no force applied.
- Page 151 Do not connect radio in vehi- on, the screen will show a welcome than 10 days after battery termi- cles with other voltage values. message «LADA KALINA». nals were disconnected. 2.1.6 USB Flash drive slot is designed to connect USB Flash card, 2.3 Sound settings...
- Page 152 3. Radio mode – 1 level for VHF range (VHF); – 1st mode. Automatic search for – 1 level for FMAS range (com- next/previous station. To do this 3.1 Radio activation bined VHF-FM range); press one of the buttons – 3 levels for FM range (FM1- (Fig.
- Page 153 16, 17, 18, 19, 21. Until the num- 3.6 RDS function artist name (selection is made by short pressing of DISP button (pos. ber of cell with stored radio station 9). If the information is larger than 16 appears on the display and audio 3.6.1 RDS (Radio Data System) is symbols, the line will be cycled.
- Page 154 (pos. 17) up to appearing the mes- Ta b l e 3 sage «FOLDER REPEAT». The sym- RDS function Description bol RPT (Fig. 3, pos. 10) will be active and indicator FOLDER (Fig. 3, pos. 1) – Activation of alternative frequency (AF) makes the receiver to search blinking.
- Page 155 4.5 MUTE mode 5.2 Connection of telephone 5.2.5. To connect to audio system with Bluetooth® function activate Bluetooth® function on the 4.5.1. When pressing the button phone. If your phone is discoverable, ATTENTION! MUTE (Fig. 2, pos. 3) there is corre- turn on this mode.
- Page 156 5.2.9. The correct functioning is 5.4.4. During phone call it is pos- – Start player on the phone (not all not guaranteed with a cell phone with sible: cell phones support this function). two and more sim-cards. It is recom- –...
- Page 157 pressing and holding one of the but- Note. If user does not make any – turn on/off the function of radio adjustments during 5 minutes, the setting stations seeking based on the set tons 1–6 till the number is displayed mode turns off automatically.
- Page 158 Ta b l e 4 Occurrence Typical place of occurrence Cause Liquid spilled on unit (inside it) Flow marks from outside and inside of Violation of operation rules for unit unit. Smoke fume Smoke fume Surface of unit, inside the part Incorrect connection, downfall, unauthorized repair, ingress of liquid into the unit Breaking of seals, geometry or initial...
- Page 159 The unit doesn't get started, hangs up FLASH memory chip Software is damaged. User's attempt to at LADA logo, white screen reprogram The display is broken; there are Unit surface Mechanical action (impacts, downfalls, etc.)
- Page 160 End of Table 4 Occurrence Typical place of occurrence Cause The screen does not respond to Display Mechanical action (impacts, downfalls, etc.) pressing Distorted colors (red, green and simi- Display Mechanical action (impacts, downfalls, etc.) lar colors of the screen) No connection to the phone, unstable Individual incompatibility of phone and unit operation of the Bluetooth function...
- Page 161 Appendix 4a Appendix 4b (reference) (reference) Search parameters List of radio broadcasts transmitted within RDS system with RDS modes № Program type Display image 1. When RDS modes are on (AF, PTY on display) automatic search is News NEWS done in accordance with selected Miscellanea VARIED mode.
- Page 162 Appendix 4d Appendix 4c (reference) (mandatory) Correct connection conditions Radio care 1. Only connection of USB devices Note. More files/folders on the stor- age – longer time of loading. It is recom- with 2.0 specification is possible. mended to use a storage, which contains 1.
- Page 163 Appendix 4e (mandatory) Fault Diagnosis Fault Remedy Make sure that supply circuit terminals are in good repair, not contami- Radio does not turn on nated. Make sure that radio supply voltage is 12 V on the terminal. Make sure the temperature in passenger compartment is within acceptable limits Make sure that Bluetooth function in mobile phone is on and tuned No Bluetooth connection between radio and mobile...
- Page 164 Appendix 4f (reference) List of abbreviations and conventions – List of Alterative Frequencies. Possibility of automated retuning of the radio, for example, in case of poor signal receiving at some frequency band, to another frequency band which also transmits the signal of selected program.
- Page 165 Appendix 4g (reference) tions and allows to connect two What Bluetooth versions are Frequently asked questions supported? devices which can have objects Bluetooth standard has many ver- between them. The connection can What is stream audio- Blue- sions, which ensure certain func- be set in a range of about 10 meters.
- Page 166 Автомобиль LADA Kalina и его модификации Руководство по эксплуатации на английском языке (состояние на 16.02.2016 г.) Разработчики: Ю.В.Сабанов, Н.В.Казаков, А.В.Мингачев Художник Е.И.Брейкин Корректор Н.С.Фомина Компьютерная верстка Т.В.Лисина Формат 60х90 . Объем 10,25 п.л. Заказ 196. Тираж 339. Отпечатано ООО «Двор печатный АВТОВАЗ». Март 2016 г.
- Page 168 21920-3902012-30 АНГЛИЙСКИЙ ЯЗЫК...
Need help?
Do you have a question about the Kalina and is the answer not in the manual?
Questions and answers