Table of Contents
Advertisement
Advertisement
Table of Contents

Related Manuals for VeriFone MX 880


Summary of Contents for VeriFone MX 880
- Page 1 MX 800 Series Installation Guide...
- Page 2 MX 800 S ERIES NSTALLATION UIDE...
- Page 3 ID, Electronic Journal On-site, Ruby Card, MX870, MX860, MX850, MX830, Omni, Verix, ZONTALK, VeriTalk, VeriShield, TXO, and VisualPayments Suite are trademarks of VeriFone, Inc. in the U.S. and/or other countries. All other trademarks or brand names are the properties of their respective holders.
- Page 4 MX 800 S ERIES NSTALLATION UIDE...
-
Page 5: Table Of Contents
CONTENTS ........1 RE FA C E Intended Audience . - Page 6 H A PT ER Specifications Terminal Specifications ......... . . 25 PINpad Security Introduction.
-
Page 7: Preface
REFACE This guide is your primary source of information for setting up and installing the ™ ™ ™ ™ MX 800 Series terminals, the MX 880 , MX 870 , MX 860 , MX 850 , and MX ™ Intended... -
Page 8: Conventions Used In This Document
Conventions The following table describes the conventions used: Used in This Table 1 Document Conventions Document Convention Meaning Text in blue indicates terms that are cross referenced. Blue Courier font is used when specifying text that you would enter at Courier a command prompt. -
Page 9: Features
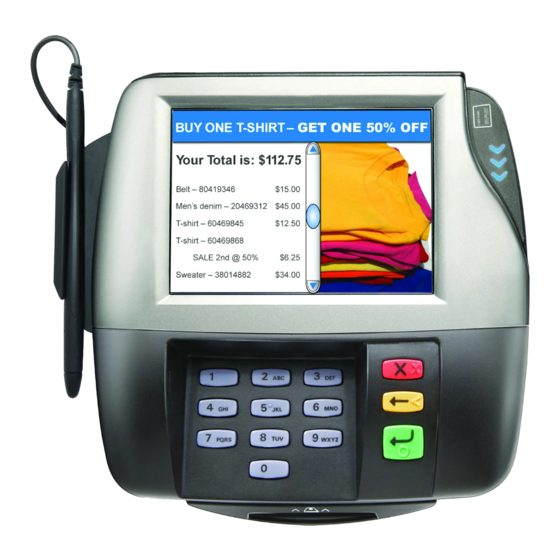
(RFID) based on ISO 14443 standards. Display Features MX 880 The MX 880 is a color 1/4 VGA payment device with a 5.7-inch display, touch screen, and tactile keypad. Its chemically hardened glass screen resists scratches and can be cleaned with normal glass cleaner. -
Page 10: Features And Benefits
MX 860 The MX 860 has a 4.3-inch color display, touch screen, and numeric keypad. MX 850 The MX 850 has a 3.5-inch color 1/4 VGA display, touch screen, and ATM-style screen-addressable keys. MX 830 The MX 830 has a 3.5-inch backlit, 16-shade grayscale display with optional touch screen and ATM-style screen-addressable keys. -
Page 11: Factory Options
Table 3 Features and Benefits (Continued) Features Benefit PCI PED-compliant PINpad Virtual PINpad complies with PCI regulations for improved security. High Resolution Display Supports sophisticated applications with full-motion video. Privacy Filter (Optional) PED-compliant privacy screen, protecting the consumer's PIN entry. Sophisticated security Includes 3DES encryption, Master Key/Session Key and Derived Unique Key Per Transaction (DUKPT) -
Page 12: Applications
Applications Standard payment applications are available from VeriFone to interface with most ECRs. Applications for the terminals are written using a C-based programming language. These programs can be downloaded directly from an ECR or a development PC using the MX 800 Series terminal System Mode. -
Page 13: Installation
HAPTER Installation This chapter describes the MX 800 Series installation procedures and includes connection examples. Installing the This section presents installation guidelines for the MX 800 Series terminal. Device Unpacking Open the shipping carton and carefully inspect the contents for possible tampering or shipping damage. - Page 14 To unpack the With the shipping carton right side up, open the top and remove all items from shipping carton the carton: • Terminal unit • Cable tie-down strap and screw • Power pack (power supply) • Multiport cable • Stylus and tether (optional) •...
-
Page 15: Selecting A Location
The MX 800 Series terminal is designed for indoor use only. Place the MX 800 Series terminal on a flat surface, such as a table or countertop, or mount it on a mounting stand supplied by VeriFone. Avoid areas with: •... -
Page 16: Pin Protection Measures
Attach the cable tie-down strap with the supplied screw. Align and seat the three pins on the top plate of the stand mount platform with the three key-hole slots on the bottom of the terminal (Figure Slide the terminal down until the unit seats securely. Figure 2 Aligning MX 800 Series Terminal with the Typical Mounting Plate... -
Page 17: Installing Optional Components
No action needed with stand needed is between PED and next in queue VeriFone also recommends instruction of the cardholder regarding safe PIN-entry. This can be done with a combination of: • Signage on the PED • Prompts on the display, possibly with a “click-through” screen •... -
Page 18: Installing I/O Modules
Route the multiport cable through the races in the countertop wedge or through the races underneath the wedge. Figure 4 Installing the Countertop Wedge Installing I/O Use the following steps to install optional I/O modules: Modules NOTE The retaining screws are captive, which means they do not actually separate from their seats, but only from the mounting hole. -
Page 19: Installing Msam Cards
Slide the module into place (Figure 6) and secure the retaining screw. Figure 6 Installing the Module Installing MSAM Follow the steps below to install smart cards (MSAM cards). Cards Often merchants are issued MSAM cards to run small applications, such as loyalty programs. - Page 20 Remove any previously installed MSAM card by sliding the card from the MSAM cardholder. Figure 8 Removing Installed MSAM Card Before inserting the MSAM card, position it with the card’s gold contacts facing the NOTE smart card reader end of the terminal. The cardholder connector base has a set of contacts and a notch on one corner to ensure the MSAM card is positioned correctly.
-
Page 21: Installing The Trimplate
The MX 800 Series terminal can be fitted with interchangeable trimplates to Trimplate customize the appearance of the terminal. Trimplate installation for the MX 880 and MX 870 is explained below. Trimplates for the MX 860, MX 850, and MX 830 are snapped straight down and are not rocked into place. - Page 22 • For the wide stylus holster, attach the holster to the terminal using two screws as shown in Figure 12. Figure 12 Attaching the Holster Plug the stylus cable into the top of the terminal. Figure 13 Plug in the Stylus Cable For the wide stylus, secure the cable into the two strain relief tabs on the underside of the holster.
-
Page 23: Installing The Privacy Shield
Installing the To install the privacy shield, insert one of the tabs on the shield into one of the Privacy Shield slots on the side of the keypad and snap into place. Figure 14 Installing the Privacy Shield Connecting the This section provides brief descriptions of possible MX 800 Series terminal device Device connections and the power pack connection. - Page 24 Figure 15 Sample Multiport Cable: Front and Rear CAUTION Improper installation or removal of the terminal connector may permanently damage the MX 800 Series terminal. The following precautions must be taken with multiport cables: • Do not force the terminal connector into place. •...
-
Page 25: Connecting Ecr In Tailgate Mode
Connecting ECR in To connect an ECR to the MX 800 Series terminal, insert the multiport cable plug Tailgate Mode into the bottom socket on the terminal and install the tie-down strap as shown in Figure 16. Then connect the RS485 tailgate connector to the desired 12-volt port on th back of the IBM register, such as 9A or 9B. -
Page 26: Connecting To A Host Pc
Ethernet cable, insert the LAN cable from the LAN router or hub into the Ethernet port on the multiport cable. Connecting to Connecting to a USB host or hub requires VeriFone USB cable (P/N 23741-02-R). USB Host or Hub To connect to a USB host or hub:... -
Page 27: Power Up With The Multiport Cable
Power Up with This section describes how to connect the MX 800 Series terminal to a power the Multiport source using the multiport cable. Cable NOTE If connected to an ECR, the MX 800 Series terminal can receive power from the ECR. -
Page 28: Calibrate Touch Screen
Plug the power pack into an indoor electrical power outlet (Figure 18). TIE-DOWN STRAP Figure 18 Power Pack Connection Calibrate The MX 800 Series terminal requires a touch screen calibration at the time of Touch Screen installation. The terminal should be powered on and allowed to stabilize at normal operating temperature;... -
Page 29: Maintenance
(MSR) should be cleaned on a regular basis using commercially available card reader cleaning cards. Smart Card Reader Do not attempt to clean the smart card reader. Doing so may void the warranty. For smart card reader service, contact your VeriFone distributor or service provider. MX 800 S ERIES... - Page 30 MX 800 S ERIES NSTALLATION UIDE...
-
Page 31: Specifications
Width: 192 mm (7.5 inches) • Depth: 71 mm (2.8 inches) • Weight MX 880: 2.17 lbs. (.98 kg) MX 870: 1.68 lbs. (.77 kg) MX 860: 1.62 lbs. (.74 kg) MX 850: 1.62 lbs. (.74 kg) MX 830: 1.62 lbs. (.74 kg) - Page 32 Shipping weight: 1.08 kg (2.38 lb); includes terminal, cable tie-down strap and screw, and the MX 800 Series Quick Installation Guide. MX 800 S ERIES NSTALLATION UIDE...
-
Page 33: Pinpad Security
Due to repeated targeting of pre-PED PINpads and payment terminals, VeriFone has developed the following PINpad Security Best Practices. These best practices first enable a retailer to determine if any existing terminals have been tampered... -
Page 34: Security Activities
Security The following table summarizes the PINpad Security Best Practices. Activities PINpad Security Best Practices Quick Reference Table Prevent Deter Prevention Detection Correction Administrative Activities Educate store employees about the techniques criminals use Update new employee training curriculum to include security awareness Instruct all employees to be vigilant in looking for... -
Page 35: Administrative Activities
Develop a response plan in advance in case a breach occurs Physical Activities Mount PINpads securely to counter Visually inspect terminals weekly Focus security cameras on terminals; maintain CCTV data logs for use later Call Law Enforcement if device tampering is found Technical Activities Encrypt data from the PINpad... - Page 36 Change the default PINpad password. Make sure the password for device access is not the original default password. If it is, have it changed, as default passwords become widely known. Contact your account executive if you need help changing this password.
-
Page 37: Physical Activities
Purchase from authorized sources. Obtain PINpads only from a manufacturer or manufacturer’s authorized partner. Unauthorized resellers, such as those that may be found online at sites such as eBay, may potentially sell devices that are already compromised, whether intentionally or unwittingly. Use authorized repair centers. -
Page 38: Technical Activities
the terminal manufacturer to determine the next steps. Continue to perform visual inspections weekly. Focus security camera’s on PINpads. Ensure security cameras have a clear line of sight to the PINpad terminals to aid investigators in the event of a security compromise. Images of data thieves and the methods they are using is invaluable information. -
Page 39: Reference Documents
2. Visa Fraud Prevention for merchants (http://merchants.visa.com/prevention/ main.jsp) 3. Payment Card Industry (PCI) Data Security Standard (https:// www.pcisecuritystandards.org) 4. Fuel Dispenser Payment Security Best Practices V1, VeriFone Inc, October 2008 5. VeriFone’s Retail Payment Security website (www.secureretailpayments.com). MX 800 S... - Page 40 MX 800 S ERIES NSTALLATION UIDE...
-
Page 41: Index
NDEX optional components selecting a location acronyms, Installation Guide stand mount applications trimplate audience, Installation Guide I/O modules connecting location for MX 800 Series ECR Tailgate Ethernet LAN multiport cables maintenance to Host PC cleaning a terminal to USB host or hub magnetic stripe reader contactless smart cards smart card reader... - Page 42 PIN protection measures stand mount for MX 800 Series power up with multiport cable trimplate, installing smart cards, contactless specifications, MX 800 Series USB connection MX 800 S ERIES NSTALLATION UIDE...
- Page 43 MX800 S ERIES NSTALLATION UIDE...
-
Page 44: Installation Guide
VeriFone, Inc. 2099 Gateway Place, Suite 600 San Jose, CA, 95110 USA Tel: 408-232-7800 www.verifone.com MX 800 Series Installation Guide...
Need help?
Do you have a question about the MX 880 and is the answer not in the manual?
Questions and answers