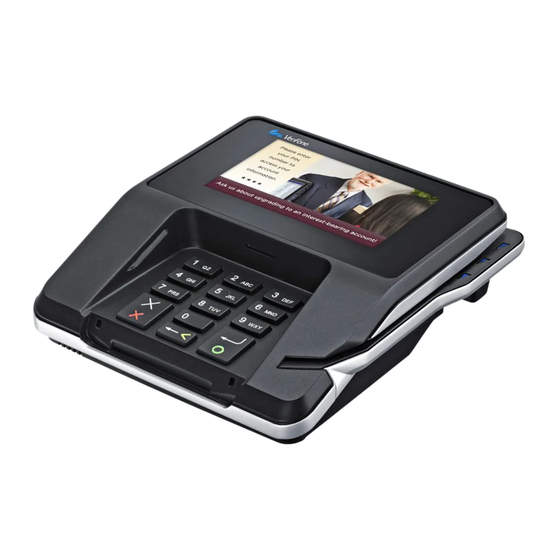
VeriFone MX 915 Installation Manual
Mx 900 series
Hide thumbs
Also See for MX 915:
- Reference manual (66 pages) ,
- Installation manual (44 pages) ,
- Manual (51 pages)
Table of Contents
Advertisement
Advertisement
Table of Contents

Related Manuals for VeriFone MX 915


Summary of Contents for VeriFone MX 915
- Page 1 MX 900 Series Inst allat ion Guide...
- Page 3 ID, Elect ronic Journal On-sit e, and Ruby Card are t rademarks of VeriFone, Inc. in t he U. S. and/ or ot her count ries. All ot her t rademarks or brand names are t he propert ies of t heir respect ive holders.
-
Page 5: Table Of Contents
Contents 1. Introduction ......Int ended Audience ......1 Document Organizat ion . - Page 6 MX 900 Series Installation Guide Cleaning t he Terminal ......25 Cleaning t he Display Screen ..... . 25 Magnet ic St ripe Cleaner.
-
Page 7: Introduction
This inst allat ion guide is your primary source of inf ormat ion f or set t ing up and ™ ™ inst alling t he MX 900 Series t erminals, t he MX 915 and MX 925 Intended Audience This guide is usef ul f or anyone inst alling and conf iguring t he MX 900 Series t erminals. -
Page 8: Acronyms, Abbreviations, And Definitions
MX 900 Series Installation Guide Acronyms, Abbreviations, and Definitions The f ollowing t able describes t he common acronyms, abbreviat ions, and def init ions used: Convention Meaning Buf f er Flush Int erval bit s per second Cyclic Redundancy Check File Aut hent icat ion Firmware Sof t ware in FLASH/ ROM... -
Page 9: Hardware Installation
ARDWARE NSTALLATION This chapt er describes t he MX 900 Series inst allat ion procedures and includes connect ion examples. Installing the Device This sect ion present s inst allat ion guidelines f or t he MX 900 Series t erminal. Unpacking Open t he shipping cart on and caref ully inspect t he cont ent s f or possible t ampering or shipping damage. -
Page 10: Selecting A Location
2. Place t he MX 900 Series t erminal on a f lat surf ace, such as a t able or count ert op, or mount it on a mount ing st and supplied by VeriFone. Avoid areas wit h: –... -
Page 11: Stand Mount
MX 900 Series Installation Guide Warning: Do not use t he MX 900 Series t erminal near wat er, including a bat ht ub, wash bowl, kit chen sink, or laundry t ub. Do not use in a wet basement or near a swimming pool. 3. -
Page 12: Wall Mount
MX 900 Series Installation Guide Wall Mount The MX 900 Series t erminal can be mount ed on a wall. To wall mount t he MX 900 Series t erminal: 1. Creat e a t emplat e of t he t hree key hole slot s on t he bot t om of t he MX 900 Series t erminal. -
Page 13: Pin Protection Measures
St and Needed bet ween PED and next in queue VeriFone also recommends inst ruct ion of t he cardholder regarding saf e PIN-ent ry. This can be done wit h a combinat ion of : Signage on t he PED ■... -
Page 14: Installing Optional Components
MX 900 Series Installation Guide Installing Optional Components This sect ion discusses t he inst allat ion procedures f or t he opt ional component s available f or t he MX 900 Series t erminal. Your t erminal may already have some of t hese opt ions, as modules can be inst alled at t he f act ory or in t he f ield. -
Page 15: Removing Or Installing The I/ O Module
MX 900 Series Installation Guide Removing or Installing the I/ O Module Use t he f ollowing st eps t o remove and inst all I/ O modules. Tabs Tabs Push down t he t wo t abs so t hat t he I/ O module can slide out . March 1, 2012... -
Page 16: Installing Msam Or Sd Cards
AUD, BERG ONLY , NO P132-601-00-R MX900-01 TAILGATE PWR, AUD, BERG W/ P132-602-00-R MX900-02 TAILGATE, ETH, USB OTG, MX 915 COM 2 PWR, AUD, POE, USB OTG, P132-603-00-R MX900-03 USB HOST, COM 1, COM 2 PWR, AUD, ETH, USB OTG, P132-604-00-R... - Page 17 MX 900 Series Installation Guide 3. Remove t he card compart ment door screw and rot at e t he door up and back t o access t he SD and MSAM cardholders. 4. Remove any previously inst alled MSAM or SD card by sliding t he card f rom t he cardholder.
- Page 18 MX 900 Series Installation Guide Note: Bef ore insert ing t he SD or MSAM card, posit ion it wit h t he card’s gold cont act s f acing t he smart card reader end of t he t erminal. The cardholder connect or base has a set of cont act s and a not ch on one corner t o ensure t he card is posit ioned correct ly.
- Page 19 MX 900 Series Installation Guide 6. Reinst all t he compart ment cover and door screw. March 1, 2012...
-
Page 20: Installing The Stylus And Holster
MX 900 Series Installation Guide Installing the Stylus and Holster Use t he f ollowing st eps t o inst all t he st ylus and it s holst er. 1. Turn t he MX 900 Series t erminal over and plug t he st ylus cable int o t he t op of t he t erminal and insert and t ight en screw. - Page 21 MX 900 Series Installation Guide 2. Locat e t he t wo screw holes f or at t aching t he holst er. Rout e t he st ylus cable t hrough a channel in t he holst er and t hen at t ach t he holst er using t he t wo screws.
-
Page 22: Removing The Privacy Shield
MX 900 Series Installation Guide Removing the Privacy Shield To remove t he privacy shield, pull on each side of t he privacy shield unt il it disconnect s f rom each of t he t hree connect ion point s. Warning: Once t he privacy shield is removed, it cannot be re-inst alled. -
Page 23: Connecting The Device
MX 900 Series Installation Guide Connecting the Device This sect ion provides brief descript ions of possible MX 900 Series t erminal device connect ions and t he power pack connect ion. For complet e inf ormat ion about inst alling and using an opt ional device, see t he user document at ion supplied wit h t hat device. -
Page 24: Multiport Cable
MX 900 Series Installation Guide Example of connect ions t o t he I/ O Module (I/ O Module 2 shown below) Berg COM2 Et hernet Power Audio Multiport Cable The MX 900 Series t erminals use a mult iport cabl e t o make t he f ollowing connect ions: ■... - Page 25 MX 900 Series Installation Guide Caution: Improper inst allat ion or removal of t he t erminal connect or may permanent ly damage t he MX 900 Series t erminal. The f oll owing precaut ions must be t aken wit h mult iport cables: Use t he Et hernet port on t he IO module only if t he mult iport cable is not ■...
-
Page 26: Connecting Ecr In Tailgate Mode
MX 900 Series Installation Guide Connecting ECR in Tailgate Mode To connect an ECR t o t he MX 900 Series t erminal, insert t he mult iport cable plug int o t he bot t om socket on t he t erminal and inst all t he ret ainer. Then connect t he RS485 t ailgat e connect or t o t he desired 12-volt port on t he back of t he IBM regist er, such as 9A or 9B. -
Page 27: Connecting To A Host Pc
Et hernet port on t he mult iport cable. Connecting to USB Host or Hub Connect ing t o a USB host or hub requires VeriFone USB cable (P/ N 23741-02-R). To connect t o a USB host or hub: 1. -
Page 28: Powering Up
MX 900 Series Installation Guide Powering up This sect ion describes how t o connect t he MX 900 Series t erminal t o a power source using t he mult iport cable or I/ O Module. Note: If connect ed t o an ECR, t he MX 900 Series t erminal can receive power f rom t he ECR. -
Page 29: Using The Multiport Cable
MX 900 Series Installation Guide Using the Multiport Cable 1. Make all ot her connect ions bef ore connect ing t he power pack. 2. Insert t he mult iport cable connect or int o t he port on t he back of t he t erminal and secure wit h t he Berg ret ainer. -
Page 30: Calibrate Touch Screen
MX 900 Series Installation Guide Calibrate Touch Screen The MX 900 Series t erminal requires a t ouch screen calibrat ion at t he t ime of inst allat ion. The t erminal should be powered on and allowed t o st abilize at normal operat ing t emperat ure;... -
Page 31: Maintenance
To clean t he t erminal, use a clean clot h slight ly dampened wit h wat er and a drop or t wo of mild soap. For st ubborn st ains, use alcohol or an alcohol-based cleaner. For best result s, use t he VeriFone Cleaning Kit (P/ N 02746-01). Note: Never use t hinner, t richloroet hylene, or ket one-based solvent s as t hey may det eriorat e plast ic or rubber part s. - Page 32 MX 900 Series Installation Guide March 1, 2012...
-
Page 33: Terminal Specificat Ions
• Depth: 225 mm (8.9 inches) MX 925 • Height: 56 mm (2.2 inches) • Width: 218 mm (8.6 inches) • Depth: 230 mm (9.1 inches) MX 915: 1.3 lbs. (0.6 kg) Weight MX 925: 2.0 lbs. (0.9 kg) March 1, 2012... - Page 34 Hardware Requirements Speaker/Buzzer Speakers for Razor (stereo line out) Speaker Mini Razor (Mono Line out) Display 4.3", 7" USB Display capable for ECR type applications - Dimmable LED's, HW must be capable of going into a hibernate or standby mode reducing power draw. Additional feature requirements are documented in the Green tab in this document Green Materials used must comply with all recycling as noted on the Green...
- Page 35 locking For Kiosk applciations there needs to be an optional locking mechanism mechanism that will put the unit into a state where it can only be unlocked by a manager or store administrator the unit if removed without releasing the lock prior to removal. This needs to be an "opt in"...
- Page 36 MX 900 Series Installation Guide March 1, 2012...
- Page 37 Federal Communication Commission Interference Statement This device complies with Part 15 of the FCC Rules. Operation is subject to the following two conditions: (1) This device may not cause harmful interference, and (2) this device must accept any interference received, including interference that may cause undesired operation.
- Page 38 NDEX disconnect ing 17 count ert op wedge 8 power up wit h 22 I/ O modules 9 I/ O modules 9 inst allat ion 8 acronyms, Inst allat ion Guide inst allat ion MSAM cards 10 I/ O modules 9 SD cards 10 audience, Inst allat ion Guide MSAM cards 10...
- Page 39 MX 900 Series Installation Guide March 1, 2012...
Need help?
Do you have a question about the MX 915 and is the answer not in the manual?
Questions and answers