Table of Contents
Advertisement
f i r e - p a r t s . c o m
WARNING:
If the information in this manual is
not followed exactly, fire or explosion may result
causing property damage, personal injury or loss of
life.
— Do not store or use gasoline or other flammable
vapors and liquids in the vicinity of this or any
other appliance.
— WHAT TO DO IF YOU SMELL GAS
· Do not try to light any appliance.
· Do not touch any electrical switch; do not use
any phone in your building.
· Immediately call your gas supplier from a
neighbor's phone. Follow the gas supplier's
instructions.
· If you cannot reach your gas supplier, call the
fire department.
— Installation and service must be performed by a
qualified installer, service agency or the gas
supplier.
Installer: Please leave this manual with the appliance owner for future reference
7116 Beatty Dr
Mission, BC V2V 6B4
Canada
Euro 65
Direct Vent
Gas Fireplace
For use with natural gas or
propane
U
SERS
I
NSTALLATION
O
PERATION &
M
This appliance may be installed in an af-
termarket permanently located, manufac-
tured home (USA only) or mobile home,
where not prohibited by local codes.
This appliance is only for use with the type
of gas indicated on the rating plate. This
appliance is not convertible for use with
other gases, unless a certified kit is used.
AINTENANCE
M
ANUAL
C
U
Master Contract: 214018
200-0050
30 DEC 02
Advertisement
Table of Contents

Related Manuals for Archgard Euro 65


Summary of Contents for Archgard Euro 65
- Page 1 Euro 65 Direct Vent Gas Fireplace For use with natural gas or propane SERS NSTALLATION f i r e - p a r t s . c o m PERATION & AINTENANCE WARNING: If the information in this manual is...
-
Page 2: Table Of Contents
CONTENTS Introduction General Information Appliance Description Dimensions and Clearances Installation Instructions 7—18 Operation Instructions 19—20 Maintenance Trouble Shooting Instructions 22—23 Wiring Diagrams Servicing 25—27 Replacement Parts Warranty f i r e - p a r t s . c o m Warranty Registration Mail In Form CAUTION Due to high temperatures, the appliance should be located out of traffic and away from... -
Page 3: Introduction
INTRODUCTION Congratulations for choosing an Archgard fireplace. The Euro 65 is one of the most advanced direct vent fireplace heaters available. It is solidly designed using the latest technology and manufactured to the highest quality. It is our aim to provide you an appliance with many trouble free years of reliable service. -
Page 4: General Information
- ANSI Z21.88a-1998/CSA 2.33a-M98, Vented Gas Fireplace Heaters, - ANSI Z21.44-1995, CAN1-2.19-M81, Direct Vent Wall Furnaces - CAN/CGA-2.17-M91, Gas-Fired Appliances for Use at High Altitudes Please contact Archgard Industries Ltd., if you have any questions regarding the certification of this appliance. INSTALLATION CODES This appliance must be installed by a qualified gas appliance installer. -
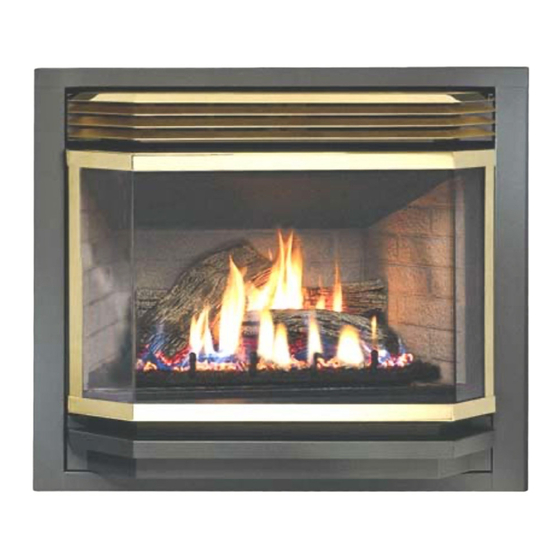
Page 5: Appliance Description
Euro 65 APPLIANCE DESCRIPTION FLAT FRONT VERSION Top Louvers Ceramic Viewing Glass f i r e - p a r t s . c o m Bottom Louvers (remove to access controls) BAY FRONT ADDED Gold or black louver kit... -
Page 6: Dimensions And Clearances
Euro 65 DIMENSIONS AND CLEARANCES APPLIANCE DIMENSIONS 37 3/4” 21 1/2” 3” 6” 39 1/2” FRONT VIEW SIDE VIEW TOP VIEW f i r e - p a r t s . c o m CLEARANCES TO COMBUSTIBLES: BACK 0” to stand-offs SIDES 0”... -
Page 7: Installation Instructions
Euro 65 INSTALLATION INSTRUCTIONS PRECAUTIONS • This appliance must be installed by a qualified gas installer and the installation must conform to the installation codes. • Provide adequate clearance around air openings of the appliance. Never obstruct front openings. •... - Page 8 Retighten the screw. ELECTRICAL CONNECTIONS The Euro 65 comes complete with Blower installed and wired to an internal junction box. Have a qualified electrician run a 120VAC supply line to the lower left side of the fireplace before installing the appliance.
- Page 9 4. DO NOT recess vent termination into walls, sidings or planters. 5. Vent terminations located below 7ft from grade level or anywhere that it can be a burn hazard to the public, such as patios and balconies, must be protected with an Archgard approved termination cage.
- Page 10 Euro 65 INSTALLATION INSTRUCTIONS FRAMING DIMENSIONS 16-1/4” *38” f i r e - p a r t s . c o m 37 3/4” * This dimension allows the top of the fireplace to slide under. If more rigidity is required.
- Page 11 VENTING The appliance will not function without being connected to a proper venting system. This appliance may only use direct vent system supplied by Archgard, or Simpson Dura- Vent direct vent systems with Archgard SDK-3 adapter. See next page for restrictor placement f i r e - p a r t s .
- Page 12 Euro 65 ALLOWABLE TERMINATION LOCATIONS f i r e - p a r t s . c o m...
- Page 13 - p a r t s . c o m Restictor Number 2 Archgard System In the Archgard system the restrictors are placed on the exhaust outlet on the appliance. Simpson Duravent With Simpson Duravent the restrictors can be placed anywhere in the system. Locate the restrictor in the exhaust section fitting into the formed lip.
- Page 14 6. Never slope horizontal vents downwards. 7. Maintain at least a rise of 1/4” (7 mm) for every 1 ft (305 mm) of horizontal vent. 8. Terminate the vent with a suitable vent termination supplied by Archgard Part # TK-1 or Simpson Dura Vent.
- Page 15 Euro 65 INSTALLATION INSTRUCTIONS Cont... VENT KIT COMPONENTS (TVK-1) Termination 7” and 4” flex vent lengths (compressed Fire-stop Cement Screws Sleeve f i r e - p a r t s . c o m Spring spacers VENT ASSEMBLY 4” exhaust vent...
- Page 16 Euro 65 INSTALLATION INSTRUCTIONS Cont... GLASS DOOR WARNING: Do not attempt to remove the glass door when the appliance is hot. Removing the Glass Door Remove the top louver and open bottom louver There are 2 buckle latches under the door frame. Lift the lever on the back of the latches to release them.
- Page 17 Euro 65 INSTALLATION INSTRUCTIONS Cont... PLACEMENT OF LOGSET, COALS & EMBER WOOL • Place the back log on the back log support at the back of the fireplace. • Place the front log on top of the burner as shown. There are pins on the burner to locate the log.
- Page 18 Euro 65 INSTALLATION INSTRUCTIONS Cont... OPTIONAL BAY DOOR INSTALLATION WARNING: THE OPTIONAL BAY DOOR IS A DECORATIVE OPTION ONLY AND IS MANUFACTURED WITH TEMPERED GLASS. THIS UNIT MUST NOT BE OPERATED WITHOUT THE FLAT CERAMIC GLASS DOOR SECURED IN PLACE, BEHIND IT.
-
Page 19: Operation Instructions
Euro 65 OPERATION INSTRUCTIONS FOR YOUR SAFETY, READ BEFORE LIGHTING INITIAL OPERATION • Check that the appliance is properly vented and connected to the gas supply. • Check that the logs and branches are properly placed. • Check that all external parts, such as grills, door and faceplate are properly attached and fastened. -
Page 20: Operation Instructions
Euro 65 OPERATION INSTRUCTIONS Cont.. LIGHTING INSTRUCTIONS (copy of instruction plate found in control panel) FOR YOUR SAFETY READ BEFORE WARNING: If you do not follow these instructions exactly, a fire of explosion may result causing property damage, personal injury or loss of life. -
Page 21: Maintenance
Euro 65 MAINTENANCE CAUTION : Do not conduct maintenance on the appliance while it is operating or while it is still hot. CLEANING THE APPLIANCE The exterior painted surfaces, glass and gold trims may be cleaned with a soft, non-abrasive cloth and water or a suitable, mild, non-abrasive cleaner. -
Page 22: Trouble Shooting Instructions
Euro 65 TROUBLE SHOOTING Please check to make sure the instructions are followed exactly before attempting trouble shooting of the appliance. WARNING: Trouble shooting and servicing of gas and electrical devices of the appliance should only be conducted by a qualified service technician. - Page 23 Euro 65 TROUBLE SHOOTING Cont... SYMPTOM ACTION The main burner does not 3. Check to make sure the thermostat is set high enough to turn turn on with the pilot lit. on the appliance. Cont... 4. Check that the remote switch or the thermostat is turned on.
-
Page 24: Wiring Diagrams
Euro 65 WIRING DIAGRAMS VALVE CONNECTIONS SPARK ELECTRODE OPTIONAL THERMOSTAT PILOT BURNER THERMOCOUPLE THERMOPILE OPTIONAL REMOTE WALL SWITCH PILOT ON/OFF SWITCH ASSEMBLY To SPARKER f i r e - p a r t s . c o m... -
Page 25: Servicing
SERVICING SERVICING UNDER WARRANTY Before servicing, read the terms and conditions of the Archgard warranty at the back of the manual. Contact the Archgard authorized dealer which you have purchased the appliance from and provide him with details of the problem and the installation information which the installer has fill out at the back of the manual. - Page 26 Euro 65 SERVICING Cont... CHANGING MAIN BURNER ORIFICE • Remove the glass door, log branches and the front log. • Unscrew the 2 screws holding the left burner shields between the burner tubes and remove the shield. • Remove the adjustment wing nut and slide the air shutter away from the orifice cap.
- Page 27 In the event your glass cracks or breaks, it must be replaced by the exact same size and mate- rial. It is made from high temperature ceramic material. See replacement parts list and contact your nearest Archgard dealer. • Remove door and carefully remove all traces of glass and gasket material.
-
Page 28: Replacement Parts
310-0017 LOG REAR LOG FIBRE EURO 55/65 1 EA 310-0046 MINERAL WOOL, "EMBERS" 1 OZ 311-0017 BRICK LINER EURO 65/70 RH (713-0032) 1 EA 311-0018 BRICK LINER EURO 65/70 LH (713-0032) 1 EA 311-0031 BRICK LINER, EURO 65 REAR 1 EA 312-0015 CONNECTOR, GAS 3/8 MIP x 3/8 FIP x 24"... -
Page 29: Warranty
This Limited Warranty is made by ARCHGARD INDUSTRIES LTD. hereinafter referred to as "Archgard". Archgard warrants to the original consumer that the gas burning fireplaces will be free from defects in materials and workmanship under normal use and service, for a lifetime. -
Page 30: Warranty Registration Mail In Form
Postage WARRANTY REGISTRATION ARCHGARD INDUSTRIES LTD. 7116 BEATTY DRIVE MISSION, B.C. CANADA V2V 6B4 FOLD DOWN AT LINE f i r e - p a r t s . c o m FOLD DOWN AT LINE & TAPE CLOSED Model No:____________________________ Date Installed: _____/_____/______ Serial Number:____________ Name &...
Need help?
Do you have a question about the Euro 65 and is the answer not in the manual?
Questions and answers