Table of Contents
Advertisement
Battery:
Maximum torque:
Variable speed ranges:
Torque clutch positions:
Keyless chuck:
Maximum drilling depth:
Charger:
Charger input:
Charger output:
Replacement battery:
Weight:
Need Assistance?
Call us on our toll free customer support line:
1-800-689-9928
Technical questions
Replacement parts
Parts missing from package
Imported by Mastercraft Canada Toronto, Canada M4S 2B8
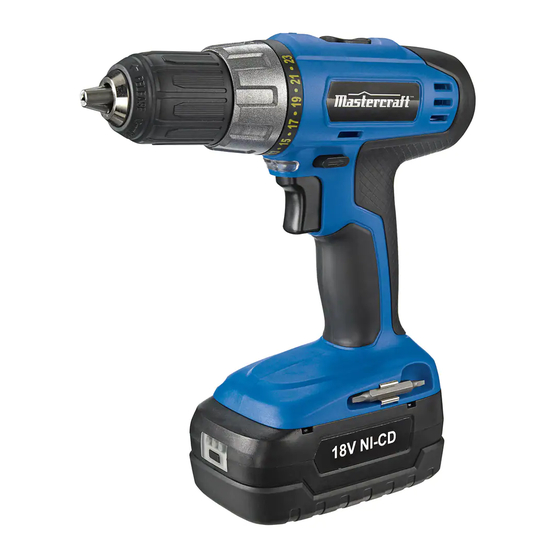
18 V NI-CD CORDLESS DRILL
PRODUCT SPECIFICATIONS
18 V, 1.7 Ah, Ni-Cd
330 in-lb
0–400 & 0–1400 RPM (no load)
23 + drill mode
1/2" (13 mm)
7/32" (6 mm) in steel
25/32" (20 mm) in wood
1-hour diagnostic, Class 2
120 V AC, 60 Hz
18 V DC, 2.2 A (maximum)
054-3168-6 Ni-Cd
2 lb 10 oz (1.2 kg) without battery
054-1319-0
Owner's Manual
Advertisement
Table of Contents

Related Manuals for MasterCraft 054-1319-0


Summary of Contents for MasterCraft 054-1319-0
-
Page 1: Product Specifications
Weight: 2 lb 10 oz (1.2 kg) without battery Need Assistance? Call us on our toll free customer support line: 1-800-689-9928 Technical questions Replacement parts Parts missing from package Imported by Mastercraft Canada Toronto, Canada M4S 2B8... -
Page 2: Table Of Contents
TABLE OF CONTENTS Product specifications ………….………………………………………………………………... Table of contents ……………………………………………………………………....General safety warnings ………………………………………………………………………… 3–4 Eye, ear & lung protection ………………………………………………………………………. 3–4 Electrical safety …………………………………………………………………………………... Power tool safety ……………………………………………………………………....5–6 General safety rules ……………………………………………………………………………... Work area ………………………………………………………………….……………………... Electrical safety …………………………………………………………………………………... Personal safety …………………………………………………………………………………... -
Page 3: General Safety Warnings
GENERAL SAFETY WARNINGS WARNING: Before using this tool or any of its accessories, read this manual and follow all Safety Rules and Operating Instructions. The important precautions, safeguards and instructions appearing in this manual are not meant to cover all possible situations. It must be understood that common sense and caution are factors which cannot be built into the product. -
Page 4: Electrical Safety
GENERAL SAFETY WARNINGS WEAR A DUST MASK THAT IS DESIGNED TO BE USED WHEN OPERATING A POWER TOOL IN A DUSTY ENVIRONMENT. WARNING: Dust that is created by power sanding, sawing, grinding, drilling, and other construction activities may contain chemicals that are known to cause cancer, birth defects, or other genetic abnormalities. -
Page 5: Power Tool Safety
POWER TOOL SAFETY If operating a power tool in a damp location WARNING: Read all safety warnings is unavoidable, use a residual current device and instructions. Failure to follow the warnings (RCD) protected supply. Use of a ground fault and instructions may result in electric shock, fire circuit interrupter (GFCI) reduces the risk of and/or serious injury. -
Page 6: Power Tool Use And Care
POWER TOOL SAFETY PERSONAL SAFETY – cont’d Battery tool use and care Power tool use and care Recharge only with the charger specified by the manufacturer. A charger that is suitable for Do not force the power tool. Use the correct one type of battery pack may create a risk of fire power tool for your application. -
Page 7: Specific Safety Rules
SPECIFIC SAFETY RULES WARNING: Secure the workpiece. Use clamps or a vice to Know your cordless drill. Do hold the workpiece. It is safer than using your not plug in the charger or install the battery hand and it frees both hands to operate the tool. in the tool until you have read and understand this Instruction Manual. -
Page 8: Battery & Charger Safety
BATTERY & CHARGER SAFETY WARNING: Do not use the charger to charge any batteries Only use the charger other than the cordless drill batteries. Other supplied with this kit to charge the 18V batteries may explode. battery. Charging any other batteries may damage the charger and possibly cause Do not operate charger if the cord or plug is serious injury. -
Page 9: Symbols
SYMBOLS WARNING: Some of the following symbols may appear on the cordless drill. Study these symbols and learn their meaning. Proper interpretation of these symbols will allow for more efficient and safer operation of this tool. Volts Direct current Amperes No load speed Hertz Alternating or direct... -
Page 10: Know Your Cordless Drill
KNOW YOUR CORDLESS DRILL Gear box switch Single sleeve keyless chuck Forward / Torque reverse switch clutch worklight Trigger switch Double ended screwdriver bits #2 & 15/64" (6 mm) #1/#2 Battery #054-3168-6 Battery charge indicator LED’s Battery charge test button Battery charger Green... -
Page 11: Assembly And Operating
ASSEMBLY AND OPERATING CHARGING THE BATTERY PACK Place the battery charger (1) in a dry location near a 120 V 60 Hz electrical outlet (Fig. 1) Turn the battery pack up side down and slide it onto the charger (2). NOTE: Make sure the battery pack is fully engaged with the charger. -
Page 12: Installing A Battery Pack In The Drill
ASSEMBLY AND OPERATING INSTALLING THE BATTERY PACK IN THE ADJUSTING THE TORQUE DRILL Your drill is equipped with an adjustable torque Remove the discharged battery pack (1) clutch for driving different types of screws into from the tool by pressing the battery different types of materials. -
Page 13: Forward/Reverse Switch
ASSEMBLY AND OPERATING FORWARD/REVERSE SWITCH BUILT IN WORK LIGHT The forward/reverse switch (1) is conveniently The built in work light (3) will automatically turn mounted above the trigger switch (2) (Fig. 8). To ON when the trigger switch (2) is squeezed make the drill rotate clockwise (for drilling) push (Fig. -
Page 14: Installing Drill Bits
ASSEMBLY AND OPERATING INSTALLING DRILL BITS WARNING: Never hold the chuck body with one hand and use the drill power to rotate the drill body to loosen or tighten bits. Serious injury may result. This drill is equipped with a single sleeve keyless chuck. -
Page 15: Drilling
ASSEMBLY AND OPERATING NOTE: Make sure the hand placed on the body of the drill does not cover the air vents. Covering these air vents will reduce WARNING motor cooling, and possibly lead to overheating the motor. For safety reasons, the operator must read the sections of this Owner’s Manual While holding the drill firmly, place the point entitled "GENERAL SAFETY... -
Page 16: Driving Screws
ASSEMBLY AND OPERATING DRILLING – cont’d NOTE: Do not continue to drive the screw once the clutch has released. This causes unnecessary wear of the clutch. REMOVING A CHUCK Remove the battery pack from the drill. Insert a 5/16" (8 mm) or larger hex key (1) into the chuck (2) and tighten the chuck jaws securely (Fig. -
Page 17: Retightening A Loose Chuck
ASSEMBLY AND OPERATING ASSEMBLY AND OPERATING REMOVING THE CHUCK – cont’d Insert the hex key into the chuck and tighten jaws of chuck securely (Fig. 16). Tap the hex key sharply with a mallet in a COUNTER-CLOCKWISE direction. This will loosen the chuck on the spindle. The chuck can now be unscrewed and removed from the spindle by hand. -
Page 18: Maintenance
MAINTENANCE BATTERY PACK REMOVAL AND GENERAL PREPARATION FOR RECYCLING WARNING: When servicing, use only To preserve our natural resources, please identical replacement parts. The use of any recycle or dispose of batteries properly. other part may create a hazard or cause product damage. -
Page 19: Nickel-Cadmium Battery Maintenance
MAINTENANCE NICKEL-CADMIUM BATTERY Every two months or after 30 MAINTENANCE charge/discharge cycles, whichever comes first, fully discharge your battery. Nickel-cadmium batteries are powerful, rugged To fully discharge the battery, place it in and provide hundreds of charge/discharge the tool that it came with and work with the cycles if properly maintained and periodically tool until it nearly stops and no longer "exercised". -
Page 20: Exploded View
EXPLODED VIEW... -
Page 21: Parts List
PARTS LIST ® WARNING: When servicing, use only Mastercraft replacement parts. The use of any other parts may create a safety hazard or cause damage to the tool. Any attempt to repair or replace electrical parts on this tool may create a safety hazard unless repairs are performed by a qualified technician. - Page 22 PARTS LIST Key # Part # Part Name Quantity 2010090059 Gearing ring 1170070065 Planetary carrier 2010010087 Planetary gear 2030020007 Washer 3150080020 High/Low speed switch box 4030010031 Tapping screw 2050080149 2-speed lever 2010090060 Moveable ring gear 1170070066 Planetary carrier 2010010088 Planetary gear 1170070067 Planetary carrier 2010010089...
-
Page 23: Warranty
3-Year Limited Warranty This Mastercraft® product is guaranteed for a period of three (3) years from the date of original retail purchase against defects in workmanship and materials, except for the following components: Component A: Batteries, chargers and carrying cases, which are guaranteed for a period of two (2) years from the date of original retail purchase against defects in workmanship and materials;... - Page 24 Mastercraft® is a superior line of products selected for their workmanship and materials. These products are designed to meet rigorous quality and performance standards, and are approved by our Quality Assurance laboratory.
Need help?
Do you have a question about the 054-1319-0 and is the answer not in the manual?
Questions and answers