2N OfficeRoute User Manual
Hide thumbs
Also See for OfficeRoute:
- User manual (113 pages) ,
- Quick manual (11 pages) ,
- User manual (124 pages)
Table of Contents
Advertisement
Quick Links
Advertisement
Table of Contents

Subscribe to Our Youtube Channel
Related Manuals for 2N OfficeRoute


Summary of Contents for 2N OfficeRoute
- Page 1 2N OfficeRoute USER MANUAL version 1.3 www.2n.cz...
- Page 2 OfficeRoute system. This new product has been developed and produced in order to provide the maximum utility value, quality and reliability to the user. We hope you will be fully satisfied with the 2N OfficeRoute for a long time. • The manufacturer constantly improves the software contained in the product (the so-called firmware).
-
Page 3: Packing List
Please check your 2N OfficeRoute delivery for completeness with the following packing list. Item Pieces 2N OfficeRoute – check the model type according to the order number, see the type label on the gateway back side 12V/2,5 A mains adapter... -
Page 4: Table Of Contents
2N OfficeRoute CONTENTS PACKING LIST ....................3 PRODUCT PRESENTATION ................5 ..............5 OW TO ELEPHONE OSTS ............6 THER DVANTAGES AND PPLICATIONS RF R ............... 6 ADIATION AFETY RECAUTIONS INSTALLATION ....................7 .................. 8 EFORE NSTALLATION ................10 RIEF NSTALLATION UIDE ..................11... -
Page 5: Product Presentation
The data mode, i.e. HSPA/EDGE/GPRS data router, gives a possibility to use 2N OfficeRoute as a router, firewall and DNS proxy. It also has a DHCP server functionality. There is also very unique feature –... -
Page 6: Other Advantages And Applications
! In general, any prohibition regarding mobile phones based on RF energy radiation applies to GSM/UMTS devices. ! Where necessary, a 2N OfficeRoute may be installed at a safe distance (in the neighbouring building, e.g.) and an Ethernet cable may be carried from the device gateway to the original building. -
Page 7: Installation
2N OfficeRoute 3 Installation This section shows how to install the 2N OfficeRoute gateway including all accessories. Here is a survey of what you will find in this section: What you should know before you start; Overview of installation steps;... -
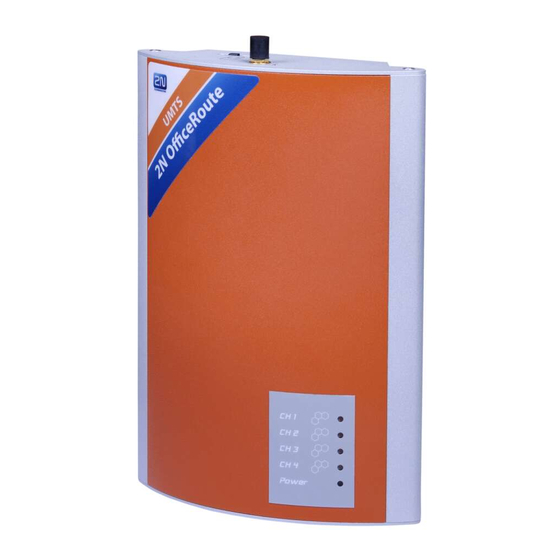
Page 8: Before Installation
2N OfficeRoute 3.1 Before Installation Before you start installing your 2N OfficeRoute, get familiar with its physical structure, arrangement of connectors and status indicators. Fig. 1 – Bottom View www.2n.cz... - Page 9 2N OfficeRoute Fig. 2 – Top View www.2n.cz...
-
Page 10: Brief Installation Guide
2N OfficeRoute 3.2 Brief Installation Guide Proper mounting – 2N OfficeRoute is designed for suspension on a vertical surface. Fit the holder included in the delivery on a wall and hang the gateway on it. For details on the prescribed working position and other recommendations refer to Subsection 1. -
Page 11: Proper Mounting
2N OfficeRoute 3.3 Proper Mounting The device is designed for mounting on a vertical surface. For this purpose a wall mounting holder is available. Just fit the holder with dowels and screws to the wall and hang the device. Fig. 3 – Gateway Holder Wall-Mounting Fig. - Page 12 2N OfficeRoute The device may not be exposed to aggressive gas, acid vapours, solvents, etc. or aggressive liquids, during cover cleaning, for example. The device is not designed for high-vibration environments, e.g. means of transport, machine rooms, etc. Free space has to be left under and over the device for cables and agitated air to remove operational heat.
-
Page 13: Lan Connection
2N OfficeRoute 3.4 LAN Connection 2N OfficeRoute is connected to the 10/100BASE-T (Twisted Pair Ethernet) LAN using a standard straight (non-crossed) cable terminated with RJ-45 connectors like other types of equipment (PC, etc.). Fig. 5 – LAN Connection 3.5 Antenna Connection... -
Page 14: Gateway Power Supply
2N OfficeRoute 3.6 Gateway Power Supply Be sure to use only the mains supply adapter that is included in this device delivery. Before plugging in the device, make sure that the mains voltage value meets the data given on the mains adapter label. -
Page 15: Sim Card Insertion
OfficeRoute gateway and PC especially when you do not know the gateway IP address and thus cannot configure it using a web browser. In such a case, connect the gateway directly to your PC USB port with the cable enclosed and select the basic network parameters using your console interface. -
Page 16: Status Indicators
2N OfficeRoute 3.9 Status Indicators There is a panel with five LEDs on the gateway upper cover. The Power indicator signals that the gateway as a whole is in operation. The other LEDs, marked CH 1 to CH 4, indicate the status of each module. -
Page 17: Gsm Indicators
2N OfficeRoute 3.9.2 GSM Indicators The CH 2 to CH 4 indicators signal the status of the respective GSM module. After connection to the power supply, the VoIP gateway application starts within two minutes. During that time, the installed GSM modules and SIM cards are detected. -
Page 18: Console Access
2N OfficeRoute 3.10 Console Access The console system is arranged as a set of nested menus. By selecting a menu item you either get into a submenu, or have the required operation executed, or set the selected parameter. 3.10.1 Serial console access When the gateway is powered on, the main menu should get displayed after terminal connection. -
Page 19: Submenus
2N OfficeRoute 3.10.2 Submenus If you select a submenu, this submenu gets displayed. Now you can select items from the selected submenu or return by pressing 3.10.3 Commands and Values If you are requested to enter some information after selecting an item, you should enter one of the following values: Key word: A list of one or more fixed strings. -
Page 20: About Menus
2N OfficeRoute As soon as the requested information is entered, the respective operation is executed, new values are displayed in the redrawn menu. Some configuration parameters may have just one of two constant values. By selecting such an item you immediately make its value opposite to that preceding the selection. -
Page 21: Telnet Console Access
This is a short description of new features added to the serial console configuration. For the standard serial console configuration capabilities refer to the 2N OfficeRoute There is also a possibility of using Telnet for 2N OfficeRoute configuration in addition to the standard serial console configuration. -
Page 22: Web Browser Access
OfficeRoute gateway. To establish connection with the gateway, enter the gateway IP address into the Internet address setting line in the browser, e.g.:... -
Page 23: Survey Of Group Bookmarks And Menus
2N OfficeRoute After a successful login you get onto the main page of the web application. The window is divided into four parts,. Fig. 10 – Web Interface Desktop Header bar: Network, User management, Telephony services, Administration, States&logs and Messaging. -
Page 24: Network Settings
4 Network settings Main settings: OfficeRoute’s own IP address, mask, default gateway and DNS. There is also a possibility to switch on DHCP client (when OfficeRoute doesn’t serve as a DHCP server and there is another DHCP server in the network). - Page 25 Subnet option: Subnet mask for internal network Router option: Default gateway of subnet (typically it is IP address of the OfficeRoute, for VRRP it is IP address of the virtual router. Primary and Secondary DNS: Used only in case of local DNS servers in the LAN.
-
Page 26: User Management
Admin is default user and it is not possible to remove him. Mainly serves for management of the device. Emergency change of Admin’s password – connect OfficeRoute via USB cable and by serial console change Admin’s password (it is not necessary to know previous password. - Page 27 Fig. 13 – ‘Add group’ form By ticking checkboxes assign rights. Add user: Adding of a new user/extension Fig. 16 – ‘Add user’ form User name: User name for log-in to OfficeRoute’s web interface and SIP authentication. password: Password log-in authentication.
-
Page 28: Telephony Services
2N OfficeRoute Voicemail: It is discussed later. Set PIN for entering user’s voicemail and set his mobile phone number for receiving notification SMSes. 6 Telephony services Devices: List of SIP lines (SIP trunks), SIM cards (available in the unit or presented in the past) and DISA lines. - Page 29 – you can find these information on a webpage of a network provider or obtain from his helpline. Fig. 15 – Modify SIM card form LCR: Least Cost Router is ‘the brain’ of OfficeRoute. All rules for call routing (inbound and outbound) can be set there. www.2n.cz...
- Page 30 2N OfficeRoute Fig. 169 – List of LCR rules LCR menu contains Time intervals (for using time conditions), Normalization (for incoming/outgoing number normalization), Tariffication (for setting free minutes, free SMS, etc.), Blacklist, Routes (a Route is outgoing direction/trunk consisting of GSM/UMTS module(s), SIM card(s), SIP line(s) or DISA line).
- Page 31 2N OfficeRoute added. Remove count is number of removed digits behind prefix. Final normalized number in this case is +420737555666. It is also possible to modify number before LCR rules are applied (Type is ‘Called incoming’) or modify calling party number.
- Page 32 2N OfficeRoute Example on the picture – the tariff is applied to SIM card 89..8413, only during weekdays and workdays (time intervals defined in previous step). Limit is restored for 1 day in each months (proper time and day must be set in the unit). Accounting of called minutes is...
- Page 33 2N OfficeRoute Fig. 20 – ‘Add LCR table item’ form There is an example of a LCR rule. Destination name is user defined, the rule is applied to called numbers with prefixes 6 or 7, call is routed to the route ‘ Mobile networks’...
- Page 34 2N OfficeRoute specific number through the specified line (for calls to a IP phone registered in the internal SIP proxy it is internal SIP line – in this case is necessary to fill operator’s number). SIP PROXY – into the internal SIP proxy IP phones are registered.
-
Page 35: Administration
(e.g. PIN for SIM cards, DSP codecs – G.729 or G.723, enable Mobility Extension). Fig. 23 – Administration – Main configuration Set timezone: setting of timezone where OfficeRoute is used. Synchronize time: Synchronization of OfficeRoute’s time with PC time. -
Page 36: States&Logs
2N OfficeRoute setting = when is loaded into a unit, erases the previous licence and changes IP address of the unit). SNMP: Setting of SNMP traps sending. Reboot: Reboot the device. Reboot takes approximately 3 minutes. 8 States&Logs States: Tariffication – Amount of free minutes/SMSes. - Page 37 Inbox directory through web-based interface, but POP3 server can not see it, Fig. 27. Fig. 24 – SMS delivery – Main configuration OfficeRoute’s internal SMTP server provides sending e- mail messages as SMS from VBE. USERNAME and www.2n.cz...
- Page 38 2N OfficeRoute PASSWORD for authorization are the same as the USERNAME and PASSWORD for web-based interface of VBE. Authentication could be set in web-based interface of VBE. Domain name must be equal to POP3 domain name (Fig. 27). Server awaits e-mail in format...
-
Page 39: Technical Parameters
2N OfficeRoute 10 Technical Parameters VoIP Signalling standards Number of channels Codecs G.711 PCM (64 kbps) G.729A CS-ACELP (8 kbps) G.723.1 MP-MLQ/ACELP 6.3 kbps (optional) A-law / µ-law PCM quantizing Mobile networks Mobile network type UMTS WCDMA FDD EGSM 900 phase II... - Page 40 2N OfficeRoute Interface Connector type A and B, host and master USB 2.0 Micro SD Ethernet RJ-45 10/100 Base T Protocols IP, ICMP, TCP, UDP, DHCP, RTP, TELNET, SSH, HTTP, HTTPS, SMTP, SNMP, POP3 Operational Conditions 0°C ÷ 40°C Temperature 5 ÷...
Need help?
Do you have a question about the OfficeRoute and is the answer not in the manual?
Questions and answers