Table of Contents
Advertisement
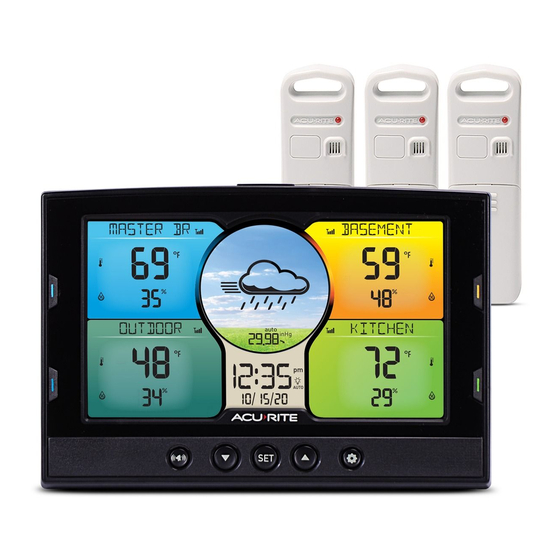
This product requires at least one AcuRite Monitor or Sensor
CONTENTS
Unpacking Instructions ........... 2
Package Contents .................. 2
Features & Benefits ................. 2
Setup .................................... 6
Display Setup ........................ 6
Set the Time, Date & Units ...... 7
Backlight Settings .................. 11
Placement Guidelines ............ 11
Questions?
(877) 221-1252 or visit www.AcuRite.com.
SAVE THIS MANUAL FOR FUTURE REFERENCE.
Home Environment Display
(sold separately) to be operational.
Contact Customer Support at
models 06024/06036
auto
Using the Display ..................12
Programmable Alarms ...........13
Troubleshooting ....................14
Calibration ...........................16
Specifications ........................17
FCC Information ...................17
Customer Support .................18
Warranty..............................18
Instruction Manual
Advertisement
Table of Contents

Subscribe to Our Youtube Channel
Related Manuals for ACU-RITE 06024


Summary of Contents for ACU-RITE 06024
-
Page 1: Table Of Contents
Instruction Manual Home Environment Display models 06024/06036 auto This product requires at least one AcuRite Monitor or Sensor (sold separately) to be operational. CONTENTS Unpacking Instructions ... 2 Using the Display ....12 Package Contents ....2 Programmable Alarms ...13 Features & Benefits ....2 Troubleshooting ....14... -
Page 2: Unpacking Instructions
Congratulations on your new AcuRite product. To ensure the best possible product performance, please read this manual in its entirety and retain it for future reference. Unpacking Instructions Remove the protective film that is applied to the LCD screen prior to using this product. -
Page 3: Back Of Display
BACK OF DISPLAY 1. Integrated Hang Holes 5. CLEAR Button For easy wall mounting. For resetting the high and low records that are stored for the location(s) that 2. Battery Compartment the display is tracking. 3. Plug-in for Power Adapter 6. - Page 4 DISPLAY SCREEN auto...
- Page 5 Icon Indicator Disappears after weather forecast Indicates display is in auto-dimming self-calibration is complete (see brightness mode (see page 11). page 12). 14. Date 2. 12 to 24 Hour Weather Forecast 15. +SENSOR Icon Self-Calibrating Forecasting pulls data Indicates a Wired Sensor (sold from your backyard to generate your separately) is reporting data to the personal forecast.
-
Page 6: Setup
SETUP Display Setup Install External Monitor or Sensor Batteries BEFORE powering on the display, install batteries for all external Monitors and/or Sensors (sold separately) that you would like to synchronize with the display. A-B-C Channel A-B-C Channel NOTE: If pairing more than one wireless sensor (model 06002 or 06044) with the display, the A-B-C channel must differ between each sensor. -
Page 7: Set The Time, Date & Units
Set the Time, Date & Units Press and release the “SET” button, located on the front of the display, to enter SET MODE. Once in set mode, the preference you are currently setting will blink on the display. To adjust the currently selected (flashing) item, press and release the “▲“ or “▼“... - Page 8 Compatible Monitors Perfect for: (continued) • Indoor and outdoor applications Temperature & Humidity Sensor Model 06002 • Indoor applications NOTE: During setup, an image of model 06002 will be shown. Temperature & Humidity Sensor Model 06044 Monitor + Wired Sensor Perfect for: •...
- Page 9 Setup a Location Name on the Display For easy home environment monitoring, label data readings on the display using the following directions. Simply select the name from a preset list that most closely matches the location where the display, Monitor or Sensor that is reporting data for the location is installed: 1.
- Page 10 Sync a New Monitor or Sensor with the Display To manually add a new Monitor or Sensor to the display: 1. Press and release the color-coded button next to a location on the display with the name “AVAILABLE.” Next, “ADD MONITOR” will flash at the top of the display.
-
Page 11: Backlight Settings
Backlight Settings The color display features three different lighting settings: High (100%) brightness, Medium (60%) brightness and Low (30%) brightness. Using battery power alone, the backlight is available momentarily for 10 seconds by pressing the Backlight button. When display is powered by the power adapter, backlight remains on at 100% brightness. -
Page 12: Using The Display
OPERATION Using the Home Environment Display Weather Forecast AcuRite’s patented Self-Calibrating Forecasting provides your personal forecast of weather conditions for the next 12 to 24 hours by collecting data from a sensor in your backyard. It generates a forecast with pinpoint accuracy - personalized for your exact location. -
Page 13: Programmable Alarms
the highest and lowest values recorded since the unit was powered on. A timestamp is shown in the clock area of the display indicating when the record values were recorded. To manually clear the records currently being viewed, press and release the CLEAR button, located in the battery compartment of the display. -
Page 14: Troubleshooting
Disable an Alarm 1. Press and release the color-coded button next to the location on the display for which you wish to disable an alarm. 2. Press and release the “ ” button to enter alarm SET MODE. 3. Press and release the “ ”... - Page 15 Problem Possible Solution • Weather Forecast icon predicts conditions for the next 12 to 24 hours, not current conditions. • Verify at least one weather-resistant Monitor/Sensor is placed outdoors with the location name set to OUTDOOR or GARDEN. This is required for full weather forecast functionality.
-
Page 16: Calibration
Care & Maintenance Display Care Clean with a soft, damp cloth. Do not use caustic cleaners or abrasives. Keep away from dust, dirt and moisture. Clean ventilation ports regularly with a gentle puff of air. Calibration Calibrate Temperature and Humidity The temperature and humidity readings can be calibrated on the display to improve accuracy. -
Page 17: Specifications
Specifications DISPLAY’S BUILT-IN TEMPERATURE SENSOR 32ºF to 122ºF; 0ºC to 50ºC RANGE DISPLAY’S BUILT-IN 1% to 99% RH HUMIDITY SENSOR RANGE 330 ft / 100 m depending on home construction materials WIRELESS RANGE 433 MHz OPERATING FREQUENCY Display: 5vdc power adapter POWER 3 x AAA alkaline batteries (for backup;... -
Page 18: Customer Support
Customer Support AcuRite customer support is committed to providing you with best-in- class service. For assistance, please have the model number of this product available and contact us in any of the following ways: (877) 221-1252 AcuRite Visit us at www. .com Installation Videos Register your Product... - Page 20 Weather Temperature Weather Kitchen Clocks Stations & Humidity Alert Radio Thermometers & Timers It’s more than accurate, it’s AcuRite offers an extensive assortment of precision instruments, designed to provide you with information you can depend on to Plan your day with confidence ™...
Need help?
Do you have a question about the 06024 and is the answer not in the manual?
Questions and answers