
Related Manuals for KKT KOLBE FLAT INSEL ED


Summary of Contents for KKT KOLBE FLAT INSEL ED
- Page 1 User’s manual for your island cooker hood Model FLAT INSEL ED Version . / Gewerbliches inhaltliches Kopieren verboten! Gewerbliches inhaltliches Kopieren...
-
Page 2: Hints And Symbols
Hints and symbols Dispose of the dishwasher packaging material correctly. All packaging materials can be recycled. Plastic parts are marked with the standard international abbreviations e.g. PS for polystyrene, padding material This appliance is identiied according to the ‘uropean guideline / /‘C on waste electrical and electronic equipment -W‘‘‘. -
Page 3: Safety Informations
Safety informations • Keep children away from the unit. The operation of the device by child- ren is permitted only under adult supervision. • The device is designed for household operation and is to be used exclu- sively for that. •... - Page 4 Thank you! Congratulations on the purchase of your new island cooker hood! We recommend that you spend some time to read this Instruction / Installation Manual in order to fully understand how to install the appliance correctly and operate it. ’or installation, please read the installation section.
- Page 5 Table of content Overview . General notes . Intended use . Protection of the environment . Tips and general advice . Before using the hood . Using the hood . Operating safety information . In exhaust air mode . In circulation air mode .
-
Page 6: Protection Of The Environment
General notes . General notes . Protection of the environment . Intended use . . Package The packing materials are % recyc- lable. Comply with local regulations for their disposal. The appliance is intended for domestic use. The manufacturer is not responsible for damage resulting from improper use or maloperation. -
Page 7: Before Using The Hood
General notes . Before using the hood of the heater or other non-electric opera- ted appliances. c No lambé dishes are to be prepared under the extractor hood. The open lames could destroy the hood or even cause a kitchen ire. Ensure that the hood has not sufered d Never leave pans unwatched when damage during transport. - Page 8 Safety . In circulation air mode The inlet air is iltered through a carbon • Due to the ire risk, frying or cooking ilter also known as active carbon ilter with oils and fats under the hood is and circulated in the room. The carbon only to take place under constant ilter captures the odours produced surveillance.
-
Page 9: Care And Cleaning
Care and cleaning . Care and cleaning Special information for appliances with a stainless steel casing Prior to any maintenance or cleaning A commercially available non-abrasive work, isolate the hood from the electrical stainless steel cleaning agent should be supply by used for cleaning stainless steel surfaces. -
Page 10: Changing The Lamps
Care and cleaning cause unpleasant odours. Ater washing, • Foam grease ilters must be soaked the washable and regeneratable carbon once a month in warm soapy water for ilter must be reactivated. This is carried to hours. Do not wring out; repeat out by drying the cleaned ilter in an oven where required and replace the ilter minutes at... -
Page 11: Motor Problems
Fault – what to do if..Fault – what to do if ... When the lightning fails Motor problems • Is there a power supply failure? • Does the lamp need changing? • Is the plug properly inserted in the •... -
Page 12: Installation
Installation . Installation . Installation data / dimensions On installation, the minimum distance Minimum distance from the lower edge of between the hob and the hood must be the hood body exactly complied with see chapter . to ceramic and cast cooking hobs “Installation data“... -
Page 13: Electrical Connection
Installation Only connect the appliance to the power Never install the appliance if the data supply once it is properly installed. on the rating plate does not agree with your supply voltage. . Using the extractor hood as )ou will ind the rating plate inside the an exhaust air hood with air appliance, behind the grease ilter. -
Page 14: Appliance Components
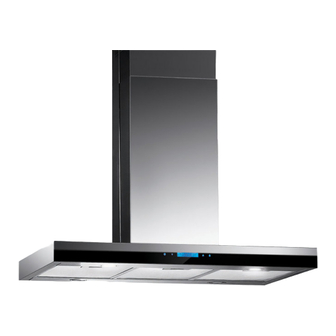
Installation . Appliance components Images are just for illustrative purposes Kochfeld Gewerbliches inhaltliches Kopieren verboten! Gewerbliches inhaltliches Kopieren verboten! - Page 15 Installation View from inside A Hood B ‘xternal chimney C Internal chimney Control panel D Mounting hook Metal ilter E ‘xhaust air nozzle Hob illumination F ‘xhaust air reducer Rating label G ’itting holes for ‘ Motor H Hob Carbon ilter Gewerbliches inhaltliches Kopieren verboten! Gewerbliches inhaltliches Kopieren verboten!
-
Page 16: Control Panel
Installation . Control panel Content E Power increase A Lamp ’ilter / Cleaning / Set time F Alarm B Automatic ater-running G Light On/Of C Power decrease D Digital display Gewerbliches inhaltliches Kopieren verboten! Gewerbliches inhaltliches Kopieren verboten! -
Page 17: Filter Cleaning
Installation Filter cleaning Setting the time If the symbol A ilter cleaning is lashing, When you press the button A for the unit remembers it, clean the ilter, or conds, the time will lash on your screen. swap it. Ater the ilter has been cleaned By repeatedly pressing the A button to and re-inserted into the extractor hood, show the hour using the arrow keys C... -
Page 18: Troubleshooting
Troubleshooting . Troubleshooting Problem Possible causes Solution Air lap jammed Rectify jamming Light on, but motor does not ’aulty capacitor Change capacitor Motor bearing faulty Change motor Suspicious smell from Change motor motor Light not on, motor does not The following are possible in addition to the above causes ’aulty lamps... -
Page 19: Exhaust Air Pipeline
Installation . Exhaust air pipeline be a large temperature drop within the individual parts of the pipeline, resulting in sweating or condensation water production. This renders outlet pipeline insulation necessary. • In some cases a condensation water barrier must be installed in addition to adequate insulation Air outlet to outdoors Air outlet via an air shat... -
Page 20: Before Installation
Installation of the hood . Before installation Clean the area thoroughly before installation, so that at the irst time, no dust or debris can be aspirated. The exhaust hose must not be routed together with gas pipes, hot-air pipes, etc. through a chute. The exhaust tube should be as straight as possible carried away from the cover and guided at a maximum delection of °... -
Page 21: Installation Scheme
Installation of the hood . Installation scheme . Drill holes for ceiling mount. . Adjust the height of the telescopic frame and attach it to the hood body. Gewerbliches inhaltliches Kopieren verboten! Gewerbliches inhaltliches Kopieren verboten! - Page 22 Installation of the hood Hood body just for explanation . Ater the support frame is bolted to the motor unit, ple- ase push the two shats on the support frame to the hood. Note The folded points with the holes down When you remo- ve the metal ilter, the shat from below through the housing is bolted to the top Gewerbliches inhaltliches Kopieren verboten!
- Page 23 Installation of the hood . Lit island hood and secure it with screws to the ceiling. Connect to ex- haust line not necessary for recircu- lation .Inside shat to pull out and fasten with screws to the ceiling mount. . Let the exterior shat slowly slide on the hood body and attach from inside the hood up and out.
- Page 24 We wish you much success with the appliance. Version . / Gewerbliches inhaltliches Kopieren verboten! Gewerbliches inhaltliches Kopieren verboten!
Need help?
Do you have a question about the FLAT INSEL ED and is the answer not in the manual?
Questions and answers