Table of Contents
Advertisement
Advertisement
Table of Contents

Subscribe to Our Youtube Channel
Related Manuals for Silverline 3170 EC


Summary of Contents for Silverline 3170 EC
- Page 1 RANGEHOOD & INSTALLATION GUIDE 3170 EC Revision V1.0 SILVERLINE...
-
Page 2: Table Of Contents
Installation Instructions _____________________________________________________________________ 16 Ducting __________________________________________________________________________________ 17 Back Draft Fins ____________________________________________________________________________ 17 Roof Cowls/Roof Seal Kit __________________________________________________________________ 18 8. Maintenance Condensation Information ________________________________________________________________ 19 Troubleshooting _____________________________________________________________________________________________ 20 __________________________________________________________________ 21 Faulty Installation _________________________________________________________________________ 21 3170 EC _____________________________________________________________________________________________________ 22 10. Disclaimer ___________________________________________________________________________________________________ 23 Page 2... -
Page 3: Welcome
1. Welcome Thank you for purchasing your new rangehood. To get the maximum output from this unit, please read through this guide before use. The guide contains important information on the use and maintenance of the unit, as well as important safety notes. -
Page 4: Your Safety
2. Your Safety WARNING Please read this section thoroughly before attempting to operate the appliance. Inspect your product upon receipt. Any damage or defects MUST be reported within 48 hours, or no claim will be recognised. DO NOT INSTALL THIS APPLIANCE IF YOU FIND IT DAMAGED. If this product is installed damaged, neither the supplier, nor the retailer, will be responsible for the costs associated with the repair, replacement, removal or re-installation of the appliances. -
Page 5: Before Installation
2. Your Safety Before Installation void the warranty. The manufacturer declines all responsibility in case of failure to adopt proper safety measures. Ensure that the location in which this appliance is installed, has good and permanent ventilation. Please consult local laws and regulations and install in accordance. Use an electrical connector with earth that is correct for your location. -
Page 6: Product Use
2. Your Safety Product Use This product is designed for household use and should not be used for commercial applications. After use, always ensure that all controls are in the “OFF” position. Maintenance and Service The rangehood surface should be cleaned with soft cloth and non-corrosive detergent. Do not leave the rangehood wet after cleaning or use, please keep rangehood dry. -
Page 7: Tips And Suggestions
3. Tips & Suggestions The Rangehood has one mode of operation: Air extraction: For Users 3. Before carrying out any operation inside the rangehood, unplug the appliance from the electrical mains. 5. Changes made to the steel surface will render the warranty invalid. For Installers and Users 1. -
Page 8: Description
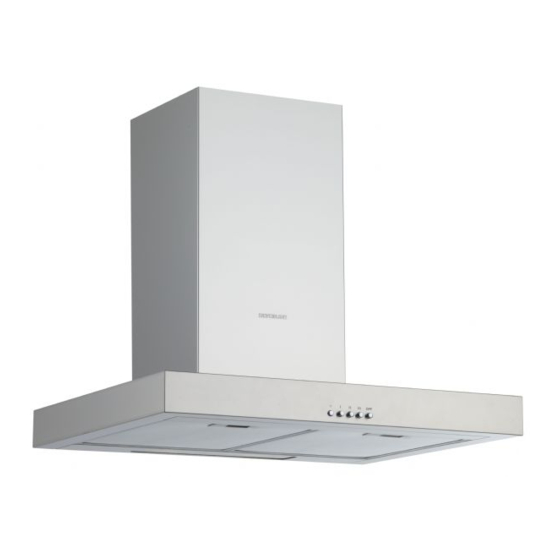
4. Description Main Rangehood Mounting Bracket Extension Flue Piece Main Flue For use with Isodrive motor system Male Plug (Main Power 240V) Used for silent and non silent models Single Outlet 200mm Filter Lighting NOTE: Filter and light quantity may vary from model to model. -
Page 9: Operation
5. Operation Control Panel 1. Press this button to turn on/off the appliance. 2. Press this button to operate the appliance in 1st speed. 3. Press this button to operate the appliance in 2nd speed. 4. Press this button to operate the appliance in 3rd speed. 5. -
Page 10: Cleaning And Maintenance
6. Cleaning & Maintenance WARNING Always switch off and disconnect power before cleaning. Surfaces Wash with warm soapy water and a soft sponge. Never use abrasive detergent, scouring pads, steel wool or solvents on any part of this appliance, Always make sure to dry the appliance after cleaning and never leave wet, as this will cause irreparable damage. -
Page 11: Cleaning The Interior
6. Cleaning & Maintenance WARNING COULD EASILY CATCH FIRE. Cleaning the Interior Clean the interior of the rangehood with a damp cloth and a neutral detergent or denatured alcohol. NOTE: Do not use denatured alcohol on the exterior of the rangehood. Do not clean the electric parts or the motor with liquids or solvents Cleaning the Exterior We recommended using a soft cloth, water and a liquid soap, rinsing it well and then drying it... -
Page 12: Replacing The Led Bulb
6. Cleaning & Maintenance Replacing the LED Lamps DANGER Always switch off and disconnect power before replacing the lights. Failure to do so may cause serious injury. Please be aware that the light bulb will retain heat for a short period of time after being switched off. Disconnect the hood from mains. -
Page 13: Installation
7. Installation DANGER Always switch off and disconnect power before installing the rangehood. Failure to do so may cause serious injury. Wall Mount Installation Every wall mounted rangehood has two primary mounting Primary mounting points rangehood in its place. Use suitable bolts to mount the appliance on a secure surface. Please ensure that the holes for the two primary mounting points are level before installation. -
Page 14: Installation Instructions
7. Installation WARNING See Mounting Laws If the user decides to install the rangehood at and Regulations a distance of less than minimum height above the cooking surface, the company declines responsibility for damages suffered by the rangehood due to excess heat or damage to objects, people and others caused directly or Installation Instructions Installation of the suspension plate to the hood:... - Page 15 7. Installation installation plate referring to the min. and max. heights of the appliance. Install 6 mm dowels to the holes you have drilled. Tightening the suspension screws Tighten 5.5x60 suspension screws to Ø10 mm dowels (A, B) you have tapped on the wall. The distance between screw head and the wall will be 5 mm.
- Page 16 7. Installation body with a screw from the hole (C) inside the body to prevent it from moving. NOTE: If the hood seems skewed, adjust the alignment of the hood by loosening the M5 screws that the suspension plates on the top are installed to. Installation of aluminum pipe: outlet.
-
Page 17: Ducting
7. Installation Ducting the system. Ducting needs to be kept taut at all times. Back Draft Fins Should your Back Draft Fins get stuck, this is not a warranty issue. When installing Back Draft Fins, please ensure that you insert the Back Draft Fins onto the back draft base, which are attached to the top of the motor outlet before installation. -
Page 18: Roof Cowls/Roof Seal Kit
7. Installation Roof Cowls / Roof Seal Kit WARNING All electrical wiring should be kept inside the roof space. Roof Cowls* Flexi Ducting must be pulled taut. DO NOT crush or kink the ducting. outlet on rangehood using duct tape or cable tie. Please DO NOT rip the ducting. -
Page 19: Maintenance
8. Maintenance Condensation Information consistency. For some customers with an induction cooktop, condensation can form on their rangehood a gas, electric or wok burner, the heat is not isolated or contained to one area and therefore gradually and eliminate the formation of condensation. For induction cooktops, the immediate and contained heat chance of condensation forming. -
Page 20: Troubleshooting
Light does not work Rangehood air suction is weak Rangehood does not direct air out (through chimney) Loud noise from the rangehood Model 3170 EC Feeding Voltage 220-240V 50Hz Lamp Power — Halogen (W) 2 x 35W (supplied) Page 20... -
Page 21: Faulty Installation
8. Maintenance Calling the Technical Assistance Service Hotline In the event that the failure is not due to the faults mentioned in Troubleshooting, contact Technical Service on 1300 829 066. A service request will require the following information: The purchase date The rangehood model and motor type (eg. -
Page 22: 3170 Ec
Page 22... -
Page 23: Disclaimer
10. Disclaimer notice. Prospective purchasers should therefore check with the retailer to ensure this publication correctly describes the products being offered for sale. All information supplied is to be used for general reference purposes only and is on the understanding that Schweigen Home Appliances will not be liable for any loss, liability or damage of whatever kind arising as a result of any reliance upon such information. - Page 24 HOME APPLIANCES Unit 102/45 Gilby Road, Distributed by: Mt Waverley 3149 Victoria. 1300 881 693 (EST) www.schweigen.com.au...
Need help?
Do you have a question about the 3170 EC and is the answer not in the manual?
Questions and answers