
Subscribe to Our Youtube Channel
Related Manuals for Silverline Pure Plus


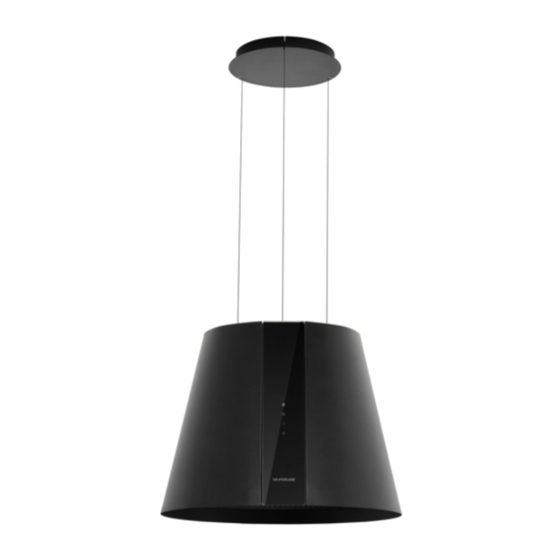
Summary of Contents for Silverline Pure Plus
- Page 1 HOOD USER GUIDE ENGLISH 4386 (Pure Plus) Read this manual prior to performing any task!
- Page 2 MANUFACTURER Merzifon OSB AMASYA, Silverline IMPORTER Via Carlo Porta 4 20813 Bovisio Masciago (MB) - Italy 1, en_US HOOD USER GUIDE ENGLISH 02.05.2019...
-
Page 3: Table Of Contents
Table of contents Table of contents INPUT................... 4 Technical Drawing.............. 5 WARNING AND SAFETY PRECAUTIONS......6 3.1 LETHAL RISK, DANGER OF POISONING....8 USAGE WITH AND WITHOUT CARBON FILTER.... 12 Cleaning of Activated Carbon Filter Pad......13 CLEANING AND PREVENTIVE MAINTENANCE..... 14 6.1 Cleaning the scale filter.......... -
Page 4: Input
INPUT INPUT This guideline and the safety data includes all necessary informa- tion for a safe mounting as well as a safe use without defects. Please read all of this guideline and safety data before using the device. Keep the guideline in an appropriate place. If you pass the device onto others, make sure you also give this guideline and safety data. -
Page 5: Technical Drawing
Techn�cal Draw�ng Techn�cal Draw�ng 166,3 83,1 F�g. 1 02.05.2019 HOOD USER GUIDE ENGLISH... -
Page 6: Warning And Safety Precautions
WARNING AND SAFETY PRECAUTIONS WARNING AND SAFETY PRECAUTIONS WARNING AND SAFETY PRECAU- This appliance can be used by children of 8 years and older, TIONS people with physical, sensory or mental capability deficiency or people with lack of experience or knowledge; as long as they are provided supervision or instructions for the safe use of the appliance and they comprehend the dangers. - Page 7 WARNING AND SAFETY PRECAUTIONS If your product's periodic cleaning is not made in a timely manner, it could pose risk of fire. De-energize the appliance before any maintenance operations. (Plug off the appliance or turn off the main switch.) When electric cooker hood and devices fed with energies other than electricity operate simultaneously, the negative pressure in the room must not exceed 4 Pa ( 4 X 10 bar ).
-
Page 8: Lethal Risk, Danger Of Poisoning
WARNING AND SAFETY PRECAUTIONS LETHAL RISK, DANGER OF POISONING 3.1 LETHAL RISK, DANGER OF POISONING DANGER! Warning - Choking Hazard The packaging materials are dangerous for chil- dren. Never allow children to play with packaging materials. DANGER! Warning - Death Hazard There are life-threatening danger and poisoning danger due to reabsorbed combustion gases. - Page 9 WARNING AND SAFETY PRECAUTIONS LETHAL RISK, DANGER OF POISONING WARNING! Fire danger! – The oil residue in the oil filter may catch fire.Clean the oil filter at least once every 3 months.Never operate the device without the oil filter. – The oil residue in the oil filter may catch fire.
- Page 10 WARNING AND SAFETY PRECAUTIONS LETHAL RISK, DANGER OF POISONING DANGER! Danger of physical injury! – During the installation, there is a danger of physical injury due to the sharp edges. Use protective gloves throughout the installation process of the appliance. –...
- Page 11 WARNING AND SAFETY PRECAUTIONS LETHAL RISK, DANGER OF POISONING NOTICE! If the feeder cable is damaged, it must be replaced by its manufacturer or its authorized technical service or any other personnel qualified at the same level, in order to avoid any dangerous situa- tion.
-
Page 12: Usage With And Without Carbon Filter
USAGE WITH AND WITHOUT CARBON FILTER USAGE WITH AND WITHOUT CARBON FILTER You can use this appliance in exhaust air mode and ventilated air mode. Exhaust air mode The absorbed air is cleaned by the grease filters, and is discharged through a piping system.Fig. -
Page 13: Cleaning Of Activated Carbon Filter Pad
Cleaning of Activated Carbon Filter Pad Cleaning of Activated Carbon Filter Pad Placing the active carbon filter Ä “Placing the active carbon Removing the metal oil filters ( filter” on page 13). Active carbon filter is placed on the rear side of the metal oil filter Push it to the side to remove it.(Fig. -
Page 14: Cleaning And Preventive Maintenance
CLEANING AND PREVENTIVE MAINTENANCE CLEANING AND PREVENTIVE MAINTENANCE CAUTION! Cleaning and user maintenance of the appliance shall not be performed by unattended children. The surface could be damaged due to aggressive and abrasive cleaning agents. Never use aggressive and abrasive cleaning agents. -
Page 15: Cleaning The Scale Filter
CLEANING AND PREVENTIVE MAINTENANCE Cleaning the scale filter 6.1 Cleaning the scale filter Open the lock of the metal oil filter (Fig. 7/2) and ensure that it will not fall. Tilt the metal oil filter forward and lift it out (Fig. 7/2). WARNING! Risk of fire due to oil sediments in metal oil filter! -
Page 16: Appliance Position
APPLIANCE POSITION Recommendations for Energy Saving APPLIANCE POSITION Fig. 8 After completing the installation of hood, the minimum distance must be 70 cm between the product and any electric cooker; and 85 cm between it and any gas ranges or cookers burning other fuels (Fig. - Page 17 APPLIANCE POSITION Recommendations for Energy Saving Use your product according to its normal speeds. Use at higher speed would cause an increase in the energy consumption. 02.05.2019 HOOD USER GUIDE ENGLISH...
-
Page 18: Content Of Package
CONTENT OF PACKAGE CONTENT OF PACKAGE Fig. 9 Appliance 4x Hanging Plate Remote controller 6 x Ø.10mm Plastic Dowels Installation Template 6x 5.5x60 Wall Mount Screw User manual 3X M5 x 15 Screws 3x Steel Hanger Rope 10 6X 3.5x9.5 Flue Connection Screw HOOD USER GUIDE ENGLISH 02.05.2019... -
Page 19: Overview Of Hood
OVERVIEW OF hood OVERVIEW OF hood 1- Ceiling carrier plate cover 2- Hanger wires 3- Body 4- Control Panel 5- Cooker Lighting Fig. 10 02.05.2019 HOOD USER GUIDE ENGLISH... -
Page 20: Assembly Of Product
ASSEMBLY OF PRODUCT Installation Diagram and Components ASSEMBLY OF PRODUCT 10.1 Installation Diagram and Components Ceiling 6 x plastic dowel, Ø 10 mm A E D B F C Ceiling Hanging Plate 6x 5.5x60 Wall Mount Screw A E D B F C Fig. - Page 21 ASSEMBLY OF PRODUCT Installation Diagram and Components CAUTION! The locking mechanism of the carrier wires will prevent the wires to move away from its position or backwards as long as the stop pims are not pressed forward. Fixing plate Securing bolt Fixing bolts Feeding Cable Fig.
-
Page 22: Use Of Product
USE OF PRODUCT 3 Spd Touch Product Usage USE OF PRODUCT 11.1 3 Spd Touch Product Usage BUTTON EXPLANATION Press this button to turn on or off the lamp. When this button is pressed, product will operate at speed level 1. When this button is pressed, product will operate at speed level 2. -
Page 23: Remote Control
REMOTE CONTROL REMOTE CONTROL 1- Motor On/Off 2- Motor Speed Increase 3- Motor Speed Decrease 4- Lighting On/Off Remote control is sold together with the product optionally. The product you bought may not have remote control option. Fig. 15: REMOTE CONTROL 02.05.2019 HOOD USER GUIDE ENGLISH... -
Page 24: Replacing The Lamps
REPLACING THE LAMPS LED Lamp Replacement REPLACING THE LAMPS 13.1 LED Lamp Replacement It indicates the maximum power consumption of the lamp. A lamp with same power rating should be used when replacing the lamp. max. 2,1 W To find out the power rating used in the product, see the rating label in the product. -
Page 25: Technical Table
TECHNICAL TABLE TECHNICAL TABLE Supply Voltage 220 - 240 V 50Hz Insulation Class of Motor Insulation Class CLASS I This product complies with the 2014/30/EC (Regulation on Electro- magnetic Compliance) and 2014/35/EC (Regulation on Low Voltage Devices (LVD)) Directives. This device complies with the Directive on the Control of Waste Electrical and Electronic Equipment. - Page 26 GUIDA UTENTE DELLA CAPPA ITALIANO 4386 (Pure Plus) Prima di qualsiasi intervento leggere le istruzioni!
- Page 27 MANUFACTURER Merzifon OSB AMASYA, Silverline IMPORTER Via Carlo Porta 4 20813 Bovisio Masciago (MB) - Italy 1, it_IT GUIDA UTENTE DELLA CAPPA ITALIANO 02.05.2019...
- Page 28 Indice Indice INGRESSO................4 Disegno Tecnico..............5 AVVERTENZE E MISURE DI SICUREZZA......6 3.1 RISCHIO DI VITA - PERICOLO DI AVVELENA- MENTO................. 8 UTILIZZI DEI FILTRI CON O SENZA CARBONE..... 13 Pulizia del cuscinetto del filtro a carboni attivi....14 PULIZIA E MANUTENZIONE PREVENTIVA.....
-
Page 29: Ingresso
INGRESSO INGRESSO Questo manuale e i dati di sicurezza comprendono tutte le informa- zioni necessarie per un montaggio sicuro ed un utilizzo sicuro senza difetti. Leggere attentamente tutte queste indicazioni e dati di sicu- rezza prima di utilizzare il dispositivo. Tenere il manuale in un luogo appropriato. -
Page 30: Disegno Tecnico
D�segno Tecn�co D�segno Tecn�co 166,3 83,1 F�g. 1 02.05.2019 GUIDA UTENTE DELLA CAPPA ITALIANO... -
Page 31: Avvertenze E Misure Di Sicurezza
AVVERTENZE E MISURE DI SICUREZZA AVVERTENZE E MISURE DI SICUREZZA AVVERTENZA E MISURE DI SICU- Questa apparecchiatura può essere usata da bambini a partire REZZA dagli 8 anni, persone con disabilità fisiche, sensoriali o mentali o persone non in possesso di esperienza o conoscenze, a con- dizione che le stesse siano supervisionate o istruite in merito all’uso sicuro dell’apparecchiatura, con indicazione dei poten- ziali pericoli. - Page 32 AVVERTENZE E MISURE DI SICUREZZA Assicurarsi di sostituire tempestivamente i filtri. I filtri non sosti- tuiti in modo tempestivo possono presentare rischio di incendio a causa dei depositi di grasso che si accumulano su di essi. Non utilizzare materiali filtranti non resistenti al fuoco al posto del filtro.
-
Page 33: Rischio Di Vita - Pericolo Di Avvelenamento
AVVERTENZE E MISURE DI SICUREZZA RISCHIO DI VITA - PERICOLO DI AVVELENAMENTO È necessario prestare attenzione quando si utilizza l’apparec- chiatura insieme ad altri apparecchi che condividono lo stesso ambiente con la stessa (ad esempio stufe o caldaie a gas, a gasolio, a carbone, a legna, scaldabagno, etc.). - Page 34 AVVERTENZE E MISURE DI SICUREZZA RISCHIO DI VITA - PERICOLO DI AVVELENAMENTO Fig. 3 PERICOLO! Pericolo di incendio! – Il residuo dell'olio nel filtro antigrasso può pren- dere il fuoco.Pulire il filtro antigrasso almeno una volta ogni 3 mesi.Non usare mai il dispo- sitivo senza il filtro antigrasso.
- Page 35 AVVERTENZE E MISURE DI SICUREZZA RISCHIO DI VITA - PERICOLO DI AVVELENAMENTO PERICOLO! Pericolo di folgorazione! – Un dispositivo malfunzionante può causare scosse elettriche. Non accendere mai un dispositivo malfunzionante. Tirare la spina e spegnere l'interruttore. Chiamare Servizio clienti. – Le riparazioni inadeguate presentano rischi.
- Page 36 AVVERTENZE E MISURE DI SICUREZZA RISCHIO DI VITA - PERICOLO DI AVVELENAMENTO PERICOLO! Rischio di ustione, rischio di folgorazione! – Lasciare che l'apparecchiatura si raffreddi prima di eseguire operazioni di pulizia o di manutenzione. Disattivare il fusibile o estrarre la spina dalla presa di corrente. –...
- Page 37 AVVERTENZE E MISURE DI SICUREZZA RISCHIO DI VITA - PERICOLO DI AVVELENAMENTO NOTA! Quando le lampadine del dispositivo non funzio- nano correttamente, spegnere l'interruttore e scol- legare la spina di alimentazione del dispositivo dalla presa. Sostituire subito le lampadine difettose (per prima cosa lasciare le lampadine a raffred- dare) per proteggere le lampadine rimanenti contro il sovraccarico.
-
Page 38: Utilizzi Dei Filtri Con O Senza Carbone
UTILIZZI DEI FILTRI CON O SENZA CARBONE UTILIZZI DEI FILTRI CON O SENZA CARBONE È possibile utilizzare il dispositivo sia in modalità scarico d’aria che in modalità circolazione d'aria. Modalità scarico d’aria L'aria aspirata viene pulita dai filtri anti grasso, e viene espulsa attraverso un sistema di tubazioni.Fig. -
Page 39: Pulizia Del Cuscinetto Del Filtro A Carboni Attivi
Pulizia del cuscinetto del filtro a carboni attivi Pulizia del cuscinetto del filtro a carboni attivi Posizionamento del filtro a carboni Ä “Posizionamento del Togliere i filtri antigrasso metallici ( attivi filtro a carboni attivi” a pag. 14). Il filtro a carbone attivo è posizionato sul lato posteriore del filtro dell’olio in metallo. -
Page 40: Pulizia E Manutenzione Preventiva
PULIZIA E MANUTENZIONE PREVENTIVA PULIZIA E MANUTENZIONE PREVENTIVA ATTENZIONE! La pulizia e l’utilizzo non devono essere effettuati da bambini senza la sorveglianza di adulti. La superficie potrebbe danneggiarsi dai detergenti aggressivi ed abrasivi. Non utilizzare mai detergenti aggressivi od abra- sivi. -
Page 41: Pulire Il Filtro A Scala
PULIZIA E MANUTENZIONE PREVENTIVA Pulire il filtro a scala. 6.1 Pulire il filtro a scala. Aprire il blocco del filtro antigrasso metallico (Fig. 7/2) e veri- ficare che non cada. Inclinare il filtro antigrasso metallico in avanti e sollevarlo fino a farlo uscire (Fig. -
Page 42: Collocazione Del Dispositivo
COLLOCAZIONE DEL DISPOSITIVO Installazione e Disimballaggio COLLOCAZIONE DEL DISPOSITIVO Fig. 8 Dopo aver completato l’installazione della cappa, la distanza minima tra il prodotto e qualsiasi fornello elettrico deve essere di 70 cm; inoltre vi devono essere 85 cm tra essa e gli altri fornelli a gas o ad altri combustibili ad olio (Fig. -
Page 43: Consigli Per Risparmiare Energia
COLLOCAZIONE DEL DISPOSITIVO Consigli per risparmiare energia 7.2 Consigli per risparmiare energia Sostituire i filtri a carbone ad intervalli regolari. Pulire regolarmente i filtri in alluminio. Poiché i filtri sporchi potrebbero bloccare il passaggio dell'aria, potrebbe rendersi necessario utilizzare l'apparecchiatura ad una velocità supe- riore. -
Page 44: Contenuto Della Confezione
CONTENUTO DELLA CONFEZIONE CONTENUTO DELLA CONFEZIONE Fig. 9 Dispositivo 6 x perni in plastica, Ø10mm Telecomando 6x 5.5x60 Vite per montaggio a parete Schema di Installazione 3x viti M5 x 15 Manuale dell'utente 10 6 x 3,5x9.5 Vite per collegamento di canna 3x funi di sospensione in acciaio fumaria 4 x piastra di sospensione... -
Page 45: Vista Generale Della Cappa
VISTA GENERALE DELLA CAPPA VISTA GENERALE DELLA CAPPA 1- Coperchio della piastra del supporto del soffitto 2- Cavi di sospensione 3- Corpo 4- Pannello di controllo 5- Illuminazione del Fornello Fig. 10 GUIDA UTENTE DELLA CAPPA ITALIANO 02.05.2019... -
Page 46: Instalalzione Del Prodotto
INSTALALZIONE DEL PRODOTTO Schema di installazione e componenti INSTALALZIONE DEL PRODOTTO 10.1 Schema di installazione e componenti Soffitto 6 x perni in plastica, Ø 10 mm A E D B F C Piastra di sospensione a soffitto 6x 5.5x60 Vite per montaggio a parete A E D B F C Fig. - Page 47 INSTALALZIONE DEL PRODOTTO Schema di installazione e componenti ATTENZIONE! Il meccanismo di blocco dei cavi di supporto evita che il cavo si sposti dalla sua posizione o si sposti all’indietro, a meno che i tasselli di blocco non ven- gano premuti in avanti. Piastra di fissaggio Bullone di sicurezza Bulloni di fissaggio...
-
Page 48: Come Usare Il Prodotto
COME USARE IL PRODOTTO 3 Uso del prodotto Spd Touch COME USARE IL PRODOTTO 11.1 3 Uso del prodotto Spd Touch PULSANTE SPIEGAZIONE Premere il pulsante per accen- dere o spegnere la lampada. Quando si preme questo tasto il prodotto funzionerà alla velo- cità... -
Page 49: Telecomando
TELECOMANDO TELECOMANDO 1- Motore On/Off 2- Aumento velocità motore 3- Riduzione velocità motore 4- Illuminazione On/Off Il telecomando viene venduto insieme al prodotto, come optional. Il prodotto acquistato potrebbe non disporre dell’opzione telecomando. Fig. 15: TELECOMANDO GUIDA UTENTE DELLA CAPPA ITALIANO 02.05.2019... -
Page 50: Sostituzione Delle Lampade
SOSTITUZIONE DELLE LAMPADE Sostituzione della Lampada LED SOSTITUZIONE DELLE LAMPADE 13.1 Sostituzione della Lampada LED Indica il consumo massimo della lampada. Quando si sostituisce la lampada deve essere utilizzata una lampada con la stessa max. 2,1 W potenza. Per conoscere la potenza nominale utilizzata nel prodotto, vedere l'etichetta di dichiarazione nel pro- dotto. -
Page 51: Scheda Tecnica
SCHEDA TECNICA SCHEDA TECNICA Alimentazione di tensione 220 - 240 V 50Hz Classe di isolamento di motore Classe di isolamento CLASSE I Questo prodotto è conforme alla direttiva 2004/108/CE per la com- patibilità elettromagnetica e la Direttiva Bassa Tensione (LVD) 2006/95/CE.
Need help?
Do you have a question about the Pure Plus and is the answer not in the manual?
Questions and answers