Table of Contents
Advertisement
Quick Links
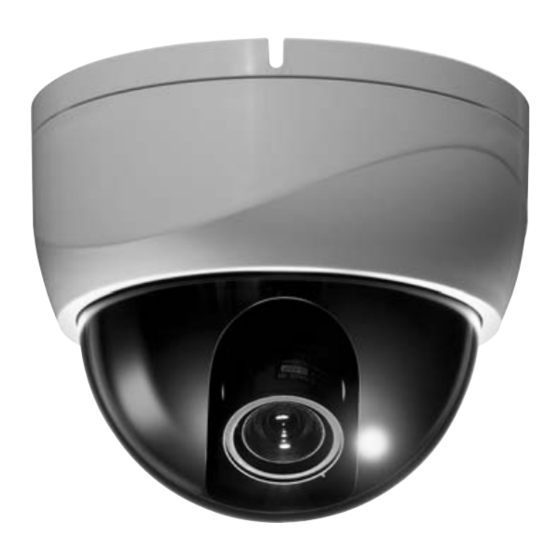
Super DNR High Resolution
Color Dome Camera
CE-955-CAM-WD
CE-D970
The lightning flash with an arrowhead symbol, within an equilateral
triangle is intended to alert the user to the presence of uninsulated
dangerous voltage within the product's enclosure that may be of
sufficient magnitude to constitute a risk of electric shock to persons.
The exclamation point within an equilateral triangle is intended to alert
the user to the presence of important operating and maintenance
(servicing) instructions in the literature accompanying the appliance.
INFORMATION - This equipment has been tested and found to comply with
limits for a Class A digital device, pursuant to part 15 of the FCC Rules & CE Rules.
These limits are designed to provide reasonable protection against harmful
interference when the equipment is operated in a commercial environment.
This equipment generates, uses, and can radiate radio frequency energy and, if
not installed and used in accordance with the instruction manual, may cause
harmful interference to radio communications.
Operation of this equipment in a residential area is likely to cause harmful
interference in which case the user will be required to correct the interference at
his own expense.
WARNING - Changes or modifications not expressly approved by the
manufacturer could void the user's authority to operate the equipment.
CAUTION : To prevent electric shock and risk of fire hazards:
◆ Do NOT use power sources other than those specified.
◆ Do NOT expose this appliance to rain or moisture.
This installation should be made by a qualified service person and
should conform to all local codes.
1
Super DNR High Resolution Color Dome Camera
Advertisement
Table of Contents

Related Manuals for Clinton Electronics CE-D970


Summary of Contents for Clinton Electronics CE-D970
- Page 1 CAUTION : To prevent electric shock and risk of fire hazards: CE-955-CAM-WD ◆ Do NOT use power sources other than those specified. CE-D970 ◆ Do NOT expose this appliance to rain or moisture. This installation should be made by a qualified service person and should conform to all local codes.
-
Page 2: Table Of Contents
■ Contents Features How to Use the Camera ■ Function Menu Structure Warnings and Precautions ■ How to Set up the Functions Components ㆍLENS ㆍEXPOSURE Names and Functions of Parts ㆍWHITE BALANCE control ■ Lens ㆍBACKLIGHT ■ ㆍDNR (Digital Noise Reduction) VBS-EXTRA ■... -
Page 3: Features
■ Features Warning ■ Ultra High Resolution The camera requires periodic inspection. Day & Night By adopting a 1/3" 410,000 pixel Sony CCD, The camera identifies whether it is day or night Contact an authorised technician to carry out the inspection. the camera produces clear picture quality with and automatically switches to the appropriate a horizontal resolution of 580 TV lines for color,... - Page 4 ■ Precautions Do not install the camera in Do not install or use the camera in an Do not drop the camera or protect Never keep the camera pointed extreme temperature conditions. environment where the humidity is high. it from physical shocks. directly at strong light.
-
Page 5: Components
■ Components Names and Functions of Parts ■ 1. COLOR DOME CAMERA 2. SCREWS 3. WIRE FOR VBS-EXTRA 4. INSTRUCTION GUIDE Super DNR High Resolution Color Dome Camera Super DNR High Resolution Color Dome Camera... -
Page 6: Names And Functions Of Parts
■ Names and Functions of Parts Names and Functions of Parts ■ LENS : Vari-Focal DC Auto Iris Lens ① VBS-EXTRA FOR CONNECTING TO LCD ③ Please use the supplied wire when connecting to LCD VBS-EXTRA 3 AXIS BRACKET ④ Please loosen screws and fix tilted and panned position. -
Page 7: Dimensions
■ Names and Functions of Parts 1. Dome Base Mounting - Open the dome by unscrewing the ring from the base-remove it by unscrewing the ring and dome anti-clockwise. - Mount the camera base to a sturdy surface using the supplied screws and the premade holes on the base of the dome. -
Page 8: How To Use The Camera
■ How to Use the Camera ■ Installation How to Use the Camera ■ On-Screen Display Menu Structure Adapter Plate Setup Menu 3.5x25 tapping LENS MANUAL • • screw (provided) SHUTTER SENS-UP • • • Camera Body EXPOSURE RETURN • MANUAL AWC SET •... -
Page 9: How To Set Up The Functions
■ How to Use the Camera How to Set up the Functions Settings can be made using the 5 buttons on the rear of the camera. MAIN SETUP Select the desired menu 1. LENS Modes can be changed item by using the UP and using the LEFT and 2. - Page 10 ■ How to Use the Camera EXPOSURE ● MANUAL : Manual Lens selection MAIN SETUP 1. LENS ● DC : Auto Iris Lens selection 2. EXPOSURE 3. WHITE BAL 4. BACKLIGHT Note 5. DNR 6. DAY/NIGHT AUTO • The brightness of the screen can be adjusted in DC mode. 7.
- Page 11 ■ How to Use the Camera White Balance (White Bal.) Note Use the White Balance function to adjust the screen colors. • When the SHUTTER is set to ESC, and the camera is set to Internal 1. Position the cursor to point to WHITE BAL on the SETUP menu screen Synchronisation, the picture may become unstable if the camera select using the Up and Down buttons.
- Page 12 ■ How to Use the Camera ● BLC : Enables a user to directly select a desired area from a picture, and Note to view the area more clearly. • Under the following conditions White Balance may not work properly. In such cases, select the AWC mode.
-
Page 13: ㆍDay/Night
■ How to Use the Camera 3. Set the DNR mode to 'ON' and press the SET button. The noise Note reduction level can now be adjusted. • Because there can be a difference in the effectiveness of HLC according to the amount of light area in the screen, optimize the installation angle for the best HLC performance. -
Page 14: ㆍImage Adj
■ How to Use the Camera IMAGE ADJ. 2. Select the desired mode using the Left and Right buttons. 1. When the SETUP menu screen is displayed, select 'IMAGE ADJ.' using ● COLOR : The picture is displayed in color. the Up and Down buttons. - Page 15 ■ How to Use the Camera SPECIAL ● D-ZOOM : Digitally zooms, the range is x1~x10. 1. When the SETUP menu screen is displayed, select 'SPECIAL' using the Up and Down buttons. MAIN SETUP 1. LENS 2. EXPOSURE 3. WHITE BAL 4.
- Page 16 ■ How to Use the Camera ② Set to 'ON' using the Left and Right buttons. ⑤ Enter a title, move the cursor to 'POS' and press the SET button. The entered title appears on the screen. Select the position to display the title on the screen using the 4 directional buttons and press the SET button.
- Page 17 ■ How to Use the Camera How to Use the Camera ■ ① When the SPECIAL menu screen is displayed, press the Up and Down - MASK COLOR : Determine area color. Select Grey, Green, Red, Blue, buttons so that the cursor points to MOTION DET. Black or White.
-
Page 18: Troubleshooting
■ Troubleshooting If you have trouble operating your camera, refer to the following table. If the guidelines do not enable you to solve the problem, contact an Problem Solution authorised technician. The Motion Detection • Check that MOTION DET in the SPECIAL SETUP Problem Solution is not set to 'OFF'. -
Page 19: Specifications
■ Specifications NTSC AC24V / DC12V DC12V AC24V / DC12V DC12V Power Source 220mA(AC24V)/260mA(DC12V) 160mA 220mA(AC24V)/260mA(DC12V) 160mA Size SONY 1/3" Super HAD High Sensitivity Color CCD Total Pixels 811(H) x 508(V) 795(H) x 596(V) 768(H) x 494(V) 752(H) x 582(V) Effective Pixels 2:1 Interlace Scanning System...
Need help?
Do you have a question about the CE-D970 and is the answer not in the manual?
Questions and answers