Spirit XBR55 Owner's Manual
Hide thumbs
Also See for XBR55:
- User manual (60 pages) ,
- Owner's manual (32 pages) ,
- Service manual (20 pages)
Advertisement
Table of Contents
- 1 Table of Contents
- 2 Important Safety Instructions
- 3 Important Electrical Instructions
- 4 Grounding Instructions
- 5 Important Operation Instructions
- 6 Console Operation
- 7 Quick Start
- 8 Programmable Features
- 9 Using the Spirit Fit App
- 10 General Maintenance
- 11 Manufacturer's Limited Warranty
- Download this manual
See also:
Service Manual
Advertisement
Table of Contents

Subscribe to Our Youtube Channel
Related Manuals for Spirit XBR55


Summary of Contents for Spirit XBR55
- Page 1 XBR55 SEMI - RECUMBENT BIKE OWNER’S MANUAL...
-
Page 3: Table Of Contents
XBR55 ASSEMBLY INSTRUCTIONS CONSOLE OPERATION PROGRAMMABLE FEATURES USING HEART RATE TRANSMITTER USING THE SPIRIT FIT APP GENERAL MAINTENANCE MANUFACTURER’S LIMITED WARRANTY Thank you for purchasing our product, please save these instructions. Please do not perform or attempt any customizing, adjustments, repair or maintenance that is not described in this manual. - Page 4 Through your dealer, Spirit Fitness will do all we can to make your ownership experience as pleasant as possible for many years to come.
-
Page 5: Important Safety Instructions
described in this manual. Do not use attachments not Important Safety Instructions recommended by the manufacturer. WARNING • Never operate this appliance if it has a damaged cord or plug, if it is not working properly, if it has been When using an electrical appliance, basic precautions should dropped or damaged, or dropped into water. -
Page 6: Important Electrical Instructions
Fitness Equipment Safety Instructions To disconnect turn all controls to the off position, then remove the plug from the outlet. • Do not operate equipment on deeply padded, plush or shag carpet. Damage to both carpet and equipment may result. •... -
Page 7: Grounding Instructions
Circuit Breakers: Some circuit breakers used in homes are not rated for high inrush currents that can occur when a equipment is first turned on or even during use. If your equipment is tripping the house circuit breaker (even though it is the proper current rating) but the circuit breaker on the equipment itself does not trip, you will need to replace the home breaker with a high inrush type. -
Page 8: Important Operation Instructions
Please record the serial number of this fitness product in the space provided below. Serial Number: Register Y our Purchase The self-addressed product registration card must be completed in full and returned to Spirit Fitness. You can also go to http://www.spiritfitness.com/residentialwarrantyregistration.html under the Support tab to register online. - Page 9 XBR55 PRE ASSEMBLY UNPACKING TOOLS INCLUDED: 1. Cut the straps, then along the dotted line on the bottom of the box; lift ‰ 12/14mm Wrench the box over the unit and unpack. ‰ 13/15mm Wrench ‰ Phillips Screwdriver 2. Locate the hardware package. The hardware is separated into four steps.
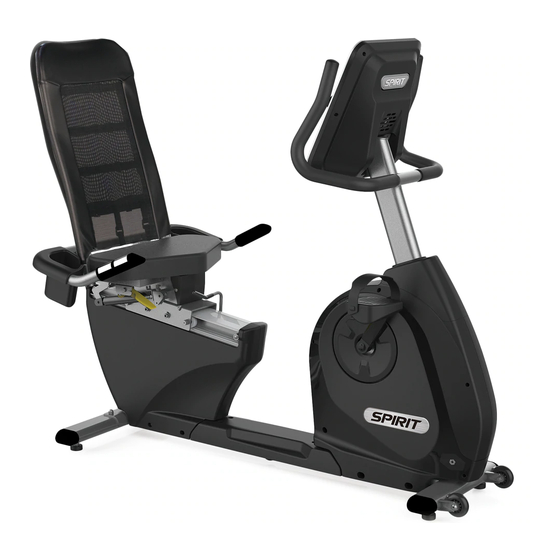
- Page 10 CONSOLE FRONT HANDLEBARS CONSOLE FAN CONSOLE MAST CONSOLE MAST COVER PEDALS SEAT BACK CRANK ARMS SEAT PULSE GRIPS CUP HOLDER FRONT STABILIZER MAIN FRAME REAR STABILIZER...
- Page 11 XBR55 STEP ONE HARDWARE FOR STEP 1 PART TYPE DESCRIPTION BOLT 3/8”X53mm 3/8”XUNC16X4” BOLT FLAT WASHER Ø3/8” × Ø25 × 2T 3/8”X7T NYLOC NUT CAP NUT 3/8”XUNC16X12.5T 1. Gather HARDWARE FOR STEP 1. 2. Attach the REAR STABILIZER (7) to the...
- Page 12 XBR55 STEP TWO HARDWARE FOR STEP 2 PART TYPE DESCRIPTION BOLT 5/16”XUNC18X5/8” Ø5/16” × Ø18 × 1.5T FLAT WASHER SPLIT WASHER 5/16”X1.5T Ø5/16” × 19 × 1.5T CURVED WASHER PHILLIPS HEAD SCREW M5 × 12mm 1. Gather HARDWARE FOR STEP 2.
- Page 13 4. Remove the white Styrofoam pad (factory installed to prevent bolts from being accidentally dropped into the Console Mast Tube). 5. Attach the HANDLE BAR ASSEMBLY (3) onto the CONSOLE MAST (2) bracket with the 2 BOLTS (68), 2 SPLIT WASHERS (82), and 2 FLAT WASHERS (76). Completely tighten with the WRENCH (112).
- Page 14 XBR55 STEP THREE HARDWARE FOR STEP 3 PART TYPE DESCRIPTION BOLT 3/8” X 1-3/4” Ø3/8” X Ø19 X 1.5T FLAT WASHER NYLOC NUT 3/8”X7T M6X15MM PHILLIPS HEAD SCREW 1. Gather HARDWARE FOR STEP 3. 2. Install the SEAT (61) on the SEAT CARRIAGE (4) with 4 PHILLIPS HEAD SCREWS (98).
- Page 15 XBR55 STEP FOUR HARDWARE FOR STEP 4 PART TYPE DESCRIPTION BOLT 5/16”XUNC18X1-1/4” Ø5/16” × Ø18 × 1.5T FLAT WASHER NYLOC NUT 5/16”X6T 4X16MM SHEET METAL SCREW 1. Gather HARDWARE FOR STEP 4. 2. Install the GAS CYLINDER (57) on the SEAT...
-
Page 16: Console Operation
XBR55 CONSOLE OPERATION Large Blue-LED Matrix Window Heart Rate % Profile Message Center Fan to keep Convenient cargo you cool compartment for keys, phone, or MP3 player T en innovative programs offer a variety of work-outs Easy-T ouch Control Buttons... - Page 17 POWER When the power cord is connected to the equipment, the console will automatically power up. When initially powered on the console will perform an internal self-test. During this time all the lights will turn on. When the lights go off, the Message Center will show the software version (i.e.: VER 1.0). The distance window shows the distance in miles and the time window shows the total hours of use.
- Page 18 1/4 Mile T rack The 1/4-mile track (one lap) will be displayed around the dot matrix window. The flashing segment indicates your progress. Once the 1/4-mile (Metric - 0.4k) is complete this feature will begin again. The Lap track will move in a counterclockwise direction. There is a lap counter in the Message Center for monitoring your distance.
-
Page 19: Quick Start
Muscle Activation Figure There is an anatomical figure located at the top of the console. This figure will light all areas that are activated when using the bike. These will light up during any of the programs. You can control which muscles are activated by customizing the resistance profile during the set up phase of console programming. - Page 20 This is the quickest way to start a workout. After the console powers up you just press the Start key to begin, this will initiate the Quick Start mode. In Quick Start the Time will count up from zero and the workload may be adjusted manually by pressing the Level Up/Down buttons.
- Page 21 the Stop key is held down for 3 seconds or a third time during the program, the console will perform a complete Reset. During data entry for a program the Stop key performs a previous screen or segment function. This allows you to go back to change programming data. Program Keys The Program Keys are used to preview each program.
- Page 22 high or low for you. Entering your Weight aides in calculating a more correct Calorie reading. Although we cannot provide an exact calorie count, we do want to be as close as possible. Calorie readings on every piece of exercise equipment, whether it is in a gym or at home, CALORIE NOTE: are not accurate and tend to vary widely.
-
Page 23: Programmable Features
Programmable Features MANUAL The Manual program works as the name implies, manually. This means that you control the workload and not the computer. To start the Manual program, follow the instructions below or just press the Manual button, then the Enter button and follow the directions in the Message Center. Press the Manual key, then press the Enter key. -
Page 24: Preset Programs
Preset Programs The Semi - Recumbent Bike has five different programs that have been designed for a variety of workouts. These five programs have factory preset work level profiles for achieving different goals. HILL This program follows a triangle or pyramid type of gradual progression from approximately 10% of maximum effort (the level that you chose before starting this program) up to a maximum effort which lasts for 10% of the total workout time, then a gradual regression of resistance back to approximately 10% of... - Page 25 STRENGTH Resistance: This program has a gradual progression of resistance up to 100% of maximum effort that is sustained for 25% of workout duration. This will help build strength and muscular endurance in the lower body and glutes. A brief cool down follows.
- Page 26 If you want to increase or decrease the workload at any time during the program press the Up or Down key. This will change the resistance settings of the entire profile, although the profile picture on the screen will not change. The reason for this is so that you can see the entire profile at all times.
- Page 27 new one. The Message Center will ask you to enter your Age. You may enter your age, using the Level Up/Down keys, then press the Enter key to accept the new value and proceed on to the next screen. The Message Center will ask you to enter your Age. You may enter your age, using the Level Up/Down keys, then press the Enter key to accept the new value and proceed on to the next screen.
-
Page 28: Heart Rate Programs
Heart Rate Programs The old motto, “no pain, no gain”, is a myth that has been overpowered by the benefits of exercising comfortably. A great deal of this success has been promoted by the use of heart rate monitors. With the proper use of a heart rate monitor, many people find that their usual choice of exercise intensity was either too high or too low and exercise is much more enjoyable by maintaining their heart rate in the desired benefit range. - Page 29 Consult your physician before participating in any exercise program. With all Spirit Fitness Heart Rate programs you may use the heart rate monitor feature without using the Heart Rate program. This function can be used during manual mode or during any of the nine...
-
Page 30: Rate Of Perceived Exertion
Rate of Perceived Exertion Heart rate is important but listening to your body also has a lot of advantages. There are more variables involved in how hard you should workout than just heart rate. Your stress level, physical health, emotional health, temperature, humidity, the time of day, the last time you ate and what you ate, all contribute to the intensity at which you should workout. - Page 31 Wearing The Chest Strap Attach the transmitter to the elastic strap using the interlocking key. Adjust the strap as tightly as possible as long as the strap is not too tight to remain comfortable. Position the transmitter with the logo centered in the middle of your torso facing away from your chest (some people must position the transmitter slightly left of center).
-
Page 32: Using The Spirit Fit App
MapMyFitness, Record, Fitbit, etc, in order for the icon to be active and available. *Note: Your device will need to be running on a minimum operating system of iOs 7 or Android 4.4 for the Spirit Fit App to operate... - Page 33 Some people have problems with the transmitter picking up a signal from their skin. If you have problems try wearing the transmitter upside down. Normally the transmitter will be oriented so the Spirit Fitness logo is right side up. The antenna that picks up your heart rate is very sensitive. If there is an outside noise source, turning the whole machine 90 degrees may de-tune the interference.
- Page 34 After selecting your heart rate target, the program will attempt to keep you at or within 3-5 heart beats per minute of this value. Follow the prompts in the Message Center to maintain your selected heart rate value. Press the HR 1 or HR 2 key then press the Enter key. The Message Center will ask you to enter your Age.
-
Page 35: General Maintenance
GENERAL MAINTENANCE Wipe down all areas in the sweat path with a damp cloth after each workout. If a squeak, thump, clicking or rough feeling develops the main cause is most likely one of two reasons: The hardware was not sufficiently tightened during assembly. All bolts that were installed during assembly need to be tightened as much as possible. -
Page 36: Manufacturer's Limited Warranty
Semi - Recumbent Bike Warranty - Effective January 25, 2016 Spirit Fitness warrants all its Semi - Recumbent Bike parts for a period of time listed below from the date of retail sale, as determined by sale receipt, or in the absence of a sales receipt eighteen (18) months from the original factory shipping date. Spirit Fitness’ responsibilities include providing new or remanufactured parts, at Spirit Fitness’... - Page 37 Products that have been: sold, transferred, bartered, or given to a third party. Products that do not have a warranty registration card on file at Spirit Fitness. Spirit Fitness reserves the right to request proof of purchase if no warranty record exists for the product.
- Page 38 NOTES...
- Page 40 800.258.4555 Spirit Fitness spiritservice@spiritfitness.com 3000 Nestle Road www.spiritfitness.com Jonesboro, AR 72401 XBR55 Owners Manual © 2016 All Rights Reserved Revision: 01.25.2016...
Need help?
Do you have a question about the XBR55 and is the answer not in the manual?
Questions and answers
The bike has suddenly started to pause the workout after 30 seconds, reducing the resistance to zero