Table of Contents
Advertisement
Quick Links
Advertisement
Table of Contents

Related Manuals for Ricoh PJ KU12000


Summary of Contents for Ricoh PJ KU12000
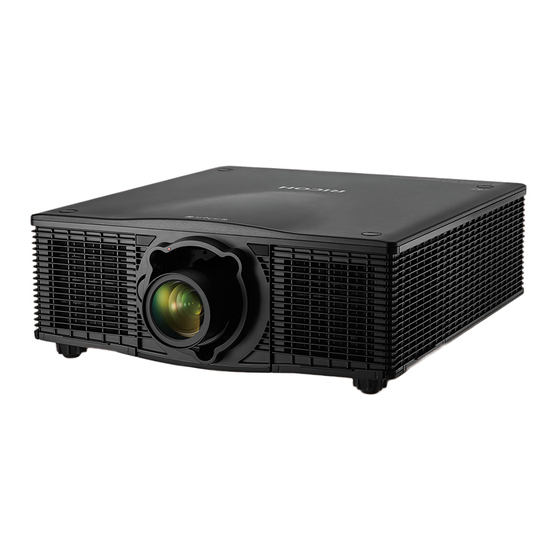
- Page 1 RICOH PJ KU12000 Series User’s Manual 1. Introduction 2. Installation 3. User Controls 4. Appendices Read this manual carefully before you use this machine and keep it handy for future reference. For safe and correct use, be sure to read the Precautions in this manual before using the machine.
-
Page 2: Safety Information
Safety Information This chapter describes safety information for this machine. Information Introduction This manual contains detailed instructions and notes on the operation and use of this machine. For your safety and benefit, read this manual carefully before using the machine. Keep this manual in a handy place for quick reference. Important Contents of this manual are subject to change without prior notice. -
Page 3: Safety During Operation
Safety Information When using this machine, the following safety precautions should always be fol- lowed. Safety During Operation In this manual, the following important symbols are used: WARNING Indicates a potentially hazardous situation which, if instructions are not followed, could result in death or serious injury. CAUTION Indicates a potentially hazardous situation which, if instructions are not followed, may result in minor or moderate injury or damage to property. - Page 4 CAUTION Keep the machine away from humidity and dust. Otherwise a fire or an elec- tric shock might occur. CAUTION Do not place any objects on the machine. Doing so may cause the machine to topple over, possibly resulting in injury. CAUTION ...
-
Page 5: Handling Power Cords And Power Cord Plugs
CAUTION Do not place or store the product in a location where direct sunlight or heat generation might occur. The heat may deform or wear out the exterior parts or negatively affect internal parts. Doing so could result in fire. CAUTION ... - Page 6 WARNING Touching the prongs of the power cable’s plug with anything metallic consti- tutes a fire and electric shock hazard. WARNING The supplied power cord is for use with this machine only. Do not use it with other appliances. Doing so could result in fire or electric shock. WARNING ...
- Page 7 WARNING Do not use the connection cable if it is deformed, cracked, or damaged. Doing so could result in fire or electric shock. If the connection cable is de- formed, cracked, or damaged, contact your service representative to request a replacement cable.
-
Page 8: Handling The Main Machine
CAUTION When performing maintenance on the machine, always disconnect the power cord from the wall outlet. Handling the main machine This section explains safety precautions about handling the main machine. WARNING If the machine emits smoke or odours, or if it behaves unusually, you must turn off its power immediately. - Page 9 WARNING If the machine topples, or if a cover or other part gets broken, you must turn off its power immediately. After turning off the power, be sure to disconnect the power cord plug from the wall outlet. Then contact your service representative and report the problem.
- Page 10 CAUTION Do not increase the volume unless you are listening while increasing the volume. Also, lower the volume before turning off the power, because a loud sound may be emitted when the power is turned on and cause hearing dam- age.
-
Page 11: About The Batteries
About the batteries Explains things that you should follow in regard to the batteries. WARNING For safe operation, follow the warnings below regarding the batteries used in the remote control. If you use the batteries incorrectly, it may result in fire or injury due to batteries leaking or exploding. -
Page 12: About The Lamp
About the lamp Explains things that you should follow in regard to the lamp. WARNING Do not look into the lens or vent when the product is on. The bright light may damage your eyes. Be especially careful in an environment with children. WARNING ... - Page 13 CAUTION What to do if a lamp has exploded If the lamp explodes, remove the power cord from the product, leave the room while making sure it is thoroughly ventilated. If the lamp explodes and you think that you have gotten glass particles or mercury vapor in your eyes or have inhaled either, contact a doctor immediately.
-
Page 14: Other Information
Other Information Copyrights to Images When projecting images using the projector, be careful not to infringe the copyright of protected materials. The following are examples that may infringe the copyright of protected materials. • Broadcasting images or movies for commercial purposes •... - Page 15 Safety Marks of This Machine Positions of WARNING and CAUTION marks This machine has marks for WARNING and CAUTION at the positions shown be- low. For safety, please follow the instructions and handle the machine as indicated. Main unit The lamp attention is for the specialists only. Do not put your face or hand near the exhaust vents.
-
Page 16: Power Switch Symbols
Do not remove any screws except the lamp cover screws. Do not block or cover the vents. Lamp(s) inside this product contain mercury and must be recycled or disposed of according to local, state or federal laws. Power Switch Symbols The meanings of the symbols for the switches on this machine are as follows: : STANDBY ... -
Page 17: Laws And Regulations
This appendix lists the general notices of your Projector. Notice: Users in the United States of America FCC notice MODEL NAME: RICOH PJ KU12000 NOTE: This equipment has been tested and found to comply with the limits for a Class A digital device, pursuant to Part 15 of the FCC Rules. - Page 18 Notice: Shielded cables All connections to other computing devices must be made using shielded cables to maintain compliance with FCC regulations. Caution Changes or modifications not expressly approved by the manufacturer could void the user’s authority, which is granted by the Federal Communications Commission, to operate this projector.
- Page 19 Notice: Users in EU countries CE Marking Traceability Information (For EU Countries Only) Manufacturer: Ricoh Co., Ltd. 3-6 Nakamagome 1-chome, Ohta-ku, Tokyo. 143-8555, Japan Importer: Ricoh Europe PLC 20 Triton Street, London. NW1 3BF, United Kingdom User Information on Electrical and Electronic Equipment Users in the countries where this symbol shown in this section has been specified in national law on collection and treatment of E-waste.
- Page 20 Notice: Users in the EU Note for the Battery and/or Accumulator Symbol In accordance with the Battery Directive 2006/66/EC Article 20 Information for end-users Annex II, the above symbol is printed on batteries and accumulators. This symbol means that in the European Union, used batteries and accumulators should be disposed of separately from your household waste.
-
Page 21: Table Of Contents
Table of Contents Structure .......... 46 Safety Information ........2 PICTURE ......... 52 Introduction PICTURE | 3D Display ..... 54 Product Features ........22 PICTURE | Color Matching ....55 Package Overview ....... 23 PICTURE | Advanced ...... 57 Product Overview ......... 24 OUTPUT .......... -
Page 22: Introduction
Introduction Product Features ` Supported resolution up to WUXGA @60Hz (Reduced Blanking) ` Single/Dual lamp system ` Power Zoom/Focus ` Power lens shift ` Dynamic Aperture ` Filter module (optional) ` Support PIP/POP function ` Embedded HDBaseT solution, support HD video streaming through RJ45 ` Embedded warping design for geometry correction &... -
Page 23: Package Overview
Package Overview Unpack and inspect the box contents to ensure all parts listed below are in the box. If something is missing, please contact our customer service. Projector without lens cover Power Cord VGA Cable Info Mode Auto Input Enter Menu Exit Gamma Bright... -
Page 24: Product Overview
Product Overview Main Unit (Front View) (Rear View) 1. IR Receivers 6. LED Status Indicators 11. Power Switch 2. Lens Release Button 7. IR Sensor 12. Anti-Theft Lock Hole (Kensington™ 3. Inlet Vent 8. Outlet Vent Lock) 4. Lens 9. Lamp Door 13. -
Page 25: Control Panel
Control Panel / Power key 2. AV Mute key 3. Auto key 4. Enter key 5. Input key 6. Focus key 7. Lens key 8. Zoom key 9. Exit key 10. Four directional select keys 11. Menu key... -
Page 26: Connection Ports
Connection Ports 1. 3D Sync OUT Connector 9. LAN Connector 2. DVI-D Connector 10. Service Connector 3. Computer IN Connector 11. USB Connector 4. Monitor OUT Connector 12. HDMI Connector 5. Component/RGBHV IN Connector 13. 3G-SDI IN Connector 6. REMOTE OUT Connector 14. -
Page 27: Remote Control
Remote Control 1. Power ON Power on the projector. 2. Numeric Keypad 3. Information Display the projector information. 4. Auto Auto adjust projector with source. 5. Enter Mode Info Confirm your item selection. 6. Four Directional Select Keys Auto Input Press up, down, left, right direction buttons to select items or make adjustments. - Page 28 17. Mode Select the preset display mode. 18. Input Automatically scans for connected source. 19. Exit Exit a menu. 20. PIP Turn PIP/PBP ON/OFF. 21. Cont. Adjust difference between dark and light. 22. Focus Adjust the lens focus. 23. Zoom Adjust the lens zoom function.
-
Page 29: Remote Control Battery Installation
Remote Control Battery Installation Remove the battery compartment cover as shown in the illustration. Install new batteries (AAA/R03). Ensure that you have the batteries’ polarity (+/–) aligned correctly. Replace the cover. Do not mix different types of batteries or new and old batteries. To ensure safe operation, please observe the following precautions: ... -
Page 30: Remote Control Operating Range
Remote Control Operating Range Point the remote control toward the projector (Remote Receiver) when pressing any button. Maximum operating range for the remote control is about 33’(10m) and ±40° (hori- zontally), and ±15° (vertically) in the front and on the rear of the projector. 33’(10m) 23’(7m) ±40°... -
Page 31: Installation
Installation Adjust the Projector Position When you select a position for the projector, consider the size and shape of your screen, the location of your power outlets, and the distance between the projector and the rest of your equipment. Follow these general guidelines: •... -
Page 32: Portrait Mode
Portrait Mode • The projector is in portrait mode when the viewing angle is from 70° to 110° as illustrated below. Portrait mode 70~90° Portrait mode 90° Portrait mode 90~110° Non-Portrait Mode • The projector is in non-portrait mode when the viewing angle is 250° to 290° as illustrated below. -
Page 33: Installing The Projector Lens
Installing the Projector Lens When handling the projector after lens installation, make sure the front lens cap is placed on the lens to protect the lens surface from potential damage. When carrying or moving the projector, do not handle by the lens. This may damage the lens, the chassis or other mechanical parts within the projector. -
Page 34: Connecting To Computer/Notebook
Connecting to Computer/Notebook Computer / Notebook Monitor 3D glasses Ethernet Computer / Notebook Power socket 1. 3D Emitter Cable 6. HDBaseT Cable 2. DVI Cable 7. USB Cable (service) 3. VGA IN Cable 8. HDMI Cable 4. VGA OUT Cable 9. -
Page 35: Connecting To Video Sources
Connecting to Video Sources DVD player, Set-top box, HDTV receiver DVD player Second projector Remote control Power socket DV camera (for DVD player live broadcasting) 5. HDBaseT Cable 1. Composite Video cable 6. HDMI Cable 2. Component (YPbPr) Cable + Stereo Audio Cable 7. -
Page 36: Powering On/Off The Projector
Powering On/Off the Projector Powering On the Projector 1. Securely connect the power cord and signal cable. Power on the switch and the “Power” button on the built in keypad is illuminated ①. 2. Turn on the projector by pressing the “... -
Page 37: Powering Off The Projector
Powering Off the Projector 1. Press the button on the remote control or the “ ” button on the control panel to turn off the projector ①. The following message will be displayed on the screen. Power OFF? Press OFF key again. Press the button on the remote control or the “... -
Page 38: Warning Indicator
Warning Indicator When the warning indicators (see below) come on, the projector will go to cooling state or automatically shutdown: y Both “LAMP1” LED or “LAMP2” LED indicators (Orange) light up. This indicates the lamp 1 or lamp 2 time has expired and lamp should be replaced. y “LAMP1”... - Page 39 AV Mute Status Lamp 1 Lamp 2 Message Note Lamp2 has unexpectedly shut down (system goes into Flashing cooling down state). Lamp2 driver communication fail AC power is off Normal (without AC plug in) AC has been applied, Normal projector is in standby mode. AC has been applied, projector is in Normal...
-
Page 40: Adjusting The Projected Image
Adjusting the Projected Image Adjusting the Projector’s Height The projector is equipped with elevator rubber feet for adjusting the image height. 1. Locate the adjustable foot you wish to modify on the underside of the projector. 2. Rotate the adjustable ring counter clockwise to raise the projector or clockwise to lower it. -
Page 41: Adjusting The Projecting Image's Position
To determine where to position the projector, consider the size and shape of your screen, the location of your power outlets, and the distance between the projector and the rest of your equipment. Platform 0.96”WUXGA Platform RICOH PJ KU12000 (WUXGA1920 x 1200) 0.96” Projection Lens Ultra-Long Lens Type Wide Zoom... - Page 42 Diagonal Width Height (inch) 1.94 1.21 14.0 2.15 1.35 15.5 2.37 1.48 17.1 2.59 1.62 10.3 10.3 18.6 2.80 1.75 11.2 11.2 20.2 3.02 1.89 12.1 12.1 21.7 3.23 2.02 12.9 12.9 23.3 3.45 2.15 13.8 13.8 24.8 3.66 2.29 14.7 14.7 26.4...
- Page 43 Lens shift range for B3/B4/B5/B6 Resolution ΔH ΔV ΔH ΔV WUXGA 0% H 15% V 25% H 60% V When the lens is shifted beyond the described range of operation, the screen edges may become darker or the images may become out of focus.
-
Page 44: User Controls
User Controls Using the Control Panel Description Name Turn the projector on/off. Power AV Mute Display or blank the video image. Auto Automatically optimize image. Enter Confirm a selected item. Input Select an input signal. Focus Adjust the lens focus function. Lens Adjust the lens vertical or horizontal offset setting. -
Page 45: On-Screen Display Menus
On-screen Display Menus The Projector has multilingual On-screen Display menus that allow you to make image adjustments and change a variety of settings. The projector will automatically detect the source. How to operate 1. To open the OSD menu, press “Menu” on the remote control or the projector keypad. -
Page 46: Structure
Structure Please note that the on-screen display (OSD) menus vary according to the signal type selected and the projector model you are using. Main Sub Menu / Settings Default Menu Presentation Video Bright DICOM SIM Display Mode By source set 2D High Speed User Save to User... - Page 47 Main Sub Menu / Settings Default Menu Normal Look BrilliantColor Bright Look Bright Look White Peaking 0 - 100 By source set VIdeo Film Gamma Bright By source set DICOM Warmest Warm Color Temperature By source set Cool Bright REC709 Color Space REC601 Auto...
- Page 48 Main Sub Menu / Settings Default Menu PC Mode H Keystone 0 ~ 40 Image Warping V Keystone 0 ~ 40 H Pincushion 0 ~ 100 V Pincushion 0 ~ 100 PIP/PBP Enable HDMI DVI-D Main Source 3G-SDI HDBaseT CVBS Network Display OUTPUT HDMI...
- Page 49 Main Sub Menu / Settings Default Menu Focus Zoom Lens Shift Lens Function Yes/No (Dialog Lens Calibration box) Lens Lock Menu Transparency 0 ~ 9 Menu Preferences Show Messages Keypad LED Settings Pin Protect PIN default : 12345 Change PIN Closed Captioning DHCP IP Address...
- Page 50 Main Sub Menu / Settings Default Menu Auto Source High Altitude Grid Green Blue Test Pattern Yellow Magenta Cyan White Black Logo Blue Background Color Logo Black White Blank Screen OPTION Aspect Ratio Hot-Key settings Freeze Screen Blank Screen Overscan Closed Captions 0.5W mode Standby Power...
- Page 51 Main Sub Menu / Settings Default Menu Constant Power Constant Light Source Mode Constant Power Luminance Eco Mode Constant Power 0 - 10 Settings Constant Luminance 0 - 10 Settings Lamp 1 Current Light Source Lamp 2 Both Light Source Both Settings On Failure Only...
-
Page 52: Picture
PICTURE PICTURE PICTURE Display Mode Presentation Brightness Contrast OUTPUT Sharpness Color Tint SETUP Phase Frequency Horz Position OPTION Vert Position Display Mode There are many factory presets optimized for various types of images. Presentation: For good color and brightness for PC input. Video: For video or TV source. - Page 53 Sharpness Adjust the sharpness of the image. Press the ◄ button to decrease the sharpness. Press the ► button to increase the sharpness. Color Adjust a video image from black and white to fully saturated color. The color setting applies to video sources only. Press the ◄...
-
Page 54: Picture | 3D Display
PICTURE | 3D Display 3D Display PICTURE 3D Enable Auto 3D Invert DLP Link OUTPUT SETUP OPTION 3D Enable Set 3D format. Supports Mandatory 3D formats and frame sequential 3D@120Hz. Auto: When a 3D identifi cation signal is detected, the 3D format is selected automatically. -
Page 55: Picture | Color Matching
PICTURE | Color Matching Color Matching PICTURE Enable Auto Test Pattern Red Part of Red 1000 OUTPUT Green Part of Red Blue Part of Red Green Part of Green 1000 SETUP Red Part of Green Blue Part of Green Blue Part of Blue 1000 OPTION Red Part of Blue... - Page 56 Blue Part of Green Adjust the intensity of the blue color component in green color. This will also affect the hue of the color. Blue Part of Blue Adjust the intensity of the blue color component in blue color. This will also affect the hue of the color.
-
Page 57: Picture | Advanced
PICTURE | Advanced Advanced PICTURE BrilliantColor Bright Look White Peaking Gamma VIdeo OUTPUT Color Temperature Bright Color Space Auto Color Settings SETUP Color Enhancement Color Wheel Speed DynamicBlack OPTION Noise Reduction BrilliantColor™ Enable the BrilliantColor function to enhance the brightness while providing true, more vibrant colors in picture. - Page 58 Color Settings Configure the brightness (gain) and contrast (offset) of an image. Red Gain/Green Gain/Blue Gain/Red Offset/Green Offset/Blue Offset: Adjust the gain of the red, green, or blue channel of the image. Adjust the offset of the red, green, or blue channel of the image. It will affect the black and white. Reset RGB Gain/Offset: Reset the gain and offset adjustments to factory defaults.
-
Page 59: Output
OUTPUT OUTPUT PICTURE Aspect Ratio Auto Overscan H Digital Zoom OUTPUT V Digital Zoom H Digital Shift V Digital Shift SETUP Image Warping PIP/PBP OPTION Aspect Ratio Use this function to choose your desired aspect ratio. Auto: Automatically selects the appropriate display format. 4:3: This format is for 4:3 aspect input sources. - Page 60 H Digital Shift Shift the display area horizontally if its size has been changed by the Digital Zoom setting. V Digital Shift Shift the display area vertically if its size has been changed by the Digital Zoom setting. Image Warping Configure the image warping settings.
-
Page 61: Output | Image Warping
OUTPUT | Image Warping Image Warping PICTURE PC Mode H Keystone V Keystone OUTPUT H Pincushion V Pincushion SETUP OPTION PC Mode Enable PC software to control geometry. H Keystone Adjust image distortion horizontally and make a squarer image. Horizontal keystone is used to correct a keystoned image shape in which the left and right borders of the image are unequal in length. - Page 62 H Pincushion Adjust the pincushion horizontally and make a more square image. V Pincushion Adjust the pincushion vertically and make a more square image.
-
Page 63: Output | Pip/Pbp
OUTPUT | PIP/PBP PIP/PBP PICTURE PIP/PBP Enable Main Source Sub Source DVI-D OUTPUT Swap Size Large Layout PBP, Main Left SETUP OPTION PIP/PBP Enable Toggle between displaying two sources at once (Main and PIP/PBP images) or one source only. Main Source From the list of active inputs, select one to be used as the main image. - Page 64 PIP/PBP Size PIP/PBP Layout Small Medium Large PBP, Main Top PBP, Main Right PBP, Main Bottom PIP-Bottom Right PIP-Bottom Left PIP-Top Left PIP-Top Right...
-
Page 65: Setup
SETUP SETUP PICTURE Language English Ceiling Mount Auto Rear Projection OUTPUT Lens Function Menu Preferences Keypad LED Settings SETUP Closed Captioning Communications OPTION Language Select an available language for the OSD display. Ceiling Mount Turn the image upside down for ceiling-mounted projection. Rear Projection Reverse the image so you can project from behind a translucent screen. -
Page 66: Setup | Lens Function
SETUP | Lens Function Lens Function PICTURE Focus Zoom Lens Shift OUTPUT Lens Calibration Lens Lock SETUP OPTION Focus Adjust focus function on the projected image. Zoom Adjust zoom function on the projected image. Lens Shift Shift the projected image. Lens Calibration Perform calibration and return lens to the center position. -
Page 67: Setup | Menu Preferences
SETUP | Menu Preferences Menu Preferences PICTURE Menu Transparency Show Messages OUTPUT SETUP OPTION Menu Transparency Change OSD menu background to be transparent. Show Messages Display status messages on the screen. SETUP | Pin PICTURE Pin Protect Change PIN OUTPUT SETUP OPTION PIN Protect... -
Page 68: Setup | Communications
SETUP | Communications Communications PICTURE Network Serial Port Baud Rate 19200 OUTPUT Serial Port Echo Serial Port Path RS232 Projector Address SETUP OPTION Configure the local area network (LAN) settings. DHCP: Turn the DHCP ON/OFF. IP Address: Select an IP address. Subnet Mask: Select subnet mask number. -
Page 69: Crestron Roomview Control Tool
Crestron RoomView Control Tool Crestron RoomView™ provides a central monitoring station for 250+ control systems on a single Ethernet network (more are possible, the number depends on the combination of IP ID and IP address). Crestron RoomView monitors each projector, including projector’s online status, system power, lamp life, network setting and hardware faults, plus any custom attribute as defined by the Administrator. - Page 70 3. Edit Attribute 4. Edit Event For more information, please visit http://www.crestron.com & www.crestron.com/getroomview. Network supports Crestron (Room View), AMX (Device Discovery Beacon Validation Tool) , PJLink and RS232 control.
- Page 71 Network Configure the general network settings. Projector Name: Display the projector hostname for Network. Restart Network: Restart the network. Network Factory Reset: Perform factory reset on the network settings. The Projector Name, LAN IP, and SNMP settings will be reset. Serial Port Baud Rate Select the serial port and baud rate.
-
Page 72: Option
OPTION OPTION PICTURE Auto Source High Altitude Test Pattern OUTPUT Background Color Logo Hot-Key settings Blank Screen Power Settings SETUP Light Source Settings Light Sensor Information OPTION Factory Reset Auto Source On: The projector will search for other signals if the current input signal is lost. Off: The projector will only search current input connection. -
Page 73: Option | Power Settings
Light Sensor Calibrate the Light Sensor for use with the Constant Luminance lamp mode, which allows the projector to be set for constant brightness. If the Light Sensor has not been calibrated, Constant Luminance mode will be disabled. Light Sensor calibration should be repeated when new lamps are installed. -
Page 74: Option | Light Source Settings
Auto Power Off Sets the countdown timer. The countdown timer will start, when there is no signal being sent to the projector. The projector will automatically power off when the countdown has finished (in minutes). Sleep Timer Sets the countdown timer. The countdown timer will start, with or without a signal being sent to the projector. - Page 75 Current Light Source Select which lamp(s) is in use. Auto Switch Control when the projector switches lamps. Options include: on failure only, at power-up, or after a set number of hours. Auto Switch Time (Hours) Set the number of hours for Lamp Auto Switch. For example: 1 Lamp conditions: lamp 1 = 50 hours, lamp 2 = 60 hours.
-
Page 76: Appendices
Appendices Troubleshooting If you experience a problem with your projector, please refer to the following information. If a problem persists, please contact your local reseller or service center. Image Problems No image appears on-screen ` Ensure all the cables and power connections are correctly and securely connected as described in the “Installation”... - Page 77 ` If you are using a Notebook: First, follow the steps above to adjust resolution of the computer. Press the toggle output settings. example: [Fn]+[F4] Notebook Brand Function Keys Acer [Fn]+[F5] Asus [Fn]+[F8] Dell [Fn]+[F8] Gateway [Fn]+[F4] IBM/Lenovo [Fn]+[F7] HP/Compaq [Fn]+[F4] [Fn]+[F3] Toshiba...
- Page 78 The image is stretched when displaying 16:10 DVD title ` When you play anamorphic DVD or 16:10 DVD, the projector will show the best image when the projector display mode is set to 16:9 in the OSD. ` If you play 4:3 format DVD titles, please change the format to 4:3 in the projector OSD.
-
Page 79: Projector Problems
Projector Problems The projector stops responding to all controls ` If possible, turn off the projector, then unplug the power cord and wait at least 60 seconds before reconnecting power. Lamp burns out or makes a popping sound ` When the lamp reaches its end of life, it will burn out and may make a loud popping sound. - Page 80 Step 4: On the General tab, under This connection use the following items, click Internet Protocol(TCP/IP), and then click “Properties”. Step 5: Click Use the following IP address, and type in as below: 1) IP address: 192.168.0.101 2) Subnet mask: 255.255.255.0 3) Default gateway: 192.168.0.254...
- Page 81 Step 6: To open Internet Options, click IE web browser, click Internet Options, click the Connections tab and click “LAN Setting…”. Step 7: All items in the Local Area Network (LAN) Setting window must unchecked. Then click “OK” button twice. Step 8: Connect a cat5 Ethernet cross-over cable between the projector and the computer.
-
Page 82: On Screen Messages
On Screen Messages y Power off confirm Power OFF? Press OFF key again. y Lamp 1 life warning Lamp 1 and filters are going to expire; change the lamp and filters. y Lamp 2 life warning Lamp 2 and filters are going to expire; change the lamp and filters. -
Page 83: Replacing The Lamp
At this point, it is recommended to change the lamp as soon as possible. Please contact the dealer to acquire a lamp. Type number: RICOH replacement lamp type 25 Warning: If ceiling mounted, please use caution when opening the lamp access panel. - Page 84 Lamp Replacing Procedure: 1. Switch off the power to the projector by pressing the “ ” button. 2. Wait for projector to cool down: Allow the projector to cool down into standby mode. 3. Disconnect the power cord. 4. Unscrew the two screws on the lamp door. ① 5.
-
Page 85: Filter Maintenance
Filter maintenance Filter Replacing Procedure: 1. Switch off the power to the projector by pressing the “ ” button. 2. Wait for projector to cool down: Allow the projector to cool down into standby mode. 3. Disconnect the power cord. 4. -
Page 86: Compatibility Modes
Compatibility Modes Frequency Frame Rate Signal Type Resolution HDMI 3G-SDI HDBaseT CVBS H. (kHz) (Hz) 640x480 640x480 37,861 640x480 37,500 640x480 43,269 640x480 35,000 66.6 720x400 31,469 800x600 37.9 800x600 48.1 800x600 46.9 800x600 53.7 800x600 77.285 832x624 848x480 24.621 848x480 29.829 848x480... - Page 87 Frequency Frame Rate Signal Type Resolution HDMI 3G-SDI HDBaseT CVBS H. (kHz) (Hz) 1280x720 90.1 1280x768 47.776 1280x768 60.288 1280x768 68.633 1280x800 41.262 1280x800 49.702 1280x800 62.795 1280x800 71.554 1280x960 49.404 1280x960 59.699 1280x960 75.231 1280x960 85.792 1280x1024 52.678 1280x1024 1280x1024 1280x1024 91.1...
- Page 88 Frequency Frame Rate Signal Type Resolution HDMI 3G-SDI HDBaseT CVBS H. (kHz) (Hz) PAL (B,G,H,I) 15.625 PAL (N) 15.625 PAL (M) 15.625 SECAM SECAM (M) 480i 15.734 SDTV 576i 15.625 480p 31.469 EDTV 576p 31.25 1080i 28.125 1080i 33.716 1080i 33.75 720p 37.5...
- Page 89 Frequency Frame Rate Signal Type Resolution HDMI 3G-SDI HDBaseT CVBS H. (kHz) (Hz) 480i YcbCr422 59.94 10bit SD-SDI 576i YcbCr422 10bit 720p YcbCr422 59.94 10bit 1080i YcbCr422 59.94 10bit 23.98 HD-SDI 1080p YcbCr422 10bit 29.97 1080sF 29.97 YcbCr422 10bit 1080p YcbCr422 3GA-SDI 59.94 10bit...
-
Page 90: Remote Key Code
Remote Key Code Default custom code => 0x80EB ID code 01 ~ 99 => 0x0010~0x0073 Format => NEC Address Data Key Legend Key position Repeat format Byte 1 Byte 2 Byte 3 Byte 4 INFO Mode Auto Sync Source LEFT Enter RIGHT DOWN... - Page 91 Address Data Key Legend Key position Repeat format Byte 1 Byte 2 Byte 3 Byte 4 KEYSTONE KEYSTONE ▲ ZOOM KEYSTONE KEYSTONE ▼ ZOOM Shutter (AV Mute) Hot key Pattern Projector addressing ID code Change mode Customer code Press the "Hot key" for 3 sec, release, enter 0 then enter 1 0010 within 2 sec Press the "Hot key"...
-
Page 92: Rs232 Pin Assignments
RS232 Pin Assignments Projector Side Pin No. PC Side (RS232 Terminal) Setup Information RS-232 protocol Baud Rate 9600 bps (default) Data Length 8 bit Parity Check None Stop Bit 1 bit Flow Control None RS232 shell is grounded. RS232 interface need use swap pin for RS232 communication. ... -
Page 93: Specifications
Specifications Technology KU12000:DMD,0.96" WUXGA ASIC DDP4422 + PW392C Native Resolution WUXGA (1920x1200) Computer compatibility IBM PC Compatible, support HDTV (1080i/p, 720p, 576i/p, 480i/p) include both PC and component inputs Video compatibility NTSC M(3.58MHz), 4.43MHz PAL (B, D, G, H, I, M, N), 4.43MHz SECAM (B, D, G, K, K1, L), 4.25/4.4MHz HDTV 720p (50/60Hz), 1080i/p (50/60Hz), 1080p (24/25/30/50/60Hz) - Page 94 I/O connectors HDMI In x 1 Computer In x 1 CVBS In x 1 (Composite Video) BNC x 5 (YPbPr In (Component Video), RGBHV In, BNC Connector) USB x 1 (Type A) 3G-SDI x 1 (BNC Connector) 3D Sync x 1 DVI-D x 1 Monitor Out x 1 LAN x 1...
-
Page 95: Cabinet Dimension
Cabinet dimension Unit: mm Screw type: M8 x 4 Maximum screw hole depth: 20mm... - Page 96 Trademarks y DLP is trademark or registered trademark of Texas Instruments. y IBM is a trademark or registered trademark of Interna tional Business Machines Corporation. y Macintosh, Mac OS X, iMac, and PowerBook are trade marks of Apple Inc., registered in the U.S. and other countries. y Microsoft, Windows, Windows Vista, Internet Explorer and PowerPoint are either a registered trademark or trademark of Microsoft Corporation in the United States and/or other countries.
- Page 97 Y092-6221A...
Need help?
Do you have a question about the PJ KU12000 and is the answer not in the manual?
Questions and answers