Table of Contents
Advertisement
User's Manual
1.
Usage Notice
2.
Introduction
3.
Installation
4.
Basic Operations
5.
User Controls
6.
Appendices
Read this manual carefully before you use this machine and keep it
handy for future reference. For safe and correct use, be sure to read
the Precautions in this manual before using the machine.
Advertisement
Table of Contents

Related Manuals for Ricoh PJ X4340


Summary of Contents for Ricoh PJ X4340
- Page 1 User’s Manual Usage Notice Introduction Installation Basic Operations User Controls Appendices Read this manual carefully before you use this machine and keep it handy for future reference. For safe and correct use, be sure to read the Precautions in this manual before using the machine.
-
Page 3: Table Of Contents
Table of Contents Appendices ........43 Table of Contents ......1 Usage Notice ........2 Lamp Replacement Procedure ..43 Reset the lamp usage time ....43 Precautions .........2 Compatibility Modes ......44 Installing the Projector on a Wall or Ceiling ..........5 Computer/Video/HDMI/Mac Compatibility ........44 Safety Labels of This Machine ....7 Troubleshooting ........46 Regulation &... -
Page 4: Usage Notice
Usage Notice Precautions Follow all warnings, precautions and mainte- nance as recommended in this user’s guide to maximize the life of your unit. ▀■ Warning- This apparatus must be earthed. ▀■ Warning- Do not look into the projector’s lens when the lamp is on. - Page 5 ▀■ Caution- Do not use attachments not recommended by RICOH. Use of an incompatible attachments could cause hazards or damage to the product. ▀■ Caution- Do not place this product on an unstable cart, stand, tripod, bracket, or table. The product may fall, caus- ing serious injury to a child or adult, and serious dam- age to the product.
- Page 6 Usage Notice ▀■ Caution- This product incorporates glass components, includ- ing a lens and a lamp. If these should break, please handle with care to avoid injury and contact your sales representative for repair service. Avoid any broken pieces of glass since they may cause injury. In the unlikely event that the lamp ruptures, thoroughly clean the area around the projector and discard any edible items placed in that area since they may be contami- nated.
-
Page 7: Installing The Projector On A Wall Or Ceiling
Usage Notice Installing the Projector on a Wall or Ceiling Do not attempt to clean or replace parts for a machine that is installed in a high location on a wall or ceiling. Doing so may cause it to fall down, result- ing in an injury. Do not open the lamp cover of a machine that is installed on a wall or ceil- ing. Doing so may cause the lamp cover to fall down. If the lamp is broken, pieces of glass may fall and cause an injury. - Page 8 Usage Notice After unpacking this product, read the manual carefully, and follow all the operating and other instructions. Turn off the product before cleaning. Use a soft cloth moistened with mild detergent to clean the display housing. Disconnect the power plug from AC outlet if the product is not being used for a long period of time.
-
Page 9: Safety Labels Of This Machine
Usage Notice Safety Labels of This Machine 1 Do not block the air intake or exhaust. Doing so could cause a fire due to internal overheating. Do not place your hands, face, or other objects near the air exhaust, the lamp cover or the bottom of the unit. Doing so could result in injury and/or damage the object. 2 Do not look into the lens while the lamp is on. The strong light from the lamp may cause damage to your eyesight. -
Page 10: Regulation & Safety Notices
Regulation & Safety Notices This appendix lists the general notices of your Projector. Notice: Users in the United States of America FCC notice MODEL NAME: RICOH PJ X4340 TRADE NAME: PROJECTOR MODEL NAME: RICOH PJ X4340 Tested To Comply With FCC Standards FOR HOME OR OFFICE USE This device complies with Part 15 of the FCC Rules. - Page 11 Usage Notice RESPONSIBLE PARTY: Ricoh Americas Corporation 5 Dedrick Place, West Caldwell, NJ 07006 Phone: 973-882-2000 Notice: Shielded cables All connections to other computing devices must be made using shielded cables to maintain compliance with FCC regulations. Caution Changes or modifications not expressly approved by the manufacturer could void the user’s authority, which is granted by the Federal Communications Commission, to operate this projector.
- Page 12 Cet appareil numerique de la classe B est conforme a la norme NMB-003 du Canada. Declaration of Conformity for EU countries ▀■ EMC Directive 2004/108/EC (including amendments) ▀■ Low Voltage Directive 2006/95/EC Notice: Users in EU countries CE Marking Traceability Information (For EU Countries Only) Manufacturer: Ricoh Co., Ltd. 3-6 Nakamagome 1-chome, Ohta-ku, Tokyo. 143-8555, Japan Authorized representative: Ricoh Europe PLC 20 Triton Street, London. NW1 3BF, United Kingdom English...
- Page 13 Usage Notice User Information on Electrical and Electronic Equipment Users in the countries where this symbol shown in this section has been specified in national law on collection and treatment of E-waste. Our Products contain high quality components and are designed to facilitate recycling. Our products or product packaging are marked with the symbol below. This product contains substances which are harmful to hu- mans and the environment.
-
Page 14: Remote Control Battery
Usage Notice Remote Control Battery If you wish to discard this product, please contact your local authorities, the shop where you bought this product, your local dealer or sales/service representatives. Warning • Never throw batteries into a fire. Using the batteries improperly may cause them to explode or leak and may result in serious injury. If battery-leaking fluid contacts skin, wash the fluid off immediately with clean water and consult a doctor. If the fluid spills on an instrument, avoid contact and wipe it off using tissue paper. Then dispose of the used tissue paper as flammable garbage after moistening the tissue with water. • Do not ingest battery, Chemical Burn Hazard. The remote control supplied with this product contains a coin cell battery. - Page 15 Usage Notice Notice: Users in the EU Note for the Battery and/or Accumulator Symbol In accordance with the Battery Directive 2006/66/EC Article 20 Information for end-users Annex II, the above symbol is printed on batteries and accumulators. This symbol means that in the European Union, used batteries and accumulators should be disposed of separately from your household waste. In the EU, there are separate collection systems for not only used electri- cal and electronic products but also batteries and accumula- tors.
-
Page 16: Other Information
Usage Notice Other Information Copyrights to Images When projecting images using the projector, be careful not to infringe the copyright of protected materials. The following are examples that may infringe the copyright of protected materials. • Broadcasting images or movies for commercial purposes • Modifying images or movies using functions such as freeze, magnify, or zoom to broadcast images for commercial pur- poses or public viewing • Varying the aspect ratio of images or movies using a function that changes the screen size to broadcast images for com- mercial purposes or public viewing Note to Users Viewing 3D Images Pay attention to the following points when viewing images us-... -
Page 17: Product Features
Usage Notice Product Features ▀■ XGA (1024x768) Native resolution ▀■ HD compatible – 720p and 1080p supported ▀■ VGA monitor loop through(works in standby mode > 0.5W) ▀■ BrilliantColorTM Technology ▀■ Security Bar and antitheft lock hole ▀■ RS232 control ▀■ Rapid shutdown ▀■ Built-in mono 8 Watt speaker ▀■... -
Page 18: Introduction
Introduction Package Overview Unpack and inspect the box contents to ensure all parts listed below are in the box. If something is missing, please contact your nearest customer service center. VGA Cable Projector with lens cap Power Cord Remote Control CD-ROM (CR2025 Battery is contained. -
Page 19: Product Overview
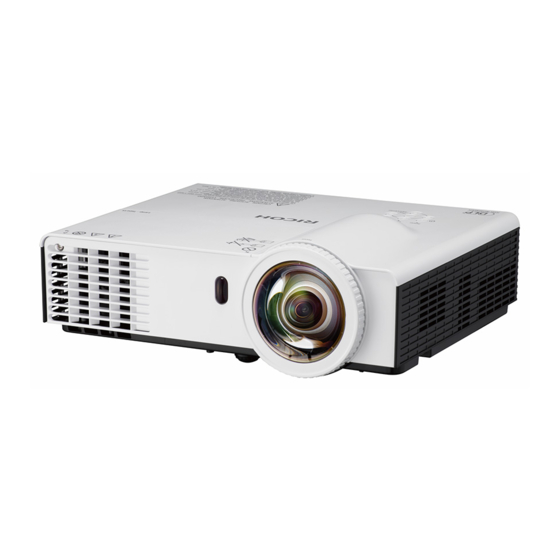
Introduction Product Overview 12 9 12 8 12 3 12 4 12 5 12 6 Control panel and Lamp cover indicator light Safety lock Air inlet This lock catch is used to install an anti-theft lock to prevent video Speaker machines from being stolen. -
Page 20: About Your Projector
Introduction About Your Projector Control Panel and Indicators (1) <Power> indicator (6) <Temp> indicator Indicates the projector’s status. Indicates the status of the internal tempera- (2) < > button ture or the cooling fan of the projector. (7) <Lamp> indicator Turns the projector on/off. - Page 21 Introduction Connecting terminals RICOH PJ X4340 RICOH PJ RX300 (1) <HDMI In> (7) <PC Control> This is a terminal to connect to HDMI signal. This is a RS-232C compatible terminal to (2) <Monitor Out> externally control the projector. This is a terminal to output the RGB signal (8) <Computer 2 In>...
- Page 22 Introduction Remote control (11) <Enter> button Confirm your section of items in menu system. (12) <Volume +/-> buttons Adjust sound level. (13) <Magnify +/-> buttons Adjusts magnification ratio of the displayed image. Attention Do not drop the remote control. Avoid contact with liquids. Do not attempt to modify or disassemble the remote control. Note The <...
- Page 23 Introduction Changing the battery of the remote control Press firmly and slide Install new battery into the Put the cover the battery cover off. compartment. back. Remove the old battery and install new one (CR2025). Ensure that the side with a “+” is facing up.
-
Page 24: Installation
Installation Connections Connecting example: Computers RICOH PJ X4340 Computer Monitor Computer Control Audio equipment Computer MONITOR OUT (COMP.) HDMI IN PC CONTROL RICOH PJ RX300 Monitor Computer Control Computer MONITOR OUT (COMP.) PC CONTROL English... - Page 25 Installation Connecting example: AV equipment RICOH PJ X4340 Blu-ray disk player DVD player Audio equipment MONITOR OUT (COMP.) HDMI IN PC CONTROL English...
-
Page 26: Basic Operations
Basic Operations Powering the projector On / Off Powering On the Projector 1. Remove the lens cap if it is on the lens. 2. Securely connect the power cord and signal cable. When the power cord is connected, the Power indicator will turn Amber. 3. Turn on the lamp by pressing “ ” button either on the top of the projector or on the remote. -
Page 27: Powering Off The Projector
Basic Operations Powering Off the Projector 1. Press the “ ” button on the remote control or on the control panel to turn off the projector. The following message will be displayed on the screen. Press the “ ” button again to confirm otherwise the message will disappear after 10 seconds. When you press the “... -
Page 28: Setting Up
Basic Operations Setting up Adjusting the Projector’s Height The projector is equipped with elevator feet for adjusting the image height. Extend the adjustable feet by rotating in the direction shown in the below picture and retract by rotating in the opposite direction. Adjustable range Adjustable range Front adjustable foot :... -
Page 29: Adjusting The Projector's Focus
Basic Operations Adjusting the Projector’s Focus To focus the image, rotate the focus ring until the image is clear. The projector will focus at distances from 0.51 to 2.54 meters (1.67 to 8.34 feet ). Focus Ring Adjusting Projection Image Size Projection Image Size from 40” to “200” (1.02 to 5.08 me- ters). - Page 30 Basic Operations Screen Size W x H Projection Distance (D) Diagonal length Offset (Hd) (inch) size of (inch) (feet) 4:3 Screen Width Height Width Height (inch) 40.00 0.81 0.61 32.00 24.00 0.50 1.64 0.09 3.60 60.00 1.22 0.91 48.00 36.00 0.75 2.46 0.14...
-
Page 31: User Controls
User Controls On-screen Display Menus How to operate menu ■ Operation steps Press <Menu> button on the remote control or on the control panel. Main Menu displays. Use ▲▼ to select any item in the Main Menu. The selected item is highlighted in orange. Press ►, <Input/Enter>... - Page 32 User Controls Menu Tree Main Menu Sub Menu 2nd Sub Menu Default Value Range Color Mode Dynamic / PC / Movie / Game / User Wall color White / Light Yellow / Light Blue / Pink / White Dark Green Brightness 0 ~ 100 Contrast 0 ~ 100 Sharpness 0 ~ 31 Picture Saturation 0 ~ 100 0 ~ 100 Gamma 0 ~ +3...
- Page 33 User Controls Main Menu Sub Menu 2nd Sub Menu Default Value Range Auto Source On / Off Input HDMI, Computer 1, Computer 2, Video Auto Power Off (Min) 0~120 Lamp Hours Used (Normal) Lamp Hours Used (ECO) Lamp Life Off/On Reminder Lamp Normal / Auto / ECO1 Normal Lamp Settings Power / ECO2 Mode...
-
Page 34: Picture
User Controls Picture Wall color Select [Picture] from the Main Menu (see “How to operate menu” on page 29) and then select the item from the Sub Menu. Select an appropriate color for wall projection. Press ▲▼ to select [Wall color]. Press ►, <... - Page 35 User Controls Sharpness Note [Hue] can be adjusted only when video is selected Adjust the sharpness of the projected image. and the color mode is NTSC or NTSC 4.43. Press ▲▼ to select [Sharpness]. Gamma Press ►, < Input/Enter> or <Enter> to display the adjustment dialog box.
-
Page 36: Position
User Controls Position tels to display programs for a commercial purpose or Select [Position] from the Main Menu (see “How for public presentation, note that adjusting the aspect to operate menu” on page 29) and then select the ratio or using the zoom function to change the screen item from the Sub Menu. - Page 37 User Controls V Position Operation Screen image Shift the projected image position vertically. Press the ▲► on Press ▲▼ to select [V Position]. the remote control or the ► on the Press ►, < Input/Enter> or <Enter> to display control panel to the adjustment dialog box. adjust the upper of Press ◄►...
-
Page 38: Setting
User Controls Setting Select [Setting] from the Main Menu (see “How to Do not display Closed Caption. operate menu” on page 29) and then select the Displays the CC1 data. item from the Sub Menu. Displays the CC2 data. Displays the CC3 data. Displays the CC4 data. - Page 39 User Controls Startup Logo Set this function to display the RICOH logo when the projector is turning on. Press ▲▼ to select [Startup Logo]. Press ►, < Input/Enter> or <Enter> to display the setting dialog box. Press ◄► to switch [On]/[Off].
-
Page 40: Audio
When setting the [In Standby Mode (Audio)] function to [On] and in Standby mode status, the connected audio signal to <Audio 1 In> terminal can be output from the <Audio Out> terminal. The audio signal Note output level is fixed and cannot be adjusted. “AUDIO” menu is not available on RICOH PJ RX300. Mute Temporarily turn off the sound. Press ▲▼ to select [Mute]. Press ►, < Input/Enter> or <Enter> to display the setting dialog box. -
Page 41: Options
User Controls Options Select [Options] from the Main Menu (see “How to operate menu” on page 29) and then select the item from the Sub Menu. Press ▲▼ to select the input you want to search and press ►. The input with a check mark will be able to be searched when [Auto Source] is set to [On]. -
Page 42: Lamp Power Mode
User Controls Displays the lamp warning High Altitude message. The warning lamp message will not Set to [On] when the projector is used at elevation be displayed. between approx. 1 000 m (3 300 ft) and approx. 3 000 m (10 000 ft). Attention Press ▲▼... - Page 43 User Controls It is recommended to clean the air filters regularly every 500 hours of usage. Information Displays the input signal source and setting state infor- mation of the projector. Press ▲▼ to select [Information]. Press ►, < Input/Enter> or <Enter> to display the information dialog box. Displays [Source], [Resolution], [Software Ver- sion], [Color Space] and [Aspect Ratio].
- Page 44 User Controls Select [3D] from the Main Menu (see “How to 3D Invert operate menu” on page 29) and then select the item from the Sub Menu. Flips the timing of the switch between the left and right of an image to display. Change the setting if the 3D im- ages you see appear strange.
-
Page 45: Appendices
Appendices Lamp Replacement Procedure If ceiling mounted, please use caution when opening the lamp access panel. It is recom- mended to wear safety glasses if changing the bulb when ceiling mounted. Caution must be used to prevent any loose parts from falling out of projector. Firmly install the lamp assembly as well as its cover. ... -
Page 46: Compatibility Modes
Appendices Compatibility Modes Computer/Video/HDMI/Mac Compatibility Refresh Rate Signal Resolution Video Analog HDMI (Hz) NTSC 720 x 480 PAL/SECAM 720 x 576 640 x 480 Please note that 640 x 480 using resolutions 640 x 480 72.8 other than native 640 x 480 1024 x 768 (na- tive resolution of... - Page 47 Appendices Refresh Rate Signal Resolution Video Analog HDMI (Hz) SDTV (576i) 768 x 576 SDTV (576p) 768 x 576 SDTV (480i) 640 x 480 SDTV (480p) 640 x 480 HDMI 3D Input (with 3D Info Frame Information) -Video 3D mode Input Resolutions 1280 X 720P @ 50Hz Top and Bottom 1280 X 720P @ 60Hz 1920 X 1080P @24 Hz...
-
Page 48: Troubleshooting
Appendices Troubleshooting If you experience trouble with the projector, refer to the following information. If the problem persists, please contact your local dealer or service center. No image appears on-screen Ensure all the cables and power connections are correctly and ... - Page 49 Appendices The screen of the Notebook computer is not displaying a presentation If you are using a Notebook PC: Some Notebook PCs may deactivate their own screens when a second display device is in use. Each has a different way to be reactivated.
- Page 50 Appendices Image is reversed Select “Position --> Ceiling Mount” from the OSD menu to adjust the image. Lamp burns out or makes a popping sound When the lamp reaches its end of life, it will burn out and may make a loud popping sound. If this happens, the projector will not turn on until the lamp module has been replaced. To replace the lamp, follow the procedures in the “Replacing the Lamp”. Image does not display in 3D Check if the battery of 3D glasses is drained. ...
- Page 51 Appendices Indicator lighting message <Power> <Temp> <Lamp> Message indicator indicator indicator (Green/Amber) (Red) (Red) Standby State Amber (Input power cord) Power on (Warm- Flashing ing up) Green Lamp lighting Green Flashing Power off (Cooling) Amber Flashing Error (Over Temp.) Amber Steady light ...
-
Page 52: Maintaining The Filter
Appendices Maintaining the filter We recommends cleaning the dust filter every three months; clean it more often if the projector is used in a dusty environ- ment. Replacement of the air filters 1. Turn off the projector, and remove the AC power plug from Warning: If dust builds up on the filter is not the AC outlet. cleaned, the projector 2. Clean up the dust on the projector and around the air vents. will overheat and cause 3. Pull out the air filters straight and slowly with grabbing the problems with the op-... -
Page 53: Configurations Of Terminals
Appendices Configurations of Terminals Terminal: Computer in 1/2 [Monitor Out] (Mini D-sub 15 pin) Red (R/Cr) Input [R Output] DDC 5V [NC*] Green (G/Y) Input [G Output] Ground (Ver. sync.) Blue (B/Cb) Input [B Output] DDC Data [NC*] Ground (Horiz.sync.) Horiz. sync. Input [Output] (Composite H/V sync. Input) Ground (Red) Ground (Green) Vert. sync. Input [Output] Ground (Blue) DDC CLK [NC*] * Do not connect anything. Terminal: PC Control (D-sub 9 pin : female) TXD (Sending Data) Contact your... -
Page 54: Specifications
Appendices Specifications List of general specifications Item Specification Consumption Power 240W (ECO mode) / 295W (Full mode) Weight 2.8kg Dimensions (WxHxD) 220 x 288 x 100 mm (with protruding parts) Environmental Consider- Operational Temperatures : 41° to 95°F (5° to 35°C), This model ations 20% to 80% humidity (non-condensing) Storage complies with the Temperatures : -4° to 140°F (-20° to 60°C), 20% to 80% humidity (non-condensing) above specifica- tions. -
Page 55: Cabinet Dimensions
Appendices Cabinet Dimensions Unit: mm 288.0 70.8 64.0 55.0 55.0 Screw type: M3 x 3 Maximum screw length: 6mm English... -
Page 56: Trademarks
Appendices Trademarks • DLP is trademark or registered trademark of Texas Instruments. • IBM is a trademark or registered trademark of Interna- tional Business Machines Corporation. • Macintosh, Mac OS X, iMac, and PowerBook are trade- marks of Apple Inc., registered in the U.S. and other countries. • Microsoft, Windows, Windows Vista, Internet Explorer and PowerPoint are either a registered trademark or trademark of Microsoft Corporation in the United States and/or other countries. - Page 58 Y057-6221B...
Need help?
Do you have a question about the PJ X4340 and is the answer not in the manual?
Questions and answers