
Related Manuals for Ricoh PJ WX4130


Summary of Contents for Ricoh PJ WX4130
-
Page 1: Operating Instructions
Operating Instructions For safe and correct use, be sure to read "Safety Information" before using the machine. -
Page 3: Table Of Contents
TABLE OF CONTENTS Introduction.................................4 Copyrights to Images.............................4 Important.................................4 Notes to Users Viewing 3D Images......................4 Manuals Provided with the Projector........................6 Manuals for the Projector..........................6 Manuals List..............................6 Viewing the PDF Manual on the CD-ROM.......................7 How to Read This Manual..........................8 Symbols................................8 Notes................................8 1. Preparations for Using the Projector Main Functions..............................9 Checking the Accessories..........................10 Projector Parts and Their Functions.........................12... - Page 4 Adjusting the Angle of the Projection......................30 Adjusting the Image.............................31 Adjusting the Volume of the Speaker......................34 Manipulating Images with the Remote Control..................34 Turning Off the Projector..........................38 3. Changing the Projector Settings Viewing the Menu Screen..........................41 Using the Menu Screen...........................43 Restoring Settings to Their Default Settings....................47 List of Menu Items.............................49 Image Adjustment Menu..........................53 Display Settings Menu.............................57...
- Page 5 Specifications for Ports.............................88 Computer In Port............................88 Control Port..............................89 Where to Inquire..............................91 Trademarks...............................92 INDEX ................................93...
-
Page 6: Introduction
Introduction Copyrights to Images When projecting images using the projector, be careful not to infringe the copyright of protected materials. The following are examples that may infringe the copyright of protected materials. • Broadcasting images or movies for commercial purposes •... - Page 7 • To view 3D images, sit in front of the screen so that your eyes are parallel and level with the screen. • Viewing 3D images from a place that is too close to the screen may result in eye strain. The distance between the screen and you should be at least three times the height of the screen.
-
Page 8: Manuals Provided With The Projector
Manuals Provided with the Projector Manuals for the Projector Read this manual carefully before you use the projector. Refer to the manuals that are relevant to what you want to do with the projector. • The manuals are provided in various formats. ®... -
Page 9: Viewing The Pdf Manual On The Cd-Rom
Viewing the PDF Manual on the CD-ROM This section describes how to view the PDF manual on the supplied manual CD-ROM. File path The manual is included in the following folder on the CD-ROM: Manual\(language) Insert the CD-ROM in the CD-ROM drive of your computer. Double-click the "Manual"... -
Page 10: How To Read This Manual
How to Read This Manual Symbols This manual uses the following symbols: Indicates points to pay attention to when using the projector. Indicates supplementary explanations of the projector’s functions, and instructions on resolving user errors. Indicates the names of buttons on the control panel and remote control. It also indicates items displayed on the menu screens. -
Page 11: Preparations For Using The Projector
1. Preparations for Using the Projector This chapter explains the names and functions of the different parts of the projector and remote control, and how to use them. It also explains how to position the projector and how to connect it to other equipment. -
Page 12: Checking The Accessories
1. Preparations for Using the Projector Checking the Accessories The projector is provided with the following accessories. Make sure that everything is included in the package. If anything is missing or damaged, contact your sales representative or service representative. Remote control AAA battery LR03 (2 ea) RGB cable (3 m) Power cord... - Page 13 Checking the Accessories • The Operating Instructions are on the provided CD-ROM. For procedures about how to read Operating Instructions, see p.7 "Viewing the PDF Manual on the CD-ROM".
-
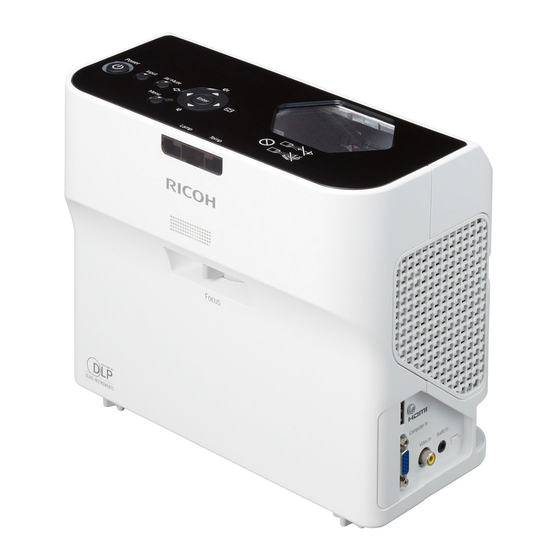
Page 14: Projector Parts And Their Functions
1. Preparations for Using the Projector Projector Parts and Their Functions Control Panel (Top View) CLB009 1. [Power] button Turns the projector on and off. You can confirm the status of the projector with the indicator. • On: Power is on. •... -
Page 15: Front And Left-Side View
Projector Parts and Their Functions 6. Arrow buttons Used to operate the menu screen. The [ ] and [ ] buttons are used to adjust the size of the projected image. The [ ] and [ ] buttons are used to adjust the volume. 7. -
Page 16: Rear And Right-Side View
1. Preparations for Using the Projector Rear and Right-Side View CLB012 1. HDMI port For connecting an HDMI (High-Definition Multimedia Interface) cable. 2. Computer In port (Y/Pb/Pr) For inputting RGB signals from a computer or component image signals (Y/Pb/Pr) from a video player. 3. -
Page 17: Remote Control Parts And Their Functions
Remote Control Parts and Their Functions Remote Control Parts and Their Functions CLB013 1. [Menu] button Displays the menu screen. Press it again to close the menu screen. 2. [Input] button Switches the signal input. The signal that is input changes each time the button is pressed. 3. - Page 18 1. Preparations for Using the Projector 9. [Enter] button Enters the selected item or mode. 10. [Volume] buttons Adjusts the volume of the speaker. Press the [ ] button to increase the volume. Press the [ ] button to decrease the volume.
-
Page 19: How To Use The Remote Control
How to Use the Remote Control How to Use the Remote Control You can use the remote control to turn the projector on and off, and to change the signal of the image being input and projected. You can also enlarge or reduce the image and mute the audio. Note the following precautions when using the remote control: •... -
Page 20: Loading Batteries Into The Remote Control
1. Preparations for Using the Projector Loading Batteries into the Remote Control • For safe operation, follow the warnings below regarding the batteries used in the remote control. If you use the batteries incorrectly, it may result in fire or injury due to batteries leaking or exploding. -
Page 21: Operating Multiple Projectors With The Remote Control
How to Use the Remote Control Insert the batteries. CLB016 Note the direction of the positive and negative terminals when inserting the batteries. Close the battery cover. CLB017 • Replace the batteries if the remote control does not work or if the effective distance becomes too narrow. - Page 22 1. Preparations for Using the Projector While pressing the [ID] button, press the number button that corresponds to the ID number of the projector to be operated for three seconds or more. CLB020 The ID number assigned to the remote control is changed. Operate the projector.
-
Page 23: Positioning The Projector
Positioning the Projector Positioning the Projector When positioning the projector, place it so that the projector's rear side faces the screen. Make sure the projector and the screen are parallel to each other. Adjust the distance between the projector and the screen according to the size of the projected image. For details, see p.21 "Relationship Between the Projection Distance and the Screen Size". - Page 24 1. Preparations for Using the Projector CLB023 Projection size Projection distance Projection height 48 inches 12 cm (4.6 inches) 9 cm (3.7 inches) 60 inches 17 cm (6.5 inches) 12 cm (4.7 inches) 80 inches 25 cm (9.8 inches) 16 cm (6.2 inches) *1 The sizes of the projected images are for a full size image without keystone adjustment.
-
Page 25: Connecting Equipment To The Projector
Connecting Equipment to the Projector Connecting Equipment to the Projector • Do not place the power cord and connection cable in a way that might cause someone to trip and fall. The product might fall over and cause an injury. Various equipments can be connected to the projector. -
Page 26: Connecting Av Equipment
1. Preparations for Using the Projector Connecting AV Equipment Use a cable that supports the signal being input when connecting AV equipment. To connect a DVD recorder, connect a conversion adapter BNC-pin to the Computer In port of the projector and to the Y/Pb/Pr output of the recorder. To connect a video recorder or a DVD player, connect a video cable to the Video In port of the projector and to the video output of the recorder or the player. -
Page 27: Connecting The Power Cord
Connecting the Power Cord Connecting the Power Cord • Do not use any power sources other than those that match the specifications shown. Doing so could result in fire or electric shock. • Do not use any frequencies other than those that match the specifications shown. Doing so could result in fire or electric shock. - Page 28 1. Preparations for Using the Projector Insert the connector of the power cord set into the AC In socket on the right side of the projector. CLB029 Insert the power plug into a power outlet. • Do not place anything near the power outlet. •...
-
Page 29: Projecting An Image
2. Projecting an Image This chapter explains the procedure for projecting an image. Basic Operations • Do not look into the projection window or vent when the product is on. The bright light may damage your eyes. Be especially careful in an environment with children. •... -
Page 30: Turning On The Projector
2. Projecting an Image Turning On the Projector Make sure that the power plug is inserted into a power outlet. For details, see p.25 "Connecting the Power Cord". Press the [Power] button. CLB030 The projector beeps and the indicator flashes blue. The start-up screen is displayed. -
Page 31: Selecting An Input Signal
Basic Operations • The start menu is only displayed the first time the projector is used. However, the start menu is displayed when the projector is turned on after [Reset All] in [Default Settings] is executed. • The display language and lamp power level can also be changed in the menu screen. For details, see p.59 "Default Settings Menu". -
Page 32: Adjusting The Angle Of The Projection
2. Projecting an Image When projecting the screen of a notebook computer When connecting a notebook computer to the projector, switch the computer's image output. In Windows operating systems, the image output can be switched with a function key. While pressing and holding the [Fn] key, press the key, the key, or the LCD/VGA function key. -
Page 33: Adjusting The Image
Basic Operations Lift the front of the projector and adjust the length of the adjustable feet. CLB031 Turn the adjustable feet to the left to make it longer. Turn the adjustable feet to the right to make it shorter. • Adjust the height of the right and left adjustable feet so the projector is level. If the projector is inclined too much, an error occurs and operation cannot be performed. - Page 34 2. Projecting an Image Press the [Zoom ] button to reduce the image. CLB037 The ratio decreases each time the [ ] button is pressed. You can confirm the current ratio on the value bar at the bottom of the screen. Press the [Zoom ] button to enlarge the image.
-
Page 35: Adjusting For Keystone Distortion
Basic Operations Adjusting for keystone distortion If the projector is placed at an angle, the projected image will be distorted. This is called keystone distortion. If [Auto Keystone] in [Default Settings] is specified as [Off], manually adjust for keystone distortion. CLB033 Press the [Keystone ] and [Keystone ] buttons to adjust the keystone distortion. -
Page 36: Adjusting The Volume Of The Speaker
2. Projecting an Image Press the [Auto set] button. CLB034 • Depending on the type of input signal, some images may not be displayed or correctly adjusted. If this happens, adjust the image with [Position] in [Image Adjustment]. For details about the types of signals that can be input to the projector, see p.81 "List of Compatible Signals". - Page 37 Basic Operations Enlarging the image Enlarges and displays a part of the image. The image can be enlarged in a range of 100 to 200%. The enlarged image becomes grainy due to the digital processing. Press the [Magnify ] button to enlarge the image. CLB036 The ratio increases each time the [ ] button is pressed.
- Page 38 2. Projecting an Image Press the [AV Mute] button. CLB038 The image blanks and the audio mutes. To cancel this function, press the [AV Mute] button again. • An icon appears on the screen when mute is used. • The mute function is canceled automatically if any button on the control panel is pressed. •...
- Page 39 Basic Operations • When the [Freeze] button is pressed, the image that is being projected at that time is stored in memory, and that image is projected. Because of this, even though the projector has paused the image, the equipment continues to play the video. Changing the image quality Press the [Picture] button.
-
Page 40: Turning Off The Projector
2. Projecting an Image • You can also change the aspect with [Display Settings]. For items that can be specified, see p.57 "Display Settings Menu". Switching the lamp mode Select eco mode if the image is too bright or when projecting images in a dark room. Press the [Eco] button. - Page 41 Basic Operations Press the [Power] button. The projector beeps and the projector turns off. • After turning the projector off, wait about five minutes for the lamp to cool before turning the projector on again. The lamp may not light if it is very hot. •...
- Page 42 2. Projecting an Image...
-
Page 43: Changing The Projector Settings
3. Changing the Projector Settings This chapter explains the settings on the menu screen and how to change the settings. Viewing the Menu Screen CLB047 1. Image Adjustment menu tab Enables the image items to be adjusted and configured. For the Image Adjustment menu settings, see p.53 "Image Adjustment Menu". 2. - Page 44 3. Changing the Projector Settings For item that can be displayed, see p.63 "Display Status". 5. Settings The settings and information for each menu can be displayed. For the list of possible settings for each menu, see p.49 "List of Menu Items".
-
Page 45: Using The Menu Screen
Using the Menu Screen Using the Menu Screen This section explains the methods for changing the menu screen using the remote control. Press the [Menu] button. CLB046 Select the menu tab using the [ ] and [ ] buttons. If you select the Display Status tab, you can confirm the information in this step. Press the [ ] button. - Page 46 3. Changing the Projector Settings Select the item to be changed using the [ ] and [ ] buttons. If [To settings] is displayed on the right, the item has a submenu. Press the [Enter] button to display the submenu screen. Press the [Enter] button.
- Page 47 Using the Menu Screen • Selecting the value from a list Change the value using the [ ], [ ], [ ], and [ ] buttons, and then press the [Enter] button. • Inputting numbers Use the number buttons on the remote control to input numbers.
- Page 48 3. Changing the Projector Settings • The control panel on the projector can be used for operations, but numbers for settings cannot be inputted. • A confirmation screen appears before some functions are executed or some settings are changed. • Changes to the settings are automatically applied when you close the menu screen. You do not need to press the [Enter] button.
-
Page 49: Restoring Settings To Their Default Settings
Restoring Settings to Their Default Settings Restoring Settings to Their Default Settings This section explains the method for restoring the projector settings to the default values using the remote control. Press the [Menu] button. CLB046 Select the Default Settings menu tab, and then press the [ ] button. - Page 50 3. Changing the Projector Settings Select [Reset All], and then press the [Enter] button. Select [OK] in the confirm screen, and then press the [Enter] button. • The following settings cannot be reset with this function: • [User Logo] in [Display Settings] To reset the registered user logo, select [Reset Logo] in [Display Settings].
-
Page 51: List Of Menu Items
List of Menu Items List of Menu Items Image Adjustment menu Item Summary Picture Mode Select the picture mode. Contrast Adjust the image contrast. Brightness Adjust the image brightness. Color Saturation Adjust the color saturation of the image. Tint Adjust the tint of the image. Sharpness Adjust the sharpness of the image. - Page 52 3. Changing the Projector Settings Item Summary Wall Color Correction Select the image hue according to the projection surface when the image is being projected on something other than a screen. Background on NoSignal Select the image display when there is no input signal.
- Page 53 List of Menu Items Item Summary Power On Method Select whether or not to use the auto power on function. Standby Energy Saving Select the level of energy saving while on standby. Lamp Power Select the lamp power level. High Altitude Mode Select whether or not to increase the speed of the fan.
- Page 54 3. Changing the Projector Settings Item Summary Main FW Version Displays the version of the firmware on the main board.
-
Page 55: Image Adjustment Menu
Image Adjustment Menu Image Adjustment Menu Picture Mode Select the picture mode. This function is not available when you select [On] in [3D Projection] under [Default Settings]. Default: [Standard] • Bright This image mode makes it easier to see the projection in bright locations. •... - Page 56 3. Changing the Projector Settings • -16 to +16 Sharpness Adjust the sharpness of the image. The greater the value, the sharper the image. Default: 0 • -8 to +8 Noise Reduction Select whether or not to use the function to reduce the Y/Pb/Pr (480i/576i) or video signal noise. This function is available when you select [Y/Pb/Pr] (480i/576i) or [Video] as an input signal.
- Page 57 Image Adjustment Menu • Stnd. • Full Auto Set Automatically adjust the items set for the image according to the type of input signal. This function is available when you select [Computer] as an input signal. Equalizer Select the strength of the functions that reduce the HDMI signal noise. This function is available when you select [HDMI] as an input signal.
- Page 58 3. Changing the Projector Settings • 0 to +255 • Clamp Pulse 2 Adjust the clamp pulse width. • 0 to +255...
-
Page 59: Display Settings Menu
Display Settings Menu Display Settings Menu Keystone Adjust for image keystone distortion. This setting changes automatically depending on the angle of the projector position if you select [On] in [Auto Keystone] under [Default Settings]. Default: 0 • -32 to +32 Aspect Select the screen size of the image. - Page 60 3. Changing the Projector Settings Background on NoSignal Select the image display when there is no input signal. Default: [Logo] • Logo • Blue • None Display Help Select whether or not to display Help when there is no input signal. Default: [On] •...
-
Page 61: Default Settings Menu
Default Settings Menu Default Settings Menu Auto Input Search Select whether or not to only select inputs with signals when switching input signals. Default: [On] • On • Off Auto Keystone Select whether or not to implement keystone correction automatically depending on the angle of the projector's position. - Page 62 3. Changing the Projector Settings 3D Projection Specify 3D projection. 3D projection is compatible with the field sequential signal and the frame sequential signal. • 3D Projection Select whether or not to use 3D projection. The image will be slightly darker if this is set to [On]. Default: [Off] •...
- Page 63 Default Settings Menu • 3 • 4 Power Off on No Signal Select the time from the final operation to automatic power shutdown when there are no input signals. Default: [Off] • Off • 5 min. • 10 min. • 20 min. •...
- Page 64 3. Changing the Projector Settings High Altitude Mode Select whether or not to increase the speed of the fan. The number of fan rotations is high when set to [On]. Select [On] only when using the projector at an altitude of more than 1,500 meters (4,921 feet). Do not select [On] when the altitude is less than 1,500 meters (4,921 feet).
-
Page 65: Display Status
Display Status Display Status Input Displays the selected input signals. Resolution Displays the resolution. This item appears when you select [Computer] or [HDMI] as an input signal. Frequency Displays the synchronous frequency. This item appears when you select [Computer] or [HDMI] as an input signal. Sync Displays the synchronous signal polarity. - Page 66 3. Changing the Projector Settings...
-
Page 67: Troubleshooting
4. Troubleshooting This chapter explains the basic problems and troubleshooting methods when an indicator light is lit. Indicator Display List The projector uses the [Power] button, indicators, and beeps to notify you if a malfunction occurs. Check the indicator's status, and implement the following measures. Indicator display image The [Power] button is located on top of the projector. - Page 68 4. Troubleshooting Status Causes Solutions The lamp turned off during • The lamp has overheated • Disconnect the power cord, operation, or it does not turn and cannot turn on. wait a while, and then turn on the projector again. •...
- Page 69 Indicator Display List Status Causes Solutions "Installation Error" was The projector's angle is too Place the projector at a proper displayed, and the projector great. angle, and then turn it on again. turned off during operation, or it does not turn on. •...
-
Page 70: Common Problems
4. Troubleshooting Common Problems If you think a malfunction has occurred, check the following before contacting your service representative. Problem Solutions Power does not turn on. • Make sure the power plug or connector is connected correctly. • Make sure the lamp cover is mounted correctly. For details, see p.75 "Replacing the Lamp". - Page 71 Common Problems Problem Solutions No sound. • Press the [Input] button. For details, see p.29 "Selecting an Input Signal". • Make sure the mute function is not turned on. For details, see p.35 "Temporarily blanking the image and muting the audio". •...
- Page 72 4. Troubleshooting Problem Solutions Image is dark. • Check the settings of [Brightness] and [Contrast] in [Image Adjustment]. For details, see p.53 "Image Adjustment Menu". • Make sure the lamp is not near the end of its service life. For details, see p.63 "Display Status". •...
-
Page 73: Knowledge Base
If you have any questions about the projector, refer to the knowledge base. Visit our global Web site listed below, and then access a knowledge base page in your language. http://www.ricoh.com/support/ You can search the knowledge base by product name or keyword. - Page 74 4. Troubleshooting...
-
Page 75: Maintenance
5. Maintenance This chapter explains the operating precautions and maintenance for the projector. Operating Precautions Pay attention to the following points when using the projector: • If moving the projector under conditions including vibration and shock, use both the packing case and included carrying bag. -
Page 76: Cleaning The Projector
5. Maintenance Cleaning the Projector • Do not remove any covers or screws that are not mentioned in this manual. There are high voltage components inside the product that may cause electric shock. Contact your service representative if any of the product's internal components require maintenance, adjustment, or repair. -
Page 77: Replacing The Lamp
Replacing the Lamp Replacing the Lamp • Before replacing the lamp, turn off the power and wait at least one hour to allow the product to cool completely. If it is not completely cool, you may burn or injure yourself due to the inside of the product and lamp unit being hot. - Page 78 5. Maintenance Turn the knob counterclockwise, and then open the lamp cover. CLB059 Raise the metal handle. CLB061 Hold the handle, and then pull the lamp unit out of the projector. CLB062...
- Page 79 Replacing the Lamp Insert a new lamp unit. CLB060 Make sure that the small projections inside the projector are inserted into the holes of the lamp unit properly. Close the lamp cover. Correctly install the outer lamp cover. Incorrect installation may prevent the lamp or projector from turning on.
-
Page 80: Consumables
5. Maintenance Consumables • Lamp unit Replacement Lamp Type 3 • Contact your sales or service representative for information about consumables. -
Page 81: Appendix
6. Appendix This chapter explains the projector's specifications and compatible signals. This chapter also explains where to inquire about the projector and related services. Specifications Specifications for the Projector Component Specifications Power consumption 291 W or less Weight Approx. 3.0 kg (6.7 lb.) External dimensions (not including 257 ×... - Page 82 6. Appendix Component Specifications Connection ports • COMPUTER In port Mini D-SUB15 × 1 • HDMI port (HDCP compliant) HDMI × 1 • Video In port RCA_1pin × 1 • Audio In port Mini Jack × 1 • Control port USB-TYPE-minB ×...
-
Page 83: List Of Compatible Signals
List of Compatible Signals List of Compatible Signals Set the computer and AV equipment output signals so that they match the input signals compatible with the projector. If resolutions or signal frequencies that are not compatible with the projector are input, the image may flicker or become blurred. - Page 84 6. Appendix Resolution Frequency Mode Horizontal Horizontal Vertical (pixel) Vertical (Hz) Clock (MHz) (pixel) (kHz) 60.004 48.363 65.000 70.069 56.476 75.000 1024 × 768 1024 75.029 60.023 78.750 84.997 68.678 94.500 74.700 60.134 79.857 1152 × 864 1152 75.000 67.500 108.000 1152 ×...
-
Page 85: Y/Pb/Pr Input
List of Compatible Signals Resolution Frequency Mode Horizontal Horizontal Vertical (pixel) Vertical (Hz) Clock (MHz) (pixel) (kHz) 60.000 48.000 72.000 1366 × 768 1366 59.790 47.712 85.500 59.948 64.744 101.000 1400 × 1050 1400 1050 59.978 65.317 121.750 74.867 82.278 156.000 59.901 55.469... -
Page 86: Video Input
6. Appendix Resolution Frequency Mode Horizontal Horizontal Vertical (pixel) Vertical (Hz) Clock (MHz) (pixel) (kHz) 720 / 60p 1280 60.000 45.000 74.250 1080 / 50i 1920 50.000 28.125 74.250 1080 / 60i 1920 60.000 33.750 74.250 1080 / 50p 1920 1080 50.000 56.250... - Page 87 List of Compatible Signals Resolution Frequency Mode Horizontal Horizontal Vertical (pixel) Vertical (Hz) Clock (MHz) (pixel) (kHz) 480p (525p) 59.940 31.469 27.000 576p (625p) 50.000 31.250 27.000 720 / 50p 1280 50.000 37.500 74.250 720 / 60p 1280 60.000 45.000 74.250 1080 / 50i 1920...
- Page 88 6. Appendix Resolution Frequency Mode Horizontal Horizontal Vertical (pixel) Vertical (Hz) Clock (MHz) (pixel) (kHz) 60.004 48.363 65.000 70.069 56.476 75.000 1024 × 768 1024 75.029 60.023 78.750 84.997 68.678 94.500 74.700 60.134 79.857 1152 × 864 1152 75.000 67.500 108.000 1152 ×...
- Page 89 List of Compatible Signals Resolution Frequency Mode Horizontal Horizontal Vertical (pixel) Vertical (Hz) Clock (MHz) (pixel) (kHz) 60.000 48.000 72.000 1366 × 768 1366 59.790 47.712 85.500 59.948 64.744 101.000 1400 × 1050 1400 1050 59.978 65.317 121.750 74.867 82.278 156.000 59.901 55.469...
-
Page 90: Specifications For Ports
6. Appendix Specifications for Ports Computer In Port Pin assignment CLB064 Pin description Pin No. During RGB input During Y/Pb/Pr input Video signal (R) Color difference signal (Pr) Video signal (G) Luminance signal (Y) Video signal (B) Color difference signal (Pb) GND (R) GND (Pr) GND (G) -
Page 91: Control Port
Specifications for Ports Input Signal • RGB input RGB signals: 0.7V (p-p), 75 Horizontal sync signal: TTL level (Pos/neg polarity) Vertical sync signal: TTL level (Pos/neg polarity) • Y/Pb/Pr input Y signal: 1.0V (p-p), 75 Pb/Pr signals: 0.7V (p-p), 75 Control Port Interface format Communication method... - Page 92 6. Appendix Acknowledge Item Command (Normally ended) Icon display on ICN:1 =ICN:1 Icon display off ICN:0 =ICN:0 Auto setting (RGB input) =PAT:SC0 Status display on =DON:SC0 Status display off =DOF:SC0 RGB input INP:1 =INP:1 Y/Pb/Pr input INP:2 =INP:2 HDMI input INP:5 =INP:5 Video input...
-
Page 93: Where To Inquire
Where to Inquire Where to Inquire Contact your sales or service representative for further information about topics covered in this manual or to inquire about topics not covered in this manual. -
Page 94: Trademarks
6. Appendix Trademarks Adobe, Acrobat, and Reader are either registered trademarks or trademarks of Adobe Systems Incorporated in the United States and/or other countries. DLP is a registered trademark of Texas Instruments. DLP Link is a trademark of Texas Instruments. HDMI and High-Definition Multimedia Interface are trademarks or registered trademarks of HDMI Licensing, LLC. -
Page 95: Index
INDEX Compatible signals (HDMI input)......Compatible signals (Video input)......3D Projection............Compatible signals (Y/Pb/Pr input)....Computer button............ Computer In port..........14, 88 AC In socket............Connecting a computer........Accessories............Connecting AV equipment........Adjustable feet..........13, 30 Connecting equipment.......... Adjusting for keystone distortion......Connecting the power cord........ - Page 96 Menu items............. Menu screen..........41, 43, 47 Hardware Error............. Muting the audio........... HDMI button............HDMI port.............. High Altitude Mode..........Network button............How to read this manual......... Noise Reduction............ Notebook computer..........Notes................ ID button..............Number buttons............. Image Adjustment menu........Important..............Indicator display list..........Operating Instructions..........
- Page 97 Replacing the lamp..........Reset All............47, 62 Wall Color Correction.......... Resolution............... Where to inquire........... Restoring the settings..........RGB Input Range........... Right-side view............Zoom button............ 15, 31 Safety Information........... Screen size............. Security slot............Selecting an input signal........Setup Guide............. Sharpness............... Signal Format............Speaker..............
- Page 98 MEMO Y011-7511A...
- Page 100 Y011-7511A © 2011, 2012 Ricoh Co., Ltd.
Need help?
Do you have a question about the PJ WX4130 and is the answer not in the manual?
Questions and answers