
Related Manuals for Ricoh PJ WU6480


Summary of Contents for Ricoh PJ WU6480
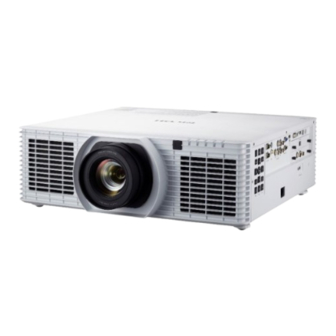
- Page 1 RICOH PJ WU6480 / X6480 WU6590 / X6590 KU9000 / KX10000 KU7000 / KX8000 2017 年 11 月...
-
Page 2: Table Of Contents
Table of Contents Important Safety Notices .............................3 Safety Notices .................................3 Symbols, Abbreviations and Trademarks ........................4 Introduction ................................5 Diagram ...................................6 Tools ..................................7 Replacement ................................8 Lens ..................................8 Expansion PCB ..............................8 Lamp..................................9 Lamp Burst ................................10 Upper cover ...............................12 Main PCB ................................12 IO PCB ................................16 KEYPAD, KEYPAD PCB .............................16 PSU cover .................................17 Relay PCB, BNC PCB ............................18... -
Page 3: Important Safety Notices
Important Safety Notices Safety Notices... -
Page 4: Symbols, Abbreviations And Trademarks
Symbols, Abbreviations and Trademarks... -
Page 5: Introduction
Introduction... -
Page 6: Diagram
Diagram... -
Page 7: Tools
Tools ▪ Screw driver (+): 105 ▪ Screw driver (+): 107 ▪ Screw driver (-): 107 ▪ Hexagonal box driver 5.0 mm ▪ Pliers ▪ The projector... -
Page 8: Replacement
Replacement ▪ Remove static electricity before working. ▪ Work in a clean place. Lens Expansion PCB... -
Page 9: Lamp
Lamp... -
Page 10: Lamp Burst
Lamp Burst 1. The lamp may burst if it continues to be used despite the end of its life, or if it receives a strong shock during use. 2. When one Lamp burst, projector shows warning message, then switch to single lamp mode. - Page 11 6. Clean glass fragments with a vacuum cleaner 7. Clean the red part over 20 to 30 seconds carefully in the figure. 8. Install a new lamp 9. Access the OSD menu and switch to dual lamp mode 10. Reset the replacement lamp usage time...
-
Page 12: Upper Cover
Upper cover 1. Remove all screws on the back and bottom of the main unit 2. Slide the top cover backward and lift it up. CAUTION: Do not break the front hook. There is a connection harness on the front LED PCB and main board on the back side of the cover, and do not pull strongly. - Page 13 The main board is vertically inserted in the BNC board and the relay PCB. Confirm that the connector is securely connected when assembling.
- Page 14 Wiring around main PCB Main PCB connectors 1. ROD fan 6. DMD 10. Fan10 (Power IN) 2. Fan2 (Power Out) 7. Lamp fan 2(T)_T 11. Lamp fan 2(T)_B 3.4. Lamp fan 1(T)/2(R) 8. Cooling pump 12. T1 センサー 13. T2 センサー 5.
- Page 15 13. Keypad PCB 17. Lens horizontal shift motor 21. Chip PCB 50pin 14. Front LED PCB 18. Limiter PCB (3in1 22. Chip PCB 40pin 15. Lens relay PCB 19. Color wheel 23. Ballast PCB 16. Lens vertical shift motor 20. Chip PCB power 24.
-
Page 16: Io Pcb
IO PCB 1. Rear screw x2 2. I/O connector hex screw x10. (Note: the two HDMI are shorter in length than others) KEYPAD, KEYPAD PCB Keypad PCB: I/O cover back, one connector to be connected to the main board... -
Page 17: Psu Cover
PSU cover Remove PSU cover... -
Page 18: Relay Pcb, Bnc Pcb
Relay PCB, BNC PCB Remove screw x4 from the sheet then remove relay PCB BNC PCB 中继 PCB Remove BNC PCB (screw x4) -
Page 19: Psu
Open the power supply cover, remove all the connectors (pay attention when assembling), remove the PSU. CAUTION: Put the harness in the clamp when assembling... -
Page 20: Partition Plate
Partition plate Remove the partition plate separating the PCB and the optical engine. (screw x3) CAUTION: If you cannot assemble well, check the distribution of the left lamp. Be careful not to bend or hit the connector of the DMD board when assembling. It is recommended to record such as photographing the state before disconnection due to complicated arrangement. -
Page 21: Emi Cover
EMI cover It is necessary to remove the EMI cover to replace the ballast with the EMI board. Caution: Although it is possible to remove the cover without removing the partition plate, the lamp harness is short and it may take time to remove it from the hook. Make sure that all connectors are out of the correct position from inside the cover when assembling. -
Page 22: Ballast Pcb, Emi Pcb
Ballast PCB, EMI PCB One front EMI PCB on the bottom right side of the main unit, two rear Ballast PCB Note: The left ballast PCB corresponds to a short lamp cable and the right ballast corresponds to a long lamp cable. Please note the distribution when assembling. EMI PCB バラスト... -
Page 24: Rear Ir Sensor, Lamp Cover Pcb
Rear IR sensor, Lamp cover PCB 1. There is a lamp cover PCB behind the rear cover 2. 6 screws (Note: screw type is different) Light cover Two screws on each side. -
Page 25: Front Cover, Front Ir・Led Pcb
Front cover, Front IR・LED PCB 1. Remove the top cover 2. Total 7 screws on the side and upper 3. Remove the connector and all the screws and take out the front IR · LED PCB. -
Page 26: Lens Shift Module
Lens shift module Remove 5 screws, all the connectors and remove the lens shift module from the optical engine Three PCBs on the left side, horizontal shift PCB, lens relay PCB, vertical shift PCB Lens relay Vertical shift Horizontal shift Two motors on the right side, each are fixed by two screws... -
Page 27: Fan
WU model has 11 fans, and WX model has 12 fans. Fan names in service mode. DMD_2 FAN (WX model only) Thermal sensor 1 *Thermal sensor 2 in on the CHIP PCB There is a decal on Fan2 and Fan 10. Be careful the direction when re-install them. - Page 28 Fan1,5,7,12 can be removed from optical engine as a fan module. CAUTION: Wiring of the DMD thermistor should pass under the fan module Fan 3,4: Open the back cover and take out the module. Fan detector PCB is on the module.
- Page 29 Fan 9 is at the left side of optical engine, and behind the CHIP PCB. Fan 11 is at the right side of optical engine . Install the right lamp house before install Fan11. Fan 6 cannot be seperated from the colling module. FAN 6 DMDCHIP FAN 9...
-
Page 30: Optical Engine, Cooling Module, Dmd Chip
Optical Engine, Cooling module, DMD CHIP The tube of the cooling module passes under the optical engine, and the head is fixed to the DMD CHIP. CHIP CHIP PCB Optical engine Cooling module... - Page 31 Total 9 screws for fixing the engine module.
- Page 32 When removing the water cooling module from the engine, first remove the left lamp house to access the head screw. Remove the fixing screw of the head to separate the water cooling module from the engine. CAUTION: Do not press the head strongly when assembling to prevent CHIP breakage. Be careful not to break a thin thermistor cable.
- Page 33 Remove DMD CHIP cover and take out the CHIP. Caution: Do exchanging the CHIP in a clean environment. Do not touch the CHIP directly. Handle carefully so as not to damage it. Re-apply the grease if possible Do not pull or bend the connector strongly as this may cause image problems. Please note that you do not misunderstand the direction of insertion.
-
Page 34: Color Wheel
Color wheel Open the color wheel cover and remove the color wheel module. Caution: Do not touch the color wheel directly. Handle carefully to avoid damage motor CW sensor... -
Page 35: Service Mode (Factory Mode)
Service mode (Factory mode) Press the power button, left, left, Menu button sequentially. When a white block is displayed on top, expand the menu with direction key and OK key. -
Page 39: After Replacement
After replacement Spare parts Action Memo Color Lens shift Main PCB OP engine Lamp wheel module Calibration Only if abnormal color issue Only if abnormal CW delay color issue Lamp time reset Only when abnormal Angle auto-keystone Calibration function Lens Do it after changing Sensor the limit sensor on... -
Page 40: Troubleshooting
Troubleshooting... -
Page 44: Indicator
Indicator... -
Page 45: Error Count Messages Definition
Error Count Messages Definition... -
Page 46: Firmware Upgrade
Firmware upgrade... - Page 48 Service Tool Upgrade SOP...
-
Page 51: Rs232 Command
RS232 command...
Need help?
Do you have a question about the PJ WU6480 and is the answer not in the manual?
Questions and answers