
Related Manuals for Ricoh PJ S2130


Summary of Contents for Ricoh PJ S2130
- Page 1 User’s Manual For safe and correct use, be sure to read the “Usage Notice” before using the projector.
-
Page 2: Table Of Contents
Table of Contents Table of Contents ......1 Default Settings 2 ......... 36 Default Settings 2 | 3D Projection ..38 Usage Notice ........2 Display Status ........39 Precautions .........2 Appendices ........40 Safety Labels of This Machine ....6 Troubleshooting ........40 Regulation & Safety Notices ....7 Replacing the lamp ......45 Other Information ......11 Computer Compatibility ....46... -
Page 3: Usage Notice
Usage Notice Precautions Follow all warnings, precautions and maintenance as recom- mended in this user’s guide to maximize the life of your unit. ■ This apparatus must be earthed. Warning- ■ Do not look into the projector’s lens when the Warning- lamp is on. - Page 4 Usage Notice ■ This product should be operated only from the Warning- type of power source which does not exceed the voltage range specified on the rating label and the power cord. If you are not sure of the type of power supply to your home, consult your sales representative or local power company.
- Page 5 Usage Notice ■ Unplug this product from the wall outlet and Caution- take the product to qualified service personnel if you encounter any of the following conditions: a) The power supply cord or plug is damaged. b) Liquid has been spilled, or objects have fallen into the product.
- Page 6 Usage Notice ■ Do not use the product in a closed installation Caution- location. Do not place the product in a box or in any other closed installation location. Otherwise it may overheat, which could result in a risk of fire.
-
Page 7: Safety Labels Of This Machine
Usage Notice Safety Labels of This Machine 1 Do not block the air intake or exhaust. Doing so could cause a fire due to internal overheating. Do not place your hands, face, or other objects near the air exhaust, the lamp cover or the bottom of the unit. -
Page 8: Regulation & Safety Notices
This appendix lists the general notices of your Projector. Notice: Users in the United States of America FCC notice MODEL NAME: PJ S2130 / PJ X2130 / PJ WX2130 TRADE NAME: PROJECTOR MODEL NAME: PJ S2130 / PJ X2130 / PJ WX2130... -
Page 9: Declaration Of Conformity For Eu Countries
Usage Notice RESPONSIBLE PARTY: Ricoh Americas Corporation 5 Dedrick Place, West Caldwell, NJ 07006 Phone: 973-882-2000 Notice: Shielded cables All connections to other computing devices must be made using shielded cables to maintain compliance with FCC regulations. Caution Changes or modifications not expressly approved by the manufacturer could void the user’s authority,... -
Page 10: Remote Control Batteries
Usage Notice Disposal This product contains substances which are harmful to humans and the environment. • The lamp contains mercury. Please dispose of this product or used lamps in accordance with local regulations. Following information is only for EU-member states: The use of the symbol indicates that this product may not be treated as house- hold waste. - Page 11 Usage Notice Following information is only for EU-member states: [Disposal of batteries and/or accumulators] The crossed out wheeled dust bin symbol indicates that batteries and/or accu- mulators must be collected and disposed of separately from household waste. If the battery or accumulator contains more than the specified values of lead (Pb), mercury (Hg), and/or cadmium (Cd) defined in the Battery Directive (2006/66/EC), then the chemical symbols for lead (Pb), mercury (Hg) and/or cadmium (Cd) will appear below the crossed out wheeled dust bin symbol.
-
Page 12: Other Information
Usage Notice Other Information Copyrights to Images When projecting images using the projector, be careful not to infringe the copyright of protected materials. The following are examples that may infringe the copyright of protected materials. • Broadcasting images or movies for commercial purposes •... -
Page 13: Introduction
Introduction Product Features Outstanding features include: True PJ S2130 - SVGA(800×600)/ ■ PJ X2130 - XGA(1024×768)/ PJ WX2130 - WXGA(1280×800) addressable pixels Single chip DLP technology ® ■ NTSC3.58/NTSC4.43/PAL(B/D/G/H/I/M/N)/ ■ SECAM (B/D/G/K/K1/L) and SDTV(480i/576i), EDTV(480p/576p), HDTV(720p/1080i/1080p) compat- ible Multi-Auto functions: Auto detection, Auto image and ■... -
Page 14: Package Overview
Introduction Package Overview This projector comes with all the items shown below. Check to make sure your unit is complete. Contact your dealer immedi- ately if anything is missing. Due to the differ- Projector with lens cap Wireless Remote Control Batteries for Remote ence in applications Control (AAA/R03) -
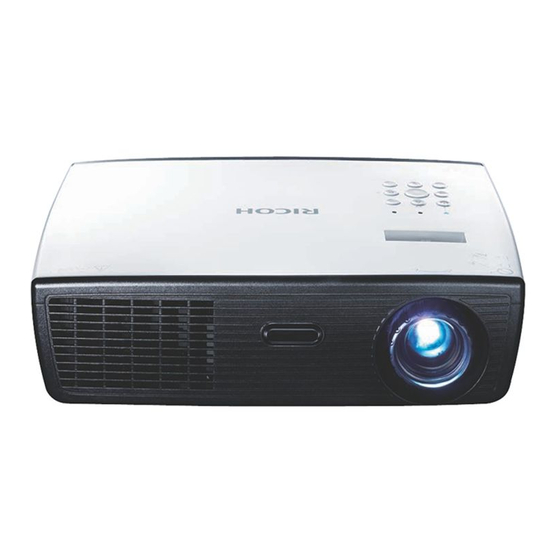
Page 15: Product Overview
Introduction Product Overview 1. Control panel 2. Zoom lever 3. Ventilation (inlet) 4. Speaker 5. Focus ring 6. Ventilation (outlet) 7. Infrared remote sensor 8. Lens 9. Lens cap 10. Connection ports 11. Adjustable feet English... -
Page 16: Connection Ports
Introduction Connection Ports 1. HDMI terminal 2. COMPUTER IN/COMPONENT IN terminal 3. S-VIDEO IN terminal 4. VIDEO IN terminal 5. SERVICE Port 6. MONITOR OUT terminal 7. AUDIO IN Jack 8. AC IN socket 9. Anti-theft lock hole English English... -
Page 17: Control Panel
Introduction Control Panel Lamp indicator Indicate the projector’s lamp status. Temp indicator Indicate the projector’s temperature status. Power indicator Indicate the projector’s status. Power Refer to the “Power On/Off the Pro- jector” section. (See pages 22~23) Volume - Decrease speaker volume. Input Press “Input”... -
Page 18: Remote Control
Introduction Remote Control Infrared trans- Sends signals to the projector. mitter Indicator Enter Confirm your section of items in sub menu operation. Four to select items or Directional make adjustments to your selection. Select Keys AV Mute Momentarily turn off/on the audio and video. - Page 19 Introduction Dim the projector lamp which will lower power consumption and extend the lamp life. Volume +/- Increase/decrease speaker volume. Video Press “Video” to choose Video in terminal. HDMI Press “HDMI” to choose HDMI in terminal. The “Magnify” Magnify Zoom in the projector display. function could not be S-Video Press “S-Video”...
-
Page 20: Remote Control Battery Installation
Introduction Remote Control Battery Installation Press firmly and Install new batteries (AAA/ Slip the cover back over the slide the battery R03). Ensure that you have batteries until it snaps into cover off. the batteries’ polarity (+/–) place. Do not mix different aligned correctly. -
Page 21: Installation
Installation Connecting the Projector Connect to Computer/Notebook Make sure that the power plug is fully inserted into both the projector AC inlet and the wall outlet. The AC outlet must be near this equipment and must be easily ac- cessible. E62405SP Due to the differ- ence in applications... -
Page 22: Connect To Video
Installation Connect to Video DVD player, Set-top Box Make sure that the HDTV receiver power plug is fully inserted into both the Video Output projector AC inlet and the wall outlet. The AC outlet must be near this equipment and must be easily ac- cessible. -
Page 23: Powering On/Off The Projector
Installation Powering On/Off the Projector Powering On the Projector 1. Ensure that the power cord and signal cable are securely connected. The Power indicator will turn red. 2. Remove the lens cap. 3. Turn on the lamp by pressing “Power” on the control panel or the remote control. -
Page 24: Powering Off The Projector
Installation Powering Off the Projector 1. Press the “Power” to turn off the projector lamp, you will see a message as below on the on-screen display. Press the “Power” again to confirm. 3. The cooling fan continues to operate for about 60 seconds for cooling cycle and the Power indicator will flash red. -
Page 25: Warning Indicator
Installation Warning Indicator When the “Temp” indicator lights red, it indicates the pro- jector has overheated. The projector will automatically shut itself down. When the “Lamp” indicator lights red, and you see the mes- sage below displays on-screen, the projector has detected that the lamp is approaching its end of life. -
Page 26: Adjusting The Projected Image
Installation Adjusting the Projected Image Adjusting the Height of Projector Image The projector is equipped with adjustable feet to raise and lower the image to fill the screen. To raise/lower the image: 1. Use to fine-tune the display angle You can raise the projector front up to 8 degrees by rotating the... -
Page 27: Adjusting The Projector Zoom And Focus
You may turn the zoom lever to zoom in or out. To focus the image, rotate the focus ring until the image is clear. PJ S2130/PJ X2130 series: The projector will focus at distanc- es from 3.93 to 42.98 feet (1.2 to 13.1 meters). - Page 28 Installation PJ S2130/PJ X2130 Screen Size W x H Projection Distance (D) Diagonal length Offset (Hd) (inch) size of (inch) (feet) 4:3 Screen Width Height Width Height wide tele wide tele (feet) 0.61 0.46 24.0 18.0 0.05 0.81 0.61 32.0 24.0...
-
Page 29: User Controls
User Controls On Screen Display (OSD) The Projector has a multilingual On Screen Display that allows you to make image adjustments and change a variety of set- tings. The projector will automatically detect the source. How to operate To open the OSD, press “Menu” on the Remote Control or the key- pad. -
Page 30: Image Adjustment
User Controls Image Adjustment Contrast The contrast controls the degree of difference between the lightest and darkest parts of the picture. Adjusting the contrast changes the amount of black and white in the image. Press the to decrease the contrast. ... -
Page 31: Picture Mode
User Controls Picture Mode There are many factory presets optimized for various types of im- ages. Use the to select the item. Bright: The mode emphasizing brightness. Standard: The mode balancing brightness and color. Natural: The mode emphasizing color representation. ... -
Page 32: Image Adjustment| Position
User Controls Image Adjustment| Position Phase Eliminate flicker from the image displayed. Use the to adjust the value. “Position” is only Frequency supported in Analog VGA (RGB) signal. Adjust the number of total dots in one horizontal period. Use the to adjust number to match your PC image. -
Page 33: Display Settings
Zoom: Zoom is available only for Video, S-Video and Y/PB/ PR(480/576) input. • PJ S2130/PJ X2130: Display 4:3 center area of 16:9 signal. (If input signal is 4:3 signal, displayed picture is stretched hori- zontally.) • PJ WX2130: Display 16:9 center area of 4:3 signal. (for letter PJ WX2130 box signal. - Page 34 User Controls Wall Color Correction Use this function to choose a wall color from “Off”, “Whiteboard”, “Beige”, “Blackboard(Green)” and “Gray”. Background on NoSignal Use this feature to display a “Logo”, “Blue” or “None”, screen when no signal is available. Display Icon Choose “On”...
-
Page 35: Default Settings 1
User Controls Default Settings 1 Power Off on No Signal Sets the countdown timer interval. The countdown timer will start, when there is no signal being sent to the projector. The projector will automatically power off when the countdown has finished. Auto Input Search When this function is turned “On”, the projector will search for other signals if the current input signal is lost. -
Page 36: Projection Mode
User Controls Projection Mode Stnd. (Standard) The factory default setting. The image is projected straight on the screen. Rear When you select this, the projector reverses the image so you can project behind a translucent screen. Ceiling When you select this, the projector turns the image upside down for ceiling-mounted projection. -
Page 37: Default Settings 2
User Controls Default Settings 2 High Altitude Mode When “On” is selected, the fans will spin faster. Set High Altitude mode to “On” when the projector is used over 2500ft (750m) eleva- tion. Key Lock When the keypad lock function is “On”, the control panel will be locked other than “Power”... - Page 38 User Controls 3D Projection Refer to next page. Reset All Return the adjustments and settings to the factory default values. English English...
-
Page 39: Default Settings 2 | 3D Projection
User Controls Default Settings 2 | 3D Projection 3D Projection Off: Choose “Off” to display normal (2D) picture. On: Choose “On” to display 3D format. DLP Link Compatible 3D source, 3D content and Select “On” to display 3D image viewing with DLP Link 3D glasses. active shutter glasses are required for 3D Optional sold 3D glasses uses DLP link system to synchronize with... -
Page 40: Display Status
User Controls Display Status Input Input source name. Resolution Resolution (in dots). Picture Mode Display the setting of Picture mode. Lamp Time Time of lamp use. Total Time Total Time, including Eco mode and Standard mode. Lamp Reset Count Display the number of projector replacement lamps. Firmware Version Display Firmware version. -
Page 41: Appendices
Appendices Troubleshooting If you experience trouble with the projector, refer to the fol- lowing information. If the problem persists, please contact your local dealer or service center. Problem: No image appears on screen Ensure all the cables and power connections are correctly and ... - Page 42 Appendices Problem: The screen of the Notebook or PowerBook com- puter is not displaying a presentation If you are using a Notebook PC: Some Notebook PCs may deactivate their own screens when a second display device is in use. Each has a different way to be reactivated.
- Page 43 Appendices Problem: Image is reversed Select “Default Settings 1-->Projection Mode” from the OSD and adjust the projection direction. Problem: Lamp burns out or makes a popping sound When the lamp reaches its end of life, it will burn out and may ...
- Page 44 Appendices Problem: Indicator lighting message POWER TEMP LAMP indicator indicator indicator Message (Red/Blue) (Red) (Red) Standby (Input power cord) (Red) Normal (Power on) (Blue) Powering up (Warming up) Flashing Blue (0.5 sec) Power off (Cooling Down) Flashing Red (0.5 sec) Error (Over temp.
- Page 45 Appendices Problem: Message Reminders Over temperature - the projector has exceeded its recommended operating temperature and must be allowed to cool down before it may be used. Replacing the lamp - the lamp is about to reach its maximum life- ...
-
Page 46: Replacing The Lamp
Appendices Replacing the lamp The projector will detect the lamp life itself. It will show you a warning message Warning: To avoid When you see this message, change the lamp as soon as pos- burns, allow the sible. Make sure the projector has been cooled down for at projector to cool for least 60 minutes before changing the lamp. -
Page 47: Computer Compatibility
Appendices Computer Compatibility A. VGA Analog (1) VGA Analog - PC Signal V.Frequency H.Frequency Modes Resolution Clock (MHz) (Hz) (kHz) 640 x 480 31.47 25.18 640 x 480 37.86 31.50 640 x 480 37.50 31.50 640 x 480 43.27 36.00 SVGA 800 x 600 35.20... - Page 48 Appendices A. VGA Analog (2) VGA Analog - Extended Wide V.Frequency H.Frequency Modes Resolution Clock (MHz) (Hz) (kHz) WXGA 1280 x 768 47.78 79.50 1280 x 768 60.29 102.25 1280 x 768 68.63 117.50 1280 x 720 44.80 74.25 1280 x 800 49.60 83.50 1440 x 900...
- Page 49 Appendices B. HDMI Digital (1) HDMI -PC Signal (Same as DVI) SXGA 1152 x 864 67.50 108.00 1152 x 864 77.10 121.50 1280 x 1024 63.98 108.00 1280 x 1024 77.90 134.60 1280 x 1024 79.98 135.00 1280 x 1024 91.15 157.50 QuadVGA...
-
Page 50: Configurations Of Terminals
Appendices Configurations of Terminals Terminal : Analog RGB (Mini D-sub 15 pin) Red (R/Cr) Input/R Output DDC 5V / NC Green (G/Y) Input/G Output Ground (Ver. sync.) Blue (B/Cb) Input/B Output ICP download ICP download / NC DDC Data / NC Ground (Horiz.sync.) Horiz. -
Page 51: Specifications
PJ X2130: 1024 × 768 pixels (XGA) PJ WX2130: 1280 × 800 pixels (WXGA) Lens PJ S2130/PJ X2130: F# 2.41 ~ 2.55, f=21.79 ~ 23.99 mm, 1.1X Zoom Lens PJ WX2130: F# 2.50 ~ 2.67, f=21.86 mm ~ 24 mm, 1.1X Zoom Lens Lamp... -
Page 52: Trademarks
Appendices Trademarks • DLP is trademarks of Texas Instruments. • IBM is a trademark or registered trademark of International Business Machines Corporation. • Macintosh, Mac OS X, iMac, and PowerBook are trademarks of Apple Inc., registered in the U.S. and other countries. •... - Page 53 © 2011...
- Page 54 Printed in China Y0206220...
Need help?
Do you have a question about the PJ S2130 and is the answer not in the manual?
Questions and answers