Table of Contents
Advertisement
Advertisement
Table of Contents

Related Manuals for SEWOO LK-P43B


Summary of Contents for SEWOO LK-P43B
- Page 1 SEWOO TECH CO.,LTD. 374-2, Gajang-dong, Osan-si, Gyeonggi-do, 447-210, Korea TEL : +82-31-459-8200 FAX : +82-31-459-8880 www.miniprinter.com MODEL : LK-P43B (Peeler) USER’S MANUAL All specifications are subject to change without notice P43B(Peeler) Rev. D 10/14...
- Page 2 RISK OF EXPLOSION IF BATTERY IS REPLACED BY AN INCORRECT TYPE. “Made for iPod,” “Made for iPhone,” and “Made for iPad” mean that an electronic DISPOSE OF USED BATTERIES ACCORDING TO THE INSTRUCTION accessory has been designed to connect specifically to iPod, iPhone, or iPad, respectively, and has been certified by the developer to meet Apple performance standards.
-
Page 3: Table Of Contents
Table of Contents 1. Safety Caution 7. Pritner Specification 2. Unpacking 7-1. Specification 3. Product Overview 8. CPCL Command Compatibility 4. Installation & Usage 9. ESC/POS Command Compatibility 10. ZPL Command Compatibility 4-1. Display 4-2. Installing the Battery 4-3. Removing the Battery 4-4. -
Page 4: Safety Caution
1. Safety Caution For higher reliability and safety, consider the following precautionary measures. WARNING Read and follow the instructions carefully before running of the product. Failure to follow these instructions could result in fire, electric shock, or other injuries, or property damage Indication Prohibition Must follow... -
Page 5: Unpacking
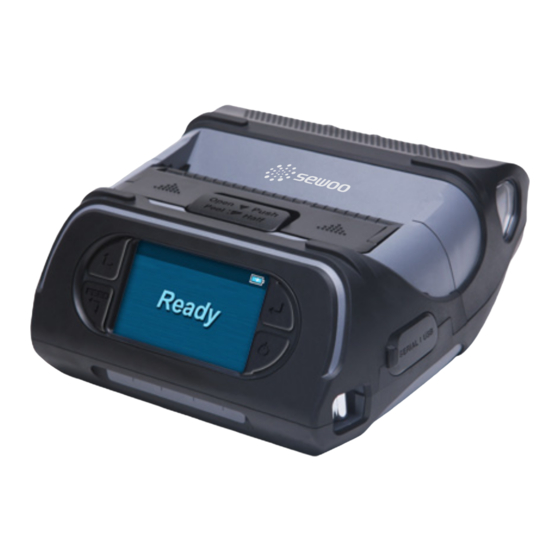
2. Unpacking 3. Product Overview Front Standard PEELER WING PEELER BODY Printer Battery Belt Clip COVER OPEN BUTTON DISPLAY SERIAL AC cord Adaptor USB Cable Bottom BATTERY Paper Quick Reference Serial Cable BELT CLIP Optional CONNECTOR SHOULDER STRAP RING CHARGER CONNECTOR Cigar Jack Shoulder Strap... -
Page 6: Display
4. Setting Up the Product 4-2. Installing the Battery 4-1. Display Button Name Function Advances the supply. Clears error message. Moves down through menu options. Paper Feed / 1. Refer to 4-9 for Diagnostic Test information. Down Button 2. Refer to the service manual regarding Hexadecimal Dumping. -
Page 7: Removing The Battery
4-3. Removing the Battery 4-4. Charging the Battery 1. Be sure that the printer is turned off 2. After open the DC JACK cover, insert DC JACK into the printer. 3. Plug the power code to electrical outlet. Remove the battery. Lift out the battery. 4-4-1 The status of lamp in charging Status Charging... -
Page 8: Battery Charger Usage
4-6. Usage of Cigar Jack Charger 4-5 Battery charger usage Optional Optional Lamp DC Jack Printer 1. Insert the battery into the battery holder as shown above 2. Connect the DC JACK to the power electrical outlet. 3. Plug the power code into the electrical outlet. 4. -
Page 9: Interface Cap Installation
4-8. Interface Cap Installation 4-7. Belt Clip Usage When Interface Cap separated from Using a sharp tool, insert the Cap Hook Insert screw into belt clip. the printer, try to array the Cap Hook in to the hole which is located in the right horizontal direction as shown in the image. -
Page 10: Roll Paper Installation
4-9. Roll Paper Installation Be cautious to handle the product when Printer Cover is an open position. You may have a potential risk of injury when Paper Cover closes CAUTION Open the Paper cover by pressing the Put the stock in so it unrolls from the Open button and set the width of paper bottom. -
Page 11: Install / Uninstall The External Paper Guides
4-10. Install / Uninstall the External Paper Guides When install the external paper, set the printer 20mm above from the Uninstall the External Paper Guides ground. Then insert the paper in right direction to the backside of the printer paper slot and adjust the paper guide to fit the paper properly. CAUTION Recommendation Please set apart the printer and paper at... -
Page 12: Peel Mode
4-11. Peel Mode Peel Mode When users operates the peeler like the image below that has slits on the label(1) and the perforated label(2), there might be an error in the peeler function CAUTION Paper (1) Label Paper Engraved Line With a roll of stock installed, slide the Push the peeler body until you see peeler body towards the back of the... -
Page 13: Shoulder Strap Installation
4-13. Diagnostic Test 4-12. Shoulder Strap Installation Optional Press and hold the Feed button Insert the strap into the hook of the printer. Turn off the printer. and Power button. NOTE 1. For Hex Dump mode, do steps 1-2 then press the Feed button. -
Page 14: Peripherals Connection
5. Peripherals Connection This printer can communicate with peripherals device via Bluetooth and Cables. The Sample of Self-test Printout 5-1 Bluetooth Connection 1. Printer can be connected to the PDA and PC which can do wireless communication. 2. By using Bluetooth function supported in PC, printer can be connected. NOTE Refer to the System Administrator Guide for more information. -
Page 15: Interface Cable Connection
6. Printer Cleaning If the interior of the printer is dusty, printing quality can be lowered. 5-2. Interface Cable Connection In this case, follow the instructions below to clean the printer. 6-1. Print-Head Cleaning 1. Use an applicator swab moistened with an isopropyl alcohol to clean the print-head and remove any dust. -
Page 16: Platen Roller Cleaning
7. Printer Specification 7-1. Specification 6-2. Platen Roller Cleaning Printing Method Direct Thermal 1.Clean the platen roller with a clean soft cloth moistened with isopropyl Printing Speed 80mm/sec alcohol or a cleaning pen. Resolution 203 DPI X 203 DPI 2. Turn the platen roller with your finger to clean the Character ALPHA NUMERIC Character, Extension Character Barcode... -
Page 17: Cpcl Command Compatibility
8. CPCL Command Compatibility NOTE Display TFT-LCD (RGB) 240X400 Compatible with only Partially Adaptor Input AC 100 ~240V 50/60Hz commanders provided by Not Compatible Compatible Compatible the manufacturer. Output 9.0V, 4.0A △ ○ ● Battery Battery Type Li-ion Output STANDARD : 7.4V, 2600 mAh/19.24Wh OPTION : 7.4V, 5200 mAh/38.48Wh Printer Commands Compatibility... - Page 18 DATAMATRIX ● SETBOLD ○ GS1(RSS-14) ○ SETSP ○ AZTEC ○ Special ASCII Characters ○ GRAPHICS Compatibility SETFF ○ ○ SET-TOF ○ LINE ○ SETLP-TIMEOUT ○ INVERSE-LINE ○ ADVANCED UTILITIES Compatibility PATTERN ○ VERSION ○ GRAPHICS CHECKSUM ○ ○ ○ ○ Advanced Commands Compatibility ○...
-
Page 19: Esc/Pos Command Compatibility
9. ESC / POS Command Compatibility Command Function Command Function Compatibility Compatibility Horizontal tab ○ ESC\ Set relative position ○ Print and line feed ESC a Align position ○ ○ Print and carriage return ○ ESC d Print and feed paper n lines ○... -
Page 20: Zpl Command Compatibility
10. ZPL Command Compatibility Command Compatibility Command Compatibility ○ ○ ○ ○ ○ ○ ○ ^CC ~CC ○ ○ ○ ○ ○ ○ ○ ○ ^CT ~CT ○ ○ ○ ○ ○ ○ ○ ○ ○ ○ ○ ○ ○ ○... - Page 21 Command Compatibility Command Compatibility ○ ○ ○ ○ ○ ○ ○ ○ ○ ○ ○ ○ ○ ○ ○ ○ ○ ○ ○ ○ ○ ○ ○ ○ ○ ○ ○ ○ ○ ○ ○ ○ ○ ○ ○...
Need help?
Do you have a question about the LK-P43B and is the answer not in the manual?
Questions and answers