Table of Contents
Advertisement
Advertisement
Table of Contents

Related Manuals for Blackberry PRIV


Summary of Contents for Blackberry PRIV
- Page 1 PRIV Version: 5.1...
- Page 2 Published: 2015-10-19 SWD-20151019145220950...
-
Page 3: Table Of Contents
Start a conference call..........................26 Turn on Voice Over LTE..........................27 Wi-Fi calling..............................28 Voicemail..............................28 Keyboard, language, and typing........................30 BlackBerry Keyboard and typing........................30 Selecting word suggestions that appear while you type................. 34 Spell check..............................35 Creating custom text shortcuts........................36 Language..............................37... - Page 4 Keyboard input methods..........................38 Applications and features..........................42 Find help for apps............................42 Organizing your home screen........................42 Clock................................44 Hangouts..............................47 Search.................................47 Location services and Google Maps......................50 Keyboard shortcuts............................51 Google Chrome and Downloads........................53 Printing................................54 Settings............................... 56 Customize your device settings........................56 Overview of Quick Settings...........................
- Page 5 Legal notice............................... 128...
-
Page 6: Setup And Basics
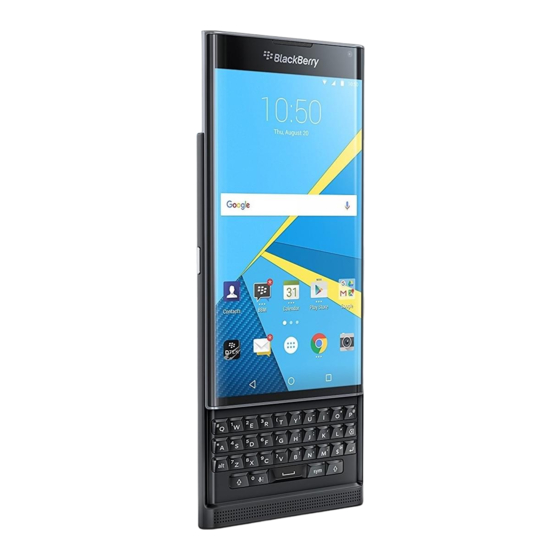
User Guide Setup and basics Setup and basics Your device at a glance 1. Nano SIM card tray 2. Media card (microSD card) tray 3. Notification LED... -
Page 7: Insert The Sim Card
User Guide Setup and basics 4. Front camera 5. Volume up 6. Mute 7. Volume down 8. Headset jack 9. Multi-function port (supports USB and video) 10. Power on/off key: Press to lock the screen; press and hold to power on/off; press and hold for 10 seconds to reset Insert the SIM card Your device uses a nano SIM card. -
Page 8: Insert A Media Card
User Guide Setup and basics Push the tray back into the slot. Insert a media card If you want more storage for pictures, videos, music, and documents, you can insert a media card (microSD card). Position your device so you can see the back cover and the top of the device. Release the media card tray by pushing the tip of the tool (provided in the box) into the hole on the top-left side of your device. -
Page 9: Move Between Home Screens
User Guide Setup and basics Pull out the tray completely and set it on a flat surface. Hold the media card so that the metal contacts are facing down and the notch is aligned with the notch in the tray. Put the media card in the tray. -
Page 10: Touch Screen Gestures
User Guide Setup and basics • To go back to the previous screen, tap • To go to your home screen, tap • To see your recently opened apps and screens, tap Touch screen gestures Take a moment to learn the common gestures that you can use on the touch screen. Wake up your device Tap the screen twice. - Page 11 User Guide Setup and basics Scroll or move between items Slide your finger to scroll through a list or move between items, such as photos. Check your notifications You can check your latest notifications (for example, email messages and text messages) at any time.
- Page 12 User Guide Setup and basics Swipe down from the top of the screen. Tap a notification to open it or pull down to see more notifications. Open Quick Settings You can open Quick Settings to turn on or turn off common settings such as Wi-Fi and airplane mode. Swipe down from the top of the screen once using two fingers, or twice using one finger.
-
Page 13: Use A Slider
User Guide Setup and basics Use a slider If a slider appears on your screen, you can progress through a file, such as a song or video, or adjust a setting, such as the screen brightness. Drag the slider handle to the right or left. Zoom in to or zoom out from the screen If you want to see something in more detail, such as a photo or part of a map, you can magnify the image. -
Page 14: Motion Gestures
User Guide Setup and basics To zoom out, slide two fingers together. Tip: In some cases, you can tap twice to zoom in or zoom out. Motion gestures You can use motion gestures to do things more quickly or efficiently. To turn motion gestures on or off, swipe down from the top of the screen once using two fingers, or twice using one finger. - Page 15 User Guide Setup and basics Flip to save power If this feature is turned on, when you place your device facedown on a flat surface, your device goes into sleep mode to extend battery life. You still receive notifications for incoming calls, messages, and alarms. To turn this feature on or off, tap the Flip to save power switch.
-
Page 16: Apps, Widgets, And Shortcuts
User Guide Setup and basics Apps, widgets, and shortcuts About apps, widgets, and shortcuts When you tap on your home screen, a tray opens where you can access installed apps and widgets and set up shortcuts. • The Apps tab includes a complete list of the apps installed on your device, including apps that you download on Google Play ™... - Page 17 User Guide Setup and basics Turn on pop-up widgets > Select the Pop-up widgets checkbox. Open a pop-up widget for an app With pop-up widgets, you can access a widget for an app without having that widget on the home screen. If a pop-up widget is available for an app, an indicator ( ) appears beneath the app icon.
-
Page 18: Personalizing Your Device
User Guide Setup and basics Open apps with a gesture You can use a gesture to open an app from anywhere on your device. The default apps for this feature are BlackBerry ™ Device Search, Google Now , and the BlackBerry Hub. You can assign different apps to this gesture as well. - Page 19 User Guide Setup and basics • Change your ringtone • Set your wallpaper • Add a contact or number to your speed dial list • Add an app, a widget, or a shortcut to your home screen • Change your font size •...
-
Page 20: Phone And Voice
User Guide Phone and voice Phone and voice Phone icons During a call Icon Description Turn on the speakerphone Mute your microphone Put a call on hold Show the dial pad Merge calls to start a conference call Split a conference call into multiple calls Find your own phone number Open the Phone app. -
Page 21: Making Calls
User Guide Phone and voice Making calls Make a call In the Phone app, tap Enter the number. Call a recent number In the Phone app, tap Recents. Tap a name or number > Call back. Call a contact In the Phone app, tap Contacts. Tap a contact. -
Page 22: View Your Call History
User Guide Phone and voice View your call history You can view past outgoing, incoming, and missed calls on the History screen. In the Phone app, in the upper-right corner of the screen, tap > Call History. Do any of the following: •... - Page 23 User Guide Phone and voice Change your default quick response messages You can create your own quick response messages to replace the available defaults. In the Phone app, in the upper-right corner of the screen, tap Tap Settings > General settings > Quick responses. Tap the quick response you want to change.
-
Page 24: Blocking Calls
User Guide Phone and voice • To move the call to your device, tap Handset earpiece. • To move the call to your device speakerphone, tap Speaker. Prevent calls from going to your Bluetooth headset You can disconnect your Bluetooth headset from the Phone app so that calls are sent to your device instead. Swipe down from the top of the screen once using two fingers, or twice using one finger. -
Page 25: Add A Contact Or Number To Your Speed Dial List
There are two different speed dial lists that you can add contacts or numbers to. You can add contacts or numbers to the BlackBerry Keyboard's speed dial list so that you can dial a number by pressing and holding a single key on your keyboard. -
Page 26: Call Waiting And Call Forwarding
User Guide Phone and voice Touch and hold the contact you want to remove. Drag the contact over Remove. Release your finger. Call waiting and call forwarding Turn call waiting on or off Depending on your service provider, this feature might not be supported. In the Phone app, in the upper-right corner of the screen, tap Tap Settings >... -
Page 27: Turn On Voice Over Lte
User Guide Phone and voice If you put the first call on hold, to merge both calls and start a conference call, tap To add more people to the conference call, repeat steps 1 and 2. Make another call while already on a call When you make another call while you're already on a call, your first call is automatically put on hold. -
Page 28: Wi-Fi Calling
User Guide Phone and voice Wi-Fi calling Turn on Wi-Fi calling Your device can make and receive calls over Wi-Fi networks, even if you have limited or no mobile network coverage. Depending on your service provider, this feature might not be supported. Contact your service provider for more information. -
Page 29: Visual Voicemail
User Guide Phone and voice Tap Setup. If the Voicemail number field is blank, tap Voicemail number, and then enter your voicemail access number. If you don't have a voicemail access number, contact your service provider. Do any of the following: •... -
Page 30: Keyboard, Language, And Typing
To scroll through a list, such as the message list in the BlackBerry Hub, or the text of a document, on the keyboard, slide your finger up and down. -
Page 31: Type An Uppercase Character
• To hide the keyboard, tap the screen outside of a text entry field. If there is nowhere to tap on the screen, tap Typing on the BlackBerry Keyboard Learn how to use accented and uppercase letters, symbols, and numbers on your keyboards. - Page 32 You can change the BlackBerry Keyboard settings so that your device automatically predicts what you are likely to type and corrects typing errors. The keyboard can also capitalize new sentences or insert a period when you press the space key twice.
- Page 33 To paste the text, touch and hold the location where you want to paste the text, and then tap Paste. Delete text using the BlackBerry Keyboard On the slider keyboard or the touch screen keyboard, swipe from right to left to delete a word. If you are typing in a right-to- left language, swipe from left to right to delete a word.
-
Page 34: Selecting Word Suggestions That Appear While You Type
User Guide Keyboard, language, and typing • When you type on the touch screen keyboard, press and hold the Period key > tap Do any of the following: • Tap the icons under the emojis to switch the emoji category. •... -
Page 35: Spell Check
User Guide Keyboard, language, and typing Spell check The BlackBerry Keyboard includes a spell check feature. Third-party spell checkers can be installed and used with the keyboard, but for best results, use the BlackBerry Spell Checker. Turn on spell check Swipe down from the top of the screen once using two fingers, or twice using one finger. -
Page 36: Creating Custom Text Shortcuts
Swipe down from the top of the screen once using two fingers, or twice using one finger. > Language & input > BlackBerry Keyboard Settings > Prediction and correction > Personal dictionary. Tap a language. To apply the setting to all languages, tap For all languages. -
Page 37: Language
In the Target field, type the substitution text for the shortcut. For example, BlackBerry. twice. If you add bb as your shortcut, and BlackBerry as the target, when you type bb, BlackBerry is inserted into your text. Change or delete a text shortcut Swipe down from the top of the screen once using two fingers, or twice using one finger. -
Page 38: Keyboard Input Methods
The language that you selected during the initial setup of your device is your display language. The home screen, BlackBerry Hub, and supported applications display content in this language. Swipe down from the top of the screen once using two fingers, or twice using one finger. - Page 39 User Guide Keyboard, language, and typing Turn on Chinese and Japanese input methods ™ ™ ™ By default, Google Pinyin Input, Google Zhuyin Input, and Google Japanese Input are available on your device. Check ™ Google Play for other Chinese and Japanese input methods. Swipe down from the top of the screen once using two fingers, or twice using one finger.
- Page 40 User Guide Keyboard, language, and typing Typing in Russian The Russian keyboard and language supports word prediction and the flick feature, which allows you to flick word suggestions up onto the screen (if you have this feature turned on). To access more Cyrillic characters on the Russian keyboard layout, you can use one of the following methods: •...
- Page 41 User Guide Keyboard, language, and typing...
-
Page 42: Applications And Features
Applications and features Applications and features Find help for apps You can learn about apps, such as BlackBerry Hub, Calendar, BlackBerry Camera, DTEK by BlackBerry, and more, at www.help.blackberry.com. Organizing your home screen Move an app, a widget, or a shortcut around Touch and hold an an app, a widget, or a shortcut, and then drag it to a new spot. - Page 43 User Guide Applications and features Organize apps and shortcuts into folders On the home screen, touch and hold an app or a shortcut. Drag the app or shortcut on top of another app or shortcut that you want to include in the same folder. To name the folder, tap the folder.
-
Page 44: Clock
User Guide Applications and features Clock Setting the alarm clock Set an alarm In the Clock app, tap • To set an existing alarm, tap the time shown on the alarm. • To create a new alarm, tap To adjust the alarm time, tap the hour or minute. Touch and hold the pink dial, and then slide the dial to your desired time. -
Page 45: Use The Stopwatch
User Guide Applications and features Select the Repeat checkbox. Days that the alarm is set to go off are indicated by a letter inside a white circle. To add or remove a day, tap its letter. Set the snooze length By default, the alarm snoozes for ten minutes. - Page 46 User Guide Applications and features • To add an extra minute to your running timer, tap • To set another timer, tap • To reset a timer, tap , and then tap • To delete a timer, tap Set your home time zone In the Clock app, tap Tap Home time zone.
-
Page 47: Hangouts
Internet sources and other application data is turned on. To narrow your results even further, you can turn off this option. Note: The BlackBerry Device Search app searches email messages that are in the BlackBerry Hub. On a home screen, tap >... -
Page 48: Send An Email
User Guide Applications and features Tip: Depending on your shortcut settings, you can also begin a search when you press the S key on the keyboard. Open apps with a gesture Use Instant Actions Instant Actions are shortcuts that allow you to perform tasks quickly.Type a command in the search field, and the app or item associated with the command is shown in your results. - Page 49 If you know the type of file that you're looking for or the category that you want to search, you can specify which categories to include in searches. For example, if you are looking for a song, you can clear all categories except Music. In the BlackBerry Device Search app, tap > Settings > Search categories.
-
Page 50: Location Services And Google Maps
User Guide Applications and features Location services and Google Maps About location services You can turn on location services so that location-based applications and services, like Google Maps , can find your ™ location. Location-based applications can use GPS technology and other positioning information to provide you with information, such as driving directions. -
Page 51: About Google Maps
You can use both short-press shortcuts and long-press shortcuts on the physical keyboard. If you install a home screen other than the BlackBerry Launcher, you can't use keyboard shortcuts. Slide open the physical keyboard. - Page 52 Add a note in the Notes app Open the Help app Lock the device screen Open a calendar app to the current day Open the BlackBerry Hub Open BBM Open the device settings Open the call history Open a search app...
-
Page 53: Google Chrome And Downloads
By default, when you type on the physical keyboard from the home screen, your device uses short-press keyboard shortcuts. You can change your settings so that typing on the physical keyboard either does nothing or starts a search in the BlackBerry Device Search app. On the home screen, tap >... -
Page 54: Printing
User Guide Applications and features Downloads icons Icon Description Delete a downloaded file Share a downloaded file View downloads as a list or as thumbnails Sort files by name, date, or file size Printing Print from your device You can print webpages, photos, documents, and more from your device using compatible Wi-Fi or Bluetooth enabled printers and printers connected to your computer. - Page 55 User Guide Applications and features Turn on the switch for that service, and then tap OK. Wait for the service to find printers automatically. Tip: Some printer services allow you to add printers manually. Tap > Add printer, and then follow the service's instructions.
-
Page 56: Settings
User Guide Settings Settings Customize your device settings Swipe down from the top of the screen once using two fingers, or twice using one finger. The Quick Settings menu is displayed to let you access options and settings you might want to interact with regularly, such as Auto-rotate or your network connections. -
Page 57: Overview Of Device Settings
User Guide Settings Item Description • Switch between black text on a white background and white text on a black background. Invert colors • View your service provider name and connection status. • Quickly access your data usage information. Mobile network icon •... - Page 58 User Guide Settings Item Description • Set up connections to Bluetooth enabled devices. Bluetooth • See your data usage stats. • Adjust or access mobile data settings. Data usage • Receive a notification when you reach specified data limits. • Customize your device settings for Airplane mode, NFC (if supported), mobile hotspots, and more.
- Page 59 User Guide Settings Item Description • Monitor apps that are using your device memory. • View and sort all apps on your device. Apps • Select the location for installing apps. • Add individual user profiles to your device. • Customize the settings for user and guest profiles.
-
Page 60: Notifications
User Guide Settings Item Description • Set up cloud accounts for backing up your data. • Turn the option to restore your data automatically on or off. • Delete your device data. • Turn the option to share diagnostic and usage data on or off. Diagnostics •... - Page 61 You can sort a list of notifications to see notifications associated with a particular app only. Swipe down from the top of the screen with one finger. Tap an app icon, such as BBM, BlackBerry Help, or Phone. To exit the filtered view and return to the full notifications list, tap the app icon again.
- Page 62 User Guide Settings Change your notification sounds You can change the default sound that your device makes when you receive a notification, or you can turn off notification sounds completely. Swipe down from the top of the screen once using two fingers, or twice using one finger. >...
- Page 63 User Guide Settings Turn off all sounds and notifications except calls Swipe down from the top of the screen once using two fingers, or twice using one finger. > Sound & notification > Interruptions. Tap When calls and notifications arrive > Allow only priority interruptions. Tap a length of time, and then tap OK.
- Page 64 BlackBerry Smart Flip Case The BlackBerry Smart Flip Case helps protect the screen from scratches and smudges, and also lets you interact with your device without opening the cover. You have direct access to your device for incoming calls, notifications, alarms, and your music player.
- Page 65 Swiping horizontally to the left or the right within the case window dismisses notifications. Swiping up or down lets you move through the notifications. Using the BlackBerry Smart Flip Case You can interact with your device, even when the cover of the flip case is closed.
-
Page 66: Answer Or Decline A Call
Note: If you turn off lock screen notifications, your notifications don't display in the case window. For the full experience using your device in the BlackBerry Smart Flip Case, tap Show all notification content in the lock screen notification options. - Page 67 To see more details about an item, tap the notification. • To open the app associated with the notification, tap More or Open. You can return to the BlackBerry Productivity Tab screen from an app when you swipe on the tab again.
-
Page 68: Storage Space And Media Cards
Settings Create an item using the BlackBerry Productivity Tab You can add new items, such as calendar events or email messages, right from the BlackBerry Productivity Tab without opening your calendar or email apps. Swipe on the tab toward the center of the screen. - Page 69 To use a media card with a capacity greater than 32 GB, you must download the Microsoft exFAT Technologydriver for BlackBerry. A notification appears when you insert the media card into your device. Make sure that you are connected to the Internet, and then tap the notification to download the driver.
-
Page 70: Check How Much Storage Space Is Free
In your browser, clear your history, cookies, and other web data. Transfer files between your computer and device using a USB connection If you use Mac OS, you must download and install the BlackBerry File Transfer app on your computer. To download the BlackBerry File Transfer app, visit Macfile transfer. -
Page 71: Connections
• Connect as a media device using MTP to transfer most file types between your device and a Windows or Mac computer using the BlackBerry File Transfer application. • Connect as a camera using PTP to transfer photos using camera software and to transfer files between your device and a computer that doesn't support MTP. - Page 72 User Guide Settings Icon Description make a phone call, but you might not be able to access the Internet or view email messages. You have no mobile network coverage. You can only make emergency calls. Your device is roaming. Extra charges might apply. The amount of solid color indicates the strength of the Wi-Fi signal.
-
Page 73: Network Connections
User Guide Settings Choosing a connection Your device is capable of a wide range of connections. Look at the following connection types for information and tips on using each type. Network connections Mobile network A mobile network connection allows your device to make calls and, if you have a data plan, use data services such as Internet browsing. - Page 74 Mobile hotspot You can use mobile hotspot mode to connect up to ten devices to your BlackBerry device. The number of devices that you can connect depends on your device model. When you use the mobile hotspot feature, your device becomes a Wi-Fi access point that other Wi-Fi enabled devices can connect to and use to access the Internet.
-
Page 75: Connect To The Mobile Network
User Guide Settings With airplane mode turned on, you can turn on some connections, such as Wi-Fi and Bluetooth technology. This feature allows you to, for example, connect to an in-flight Wi-Fi network if one is available. Mobile network A mobile network connection allows your device to make calls and, if you have a data plan, use data services such as Internet browsing. -
Page 76: Switch Wireless Networks Manually
User Guide Settings Change the APN settings for your default Internet connection Your device uses Access Point Name (APN) settings to open a data connection with your service provider's wireless network. You might need to change your APN settings if you change your wireless service plan or if the default settings don't apply to your service provider. - Page 77 User Guide Settings • To switch to a preferred network, tap a network. Turn off data services while roaming Depending on your wireless service plan, you might be able to turn off data services (email messages, PIN messages, text messages with attachments, and browser service) on your device so that only the phone and basic text messaging are available.
- Page 78 User Guide Settings • If your device normally connects to a CDMA network and your device supports international roaming, you can set your device to connect automatically while roaming. Swipe down from the top of the screen once using two fingers, or twice using one finger.
- Page 79 User Guide Settings • If you are connecting to a public network, tap the sign-in notification and, if necessary, accept the license agreement. If necessary, tap > Use this network as is. Manually add a Wi-Fi network You might need to add a Wi-Fi network manually to your device. To find out what information you should specify, you can ask your network administrator or the person who manages the Wi-Fi network.
- Page 80 User Guide Settings If necessary, turn on the switch. > Saved networks. Tap a network. Tap Forget. View saved Wi-Fi networks When you connect your device to a Wi-Fi network, your device automatically saves the information required to connect to the network.
- Page 81 User Guide Settings Swipe down from the top of the screen once using two fingers, or twice using one finger. > Wi-Fi. If necessary, turn on the switch. Tap and hold a network. Tap Modify network. Select the Advanced options checkbox. In the IP settings drop-down list, tap Static.
- Page 82 User Guide Settings Setting Description Install certificates Tap this option to install digital certificates that can identify your device when, for example, your device connects to VPN or a Wi-Fi network. Wi-Fi Direct Tap this option to connect with available Wi-Fi Direct compatible devices. WPS Push Button Tap this option to turn on the Wi-Fi Protected Setup feature.
-
Page 83: Bluetooth Connections
User Guide Settings • Check that the time on your device is correct and synchronized with the network time. If the times are different, it could prevent your device from connecting (for example, connecting to a network might require that you have a certificate on your device, and the certificate has an expiration date). - Page 84 User Guide Settings > Bluetooth. If necessary, turn on the switch. Your device automatically detects any discoverable devices within range. If necessary, to scan again for nearby Bluetooth enabled devices, tap > Refresh. Do one of the following: • If the device that you want to connect to appears in the Available devices list, tap the device name. Complete the instructions on the screen.
- Page 85 You can allow Bluetooth enabled devices that support the Message Access Profile (MAP) to access text messages (SMS and MMS) and email messages for accounts that are set up on your BlackBerry device. Examples of Bluetooth enabled devices that support MAP include some car kits and some watches.
-
Page 86: Supported Bluetooth Profiles
User Guide Settings beside the device you want to change. Do any of the following: • To turn a feature on or off, tap the profile. • To rename the device, in the Name field, enter the new name for the device. Tap OK. - Page 87 User Guide Settings Profile Description Advanced Audio Distribution Profile This profile allows your device to stream audio files to Bluetooth enabled (A2DP) devices that support stereo audio, such as stereo headsets, speakers, and car kits. Audio/Video Remote Control Profile This profile allows you to use the buttons on a Bluetooth enabled device, such (AVRCP) as a headset, to perform actions such as adjusting the volume or playing the next or previous media file on your device.
- Page 88 If your device is connected to a Bluetooth enabled headset or a car kit and you try to use Google Voice Search , by ™ default Google Voice Search uses the speaker and microphone on your BlackBerry device instead the speaker and ™ microphone on your Bluetooth enabled device. Turn on Bluetooth voice settings for Google Voice Search . On the ™...
- Page 89 User Guide Settings Depending on the apps you have installed on your device and the NFC compatibility of other devices, some of the ways you can use NFC include: • Pass a picture to your friend. • Tap an NFC tag to unlock your device using the Smart Lock feature. •...
- Page 90 User Guide Settings Change your NFC settings You can customize the NFC experience on your device by changing your NFC settings. You can set up your device to display a prompt before it receives a file using NFC. You can also set up when your device can complete an NFC card transaction, such as making a payment using a payment app.
-
Page 91: Tethering And Mobile Hotspot
Internet tethering allows you to share your device's connection to the mobile network with one other device, such as a laptop or tablet. You can connect the other device to your BlackBerry device using a USB cable or, if both devices are Bluetooth enabled, you can use Bluetooth technology instead. - Page 92 User Guide Settings Mobile hotspot When you use the mobile hotspot feature, your device becomes a wireless access point that other Wi-Fi enabled devices can connect to and access the Internet. Up to ten other devices can connect to your Wi-Fi network at one time, depending on your device model.
- Page 93 User Guide Settings View a list of devices that are connected to your mobile hotspot Mobile hotspot must be turned on. Swipe down from the top of the screen once using two fingers, or twice using one finger. > More > Tethering & mobile hotspot > Connected devices. Troubleshooting: Tethering and mobile hotspot I can't use Internet tethering •...
-
Page 94: Connect To A Vpn
User Guide Settings If you use your device for work, a VPN profile lets you connect securely to your organization's intranet when you are working outside of the office. When you connect to a private network using a VPN profile, the security and data management policies set up for the private network protect your data. - Page 95 User Guide Settings About Always-on mode Some virtual private networks (VPNs) support Always-on mode. If Always-on mode is turned on and your device loses its VPN connection, your device stops sending or receiving data until Always-on mode re-establishes the VPN connection automatically.
-
Page 96: Data Usage
User Guide Settings Change the settings for emergency broadcast messages You can set your device to vibrate when you receive an emergency broadcast message. You can also set a language for broadcast messages and how often you receive reminders for broadcast messages. Some settings might not be available depending on your region. - Page 97 User Guide Settings • To check how much data each user profile set up on the device used, tap a user profile. • To check how much data you used during a different time period, tap > Change cycle. Tap a date, and then tap Set.
-
Page 98: Battery And Power
User Guide Settings Swipe down from the top of the screen once using two fingers, or twice using one finger. > Data usage. If necessary, tap the Cellular tab. If necessary, turn on the Cellular data switch. Do one of the following: •... -
Page 99: Charge Your Device
CAUTION: Other chargers might not provide adequate power and might damage your device. Hold the cable with the BlackBerry logo facing the front of the device, and insert the cable into the multi-function port on your device. - Page 100 Some service providers support wireless charging for your device. You can charge your device by setting it on a supported charging mat instead of connecting your device to a charger. You can use the following device models with Qi and Power Matters Alliance (PMA) wireless chargers: • PRIV by BlackBerry STV100-1 smartphone • PRIV by BlackBerry STV100-2 smartphone •...
- Page 101 User Guide Settings When the device is asleep and charging, the percentage of your current battery power and an estimate of how much time until the device is fully charged appears above the strip. The indicator will automatically disappear when the room is dark. Turn the battery edge indicator on or off By default, the battery edge indicator is turned on.
- Page 102 User Guide Settings Note: When Battery saver mode is turned on, some applications and messaging services that rely on syncing might not update unless you open them. 1. Swipe down from the top of the screen once using two fingers, or twice using one finger. 2.
- Page 103 Battery saver. Device and battery safety You should use only the battery that BlackBerry specifies for use with your particular BlackBerry device model. If you use any other battery, you might invalidate any warranty provided with your device. CAUTION: There is a risk of explosion if the battery is replaced with an incorrect battery type. Do not try to replace your...
-
Page 104: Display
Please recycle your device and battery in accordance with your local regulations. Do not dispose of either your device or battery in a fire. Your device or battery should not be placed in household waste bins. For information about returning your device to BlackBerry for recycling and safe disposal, from a browser on your computer visit http://www.blackberry.com/ recycling. -
Page 105: Change The Screen Brightness
User Guide Settings Change the screen brightness Swipe down from the top of the screen once using two fingers, or twice using one finger. > Display > Brightness level. and drag the slider back and forth to adjust the brightness. Tip: Turn on the Adaptive brightness switch to allow your device to detect the light around you and automatically adjust the brightness level. - Page 106 User Guide Settings Choose what to display in Daydream ™ ™ After you turn on the Daydream feature, you can select which dreams you want to display, such as the clock or pictures, when your device is sleeping. On the Daydream screen, tap a dream.
-
Page 107: Accessibility
Turn Retail Demo Mode on or off Retail Demo Mode includes animations, demos, video tutorials, and more to teach users about different device features. Features include the BlackBerry Keyboard, productivity apps, such as BlackBerry Hub, contacts, and calendar, Google ™... - Page 108 Teletypewriter (TTY) support allows you to connect to a TTY device to make and receive calls from TTY devices. For more information on the following features, visit BlackBerry Accessibility. • Hearing aid compatibility is available for certain BlackBerry smartphone models. Compatibility ratings are available online at BlackBerry Accessibility. •...
-
Page 109: Users
TTY support is designed to allow your device to connect with an external TTY device that converts received calls to text. The TTY device that you want to connect to your BlackBerry device must operate at 45.45 bps. If your TTY device is designed for use with a 2.5-mm headset jack, you must use an adapter accessory to connect your TTY device to your... - Page 110 User Guide Settings All user profiles use the wireless connection information set up on the device. Any changes that a user makes to some device settings, such as Wi-Fi network connections, are available or applied to all users on the device. All users can install app updates for any user on the device.
- Page 111 User Guide Settings Select the Add users when device is locked checkbox. Add a user A user profile creates a separate space on your device for another person to use and customize. For example, the user can ™ add a Google account or download apps, wallpaper, and music without seeing the device owner or other users' account info, apps, and data.
-
Page 112: Backup And Reset
User Guide Settings A guest or a user can delete the apps and data from the guest space or user profile space on your device. A guest can tap > Delete Guest from this device. A user can tap > Delete <userprofile> from this device. Update contact information for the device owner You can add or change the contact information for the device owner. - Page 113 User Guide Settings • Apps installed on Google Play ™ • Display settings • Language and input settings • Date and time settings • Third-party app settings and data (varies by app) Back up device data using Android Backup Service ™...
-
Page 114: Update Your Device Software
User Guide Settings After you finish adding your account, your data is restored on your new device. Delete your device data with a factory reset Before you switch to a new device or give away your current device, you should delete your data. A factory reset is designed to delete all of the data on your device permanently so that it can't be recovered. -
Page 115: Security
User Guide Security Security Locks, passwords, and protecting your data There are several types of locks, PINs, and security features that you can use to help protect the data on your device. If you use your device for work, your organization might have security rules in place. The organization might require you to enter a password to unlock your device or might prevent you from using the Smart Lock feature. -
Page 116: Data Encryption
User Guide Security Data encryption By default, data on your device, including your account information, apps, music, pictures, and other downloaded files, is stored in a format that can be read only when your device decrypts the data. If you set up a screen lock and require that it must be entered to turn on your device, your password, PIN, or pattern is used to generate a new encryption key to decrypt your data. - Page 117 User Guide Security > Security > Screen lock. Do one of the following: • To unlock your device with a password, tap Password. • To unlock your device with a numeric PIN, tap PIN. • To unlock your device using a number and picture combination, tap Picture. •...
- Page 118 User Guide Security Set your screen lock options After you set up a screen lock for your device, you can set up your screen lock options. For example, you can set how long your device can be inactive before it automatically locks and whether your device automatically deletes your device data if you enter your password incorrectly ten times.
- Page 119 User Guide Security About Smart Lock The Smart Lock feature makes it easy for you to unlock your device. You can set up your device to remain unlocked in the following situations: • When your device is connected to a trusted Bluetooth enabled device or NFC-enabled device •...
-
Page 120: Protect Your Sim Card With A Pin
User Guide Security Enter your screen lock, and then tap Next. Do any of the following: • Tap Trusted devices. Tap a device, and then tap Delete. • Tap Trusted places. Tap a location, and then tap Delete. • Tap Trusted face. Tap Remove trusted face, and then tap Remove. •... - Page 121 User Guide Security Enter the new PIN again. Tap OK. About smart cards Smart cards store certificates and private keys. You can import certificates from a smart card to your device by using an external smart card reader or a microSD smart card. Private key operations such as signing and decryption use the smart card.
-
Page 122: Finding And Protecting A Lost Device
> Security > Smart Lock > Trusted face > Improve face matching. • Adjust the distance between your BlackBerry device and a trusted Bluetooth enabled device. The distance of a Bluetooth connection can vary depending on your BlackBerry device model and the Bluetooth enabled device. - Page 123 User Guide Security • Make your device ring • Add a phone number or message to the home screen of your device • View the approximate location of your device on a map • Delete all of the data on your device If your device is not connected to the wireless network or if data services are turned off, you should still try to lock your device and delete your device data.
-
Page 124: Security Settings
User Guide Security Tap Security. Do any of the following: • To be able to locate your device if it is lost or stolen, turn on the Remotely locate this device switch. • To be able to lock your device and delete all of your device data if it is lost or stolen, turn on the Allow remote lock and erase switch. - Page 125 User Guide Security Turn on screen pinning Swipe down from the top of the screen once using two fingers, or twice using one finger. > Security > Screen pinning. Turn on the switch. To unpin a screen without entering your screen lock, turn off the Ask for <Password | PIN | Picture | Pattern> before unpinning switch.
- Page 126 BlackBerry The DTEK by BlackBerry app is designed to help you monitor and control the level of security on your BlackBerry device. The DTEK by BlackBerry app is preloaded on your device, and updates are available from the Google Play store.
- Page 127 Monitoring how apps access your data The DTEK by BlackBerry app lets you see which third-party apps use features on your device to access your info. DTEK by BlackBerry monitors apps that: •...
-
Page 128: Legal Notice
This documentation including all documentation incorporated by reference herein such as documentation provided or made available on the BlackBerry website is provided or made accessible "AS IS" and "AS AVAILABLE" and without condition, endorsement, guarantee, representation, or warranty of any kind by BlackBerry Limited and its affiliated companies ("BlackBerry") and BlackBerry assumes no responsibility for any typographical, technical, or other... - Page 129 BlackBerry. The terms of use of any BlackBerry product or service are set out in a separate license or other agreement with BlackBerry applicable thereto. NOTHING IN THIS DOCUMENTATION IS INTENDED TO SUPERSEDE ANY EXPRESS WRITTEN AGREEMENTS OR WARRANTIES PROVIDED BY BLACKBERRY FOR PORTIONS OF ANY BLACKBERRY PRODUCT OR SERVICE OTHER THAN THIS DOCUMENTATION.
- Page 130 Legal notice • STV100-2 / RHT181LW • STV100-3 / RHL211LW • STV100-4 / RHM181LW BlackBerry Limited 2200 University Avenue East Waterloo, Ontario Canada N2K 0A7 BlackBerry UK Limited 200 Bath Road Slough, Berkshire SL1 3XE United Kingdom Published in Canada...
Need help?
Do you have a question about the PRIV and is the answer not in the manual?
Questions and answers