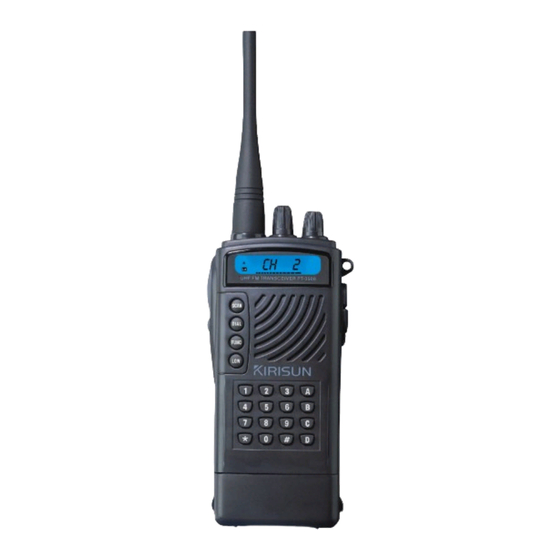
Summary of Contents for Kirisun PT2508
- Page 1 PT2508/3508 VHF/UHF HANDHELD TRANSCEIVER INSTRUCTION MANUAL 0681 0681...
- Page 2 If an abnormal odor or smoke is detected coming from the NOTICES TO THE USER transceiver, switch OFF the power immediately and remove the optional battery from the transceiver and Contact your KIRISUN Government law prohibits the operation of unlicensed radio dealer.
-
Page 3: Table Of Contents
CONTENTS Unpacking and checking equipment.........1 Transmitting stored DTMF numbers........15 supplied accessories............1 erasing stored DTMF numbers...........15 Preparation................1 Redialing................16 Charge the battery..............2 Code squelch................17 installing/removing the battery..........3 receiving ................17 installing antenna..............4 transmitting..............18 installing belt hook..............6 Selective call ................19 installing wrist loop..............6 Receiving................19 installing loop of sp &mic............6 transmitting..............20... -
Page 4: Unpacking And Checking Equipment
UNPACKING AND CHECKING EQUIPMENT /PREPARATION Carefully unpack the transceiver. We recommend that you identify the Items listed on the following page before discarding the packing material. If any damage has occurred during shipment, file a claim with the carrier Immediately. Charger Adaptor Battery... -
Page 5: Installing/Removing The Battery
1.Insert the battery into t h e b o t t o m o f t h e transceiver until the release catch on the base of the transceiver and locks the battery in Note: place. Do not recharge the battery if it is already fully charged or there is no low battery alarm .If do this, you will overcharge the battery which may shorten its life or damage it. -
Page 6: Installing Belt Hook
INSTALLING THE BELT HOOK INSTALLING THE SPEAKER /LOOP OF MIC If necessary, attach the belt hook using the two 3mm Use the optional KMC-17 or screws from the supplied screw KMC-21 speaker/MIC with the set. supplied connecting loop. 1. Switch power off and remove the panel from cap of MIC-SP. -
Page 7: Getting Acquainted
GETTING ACQUAINTED Selects operating channels. Also used for selecting squelch level, If so programmed by your dealer, used for selecting channels to Be locked. PTT(Push-to-Talk) switch Switches the transceiver between receive and transmit modes. MONI Button Press to monitor activity on your selected channel. Also used with QT/DTMF to mute the speaker after these functions have opened Squelch. -
Page 8: Lcd
BASIC USE Switch Power ON/OFF To switch ON the transceiver: Turn the POWER/VOL control clockwise. To switch OFF the transceiver. Turn the POWER/VOL control fully counterclockwise. Until a click is heard. Adjusting Volume To adjust the volume, turn the POWER/VOL control while. FIGURE DESCRIPTION Using [MONI] to listen to channel background noise. -
Page 9: Calling
CHANAL SCAN Scan is a useful feature for monitoring activity on the channels programmed in the transceiver. When scanning, the transceiver checks each channel for activity, and only stops on 0~9. a channel if a signal is present. Turning the CHANNEL Selector clockwise to increase the The transceiver remains on a busy channel until the channel is squelch level, and turning the selector counterclockwise to no longer Busy, unless transceiver check the new signal during... -
Page 10: Standby Channel
DTMF CALLING Each time this key combination is pressed, the lockout digits are currently displayed. status. The digits for the stored number scroll across the display Toggles ON And OFF for the selected channel. and Their associated DTMF tones are transmitted. A on LCD stands for the scanning channel, A will not show If so programmed by your dealer, no DTMF tone is for excluded channel. -
Page 11: Confirming Stored Dtmf Numbers
Confirming Stored DTMF Numbers DTMF CALLING To confirm stored DTMF Numbers, Contains the DTMF number to be erased. 1. Press [DIAL] to enter Dialling mode. 4. Restored to the original display. LCD display --------- D 2. Press key to enter into confirming mode. REDIALING 3. -
Page 12: Code Squelch
CODE SQUELCH Code Squelch is either enabled or disabled by your dealer. the station that called. However, Transpond does not function This function opens the squelch only when the transceiver when you are called with a Group code. Receives a predetermined DTMF code that has 3 to 10 digits. If your dealer has programmed Tone Alert, both Tone Alert Usually, each transceiver would be programmed with a unique and Code Squelch can function together. -
Page 13: Transmitting
SELECTIVE CALL SELECTIVE CALL Example: 12345 C . Selective Call is either enable or disabled by your dealer. When you are called with your Group code, displayed, For example 12345GP . This function is similar to Code Squelch. The differences from Code Squelch are as follows: When no message is received, NO DATA is displayed. -
Page 14: Keypad Lock
AUXILIARY FUNCTIONS To unlock the locks, hold down FUNC for more than 1 second, and Press DIAL. Releasing [PTT] causes the squelch to open and the LED to flash Orange. When the transceiver receive a signal, the LED TIME-OUT-TIMER (TOT) lights green, After the transceiver receives no further signals, The purpose of the time-out timer is to automatically interrupt the LED flashes orange again. -
Page 15: Lamp
Transmitting Power LAMP SETTING Press LOW key to select desired output power, each time 1. Holding down FUNC key for more than 1 second, and press LOW key is Pressed, the output power is toggled between low SCAN key. and high power. 2. -
Page 16: Vox
Switch off: No function. SELECTABLE QT You can change the preset QT frequencies in some channels You can set VOX gain from Switch off to Volume 3(high). of the transceiver temporarily: When using VOX, if the gain of MIC is higher than that of VOX, transceiver Will change to transmitting mode automatically;...


Need help?
Do you have a question about the PT2508 and is the answer not in the manual?
Questions and answers