Table of Contents
Advertisement
Advertisement
Table of Contents

Related Manuals for Kirisun PT 3800(1)


Summary of Contents for Kirisun PT 3800(1)
- Page 1 PT 3800(1) FM HANDHELD TRANSCEIVER INSTRUCTION MANUAL...
-
Page 2: Instruction Manual
Do not expose the transceiver to direct sunlight for a long time, or place it close to heating devices. Do not place the transceiver in excessively dusty, moist, dabbling INSTRUCTION MANUAL places, or on unstable surface. If an abnormal odor or smoke is detected coming from the transc- eiver, turn it off and remove the battery from the transceiver and PT3800(1) promptly contact your local dealer. - Page 3 Battery and Safety Please keep the battery in the clean, dry and ventilated room with 1. Warranty Exclusions the temperature of -5 and the relative humidity not more than 75%, avoid to contacting with any corrosive substance and keep The company will not be responsible for any failure or safety accident away from fire and heat.
-
Page 4: Table Of Contents
CONTENTS Do not keep or transit the battery with metals (like necklace). Do not press or throw the battery; do not use obviously defective or 1. Unpacking and Checking the Equipment twisted battery. Supplied Accessories Do not use nail or sharp materials to puncture the battery; do not beat 2. -
Page 5: Unpacking And Checking The Equipment
2. Preparation 1. Unpacking and Checking the Equipment (1) Charging the Battery Pack Carefully unpack the transceiver. We recommend that you identify the Plug the AC adapter cable into the items listed in the following table before discarding the packing mater- adapter jack located on the rear of ial. -
Page 6: Installing / Removing The Battery Pack
over current or short circuit. Please cut off the power, and then turn on Installing the Antenna again to continue charging. Screw the antenna into the connector at the top of the If the charger tests out the temperature of the battery is too high transceiver by holding the bottom of the antenna and (over 60 ), it will stop charging, and the charger LED turns yellow. -
Page 7: Getting Acquainted
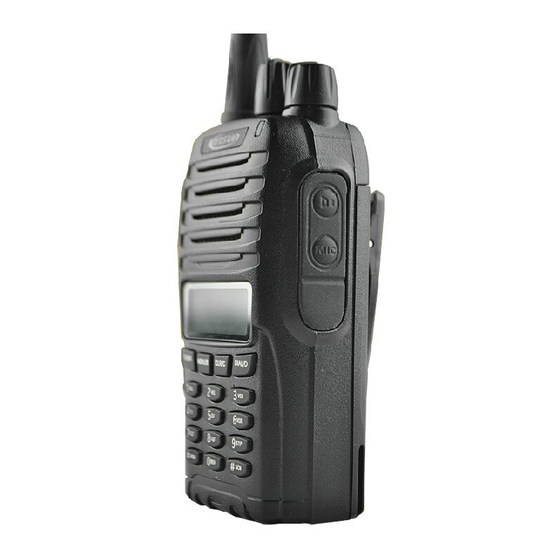
Getting Acquainted again. F.Lamp Button (1) Exterior Figure Press to light the screen and release for 5 seconds, auto light off; press again to turn off the light. G.MIC-SP Jacks For connecting external Microphone / Speaker. H.Keypad Numeric Key: input numbers and function selection. Function Key [F]: use with numeric keys to realize shortcut operation or function and parameter setting. -
Page 8: Lcd Display
4. Basic Operation (2) LCD Display Switch on Rotate Power / Volume Switch clockwise to turn on the transceiver. A du sounds and the transceiver is in the operational state. ICON DESCRIPTION Appear when [F] is pressed to enter the shortc ut function menu. Adjust the Volume Appear when the transmitting output power is set low. - Page 9 Adjusting the Squelch Level tone. 2)When press [PTT], the status of the LED indicator at the top panel The purpose of the squelch is to mute the speaker when no signals lights red. are present.While opening the squelch, you will hear the back- ground noise from the speaker;...
-
Page 10: Menu Setting
6. Channel Memory In the full-frequency display mode, selecting frequency is available. Rotate the Channel Selector to select the desired frequency. Rotate Memory Frequency clockwise to increase the frequency;rotate counterclockwise to decr- In the memory frequency, frequency memory and other parameters ease it, and then the selected frequency will appear on the screen(the setting are avaliable. - Page 11 signaling. appears; if is selected, the frequency for transmitting and receiving will be the same. 3)Press [OK] or [PTT] to keep the setting; press[CLR] to exit and 2)Press [OK] or [PTT] to keep the setting; press [CLR] to exit and quit the setting.
-
Page 12: Scan
Note: 7. Scan The basic requirement for memory scanning: minimum need 2 or Selecting Scan Resume Method more memory channels which have been set and not to be locked. Before scanning, it is necessary to decide how to continue scan- The squelch must be closed for scan to function. - Page 13 in the menu setting . (unit: minute) Battery Save Function (SAV) This function is useful to reduce the battery consumption while the transceiver is in the stand-by state. To set it ON or OFF, please Automatic Number Identification (ANI) select the third item in the memu setting .
- Page 14 Scrambler Function Reverse Frequency Function Built in voice security system to avoid being wiretapped. While the Reverse Frequency is activated, the transmitting frequency Press [F],[3] and rotate the Channel Selector to select the and receiving frequency are interchangeable, that's convenient for scrambler function ON or OFF, then press [OK] or [PTT] to keep the you to manually check the signal strength from the station which setting.
-
Page 15: Specifications
Specifications 3)Press and hold [MONI] for 2 seconds to turn on the host transceiver and enter the clone mode, LCD display CLONE? . Press [MONI] Specifications PT3800(1) again to start to clone. If the data is successfully transmitted, LCD Frequency 136-174MHz 400-470MHz display...
Need help?
Do you have a question about the PT 3800(1) and is the answer not in the manual?
Questions and answers