Chapters
Table of Contents

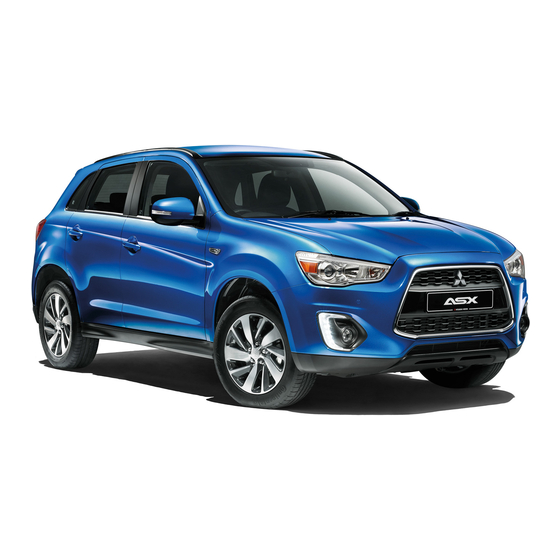
Related Manuals for Mitsubishi ASX


Summary of Contents for Mitsubishi ASX
- Page 1 Table of contents Overview General information Locking and unlocking Seat and seat belts Instruments and controls Starting and driving For pleasant driving For emergencies Vehicle care Maintenance Specifications...
-
Page 2: Instruments And Controls
Overview Instruments and controls E00100105343 1. Combination headlamps and dipper switch p. 3-44 Turn-signal lever p. 3-49 Front fog lamp switch* p. 3-50 Rear fog lamp switch p. 3-51 Headlamp washer switch* p. 3-56 2. Instruments p. 3-02 3. Shift paddles* p. 4-26 4. - Page 3 Overview 1. Instruments p. 3-02 2. Combination headlamps and dipper switch p. 3-44 Turn-signal lever p. 3-49 Front fog lamp switch* p. 3-50 Rear fog lamp switch p. 3-51 Headlamp washer switch* p. 3-56 3. Auto Stop & Go (AS&G) OFF switch* p. 4-20 4.
- Page 4 Overview 1. Digital clock* p. 5-39 Audio system* p. 5-10 MITSUBISHI Multi-Communication System* 2. Centre ventilators p. 5-02 3. Key slot p. 1-17 4. Side ventilators p. 5-02 5. Front passenger’s airbag ON-OFF switch p. 2-27 Glove box p. 5-65 6.
- Page 5 Overview 1. Centre ventilators p. 5-02 2. Digital clock* p. 5-39 Audio system* p. 5-10 MITSUBISHI Multi-Communication System* 3. Multi-information meter switch p. 3-05 4. Bonnet release lever p. 8-03 5. Accessory socket p. 5-61 6. Parking brake lever p. 4-06 7.
-
Page 6: Table Of Contents
Overview Interior E00100203858 1. Lock switch p. 1-34 2. Electric remote-controlled outside rear-view mirrors switch p. 4-09 3. Central door lock switch p. 1-22 4. Electric window control switch p. 1-34 5. Sunshade illumination dimming control switch* p. 5-63 6. Inside rear-view mirror p. 4-08 7. - Page 7 Overview 1. Rear shelf panel p. 5-69 2. Assist grip p. 5-70 Coat hook p. 5-70 3. Room lamp (rear)* p. 5-63 4. Sun visors p. 5-59 Vanity mirror p. 5-59 Card holder p. 5-59 5. Map lamp & room lamp (front) p. 5-62 Sunshade illumination switch* p.
- Page 8 Overview 1. Supplemental restraint system - curtain airbag* p. 2-31 2. Seat belts p. 2-10 Adjustable seat belt anchor p. 2-12 3. Luggage room lamp p. 5-63 4. Luggage floor box* p. 5-67 5. Tether anchorages for child restraint system p. 2-22 6.
- Page 9 Overview 1. Map lamp & room lamp (front) p. 5-62 Sunshade illumination switch* p. 1-36 2. Sun visor p. 5-59 Vanity mirror p. 5-59 Card holder p. 5-59 3. Room lamp (rear)* p. 5-63 4. Assist grip p. 5-70 Coat hook p. 5-70 5.
-
Page 10: Luggage Compartment
Overview Luggage compartment E00100401566 1. Tools p. 6-06 Vehicle with the tyre repair kit 2. Tyre repair kit* p. 6-07 3. Luggage hook p. 5-70 4. Jack p. 6-06 5. Tools p. 6-06 6. Luggage hook p. 5-70 7. Hook p. 5-70 8. - Page 11 Overview 1. Tools p. 6-06 2. Spare wheel p. 6-13 Vehicle with the spare tyre 3. Luggage hook p. 5-70 4. Jack p. 6-06 5. Tools p. 6-06 6. Luggage hook p. 5-70 7. Hook p. 5-70 8. Luggage hook p. 5-70...
- Page 12 Overview Exterior E00100504438 1. Electric window control p. 1-34 2. Fuel tank filler p. 03 3. Outside rear-view mirror p. 4-09 Side turn-signal lamps* p. 3-49, 8-24, 8-29 4. Side turn-signal lamps* p. 3-49, 8-24, 8-29 5. Position lamps p. 3-44, 8-24, 8-27 6.
- Page 13 Overview 1. Keyless entry system* p. 1-04 Keyless operation system* p. 1-07 Locking and unlocking the doors p. 1-21 2. Changing tyres p. 6-12 Tyre inflation pressures p. 8-12 Tyre rotation p. 8-13 Tyre chains p. 8-14 Size of tyres and wheels p. 9-12 3.
- Page 15 General information Fuel selection...................02 Filling the fuel tank................03 Installation of accessories..............04 Modification/alterations to the electrical or fuel systems....05 Genuine parts...................05 Safety and disposal information for used engine oil......05 Disposal information for used batteries...........06 Auto Stop & Go (AS&G) system*..........06...
-
Page 16: Fuel Selection
(EN228) have the system checked as soon as possible able on journey, etc. 1600 models, 1800 models at a MITSUBISHI MOTORS Authorized In such a case, you don’t need to adjust the 95 RON or higher Service Point. Recom- engine specially. -
Page 17: Filling The Fuel Tank
(for example, sitting on a seat) part-way through the refueling process, you could pick up a fresh charge of static electricity. If the tank cap must be replaced, use only a MITSUBISHI MOTORS original part. 3. Remove the fuel cap. -
Page 18: Installation Of Accessories
Due to large number of accessory and replacement push the fuel tank filler door closed. parts of different manufactures available in the mar- ket, it is not possible, not only for MITSUBISHI MOTORS, but also for a MITSUBISHI MOTORS Authorized Service Point, to check whether the at- tachment or installation of such parts affects the overall safety of your MITSUBISHI-vehicle. -
Page 19: Modification/Alterations To The Electrical Or Fuel Systems
Genuine parts Safety and disposal information electrical or fuel systems for used engine oil E00200500499 MITSUBISHI MOTORS has gone to great lengths E00200400368 E00200600155 to bring you a superbly crafted automobile offering MITSUBISHI MOTORS CORPORATION has al- the highest quality and dependability. -
Page 20: Disposal Information For Used Batteries
General information Disposal information for used Auto Stop & Go (AS&G) system* Deactivation E00201700036 batteries E00201500021 You can deactivate the system by pressing the “Au- This paragraph summarizes the major items of the E00201300032 to Stop & Go (AS&G) OFF” switch. Then the “ ” Auto Stop &... - Page 21 General information 2. Place the gearshift lever in the “N” (Neutral) Auto go Vehicle speed is 3 km/h (2 mph) or higher position. when coasting on a slope. E00201900025 Depress the clutch pedal while the gearshift lever is Mode selection dial is set to the demister po- in the “N”...
- Page 22 General information When the air conditioning is operated in AU- TO mode where the temperature control dial is set to the max. hot or the max. cool posi- tion (for vehicles with automatic air condi- tioning). Other than the conditions mentioned above, the en- gine may not stop automatically.
-
Page 23: Locking And Unlocking
Locking and unlocking Keys....................1-02 Electronic immobilizer (Anti-theft starting system).....1-03 Keyless entry system*..............1-04 Keyless operation system*............1-07 Doors....................1-21 Central door locks.................1-22 Dead Lock System*..............1-23 Child-protection rear doors............1-25 Tailgate..................1-26 Inside tailgate release..............1-27 Security alarm system*..............1-28 Electric window control..............1-34 Sunshade*..................1-36... -
Page 24: Keys
Locking and unlocking Keys Type 2 NOTE The emergency key fits all locks. The key number is stamped on the tag as in- E00300102269 dicated in the illustration. Type 1 Make a record of the key number and store the key and key number tag in separate pla- The key fits all locks. -
Page 25: Electronic Immobilizer (Anti-Theft Starting System)
Pay attention to the following if the security If the engine does not start, we recom- alarm is set to “Active”. mend you to contact your MITSUBISHI theft starting system) Refer to “Security alarm system” on page MOTORS Authorized Service Point. -
Page 26: Keyless Entry System
Locking and unlocking Keyless entry system* If you lose one of them, contact your To unlock MITSUBISHI MOTORS Authorized Service Press the UNLOCK switch (2). All the doors and E00300302317 Point as soon as possible. Press the remote control switch, and all doors and the tailgate will be unlocked. - Page 27 MOTORS Authorized Service Point. MITSUBISHI MOTORS Authorized Service In a vehicle equipped with the MITSUBISHI Mul- Operation of the Dead Lock System Point. ti-Communication System (MMCS), it is possible A maximum of 8 remote control switches are In a vehicle that has a Dead Lock System, it is pos- to change the setting by means of screen operations.
- Page 28 4. Release in sequence the LOCK and UN- LOCK switches within 10 seconds of press- ing the LOCK switch in step 3. 2. With the MITSUBISHI mark facing you, in- sert the cloth covered tip of a straight blade NOTE...
-
Page 29: Keyless Operation System
A MITSUBISHI MOTORS Authorized Serv- Electromedical device operations could fect implantable cardiac pacemakers or ice Point can replace the battery for you if be affected by radio waves. - Page 30 • Only starting the engine: interior transmit- key use. The battery life is 1 to 3 years, de- pending on usage conditions. When the bat- tery wears out, have it replaced at a MITSUBISHI MOTORS Authorized Service NOTE Point. The keyless operation key uses an ultra-weak Because the keyless operation key continual- electromagnetic wave.
- Page 31 Locking and unlocking Operating range for locking and unlocking the If the keyless operation key is within the op- If you are too close to the door or door win- erating range, even someone not carrying the dow, the engine may start even though the doors and tailgate key can lock and unlock the doors and tail- keyless operation key is outside the vehicle.
- Page 32 Locking and unlocking Unlocking the doors and tailgate Tailgate OPEN switch Tailgate LOCK switch When you are carrying the keyless operation key, if you press the driver’s or front passenger’s door lock/unlock switch (A), or the tailgate OPEN switch (B) within the operating range, all the doors and the tailgate are unlocked.
- Page 33 If you lose one of the keyless operation keys, locking adjusted. Consult when the vehicle is locked or only when contact a MITSUBISHI MOTORS Author- MITSUBISHI MOTORS Authorized Service the vehicle is unlocked. ized Service Point as soon as possible. Point.
- Page 34 Immediately the battery to be discharged, making it im- contact a MITSUBISHI MOTORS Au- NOTE possible to start the engine, lock and un- thorized Service Point.
- Page 35 Refer to “Keyless operation key take- If any of the following warnings are activated, out monitoring system” on page please contact a MITSUBISHI MOTORS Author- NOTE 1-13. ized Service Point. If you take the keyless operation key out of Even though you press the driver’s or front...
- Page 36 MITSUBISHI MOTORS Authorized Service ing for approximately 3 seconds and you cannot ment and wireless signal conditions. Point. lock the doors and tailgate.
- Page 37 Locking and unlocking NOTE The starter motor will be turning for up to ap- Starting the engine (petrol-powered vehicles) proximately 15 seconds if the engine switch E00307000478 When the following operation is performed The starting procedure is as follows: is released at once. Pressing the engine with the operation mode in OFF, the steering 1.
- Page 38 Locking and unlocking NOTE 5. Place the gearshift lever in the “N” (Neutral) Using the MIVEC engine The engine can only be started when the se- position. The MIVEC engine automatically switches its in- lector lever is in the “P” (PARK) or “N” take-valve control between a low-speed mode and (NEUTRAL) position (CVT).
- Page 39 Locking and unlocking Do not stop the engine with the selector lever Remove the keyless operation key from the key If the operation mode is in OFF and the driver’s in any position other than the “P” (PARK) po- slot after starting the engine or changing the opera- door is opened with the keyless operation key in sition (CVT).
- Page 40 Locking and unlocking After using the emergency key, always re- Keyless entry system To unlock turn it into the keyless operation key. Press the UNLOCK switch (2). All the doors and E00307700606 Press the remote control switch, and all doors and the tailgate will be unlocked.
- Page 41 For further information, please contact door are unlocked. In a vehicle equipped with the MITSUBISHI Mul- your MITSUBISHI MOTORS Author- ti-Communication System (MMCS), it is possible • The confirmation function (this indicates ized Service Point.
- Page 42 Refer to the separate owner’s man- ual for details. + side Procedure for replacing the remote control switch battery E00309600061 - side 1. With the MITSUBISHI mark facing you, in- sert the cloth-covered tip of a straight blade Coin type battery CR2032 1-20...
-
Page 43: Doors
Locking and unlocking Doors NOTE NOTE When locking or unlocking with the key, on- The driver’s door can be opened without us- E00300402060 ly the driver’s door will be locked or unlocked. ing the lock knob by pulling on the inside To lock or unlock all doors and the tailgate, door handle. -
Page 44: Central Door Locks
When the electric window lock switch is in the lock mode, the door and tailgate unlock- ing function will be deactivated. Refer to “Electric window control: Lock switch” on page 1-34. Consult a MITSUBISHI MOTORS Author- ized Service Point. 1-22... -
Page 45: Dead Lock System
Setting the system E00305200160 NOTE 1. Except for vehicles equipped with the key- less operation system, remove the key from On vehicles equipped with MITSUBISHI Multi-Communication System (MMCS), the ignition switch. For vehicles equipped with the keyless oper- screen operations can be used to make the ad- justment. - Page 46 Locking and unlocking The UNLOCK switch (D) on the remote con- Driver’s and front passenger’s door lock/unlock switches* Driver’s and front passenger’s door lock/unlock switches* trol switch is pressed. The driver’s or front passenger’s door lock/ unlock switch (E) is pressed while you are carrying the keyless operation key.
-
Page 47: Child-Protection Rear Doors
If you need advice on how to set the Dead E00300900999 eration. Lock System, please contact a MITSUBISHI • Except for vehicles equipped with the key- MOTORS Authorized Service Point. less operation system, turn the ignition switch to the “ON”... -
Page 48: Tailgate
Locking and unlocking Tailgate NOTE NOTE If you do not open the tailgate immediately Gas struts (B) are installed to support the tail- E00301401099 after pressing the tailgate OPEN switch, the gate. tailgate can not be lifted. If this happens, To prevent damage or faulty operation. -
Page 49: Inside Tailgate Release
Locking and unlocking Inside tailgate release To open CAUTION 1. Insert a straight blade (or minus) screwdriver E00303400256 The inside tailgate release is designed to provide a into the notch of the lid (A) and pry gently to Always keep the release lever lid on the way to open the tailgate in the case of a discharged open the lid. -
Page 50: Security Alarm System
(instead of the keyless entry please contact a MITSUBISHI MOTORS Au- if a door, the tailgate or the bonnet is opened when system or the keyless operation function). - Page 51 Locking and unlocking System armed mode NOTE (The security indicator continues to blink with the When lending the vehicle to another person indicator’s reduced lit-up duration time.) or allowing the vehicle to be driven by some- Once the system preparation mode has ended, the one who is unfamiliar with the security system armed mode starts.
- Page 52 Vehicles with the keyless operation system understand, please consult your MITSUBISHI MOTORS Authorized Service Point. Avoid leaving valuable items inside the vehi- The settings mode can be toggled by press- cle even when the security alarm system has been set to the “active” mode.
- Page 53 Locking and unlocking The buzzer makes an intermittent beeping NOTE Driver’s and front passenger’s door look/unlock switches* sound and the security indicator (D) in the au- The security alarm system can be activated dio panel blinks for confirmation. when people are riding inside the vehicle or when the windows are open.
- Page 54 (except for vehicles equipped with the key- Replace the battery at a MITSUBISHI less operation system) when the system is in MOTORS Authorized Service Point. the system preparation mode.
- Page 55 Locking and unlocking 1. The alarm will be activated for approximate- NOTE Holding the keyless operation key and lock- ly 30 seconds. The turn-signal lamps will ing and unlocking the doors and the tailgate During an alarm operation, the alarm is dis- blink, and the siren will sound intermittently.
-
Page 56: Lock Switch
Locking and unlocking Electric window control Passenger’s switches Driver’s switch (RHD) The passenger’s switches can be used to operate E00302200521 The electric windows can only be operated with the the corresponding passenger’s door windows. Press the switch down for opening the window, and pull ignition switch in the “ON”... - Page 57 Locking and unlocking To unlock, press it once again. Nonetheless, make sure that nobody puts their head If the safety mechanism is activated three or or hand out of the window when closing the driv- more times in a row, the safety mechanism er’s door window.
-
Page 58: Sunshade
Locking and unlocking Sunshade* If the sunshade does not operate when the sun- shade switch is operated, release the switch To close, press the switch (2). E00302800279 and check whether something is trapped by Press and hold the switch (2), the sunshade automat- the sunshade. -
Page 59: Seat And Seat Belts
Seat and seat belts Seat....................2-02 Seat adjustment................2-03 Front seat..................2-03 Rear seat..................2-06 Head restraints................2-07 Making a luggage compartment...........2-08 Seat belts..................2-10 Pregnant women restraint.............2-14 Seat belt pretensioner system and force limiter system....2-14 Child restraint................2-15 Seat belt inspection...............2-24 Supplemental restraint system (SRS) - airbag......2-24... -
Page 60: Seat
Seat and seat belts Seat E00400101742 1-Front seat To adjust forward or backward ® p. 2-03 To recline the seatback ® p. 2-04 To adjust seat height (driver’s seat only) ® p. 2-05 Armrest* ® p. 2-05 Heated seats* ® p. 2-06 2-Rear seat Armrest* ®... -
Page 61: Seat Adjustment
Seat and seat belts Seat adjustment Front seat CAUTION E00400300271 E00400400142 Adjust the driver’s seat so that you are comfortable To adjust forward or backward Make sure the seat is adjusted by an and that you can reach the pedals, steering wheel, E00400500462 adult or with adult supervision for cor- switches etc. - Page 62 Seat and seat belts Power type To recline the seatback Power type Adjust the seat by operating the switch as indicated Adjust the seatback angle by operating the switch E00400600968 by the arrows. as indicated by the arrows. Manual type In order to recline the seatback, lean forward slight- ly, pull the seatback lock lever up, and then lean backward to the desired position and release the lev-...
- Page 63 Seat and seat belts To adjust seat height (driver’s seat on- NOTE 2- To move the rear of the seat up and down To prevent the battery from discharging, use the power seat while the engine is on. E00400700549 Manual type To adjust the seat height, operate the lever repeated- ly to adjust.
-
Page 64: Heated Seat
Seat and seat belts Rear seat Heated seats* CAUTION E00401100960 E00401300294 The heated seats can be operated with the ignition or receive minor burns (red skin, heat blis- switch or the operation mode in ON. The indica- ters, etc.): WARNING tion lamp (A) will illuminate while the heater is on. -
Page 65: Head Restraints
Seat and seat belts Head restraints The top surface of the armrest contains a cup To raise the head restraint, move it upward. To low- holder for rear seat occupants. er the restraint, move it downward while pushing E00403301439 Refer to “Cup holder” on page 5-68. the height adjusting knob (A) in the direction of the arrow. -
Page 66: Making A Luggage Compartment
Seat and seat belts Making a luggage compartment Installation To install the head restraints, first confirm that they E00403400231 are facing the correct direction, and then insert them into the seatback while pressing the height ad- WARNING justing knob (A) in the direction indicated by the ar- row. - Page 67 Seat and seat belts 2. Fold back the seatback until it is locked prop- CAUTION erly in position. The seatbacks lock in different positions de- Be careful not to catch your hands or feet pending on whether you return the seatbacks when arranging the seat.
-
Page 68: Seat Belts
Seat and seat belts Seat belts NOTE WARNING You can check if the belt locks by pulling it E00404800636 To protect you and your passengers in the event of forward quickly. No modifications or additions should be an accident, it is most important that the seat belts made by the user which will either pre- be worn correctly while driving. - Page 69 Seat and seat belts Driver’s seat belt warning lamp and The warning lamp goes off and the tone stops after WARNING approximately 90 seconds. display Subsequently, if the seat belt is still not fastened, The seat belts must not be twisted when E00409800833 the warning lamp and tone will be activated to re- worn.
- Page 70 Seat and seat belts Adjustable seat belt anchor (front WARNING seats) When using the seat belt, make sure to se- E00405000329 The seat belt anchor height can be adjusted. curely connect the latch plate (B) with the Raise or lower the seat belt anchor (A) while press- buckle (C).
- Page 71 Seat and seat belts 4. Make sure the lap belt is positioned as low as 2. Push the button (G) on the buckle (C) using 4. After the seat belt is retracted completely, in- possible on the hips and pull the shoulder the latch plate (E) to disconnect the seat belt sert the latch plate (E) into the upper slit (H) belt to adjust the slackness of the lap belt.
-
Page 72: Pregnant Women Restraint
After the pretensioner seat belts have been activated, we recommend To obtain the best results from your pre- you have it replaced by a MITSUBISHI tensioner seat belt, make sure you have ad- MOTORS Authorized Service Point. -
Page 73: Child Restraint
Seat and seat belts Child restraint Force limiter system Caution for installing the child re- E00406000209 straint on vehicles with a front passen- E00406401659 In the event of a collision, each force limiter sys- When transporting children in your vehicle, some ger airbag tem will effectively absorb the load applied to the type of child restraint system should always be... - Page 74 Seat and seat belts Infants and small children Before purchasing a child restraint system, try installing it in the rear seat to make sure E00406600609 Front passenger’s airbag ON When transporting infants and small children in there is a good fit. Because of the location of your vehicle, follow the instruction given below.
-
Page 75: Older Children
Seat and seat belts have, the child restraint can be attached us- ing one of the following two locations: • To the lower anchorage in the rear seat ONLY if the child restraint has ISOFIX mountings (See page 2-18). • To the seat belt (See pages 2-10, 2-23). Older children E00406700277 Children who have outgrown the child restraint sys-... - Page 76 IUF- Suitable for ISOFIX forward child restraints systems of universal category approved for use in the mass group. IL- Suitable for particular ISOFIX child restraint systems given in the following list (MITSUBISHI genuine parts). X- ISOFIX position not suitable for ISOFIX child restraint systems in this mass group.
- Page 77 When installing a child restraint system, prevent the head restraint from touching the child restraint system by removing it or adjusting its height. NOTE MITSUBISHI MOTORS Europe B.V. reserves the right to changes without any prior announcement. For further information, please contact your MITSUBISHI MOTORS Authorized Service Point.
- Page 78 Key of characters to be inserted in the table above: U- Suitable for “universal” category restraints approved for use in this mass group. L- Suitable for particular child restraints in the following list (MITSUBISHI MOTORS genuine parts). X- Seat position not suitable for children in this mass group.
- Page 79 When installing a child restraint system, prevent the head restraint from touching the child restraint system by removing it or adjusting its height. NOTE There is no applicable MITSUBISHI MOTORS Genuine Parts to the Mass Group “0-Up to 10 kg”. MITSUBISHI MOTORS Europe B.V. reserves the right to changes without any prior announcement.
- Page 80 Seat and seat belts Installing a child restraint system to Tether anchorage locations It is not necessary to retain the child restraint sys- tem using the vehicle’s seat belts. There are 2 child restraint anchorage points located the lower anchorage (ISOFIX child re- on the back of the rear seatbacks.
- Page 81 Seat and seat belts 3. Push the child restraint system’s connectors Installing a child restraint system to a (D) into the lower anchorages (C) in accord- 3-point type seat belt (with emergency ance with the instructions provided by the locking mechanism) child restraint system’s manufacturer.
-
Page 82: Seat Belt Inspection
MITSUBISHI MOTORS Authorized The SRS curtain airbags (if so equipped) are de- Service Point. - Page 83 Seat and seat belts How the Supplemental Restraint Sys- Only when the ignition switch or the operation WARNING mode is under the following conditions, the airbags tem works will operate. IT IS VERY IMPORTANT TO BE PROP- E00407301554 [Except for vehicles equipped with keyless opera- The SRS includes the following components: ERLY SEATED.
- Page 84 Seat and seat belts Use rearward facing child restraints in the rear seat WARNING WARNING or turn off the front passenger’s airbag ON-OFF switch. (Refer to “To turn an airbag off” on page Infants and small children should never Older children should be seated in the 2-27.) be unrestrained, stand up against the in- rear seat, properly wearing the seat belt,...
- Page 85 Seat and seat belts NOTE Front passenger’s airbag OFF indica- WARNING The labels may be in different positions de- tion lamp pending on the vehicle model. Do not fit any accessory that makes the in- E00410200303 The front passenger’s airbag OFF indication lamp dication lamp impossible to see, and do is located in the instrument panel.
- Page 86 OFF switch is turned OFF, do not fit a child restraint system to the front pas- senger seat. We recommend you to have the system inspected by a MITSUBISHI MOTORS Authorized Service Point. • If the indication lamp remains on when the front passenger’s airbag ON- OFF switch is turned ON, do not al- Driver’s knee airbag system*...
- Page 87 Seat and seat belts Deployment of front airbags and driv- The front airbags and driver’s knee airbag will de- Examples of some typical conditions are shown in ploy if the severity of the impact is above the de- the illustration. er’s knee airbag signed threshold level, comparable to a collision at E00407501644...
- Page 88 Seat and seat belts Such conditions are shown in the illustration. Examples of some typical conditions are shown in WARNING the illustration. Do not set anything on, or attach any- thing to, the instrument panel above the glove box. It might strike and injure an oc- cupant if the airbag inflates.
- Page 89 MITSUBISHI MOTORS Authorized Service Point. Side airbag system* E00407600303 The side airbags (A) are contained in the driver and front passenger seatbacks.
- Page 90 Seat and seat belts Deployment of side airbags and cur- The side airbags and curtain airbags MAY NOT Examples of some typical conditions are shown in the illustration. DEPLOY when… tain airbags With certain types of side collisions, the vehicle’s E00407701415 body structure is designed to absorb the shock to The side airbags and curtain airbags ARE DE-...
- Page 91 Seat and seat belts Because the side airbags and curtain airbags do not WARNING WARNING protect the occupant in all types of side collisions, be sure to always properly wear your seat belts. The side airbags and curtain airbags are Do not place any objects near or in front designed to supplement the driver and pas- of the seatback of either front seat.
- Page 92 SRS to be performed by a MITSUBISHI in the multi-information display. bags are located. It is dangerous if the MOTORS Authorized Service Point.
- Page 93 SRS inspected by a MITSUBISHI MOTORS Authorized Service Point. NOTE When you transfer ownership of the vehicle...
-
Page 95: Instruments And Controls
Instruments and controls Instruments...................3-02 Multi-information display.............3-03 Indication lamp, warning lamp, and information screen display list.................3-25 Indication lamps................3-40 Warning lamps................3-41 Information screen display............3-42 Combination headlamps and dipper switch........3-44 Headlamp levelling...............3-48 Turn-signal lever................3-49 Hazard warning flasher switch.............3-50 Fog lamp switch................3-50 Wiper and washer switch..............3-51 Headlamp washer switch*............3-56 Rear window demister switch............3-57 Horn switch...................3-57... -
Page 96: Instruments
Instruments and controls Instruments Tachometer NOTE E00500300982 You can adjust to 8 different levels for when E00500101147 The tachometer indicates the engine speed (r/min). the position lamps are illuminated and 8 for The tachometer helps you to obtain more economi- when they are not. -
Page 97: Multi-Information Display
Instruments and controls Multi-information display E00519900711 Always stop the vehicle in a safe place before operating. The following information is included on the multi-information display: warnings, odometer, tripmeter, service reminder, engine coolant temperature, fuel remain- ing, outside temperature, selector lever position, 4WD operation status, average and momentary fuel consumption, driving range, average speed and meter illumination. It is also possible to change elements such as the language and units used on the multi-information display. - Page 98 Instruments and controls 6- Active Stability Control (ASC) OFF display screen* ® p. 3-09 7- Information screen (when the ignition switch or the operation mode is ON) ® p. 3-09 Interrupt display screen (when the ignition switch or the operation mode is ON) ®...
- Page 99 Instruments and controls Multi-information meter switch This mark is also displayed if there is an- Information screen (when the ignition other warning other than the one dis- E00520000608 switch or the operation mode is OFF) Each time the multi-information meter switch is op- played.
- Page 100 Instruments and controls Odometer/Tripmeter If tripmeter is displayed, only tripmeter Both tripmeters can count up to will be reset. 9999.9 km (9999.9 miles). E00521201516 Each time you lightly press the multi-information When a tripmeter goes past 9999.9 km meter switch, the display screen switches. (9999.9 miles), it returns to 0.0 km Type 1 (0.0 miles).
- Page 101 Instruments and controls Refer to “Warning display list (when the ignition If you press the multi-information meter switch, Refer to “Information screen (when the ignition switch or the operation mode is OFF)” on page the display screen switches to the screen that was switch or the operation mode is OFF)”...
- Page 102 Instruments and controls Information screen (when the ignition Refer to “Warning display list (when the ignition Type 1 switch or the operation mode is ON)” on page switch is turned from the “LOCK” po- 3-30. sition to the “ON” position or the oper- ation mode is changed from OFF to Type 1 Type 2...
- Page 103 Instruments and controls If you select “4WD LOCK” mode with the drive Active Stability Control (ASC) Information screen (when the ignition mode selector, “4WD LOCK” is displayed; if you OFF display screen* switch or the operation mode is ON) select “4WD AUTO” mode, “4WD” is displayed. E00521000373 E00521100576 Nothing is displayed when 2WD mode is selected.
- Page 104 Instruments and controls 6- Average speed display, average fuel consump- Odometer/Tripmeter Engine coolant temperature Type 1 tion display, momentary fuel consumption E00524500207 display display (Type 1) E00521400566 7- Driving range display, momentary fuel con- This indicates the engine coolant temper- Type 1 Type 2 sumption display (Type 2)
- Page 105 Instruments and controls Refuel as soon as possible. The display setting can be changed to the pre- When the following operation is performed, ferred units (km or miles). Refer to “Chang- the mode setting is automatically switched ing the function settings (when the ignition from manual to auto.
- Page 106 Instruments and controls NOTE For information on how to change the average fuel When the following operation is performed, consumption display setting, refer to “Changing the mode setting is automatically switched The average speed display and the average the function settings (when the ignition switch or from manual to auto.
- Page 107 Instruments and controls NOTE Momentary fuel consumption display The display setting can be changed to the pre- ferred units {km/L, mpg (US), mpg (UK) or The average speed display and the average E00521800430 While driving, this displays the momentary fuel con- L/100 km}.
- Page 108 Instruments and controls To return to the screen displayed before the Redisplay of a warning display screen Depending on factors such as the driving conditions, the displayed warning display When the mark is displayed, if you lightly press temperature may vary from the ac- Even if the cause of the warning display is not elim- the multi-information meter switch a few times, the tual outside temperature.
-
Page 109: Service Reminder
Type 1 To modify the display settings, have it adjus- Fuel lid mark ted at a MITSUBISHI MOTORS Authorized E00522300070 The arrow (A) indicates that the fuel tank filler is Service Point. located on the left side of the body. - Page 110 We recommend you to consult a tion meter switch a few times, the informa- switch while the icon is flashing to change MITSUBISHI MOTORS Authorized Service tion screen switches to the service reminder the display from “---” to “CLEAR”. After Point.
- Page 111 OFF. ing. If you accidentally reset the display, we rec- While driving, even if you operate the mul- ommend you to consult a MITSUBISHI ti-information meter switch, the function MOTORS Authorized Service Point. Changing the function settings (when setting screen is not displayed.
- Page 112 Instruments and controls 4. Select the item to change on the menu screen 1. Press and hold the multi-information meter Manual reset mode and change to the desired setting. Refer to switch for about 2 seconds or more to switch •...
- Page 113 Instruments and controls When the engine switch or the operation 2. Lightly press the multi-information meter 4. Lightly press the multi-information meter mode is in the following conditions, the aver- switch to select “AVG UNIT” (fuel consump- switch to switch in sequence from km/L → age fuel consumption display and average tion display setting).
- Page 114 Instruments and controls 3. Press and hold the multi-information meter 2. Lightly press the multi-information meter Fuel consump- Distance Speed switch for about 2 seconds or more to switch switch to select “LANGUAGE” (language tion (driving range) (average speed) in sequence from °C → °F → °C. setting).
- Page 115 JAPA- switch to switch in sequence from A (lan- E00523300370 The language used in MITSUBISHI Multi-Commu- NESE → ENGLISH → GERMAN → guage cooperation enabled) → M (language nication System (MMCS) (if so equipped) or the FRENCH →...
- Page 116 Instruments and controls 1. Press and hold the multi-information meter NOTE 2. Lightly press the multi-information meter switch for about 2 seconds or more to switch switch to select “ALARM” (rest time setting). The memory of the operation sound setting from the setting mode screen to the menu is erased if the battery is disconnected, and it screen.
- Page 117 Instruments and controls 4. Lightly press the multi-information meter 2. Lightly press the multi-information meter 1. Press and hold the multi-information meter switch to select the time until the display. switch for about 2 seconds or more to switch switch to select (changing the turn-sig- 5.
- Page 118 Instruments and controls 1. Press and hold the multi-information meter • Average fuel consumption and average switch for about 2 seconds or more to switch speed reset mode: A (Auto reset) from the setting mode screen to the menu • Fuel consumption display unit: L/100 km screen.
-
Page 119: Indication Lamp, Warning Lamp, And Information Screen Display List
Instruments and controls Indication lamp, warning lamp, and information screen display list E00523700013 Indication and warning lamp list E00523800610 1- Position lamp indication lamp ® p. 3-40 10- Seat belt warning lamp ® p. 2-11 2- High-beam indication lamp ® p. 3-40 11- Supplement Restraint System (SRS) warning lamp ®... - Page 120 • An extremely strong electromagnetic wave is received from a source such as an illegal radio set, a spark from a wire, or a radar station. • Abnormal voltage or a static electricity discharge is generated by the operation of installed electrical equipment (including after-market parts). If the warning display appears many times, we recommend you to consult a MITSUBISHI MOTORS Authorized Service Point. 3-26...
- Page 121 Instruments and controls Warning display list (when the ignition switch or the operation mode is OFF) E00524000622 Screen type 1 Screen type 2 Cause Solution (Reference) You have forgotten to turn off Refer to “Lamps (headlamps, fog the lamps. lamp, etc.) auto-cutout function” on page 3-44.
- Page 122 There is a fault in the keyless op- Refer to “Keyless operation system” eration system. on page 1-07. –– There is a fault in the electronic We recommend you to consult a immobilizer (Anti-theft starting MITSUBISHI MOTORS Au- system). thorized Service Point. –– 3-28...
- Page 123 Refer to “Steering wheel lock” the steering wheel unlocked. on page 1-14. –– There is a fault in the electrical Immediately stop the vehicle in a system. safe place. We recommend you consult MITSUBISHI –– MOTORS Authorized Service Point. 3-29...
- Page 124 Stop the vehicle in a safe place and inspect it. If the warning remains on after you inspect the vehicle, we rec- ommend consult MITSUBISHI MOTORS Au- thorized Service Point. Refer to “Electric power steering system (EPS)” on page 4-40. 3-30...
- Page 125 There is a fault in the brake sys- We recommend you to consult a tem. MITSUBISHI MOTORS Au- thorized Service Point. Refer to “Brake warning dis- play” on page 3-42. 3-31...
- Page 126 (Anti-theft starting and then start the engine again. system). If the warning is not cancelled, –– please contact a MITSUBISHI MOTORS Authorized Service Point. The driver’s door is open and the Put the operation mode in OFF. operation mode is put in a mode Refer to “Changing the operation...
- Page 127 There is a fault in the steering Immediately stop the vehicle in a wheel lock. safe place. We recommend you to consult a –– MITSUBISHI MOTORS Au- thorized Service Point. There is a fault in the electrical Immediately stop the vehicle in a system. safe place.
- Page 128 Screen type 2 Cause Solution (Reference) There is a fault in the fuel system. We recommend you to consult a MITSUBISHI MOTORS Au- thorized Service Point. You are driving with the parking Release the parking brake. Refer brake still applied.
- Page 129 Instruments and controls Screen type 1 Screen type 2 Cause Solution (Reference) There is an automatic headlamp We recommend you to have it levelling fault. checked. Refer to “Automatic headlamp levelling” on page 3-49. There is a fault in the Active Sta- We recommend you to have it bility Control (ASC).
- Page 130 (DPF). It is suspected that the engine oil Immediately have your vehicle level has increased excessively. checked by a MITSUBISHI MOTORS Authorized Service Point. Refer to “Engine oil level warning dis- play” on page 3-44. The outside temperature is 3 °C Be careful of ice on the road.
- Page 131 Instruments and controls Other interrupt displays E00524200480 Screen type 1 Screen type 2 System operation status Reference When starting the engine, you On vehicles with M/T, place the pressed the engine switch with- gearshift lever in the “N” (Neu- out depressing the clutch pedal tral) position, fully depress the (M/T).
- Page 132 Instruments and controls Screen type 1 Screen type 2 System operation status Reference When “2WD” mode is selected Refer to “Electronically controlled with the drive mode selector 4WD system” on page 4-29. When “4WD AUTO” mode is se- lected with the drive mode selec- When “4WD LOCK”...
- Page 133 Instruments and controls The setting for rest interval can be changed. Screen type 1 Screen type 2 Solution Stop the vehicle in a safe place, turn off the engine, and take a rest. Use this display as rough guide for taking rests during a long drive. The interval from the start of your trip until this message is displayed can be set.
-
Page 134: Indication Lamps
Instruments and controls Indication lamps Front fog lamp indication NOTE lamp* If the engine is cold, the diesel pre- E00501600100 heat indication lamp is on for a lon- E00501900350 Turn-signal indication lamps/ This lamp illuminates while the front ger time. Hazard warning indication fog lamps are on. -
Page 135: Warning Lamps
Instruments and controls Warning lamps Check engine warning lamp CAUTION E00502601638 E00502400147 This lamp is a part of an onboard diag- • The brake warning lamp Brake warning lamp nostic system which monitors the emis- does not illuminate when sions, engine control system or CVT con- E00502502357 the parking brake is applied This lamp illuminates when the ignition... -
Page 136: Information Screen Display
Im- Type 1 the system inspected by a mediately park your vehicle in MITSUBISHI MOTORS Au- a safe place and we recommend thorized Service Point as soon you to have it checked. as possible. - Page 137 Instruments and controls Charge warning display Type 1 CAUTION E00524800200 If the brake warning display is displayed Type 1 and the brake warning lamp and the ABS warning lamp are illuminated at the same time, the braking force distribution func- tion will not operate, so the vehicle may be destabilised during sudden braking.
-
Page 138: Combination Headlamps And Dipper Switch
NOTE If the warning is displayed while the en- Immediately have your vehicle checked by a gine oil level is normal, have it inspected. MITSUBISHI MOTORS Authorized Service Point. 3-44... - Page 139 For further information, please con- If the lamps do not turn on or off with the tact your MITSUBISHI MOTORS Author- switch in the “AUTO” position, manually op- ized Service Point.
- Page 140 For further information, we recommend you opened and the operation mode is put in or “ACC” position, or the key is removed to consult a MITSUBISHI MOTORS Author- OFF, the lamp monitor buzzer sounds at a from the ignition switch.
-
Page 141: Headlamp Flasher
MITSUBISHI MOTORS Author- ly (2), and will go off when it is released. ized Service Point. When the high-beam is on, the high-beam indica- On vehicles equipped with MITSUBISHI tion lamp in the instrument cluster will illuminate. NOTE Multi-Communication System (MMCS),... -
Page 142: Headlamp Levelling
• The coming home light function can be deactivated. For further information, please contact your MITSUBISHI MOTORS Authorized Service Point. On vehicles equipped with MITSUBISHI Multi-Communication System (MMCS), screen operations can be used to make the ad- justment. Refer to the separate owner’s man- ual for details. -
Page 143: Turn-Signal Lever
Instruments and controls Turn-signal lever Headlamp automatic levelling system warning dis- Vehi- play E00506501231 condi- Type 1 tion Switch posi- “0” “0” “1” “2” “3” tion ●:1 person :Full luggage loading Type 2 Switch position 0- Driver only/Driver + 1 front passenger Switch position 1- 5 passengers (including driv- 1- Turn-signals... -
Page 144: Hazard Warning Flasher Switch
For further information, we recommend you indication lamp in the instrument cluster will also to consult a MITSUBISHI MOTORS Author- come on. Turn the knob in the “OFF” direction to Push the switch to turn on the hazard warning flash- ized Service Point. -
Page 145: Wiper And Washer Switch
Instruments and controls Wiper and washer switch Rear fog lamp switch NOTE E00508400569 The rear fog lamp is automatically turned off E00507101218 The rear fog lamp can be operated when the head- when the headlamps or front fog lamps (if so lamps or front fog lamps (if so equipped) turn on. - Page 146 Intermittent (Speed sensitive) The speed-sensitive-operation function of the windscreen wipers can be deactivated. Slow For further information, we recommend you Fast to consult a MITSUBISHI MOTORS Author- ized Service Point. On vehicles equipped with MITSUBISHI Multi-Communication System (MMCS), screen operations can be used to make the ad- justment.
- Page 147 The wipers will operate once. For further information, we recommend you mode in ON and lever in the “AUTO” po- OFF- to consult a MITSUBISHI MOTORS Author- sition, the wipers may automatically oper- ized Service Point. ate in the situations described below.
-
Page 148: Windscreen Washer
(except vehicle-speed sensitive). For further information, we recommend you to consult a MITSUBISHI MOTORS Author- ized Service Point. 3-54... - Page 149 • Vehicles for Russia, Kazakhstan and Uk- tion of the lever. raine, the wipers can be set to operate again after about 6 seconds. For further information, we recommend you to consult a MITSUBISHI MOTORS Author- ized Service Point. On vehicles equipped with MITSUBISHI Multi-Communication System...
-
Page 150: Headlamp Washer Switch
Avoid using the washer continuously for For further information, we recommend you more than 20 seconds. Do not operate the to consult a MITSUBISHI MOTORS Author- washer when the fluid reservoir is empty. ized Service Point. Otherwise, the motor may burn out. -
Page 151: Rear Window Demister Switch
Instruments and controls Rear window demister switch Horn switch Do not allow objects to touch the inside of the rear window glass, damaged or broken E00507901186 E00508000318 wires may result. The rear window demister switch can be operated Press the steering wheel on or around the “ ”... -
Page 153: Starting And Driving
Starting and driving Economical driving...............4-02 Active stability control (ASC)*............4-40 Driving, alcohol and drugs............4-02 Cruise control*................4-43 Safe driving techniques..............4-03 Reversing sensor system*.............4-47 Running-in recommendations............4-04 Rear-view camera*...............4-50 Parking brake................4-06 Cargo loads...................4-52 Parking..................4-07 Trailer towing................4-54 Steering wheel height and reach adjustment........4-08 Inside rear-view mirror..............4-08 Outside rear-view mirrors.............4-09 Ignition switch................4-11 Steering wheel lock..............4-12... -
Page 154: Economical Driving
Starting and driving Economical driving Driving, alcohol and drugs Idling The vehicle consumes fuel even during idling. E00600101076 E00600200070 For economical driving, there are some technical re- Driving after drinking alcohol is one of the most fre- Avoid extended idling whenever possible. quirements that have to be met. -
Page 155: Safe Driving Techniques
Starting and driving Safe driving techniques Carrying children in the vehicle Never leave your vehicle unattended with the E00600300446 Driving safety and protection against injury cannot key and children inside the vehicle. Children be fully ensured. However, we recommend that may play with the driving controls and this you pay extra attention to the following: could lead to an accident. -
Page 156: Running-In Recommendations
Starting and driving Running-in recommendations E00600402089 During the running-in period for the first 1,000 km (620 miles), it is advisable to drive your new vehicle using the following precautions as a guideline to aid long life as well as future economy and performance. Do not race the engine at high speeds. - Page 157 Starting and driving Vehicles with CVT Shift point Speed limit “D” (DRIVE) 130 km/h (81 mph) 50 km/h (30 mph) position position 60 km/h (37 mph) 70 km/h (43 mph) position In sports mode 90 km/h (56 mph) position position 120 km/h (74 mph) 130 km/h (81 mph) position...
-
Page 158: Parking Brake
Starting and driving Parking brake NOTE CAUTION Apply sufficient force to the parking brake E00600501243 To park the vehicle, first bring it to a complete lever to hold the vehicle stationary after the Before driving, be sure that the parking stop, fully engage the parking brake. -
Page 159: Parking
Starting and driving Parking NOTE Do not keep the steering wheel fully If your vehicle is equipped with CVT, be turned for a long time E00600601505 To park the vehicle, fully engage the parking sure to apply the parking brake before mov- More effort could be required to turn the steering brake, and then move the gearshift lever to 1 ing selector lever to the “P”... -
Page 160: Steering Wheel Height And Reach Adjustment
Starting and driving Steering wheel height and reach Inside rear-view mirror To reduce the glare The lever (A) at the bottom of the mirror can be adjustment E00600800366 Adjust the rear-view mirror only after making any used to adjust the mirror to reduce the glare from E00600700512 seat adjustments so you have a clear view to the the headlamps of vehicles behind you during night... -
Page 161: Outside Rear-View Mirrors
Starting and driving Outside rear-view mirrors 1. Place the lever (A) to the same side as the mir- CAUTION ror whose adjustment is desired. E00600900628 To adjust the mirror position Do not drive the vehicle with the mirror E00601000642 folded in. Except for vehicles equipped with the mirror The outside rear-view mirrors can be operated retractor switch... - Page 162 Functions can be modified as stated below. possible to retract and extend the mirrors using the able to return it to its original position using Consult a MITSUBISHI MOTORS Author- mirror retractor switch for about 30 seconds. the mirror retractor switch. If this happens, ized Service Point.
-
Page 163: Ignition Switch
The engine is stopped, but the audio system and oth- For details, we recommend you to consult a er electric devices can be operated. MITSUBISHI MOTORS Authorized Service Point. On vehicles equipped with MITSUBISHI The engine is running, and all the vehicle’s electri- Multi-Communication System (MMCS), cal devices can be operated. -
Page 164: Steering Wheel Lock
Starting and driving Steering wheel lock screen operations can be used to make the ad- CAUTION justment. E00601500676 Refer to the separate owner’s manual for de- If the engine is stopped while driving, the tails. [For vehicles equipped with keyless op- brake servomechanism will cease to func- eration system] tion and braking efficiency will deterio-... -
Page 165: Starting
Starting and driving Starting CAUTION CAUTION E00620600214 Remove the key when leaving the vehicle. Release the ignition key as soon as the en- Tips for starting In some countries, it is prohibited to leave gine starts to avoid damaging the starter Do not operate the starter motor continuous- the key in the vehicle when parked. - Page 166 Starting and driving NOTE On vehicles equipped with CVT, make sure Starting the engine (diesel-powered ve- the selector lever is in the “P” (PARK) posi- If the engine is cold, the diesel preheat indi- hicles) tion. cation lamp is on for a longer time. E00625500090 When the engine has not been started within [For vehicles equipped with keyless operation...
-
Page 167: Diesel Particulate Filter (Dpf)
Starting and driving Diesel particulate filter (DPF)* Fuel injection amount learning proc- The engine sounds slightly different than usu- al while the DPF automatically burns away ess (diesel-powered vehicles) E00619800199 trapped PM. The change in the engine sound The diesel particulate filter (DPF) is a device that E00627900043 does not indicate a fault. -
Page 168: Turbocharger Operation
Starting and driving Turbocharger operation* If the DPF warning display subsequently stays on, Have the system inspected at a MITSUBISHI contact a MITSUBISHI MOTORS Authorized Serv- MOTORS Authorized Service Point. E00611200083 ice Point. CAUTION CAUTION CAUTION Continuing to drive with the DPF warn-... -
Page 169: Auto Stop & Go (As&G) System
Starting and driving Auto Stop & Go (AS&G) system* Turbocharger While depressing the brake pedal, fully de- press the clutch pedal and place the gearshift The turbocharger increases engine power by push- E00627400035 lever in the “N” (Neutral) position. The Auto Stop & Go (AS&G) system automatical- ing large amounts of air into the engine’s cylinders. - Page 170 Starting and driving NOTE gine will not stop automatically even if the ve- CAUTION hicle is stopped. When the engine is automatically stopped, • Driver’s seat belt is not fastened changes will occur in the driving operations. • Do not leave the driver’s seat or open •...
- Page 171 Starting and driving • Electric power consumption is high, such Automatically restarting the engine NOTE as when the rear window demister or oth- E00627600037 If the engine does not restart automatically or Depress the clutch pedal while the gearshift lever is er electrical components are operating or if the engine stalls, the oil pressure warning the blower speed is set to a high setting.
- Page 172 “Auto Stop & Go (AS&G) OFF” not operate. or the max. cool position (for vehicles switch. We recommend you to consult a MITSUBISHI with automatic air conditioning). When the Auto Stop & Go (AS&G) system is deac- MOTORS Authorized Service Point.
-
Page 173: Manual Transmission
Starting and driving Manual transmission* Moving the gearshift lever to the “R” CAUTION (Reverse) position E00602000535 The shift pattern is shown on the gearshift lever E00615400083 Do not pull up the pull-ring (A) when mov- knob. Be sure to always fully depress the clutch ped- ing the gearshift lever to any position oth- al before attempting to shift the lever. - Page 174 Starting and driving NOTE The gearshift indicator (if so equipped) shows recommended gearshift points for fuel- efficient driving. It shows a “ ” when an up- shift is recommended. 4-22...
- Page 175 Starting and driving Possible driving speed E00610801265 Avoid shifting down at high speed, as this may cause excessive engine speed (the tachometer needle into the red zone) and damage the engine. Petrol-powered vehicles Speed limit Shift point 1600 models 2000 models 50 km/h (30 mph) gear 50 km/h (30 mph)
-
Page 176: Automatic Transmission Invecs-Iii Sports Mode 6Cvt (Intelligent & Innovative Vehicle Electronic Control System Iii)
Immediately have your vehicle checked by a MITSUBISHI MOTORS Authorized Move the selector lever through the gate. Service Point. If you need to move the vehicle, shift the selector lever as follows. - Page 177 Starting and driving 3. Insert a straight blade (or minus) screwdriver Selector lever position display “N” NEUTRAL with a cloth over its tip into notch (A) of the At this position the transmission is disengaged. It is E00602300293 When the ignition switch is turned to the “ON” po- cover.
- Page 178 Starting and driving Sports mode NOTE E00602500194 The upward shift may be made automatically SHIFT Whether the vehicle is stationary or in motion, in sports mode when the engine revolutions sports mode is selected by gently pushing the selec- SHIFT SHIFT rises and approaches the tachometer’s red tor lever from the “D”...
- Page 179 Starting and driving Sports mode display Operation of the CVT CAUTION E00612200208 E00602600182 In sports mode, the currently selected position is dis- If malfunction occurs in the CVT while played on the multi-information display. CAUTION driving, the warning display or the warning display will appear on the infor- mation screen in the multi-information Before selecting a position with the en-...
- Page 180 Starting and driving DRIVING DOWNHILL NOTE CAUTION When travelling down steep grades, the computer On a slope, be sure to apply the parking may automatically select a lower shift position. brake before moving the selector lever to the Do not race the engine with brake pedal This function assists engine braking efforts, reduc- “P”...
-
Page 181: Electronically Controlled 4Wd System
Starting and driving Electronically controlled 4WD Drive mode-selector Drive mode Display The drive mode can be switched by turning the dial system* while the ignition switch or the operation mode is E00604900280 in ON. The electronically controlled 4WD system is a 4- wheel drive system that allows one of three drive modes to be selected with a dial, in accordance with the driving conditions. - Page 182 5 minutes, have activate the protection of the drive-sys- Drive mode “4WD” indica- “LOCK” indi- the vehicle inspected at a MITSUBISHI tem components, causing the drive mode MOTORS Authorized Service Point. cator in “4WD AUTO” mode to lock or the “4WD”...
-
Page 183: 4-Wheel Drive Operation
You should try MITSUBISHI MOTORS is not responsible When turning a sharp corner in “4WD LOCK” po- to avoid driving on steep slopes. - Page 184 Starting and driving CAUTION WARNING Check the depth of the water and the terrain before attempting to drive through it. Drive slowly to When attempting to rock your vehicle out Avoid sudden braking, sudden accelera- avoid creating excessive water splashing. tion and sharp turning.
-
Page 185: Inspection And Maintenance Following Rough Road Oper
Starting and driving Inspection and maintenance Cautions on handling of 4-wheel CAUTION following rough road operation drive vehicles Always use tyres of the same size, same E00606700338 E00606800746 type, and same brand, and which have no After operating the vehicle in rough road condi- wear differences. -
Page 186: Braking
Starting and driving Braking CAUTION WARNING E00607001784 All the parts of the brake system are critical to safe- If the power assist is lost or if either Do not tow 4-wheel drive vehicles with ty. We recommend you to have the vehicle the front or rear wheels on the ground brake hydraulic system stops working checked at regular intervals according to the serv-... -
Page 187: Hill Start Assist
Starting and driving Hill start assist* To operate WARNING E00628100172 E00628000155 1. Stop the vehicle completely using the brake The hill start assist makes it easy to start off on a Do not leave any objects near the brake pedal. steep uphill slope by preventing the vehicle from pedal or let a floor mat slide under it;... -
Page 188: Brake Assist System
If an abnormal condition occurs in the system, the should inspected The brake assist system may become opera- following display/indicator will turn on. MITSUBISHI MOTORS Authorized tional when the brake pedal is fully de- Service Point as soon as possible. -
Page 189: Emergency Stop Signal System
Starting and driving Emergency stop signal system When the brake assist system is in use, you • The brake pedal is released. may feel as if the depressed brake pedal is • The hazard warning flasher switch is E00626000018 soft, the pedal moves in small motions in con- pressed. -
Page 190: Anti-Lock Brake System (Abs)
Starting and driving Anti-lock brake system (ABS) The ABS can be used after the vehicle has ABS warning lamp/display reached a speed over approximately 10 km/h E00607201135 E00607101046 (6 mph). It stops working when the vehicle The anti-lock brake system (ABS) helps prevent Warning lamp slows below approximately 5 km/h (3 mph). - Page 191 Starting and driving If the ABS warning lamp/display and brake warn- NOTE CAUTION ing lamp/display illuminate at the same time The ABS warning lamp and brake warning lamp illuminate at the same time and the warn- ard brake system is working. (The stand- Warning lamp ing displays appear alternately on the infor- ard brake system is functioning normal-...
-
Page 192: Electric Power Steering System (Eps)
Starting and driving Electric power steering system Active stability control (ASC)* Type 2 (EPS) E00616700331 The Active Stability Control (ASC) takes overall E00629200037 control of the anti-lock brake system, traction con- The electric power steering system (EPS) uses an trol function and stability control function to help electric motor to assist the turning of the steering maintain the vehicle’s control and traction. - Page 193 Starting and driving NOTE Stability control function CAUTION An operation noise may be emitted from the E00619100017 The stability control function is designed to help engine compartment in the following situa- For safety reasons, the “ASC OFF” the driver maintain control of the vehicle on slip- tions.
- Page 194 Starting and driving NOTE When a compact spare tyre has been put on CAUTION your vehicle, the gripping ability of the tyre The combination of items shown on the dis- will be lower, making it more likely that the play varies depending on the vehicle model. The system may be malfunctioning.
-
Page 195: Cruise Control
Starting and driving Cruise control* Cruise control switches To activate E00609300957 E00609101008 1. With the ignition switch is in the “ON” posi- Cruise control is an automatic speed control system tion or the operation mode is in ON, press that keeps a set speed. It can be activated at about the “ON OFF”... - Page 196 Starting and driving NOTE NOTE Accelerator pedal If the cruise control is on when the following While driving at the set speed, use the accelerator When you release the “COAST SET” operation is performed, cruise control will be pedal to reach your desired speed and then press switch, the vehicle speed will be set.
- Page 197 Starting and driving When you reach your desired speed, release the Brake pedal To temporarily increase or decrease switch. Your new cruising speed is now set. While driving at the set speed, use the brake pedal, the speed which disengages the cruise control, then press the E00609600178 “COAST SET”...
- Page 198 Press the “ON-OFF” switch to turn off When the Active Stability Control (ASC) the cruise control and have your vehicle starts operating. (if so equipped) inspected by a MITSUBISHI MOTORS Refer to “Active stability control (ASC)” on Authorized Service Point. page 4-40.
-
Page 199: Reversing Sensor System
Starting and driving Reversing sensor system* [Except vehicles equipped with keyless oper- Corner and back sensor locations ation system] There are two corner sensors (A) at the corners of E00615500215 Turn the ignition switch to the “LOCK” or This system operates when you are backing the ve- the rear bumper, and two back sensors (B) in the “ACC”... - Page 200 The reversing sensor system may not prop- ly. Have the vehicle inspected at a erly detect the following: MITSUBISHI MOTORS Authorized Service • Objects that are thin, such as wire Point. nets or ropes.
- Page 201 Starting and driving NOTE It will flash in case there is a malfunction in the sys- • Setting when towing bar is not equipped tem. For details, refer to “Reversing sensor system When the gearshift lever or selector lever The buzzer may sound lower than the normal operation indication lamp”...
-
Page 202: Rear-View Camera
The distances given are to be used for ref- ted to the area shown in the illustrations. It cannot MITSUBISHI MOTORS Authorized Service Point. erence only, as errors may be caused by show both sides and the lower part of the rear bump- various factors, such as temperature, hu- er, etc. - Page 203 Range of view of rear-view camera A- Upper part of the rear bumper the MITSUBISHI Multi Communication System B- Approx. 20 cm (MMCS). When you move the gearshift lever or C- Approx. 50 cm the selector lever to any other position, the screen D- Approx.
-
Page 204: Cargo Loads
Please observe the following cautions. Ignor- For details, please refer to the separate own- CAUTION ing them could lead to a camera malfunction. er’s manual for “MITSUBISHI Multi Com- • Do not subject the camera to physical munication System (MMCS)”. shock. - Page 205 Slide each cover (B) towards the front of the vehi- We recommend you to use a genuine cle to remove it. MITSUBISHI roof carrier, since the brackets CAUTION to be used have a special shape. For details, we recommend you to consult a...
-
Page 206: Trailer Towing
Remove the roof carrier before using an auto- MITSUBISHI MOTORS Authorized Service Point. matic car wash. The regulations concerning the towing of a trailer Be sure that adequate clearance is main- may differ from country to country. You are ad- tained for raising the tailgate when installing vised to obey the regulations in each area. - Page 207 Starting and driving Be sure that the driving speed does not ex- 830.5 mm CAUTION ceed 100 km/h (62 mph) for trailer operation. 461 mm It is also recommended that you obey the lo- If the engine overheats, please refer to the cal regulations in case driving speed with a 68.5 mm “Engine overheating”...
-
Page 209: For Pleasant Driving
For pleasant driving Ventilators..................5-02 Luggage hooks................5-70 Heater/Air conditioning..............5-03 Important operation tips for the air conditioning......5-09 Air purifier..................5-10 Audio system*................5-10 To play tracks from USB device*..........5-22 ® To play tracks from a Bluetooth device (vehicles with ® Bluetooth 2.0 interface)............5-30 To use the external audio input function*........5-32 Steering wheel audio remote control switches*......5-33 Error codes..................5-35 Error codes (iPod).................5-36... -
Page 210: Ventilators
For pleasant driving Ventilators To close the ventilator, fully move the knob (A) to NOTE the inner side. On vehicles with air conditioning, the cool E00700100878 air from the ventilators may appear as a mist. This is due to moist air being suddenly cooled by the air conditioning. -
Page 211: Heater/Air Conditioning
For pleasant driving Heater/Air conditioning On vehicles with automatic air conditioning, Foot/demister position there is an interior air temperature sensor (G) Air flows to the leg area, the windscreen and the E00700500449 in the illustrated position. The heater/air conditioning can only be used while door windows. - Page 212 For further information, we recommend you to con- Manual air conditioning If high cooling performance is desired, or sult a MITSUBISHI MOTORS Authorized Service if the outside air is dusty or otherwise con- Point. taminated use the recirculation position.
- Page 213 For pleasant driving On vehicles with the automatic air condition- • When the setting is changed from enable CAUTION ing, when the engine coolant temperature to disable 3 sounds are emitted and the in- rises to a certain level, the air selection is au- dication lamp flashes 3 times.
- Page 214 For pleasant driving Enable automatic air conditioning control: Turn the temperature control dial clockwise or anti- Cooling (Manual air conditioning) If the mode selection dial or blower speed se- clockwise to the desired temperature. Select the de- E00701900684 lection dial is turned to the “AUTO” posi- sired blower speed.
- Page 215 For pleasant driving NOTE Automatic mode (Automatic air conditioning) CAUTION E00764800031 When the air conditioning operates with the selection switch in the outside position, the When using the air conditioning, the system automatically determines whether to idling speed may slightly increase as the continue using outside air or to perform recir- air conditioning compressor is switched culation.
- Page 216 For pleasant driving Demisting of the windscreen and door windows For ordinary demisting For quick demisting E00702100768 Perform the following settings to prevent misting of the windscreen and door windows, and to heat Heater/Manual air conditioning the leg area. CAUTION For safety, make sure you have a clear Heater/Manual air conditioning view through all the windows.
-
Page 217: Important Operation Tips For The Air Conditioning
For pleasant driving Important operation tips for the For vehicles with the Auto Stop & Go The new refrigerant HFC-134a in your vehicle will (AS&G) system, if the mode selection dial is not harm the ozone layer. air conditioning set to the demister position shown in the illus- We recommend you to recover and recycle the re- E00708300762 tration, the Auto Stop &... -
Page 218: Air Purifier
For information on operations of the audio system The audio amplifier (if so equipped) is loca- for vehicles equipped with MITSUBISHI Multi-Co- ted under the front right seat. Do not subject munication system (MMCS), refer to the separate the amplifier to a strong impact. - Page 219 For pleasant driving Volume and tone control panel NOTE Acoustic char- Details E00708601108 The SUB PUNCH can only be adjusted on ve- acteristics hicles with a premium sound system. The optimum acoustic character- On vehicles without a premium sound sys- istics for classical music, which tem, when you press the SOUND switch, the CLASSIC...
- Page 220 For pleasant driving NOTE Radio control panel and display Sound field Details type When set to 0, it will beep. E00708901198 When SUB PUNCH, TYPE or FIELD is This sound field produces a changed, the sound will cut out briefly, but sound effect where the vocals NORMAL this does not indicate a malfunction.
- Page 221 For pleasant driving To tune the radio 2. Press one of the memory select buttons until NOTE it beeps. E00709100624 If you press the AM/FM button for 2 seconds The sound will be momentarily interrupted or longer while tuning in the FM1 or FM2 Automatic tuning while the frequency is being entered into the band, the radio will automatically switch to...
- Page 222 For pleasant driving RDS uses PI (program identification) signal and Regional programming and regional networks are 1. NEWS AF (alternative frequency) list transmitted in addi- organized differently depending on the country or 2. AFFAIRS (Current affairs) tion to the normal FM broadcasting programs, and area (they may be changed according to the hour, 3.
- Page 223 For pleasant driving 4. When the radio picks up a station with your 3. The preset memory setting is retrieved by Traffic information desired PTY, the display will show the name pressing the button and then releasing it with- E00721600241 The radio will automatically tune in to traffic infor- of the station.
- Page 224 For pleasant driving The traffic information program standby function If an emergency broadcast is caught while receiv- 1. Press the TUNE switch for 2 seconds or lon- is turned on (with the TP indicator shown on the dis- ing a FM broadcast or playing back a compact disc ger to select the function setup mode.
- Page 225 For pleasant driving 3. Select the desired setting for each mode to be CD control panel and display 23- Eject button turned ON and OFF as shown below. 24- CD insertion slot E00709501162 The setting will be shown on the display. 25- FOLDER switch (Track up) button (Track down) button...
- Page 226 For pleasant driving 1. Press the PWR switch to turn the audio sys- NOTE To listen to a music CD tem ON and OFF. The audio system turns on If there are multiple empty slots, you can se- in the last mode used. lect your desired slot by pressing the DISC 2.
- Page 227 For pleasant driving To listen to an MP3 CD NOTE CAUTION This audio system allows you to play MP3 (MPEG While listening to a disc on which CD-DA Audio Layer-3) files recorded on CD-ROMs, (CD-Digital Audio) and MP3 files have both Attempting to play a file not in the MP3 CD-Rs (recordable CDs), and CD-RWs (rewritable been recorded, you can switch between read-...
- Page 228 For pleasant driving Folder up To repeat songs in the same folder (MP3 CDs on- Folder selection Turn the FOLDER switch clockwise until the de- sired folder number appears on the display. While a song is playing, press the RPT button for 2 In the order seconds or longer (until you hear a beep).
- Page 229 For pleasant driving Random playback for all folders on a disc (MP3 With a disc that contains both CD-DA and 3. Repeat the above-described steps until all of MP3 files, the scan mode causes only files of the discs have been ejected. The CD changer CDs only) the same format (CD-DA only or MP3 files will then enter loading standby mode.
-
Page 230: To Play Tracks From Usb Device
For pleasant driving To play tracks from USB device* NOTE 2. Press the DISP button repeatedly to make se- lections in the following sequence: album The display can show up to 12 characters. If E00756100048 name → track name → artist name → nor- You can connect your iPod or USB memory device a disc name or track name has more than 12 mal display mode. - Page 231 For pleasant driving iPod control panel and display 3. Press the CD button several times to switch Fast-forward to the iPod mode. The input mode changes ev- To fast-forward the current track, press the but- E00756200094 ery time the CD button is pressed. ton.
- Page 232 For pleasant driving To find a track from the iPod menu The iPod randomly selects tracks from the current NOTE category and plays the selected tracks. E00756600102 Up to 10 characters are shown in the display You can select desired tracks from the “Playlists”, To exit this mode, press the button again.
- Page 233 For pleasant driving Preparation for voice operation 3. After the voice guide says “What Artist To search by album title would you like to play?,” say the artist name. E00757300050 E00757500023 To use the voice operation, press the SPEECH but- 1.
- Page 234 For pleasant driving NOTE 6. After the voice guide says “Playing <album 3. After the voice guide says “What Playlist title>,” the system creates a playlist index for would you like to play?,” say the playlist ® The Bluetooth 2.0 interface starts recogniz- the album title.
- Page 235 For pleasant driving NOTE USB control panel and display 2. Connect your USB memory device to the If the confirmation function is active, the USB input terminal. E00758100097 voice guide confirms if the genre is correct. Refer to “How to connect a USB memory de- If the genre is correct, say “Yes”.
- Page 236 For pleasant driving Folder selection order/file playback order (exam- NOTE If the side of the button is pressed once after a ple) few seconds, playback returns to the start of that If a file protected by copyrights is played, The folder and file hierarchy in the USB memory track.
- Page 237 For pleasant driving To play the same file repeatedly NOTE 2. The display changes as follows every time the DISP button is pressed briefly: E00758700064 Once all tracks in the folder have been cued Press the RPT button to show “RPT” in the dis- Album title →...
-
Page 238: To Play Tracks From A Bluetooth Device
For pleasant driving To play USB memory device tracks ® ® To play tracks from a Bluetooth Bluetooth device control panel and via voice operation (vehicles with Blue- display ® device (vehicles with Bluetooth ® tooth 2.0 interface) E00762600077 2.0 interface) E00759400055 Desired tracks can be selected and played from E00759700016... - Page 239 For pleasant driving changes as follows every time the CD button To find the start of each track for playback (if sup- : The track number increases by Press is pressed. ported by the device) one. CD mode → USB (iPod) mode → Blue- E00763300042 : The track number decreases by Press the SCAN button.
-
Page 240: To Use The External Audio Input Function
For pleasant driving To use the external audio input Up to 10 characters are shown in the display To activate the external audio input at once. If the title is cut off in the middle, mode function* press the PAGE button. The next characters E00732200755 are displayed every time this button is pressed. -
Page 241: Volume Adjustment
For pleasant driving Steering wheel audio remote NOTE Volume adjustment The connected audio equipment cannot be op- control switches* erated with the vehicle’s audio system. Volume up button E00710000795 For information on how to connect and oper- While the button is pressed, the volume continues The remote control switch is located on the left ate the audio equipment, refer to the owner’s to increase. - Page 242 For pleasant driving Fast-reverse You can fast-reverse the disc by holding down the fast-reverse button. While the button is kept press- ed, the disc will be fast-reversed. NOTE In the case of an MP3 CD, you can fast-for- ward and fast-reverse tracks in the same fold- To select a desired track You can select your desired track by using the track up button or the track down button.
-
Page 243: Error Codes
Inside of audio system is hot. Internal protection against high temperatures. nutes. Communication error between external device Communication or power supply Consult a MITSUBISHI MOTORS Author- ERROR and audio equipment. error ized Service Point. Power supply error of external device. -
Page 244: Error Codes (Ipod)
Connect a supported iPod. Remove the iPod. USB BUS PWR (Blink) An overcurrent or other power-supply error has occurred. Have the vehicle inspected at a MITSUBISHI MOTORS Authorized Service Point. If the iPod indicator illuminates, the iPod cannot be authen- Reconnect the iPod. -
Page 245: Error Codes (Usb Memory Device)
Remove the USB memory device. USB BUS PWR (Blink) An overcurrent or other power-supply error has occurred. Have the vehicle inspected at a MITSUBISHI MOTORS Authorized Service Point. Have the vehicle inspected at a MITSUBISHI MOTORS U LSI ERROR (Blink) Internal device errors Authorized Service Point. -
Page 246: Handling Of Compact Discs
For pleasant driving Handling of compact discs The use of special shaped, damaged compact • When the temperature suddenly rises, discs (like cracked discs) or low-quality com- such as right after the heater is turned on E00723000425 pact discs (like warped discs or burrs on the in cold weather. -
Page 247: Antenna
For pleasant driving Antenna Digital clock* Notes on CD-Rs/RWs E00725100055 E00710500543 E00711800455 You may have trouble playing back some Automatic mode and manual mode is available for CD-R/RW discs recorded on CD recorders To remove digital clock adjustment. (CD-R/RW drives), either due to their record- Select the automatic mode or the manual mode by Turn the pole (A) anticlockwise. -
Page 248: Automatic Mode
For pleasant driving (Refer to “Function setup mode” on page NOTE Manual mode 5-16.) After selecting a mode, you can leave the func- The manual mode is also available in case the auto- tion setup mode by taking either of the fol- matic mode shows the incorrect time when the ad- lowing steps: jacent local RDS stations are located in a different... -
Page 249: Link System
® Bluetooth is a registered trademark of BLUE- You have acquired a device that includes software licensed by MITSUBISHI MOTORS CORPORA- TOOTH SIG, INC. TION from JOHNSON CONTROLS Inc (the auto- motive experience business unit), and their subse- quent 3 party suppliers. - Page 250 For pleasant driving Voice recognition function ® p. 5-43 SPEECH button WARNING Useful voice commands ® p. 5-43 Press this button to change to voice recogni- Speaker enrollment function ® p. 5-45 tion mode. ® Although the Bluetooth 2.0 interface al- While the system is in voice recognition Connecting the Bluetooth®...
- Page 251 For pleasant driving If this button is pressed in the voice recogni- NOTE If many entries are registered in the vehicle tion mode, the voice recognition mode will phone book, changing the language will take If the voice command that you say differs be deactivated.
- Page 252 “Cancel” to quit the voice input mode and pleted, the voice guide will say “Password is prompts are <off/on>” and then the system then check with a MITSUBISHI MOTORS enabled” and the system will return to the will return to the main menu.
- Page 253 For pleasant driving 5. When the disabling of the password is 2. Press the SPEECH button. 6. When all enrollment commands have been completed, the voice guide will say “Pass- 3. Say “Voice training”. read out, the voice guide will say “Speaker word is disabled”...
- Page 254 For pleasant driving NOTE ® The pairing code entered here is only used Connecting the Bluetooth 2.0 inter- ® ® You cannot pair Bluetooth devices with the for the Bluetooth connection certification. ® face and Bluetooth device ® It is any 4-digit number the user would like Bluetooth 2.0 interface unless the vehicle is E00760600073...
- Page 255 For pleasant driving NOTE vice and register it as a device tag. Say the swer “Yes” to continue and connect to the cel- name you want to register after the beep. lular phone. You can connect to a music player at any Answer “No,”...
- Page 256 For pleasant driving NOTE 7. The voice guide will say “Deleted,” and then please?” Say the number of the device tag the system will end the device deletion proc- If you press and release the SPEECH button you want to change. ess.
- Page 257 For pleasant driving SEND function ® p. 5-50 The maximum supported telephone number Answer “No,” and the name of the next match- Receiving calls ® p. 5-50 length is as follows: ing person will be uttered by the voice guide. MUTE function ®...
- Page 258 For pleasant driving If the name you selected has matching data For example, if during a call you need to simulate Switching between hands-free mode and private in the mobile phone book but no telephone the press of a phone button as a response to an auto- mode number is registered under the selected loca- mated system, press the SPEECH button and speak...
- Page 259 For pleasant driving NOTE NOTE Names and telephone numbers can be changed lat- er on. When the confirmation function is on, the When the confirmation function is on, after voice guide will say “<Location>. Is this cor- repeating the telephone number you have The vehicle phone book can be used with all paired rect?”...
- Page 260 For pleasant driving NOTE 3. The voice guide will say “Select one of the 10. The voice guide will say “Would you like to following: new entry, edit number, edit ® import another contact?” If the Bluetooth 2.0 interface cannot recog- name, list names, delete, erase all, or import Answer “Yes”...
- Page 261 For pleasant driving 5. The voice guide will say “Home, work, mo- 1. Press the SPEECH button. 5. When the voice guide is done reading the bile or other?” 2. Say “Phone book.” list, it will say “End of list, would you like to Select and say the location where the tele- 3.
- Page 262 For pleasant driving NOTE Erasing the phone book Say “List names,” and the names registered ® You can delete all registered information from the The Bluetooth 2.0 interface automatically con- in the phone book will be read out in order. vehicle phone book.
- Page 263 For pleasant driving If telephone numbers contain characters oth- If you press the HANG-UP button or press er than 0 to 9, *, # or +, these characters are and hold the SPEECH button during the data deleted before the transfer. transfer, the transfer will be cancelled and For the connection settings on the cellular the system will return to the main menu.
- Page 264 For pleasant driving Enrollment commands E00732400193 Phrase English French Spanish Italian German Dutch Portuguese Russian 1 123456789 123456789 123456789 123456789 123456789 123456789 123456789 123456789 2 888 555 1212 888 555 1212 888 555 1212 888 555 1212 888 555 1212 888 555 1212 888 555 1212 888 555 1212...
-
Page 265: Usb Input Terminal
For pleasant driving USB input terminal* 3. Connect the connector cable (C) to the USB CAUTION memory device (B). E00761900015 You can connect your USB memory device or Keep the lid of the floor console box iPod* to play music files stored in the USB memo- closed while driving the vehicle. - Page 266 For pleasant driving 2. Open the USB input terminal cover (A) in Model name Condition the floor console box. Storage capacity of 256 USB memory device Mbytes or more iPod touch* F/W Ver.1.1.1 or later iPod classic* F/W Ver.1.0 or later iPod (fifth generation)* F/W Ver.1.2.2 or later iPod nano (fifth genera- F/W Ver.1.2 or later...
-
Page 267: Sun Visors
For pleasant driving Sun visors Do not connect to the USB input terminal CAUTION any device (hard disk, card reader, memory E00711201140 reader, etc.) other than the connectable devi- If the lid of vanity mirror with lamp is ces specified in the previous section. kept open for prolonged periods of time, The device and/or data may be damaged. -
Page 268: Ashtray
For pleasant driving Ashtray* Cigarette lighter* Moveable ashtray secure holder The moveable ashtray can be fitted at the indicated E00711401009 E00711501417 The cigarette lighter can be used while the ignition position. switch or the operation mode is in ON or ACC. CAUTION Put out matches and cigarettes before they are placed in the ashtray. -
Page 269: Accessory Socket
Pull it out and have the problem correc- accessories are 12 V accessories and that ted at MITSUBISHI MOTORS Author- the total power consumption does not ex- ized Service Point. ceed 120 W. -
Page 270: Interior Lamps
15 seconds it goes off. The time until the lamp goes off can be adjus- ted. details, please consult MITSUBISHI MOTORS Authorized Service Point. vehicles equipped with MITSUBISHI Multi-Communication System 1- Luggage room lamp... - Page 271 15 seconds it goes off. The time until the lamp goes off can be adjus- ted. details, please consult MITSUBISHI MOTORS Authorized Service Point. vehicles equipped with MITSUBISHI Multi-Communication System (MMCS), screen operations can be used to make the adjustment.
- Page 272 MITSUBISHI MOTORS Authorized Service Point. NOTE On vehicles equipped with MITSUBISHI The time until the sunshade illumination Multi-Communication System (MMCS), goes off can be adjusted. If it is adjusted, the screen operations can be used to make the ad- time until the room &...
-
Page 273: Storage Spaces
MITSUBISHI MOTORS Authorized Service Never leave lighters, cans of carbonated Point. drink, and spectacles in the cabin when On vehicles equipped with MITSUBISHI parking the vehicle in hot sunshine. The Multi-Communication System (MMCS), cabin will become extremely hot, so light-... - Page 274 For pleasant driving Pen holder Turn the dial to the “ ” position when not Automatic air conditioning There is a pen holder inside the glove box. using the warming and cooling function. For detailed information on how to use the air conditioning, refer to “Heater/Air condi- tioning”...
- Page 275 For pleasant driving The floor console box can also be used as an armrest. Lower box To open the lower box, lift the left release lever (B) and raise the lid. Floor console box 1- Upper box E00723300806 2- Lower box Type 1 To open the console box, lift the release lever (A) Tissue holder...
-
Page 276: Cup Holder
For pleasant driving Cup holder To use the box, raise the luggage floor board. Refer to “Armrest” on page 2-05. E00714500945 CAUTION Do not drink beverages while driving. This is distracting and could cause an ac- cident. For the front seat The cup holders are located in front of the floor con- sole box. -
Page 277: Bottle Holder
For pleasant driving Bottle holder Rear shelf panel* CAUTION E00718200328 E00715400114 Lightly push the rear shelf panel to make sure that the concave portion (A) is set CAUTION CAUTION firmly in the protruding portion (B) of the tailgate. If the rear shelf panel is not Do not drink beverages while driving. -
Page 278: Assist Grips
For pleasant driving Assist grips Coat hook* Luggage hooks E00732800256 E00725600597 E00715700537 The assist grips (located above the doors on the There is a coat hook on the rear seat assist grip of There are 4 hooks located on the side walls of the headliner) are not designed to support body weight. -
Page 279: For Emergencies
For emergencies If the vehicle breaks down............6-02 Emergency starting...............6-02 Engine overheating...............6-04 Tools, jack and tyre repair kit............6-06 How to change a tyre..............6-12 Towing..................6-19 Operation under adverse driving conditions.........6-22... -
Page 280: If The Vehicle Breaks Down
For emergencies If the vehicle breaks down Emergency starting 2. Turn off all lamps, heater and other electrical loads. E00800101108 E00800502503 3. Set the parking brake firmly on each vehicle. If the vehicle breaks down on the road, move it to If the engine cannot be started because the battery Put an A/T, CVT in “P”... - Page 281 For emergencies Petrol-powered vehicles Diesel-powered vehicles CAUTION Take care not to get the jumper cable 1600 models caught in the cooling fan or other rotat- ing part in the engine compartment. Use the proper cables suitable for the bat- tery size to prevent overheating of the ca- bles.
-
Page 282: Engine Overheating
For emergencies Engine overheating WARNING WARNING E00800602269 When the engine is overheating, the information If the battery has to be charged while fit- Do not open the bonnet while steam is com- screen in the multi-information display will be in- ted in the vehicle, disconnect the vehicle ing from the engine compartment. - Page 283 For emergencies Petrol-powered vehicles Diesel-powered vehicles CAUTION Do not add coolant while the engine is FULL hot. Suddenly adding cold coolant could damage the engine. Wait for the engine to cool down, then add coolant a little at a time. 7.
-
Page 284: Tools, Jack And Tyre Repair Kit
For emergencies Tools, jack and tyre repair kit Jack Vehicles with tyre repair kit E00802000478 E00800901278 Before removing the jack, lift up the luggage floor board. Storage The tools, jack and tyre repair kit are stowed in the luggage compartment. Vehicles with spare wheel The storage location of the tools, jack and tyre re- pair kit should be remembered in case of an emer-... -
Page 285: Tyre Repair Kit
(B). NOTE The tyre sealant cannot be used in any of the situations listed below. If any of these situa- tions occurs, please contact a MITSUBISHI MOTORS Authorized Service Point or anoth- 1- Tyre compressor er specialist. - Page 286 For emergencies Use the tyre sealant only at ambient tempera- CAUTION tures of -30 °C to + 60 °C. Effect an emergency repair without pulling If you shake the bottle after screwing on out the object (nail, screw, etc.) that is stuck the hose, sealant may spray out of the hose.
- Page 287 For emergencies 11. Holding the sealant bottle upside-down, Fit the valve insert (I) into the valve (G), and squeeze it again and again to inject all of the screw the valve insert securely into place us- sealant into the tyre. ing the valve remover (H).
- Page 288 If you overinflate the tyre, release air by Please contact a MITSUBISHI MOTORS Au- loosening the hose’s end fitting. (Refer to thorized Service Point or another specialist “Tyre inflation pressures”...
- Page 289 Contact a MITSUBISHI NOTE MOTORS Authorized Service Point or anoth- Driving faster than 80 km/h (50 mph) can er specialist.
-
Page 290: How To Change A Tyre
MITSUBISHI MOTORS Authorized Service 1. Park the vehicle on level and stable ground, Point or another specialist. Note that a proper free of loose pebbles, etc. repair is impossible following an emergency 2. Set the parking brake firmly. - Page 291 8-12.) designed specially for your vehicle from When the tread wear indicators appear, your MITSUBISHI MOTORS Author- the tyre must be replaced. ized Service Point. Refer to “Wheel condition” on page 8-13.
- Page 292 For emergencies This makes it safer if the jack slips out of po- jacking point closest to the tyre you wish to CAUTION sition. change. Do not install more than one temporary spare wheel at the same time. To remove the spare wheel E00803300117 1.
- Page 293 For emergencies 3. Rotate the jack by hand until the flange por- Slowly rotate the wheel nut wrench until the 5. Remove the wheel nuts with the wheel nut tion (B) fits in the groove (C) at the top of tyre is raised slightly off the ground surface.
- Page 294 For emergencies wheel hole seats (B) enough to keep the tyre the wheel hole seat area (B) enough to WARNING from wobbling. keep the tyre from wobbling. Be sure to position the tyres the correct way when putting them on the vehicle. The valves should be on the outer side of the vehicle.
- Page 295 For emergencies 8. Lower the vehicle slowly by rotating the CAUTION CAUTION wheel nut wrench anticlockwise until the tyre touches the ground. Never use your foot or a pipe extension After changing the tyre and driving the ve- for extra force in the wheel nut wrench. hicle about 1,000 km (620 miles), retight- If you do so, you will tighten the nut too en the wheel nuts to make sure that they...
- Page 296 MITSUBISHI MOTORS Authorized Service and pry the cover away from the wheel. Using the Point. same procedure at the other wheel cover notches, 3.
-
Page 297: Towing
If your vehicle needs to be towed If you need to tow your vehicle, we recommend This vehicle must not be towed by a tow that you contact a MITSUBISHI MOTORS Author- truck using sling lift type equipment ized Service Point or tow truck company. -
Page 298: Emergency Towing
For emergencies Place the gearshift lever in the “N” (Neutral) posi- Using a wire rope or metal chain can result CAUTION tion (M/T) or the selector lever in the “N” (NEU- in damage to the vehicle body. It is best to TRAL) position (CVT). - Page 299 For emergencies 2. Cover the end of the jack bar (C) with cloth WARNING CAUTION and use it to remove the lid from the rear bumper. When the engine is not running, the When towing or being towed down a long brake booster and power steering system slope, the brakes may overheat reducing do not operate.
-
Page 300: Operation Under Adverse Driving Conditions
For emergencies Operation under adverse driving Refer to “Tools, jack and tyre repair kit” on Depressing the brake pedal during travel on page 6-06. snowy or icy roads may cause tyre slippage conditions When installing the bumper lid, align the and skidding. -
Page 301: Vehicle Care
Vehicle care Vehicle care precautions...............7-02 Cleaning the interior of your vehicle..........7-02 Cleaning the exterior of your vehicle...........7-03... -
Page 302: Maintenance
Vehicle care Vehicle care precautions Cleaning the interior of your Upholstery E00900500076 vehicle E00900100548 1. To maintain the value of your new vehicle, In order to maintain the value of your vehicle, it is E00900200220 handle the upholstery carefully and keep the necessary to perform regular maintenance using the After cleaning the interior of your vehicle with wa- interior clean. - Page 303 Vehicle care Cleaning the exterior of your Organic solvents such as benzine, kerosene, CAUTION alcohol and petrol, acid or alkaline solvents vehicle may discolour the genuine leather surface. When washing the under side of your ve- E00900700108 Be sure to use neutral detergents. hicle or wheel, be careful not to injure If the following is left on your vehicle, it may Remove dirty patches or oil substances quick-...
- Page 304 • The wiper arms are secured in place MITSUBISHI touch-up paint to prevent corrosion. Do not wax your vehicle in direct sunlight. You Check body areas facing the road or the tyres care- with tape.
-
Page 305: Engine Compartment
Vehicle care Wiper blades CAUTION CAUTION E00901700062 Use a soft cloth and glass cleaner to remove grease, Do not use a scrubbing brush or other Do not use a brush or other hard imple- dead insects, etc., from the wiper blades. Replace hard tools as they may damage the plastic ment on the wheels. - Page 307 Maintenance Service precautions...............8-02 Catalytic converter................8-02 Bonnet...................8-03 Engine oil..................8-04 Engine coolant................8-06 Washer fluid.................8-07 Brake fluid/Clutch fluid*..............8-07 Battery..................8-08 Tyres.....................8-11 Parking brake break-in..............8-15 Wiper blade rubber replacement...........8-15 General maintenance..............8-17 For cold and snowy weather............8-17 Fusible links..................8-18 Fuses.....................8-18 Replacement of lamp bulbs............8-23...
-
Page 308: Service Precautions
We recommend you to have the periodic inspection ensure proper catalyst operation and prevent possi- and corrosive sulphuric acid. and maintenance performed by a MITSUBISHI ble catalyst damage. Do not get under your vehicle with just MOTORS Authorized Service Point or another spe- the body jack supporting it. -
Page 309: Bonnet
Maintenance Bonnet CAUTION E01000302252 After inserting the support bar into the To open slot, make sure the bar supports the bon- 1. Pull the release lever towards you to unlock net securely from falling down on to your the bonnet. head or body. -
Page 310: Engine Oil
Maintenance Engine oil NOTE Diesel-powered vehicles If this does not close the bonnet, release it E01000402413 from a slightly higher position. To check and refill engine oil Do not press down the bonnet hard with a hand as it may damage the bonnet. For vehicles equipped with the security Petrol-powered vehicles alarm system with the interior alarm sensor,... -
Page 311: Specifications
ACEA A3/B3, A3/B4 or A5/B5 and API SM “For service DL-1” specifications. If those classifications are not available, Use engine oil conforming to the following contact a MITSUBISHI MOTORS Au- classification: thorized Service Point. • API classification: “For service SM” • ILSAC certificated oil •... -
Page 312: Engine Coolant
Petrol-powered vehicles ant with long life hybrid organic acid technology move the radiator cap (B) and add coolant until the MITSUBISHI Genuine Coolant has excellent pro- level reaches the filler neck. tection against corrosion and rust formation of all metals including aluminium and can avoid block-... -
Page 313: Washer Fluid
Maintenance Washer fluid Brake fluid/Clutch fluid* CAUTION E01000700832 E01000800631 Open the washer fluid reservoir cap and check the The brake fluid and the clutch fluid share the reser- Concentrations exceeding 60 % will re- level of washer fluid with the dipstick. voir tank. -
Page 314: Battery
Maintenance Battery Fluid type Check the electrolyte level at least once every 4 weeks, depending on the operating conditions. Use brake fluid conforming to DOT3 or DOT4 E01001202131 If the battery is not used, it will discharge by itself The condition of the battery is very important for from a sealed container. - Page 315 Maintenance To remove To install 1. Remove the clips (A), and then remove the 1. Install the air duct (A), and then tighten the upper cover (B). clips (B). NOTE Attach the moulding with the wide part to- wards the front of the vehicle. 4.
- Page 316 Maintenance We recommend you to have the battery checked be- CAUTION Diesel-powered vehicles fore the start of cold weather and, if necessary, have it charged or replaced. Never short-circuit the battery. This This does not only ensure reliable starting, but a bat- could cause it to overheat and be damaged.
-
Page 317: Tyres
Maintenance Tyres E01001300255 WARNING Driving with tyres that are worn, dam- aged or improperly inflated can lead to a loss of control or blow out of the tyres which can result in a collision with seri- ous or fatal injury. 8-11... - Page 318 Maintenance Tyre inflation pressures E01001402380 At trailer towing Item Tyre size Front Rear Front Rear 215/65R16 98H 2.4 bar (35 psi) [240 kPa] 2.4 bar (35 psi) [240 kPa] Normal tyre 215/60R17 96H 2.2 bar (32 psi) [220 kPa] 2.2 bar (32 psi) [220 kPa] T125/90D16 4.2 bar (60 psi) [420 kPa] —...
-
Page 319: Tyre Rotation
Maintenance Wheel condition Tyre rotation CAUTION E01001800885 E01001901317 Tyre wear varies with vehicle conditions, road sur- Always use tyres of the same size, same face conditions and individual driver’s driving hab- type, and same brand, and which have no its. To equalize the wear and help extend tyre life, wear differences. - Page 320 A temporary spare tyre can be fitted tem- Contact a MITSUBISHI MOTORS Authorized porarily in place of a tyre that has been re- Snow tyres Service Point before putting on tyre chains. The moved during the tyre rotation.
-
Page 321: Parking Brake Break-In
This procedure is described in the vehicle service blade further to remove it. that they do not damage the disc wheel or manual and can be carried out by a MITSUBISHI body. MOTORS Authorized Service Point. Do not install a tyre chain on an emergen- cy wheel which is compact in size. - Page 322 Maintenance NOTE Refer to the illustration to ensure that the re- 5. Push the wiper blade until the hook (B) en- tainers are correctly aligned as you attach gages securely with the stopper (A). Do not allow the wiper arm to fall onto the them.
-
Page 323: General Maintenance
MITSUBISHI MOTORS Author- ized Service Point for assistance. Additional equipment It is a good idea to carry a shovel or a short-han-... - Page 324 Maintenance Fusible links Fuses 1. Open the fuse lid and pull to remove it. E01002900564 E01003002205 The fusible links will melt to prevent a fire if a Fuse block location large current attempts to flow through certain elec- trical systems. To prevent damage to the electrical system due to In case of a melted fusible link, we recommend shortcircuiting or overloading, each individual cir-...
- Page 325 Maintenance Passenger compartment (RHD vehicles) 2. Move the rod (A) on the left side of the 4. Remove the glove box fastener, and then re- glove box to the left side of the box. move the glove box. The fuse boxes in the passenger compartment are located behind the glove box at the position shown in the illustration.
- Page 326 Maintenance Engine compartment Passenger compartment fuse location (LHD) Passenger compartment fuse location (RHD) In the engine compartment, the fuse block is loca- ted as shown in the illustration. Main fuse block Main fuse block Sub fuse block Sub fuse block 1- Push the knob.
-
Page 327: Fusible Links
Maintenance Capaci- Capaci- Capaci- Symbol Electrical system Symbol Electrical system Symbol Electrical system ties ties ties Radio 15 A Front fog lamps 15 A Power seats 25 (20) A Control unit relay 7.5 A Engine 7.5 A Heated seat 30 A Interior lamps Automatic trans- *: Fusible link... - Page 328 Maintenance Identification of fuse Capaci- Capaci- Symbol Electrical system Symbol Electrical system ties ties Capacity Colour Head- Air conditioning 7.5 A Brown lamp condenser fan mo- 30 A* Dis- 20 A 10 A charge beam Radiator fan motor 40 A* 15 A Blue (right)
-
Page 329: Replacement Of Lamp Bulbs
Maintenance Replacement of lamp bulbs CAUTION E01003100488 Before replacing a bulb, ensure the lamp is off. Do If the newly inserted fuse blows again af- not touch the glass part of the new bulb with your ter a short time, we recommend you to bare fingers;... - Page 330 An LED, not a bulb, is used in the stop lamp/ that could cause an electric shock. tail lamp and high-mounted stop lamp. Con- tact a MITSUBISHI MOTORS Authorized Service Point when there is a need for repair NOTE or replacement.
- Page 331 Maintenance Headlamps (low beam, except for vehi- 2. When replacing the bulb on the right side of 4. Turn the cap (D) anticlockwise to remove it. the vehicle in the case of diesel-powered ve- cles with high intensity discharge head- hicles, remove the bolts (B) holding down lamps) the reservoir tank and move the reservoir tank.
- Page 332 To avoid the risk of an electric shock, con- it to shatter. tact a MITSUBISHI MOTORS Author- Never hold the halogen lamp bulb with a ized Service Point whenever repair or re- bare hand, dirty glove, etc.
- Page 333 Maintenance 3. Turn the bulb (C) anticlockwise to remove it. Position lamps CAUTION E01003700947 1. When replacing the bulb on the left side of Handle halogen lamp bulbs with care. the vehicle in the case of diesel-powered ve- The gas inside halogen lamp bulbs is high- hicles, remove the bolt (A) holding down the ly pressurized, so dropping, knocking, or relay box and move the relay box towards...
- Page 334 Maintenance 3. When replacing the bulb on the right side of 5. Pull the bulb out of the socket. 2. Remove the entire socket and bulb assembly the vehicle in the case of diesel-powered ve- (A) by turning it anticlockwise. hicles, remove the clips (C) by prying with a straight blade (or minus) screwdriver, and re- move the side cover.
- Page 335 NOTE For the side turn-signal lamps (on fender), it is not possible to repair or replace just the bulb. Contact a MITSUBISHI MOTORS Author- ized Service Point when there is a need for re- pair or replacement. Side turn-signal lamps (on outside rear-...
- Page 336 Maintenance Daytime running lamps* 3. Turn the bulb (C) anticlockwise to remove it. CAUTION E01011200055 1. Pull the lamp cover (A) to the direction of Handle halogen lamp bulbs with care. Type 1 Type 2 the arrow to remove it. The gas inside halogen lamp bulbs is high- ly pressurized, so dropping, knocking, or scratching a halogen lamp bulb can cause...
- Page 337 Maintenance Rear fog lamp 3. Remove the bulb by pulling it out. Rear combination lamps E01004100456 E01004201366 1. When removing the lamp unit (A), push it to- 1. Remove the screws (A) that hold the lamp wards the left side of the vehicle body. unit and remove the lamp unit.
- Page 338 An LED, not a bulb, is used in the stop lamp/ ing it anticlockwise. tail lamp. Contact a MITSUBISHI MOTORS Author- ized Service Point when there is a need for re- pair or replacement. 3. Pull the bulb out of the socket.
- Page 339 NOTE An LED, not a bulb, is used in the high-moun- ted stop lamp. Contact a MITSUBISHI MOTORS Author- ized Service Point when there is a need for re- pair or replacement. 4. To install the bulb, perform the removal steps in reverse.
- Page 341 Specifications Vehicle labeling................9-02 Vehicle dimensions...............9-04 Vehicle performance..............9-06 Vehicle weight................9-07 Engine specifications..............9-10 Electrical system................9-11 Tyres and wheels................9-12 Fuel consumption.................9-13 Refill capacities................9-14...
-
Page 342: Vehicle Labeling
Specifications Vehicle labeling Please use this number when ordering replacement Vehicle identification number plate parts. (RHD vehicles only) E01100102785 The vehicle identification number is stamped on Vehicle identification number the plate riveted to the left front corner of the vehi- The vehicle identification number is stamped on cle body. - Page 343 Specifications 1800 models, 2000 models *: Front of the vehicle Diesel-powered vehicles *: Front of the vehicle 9-03...
-
Page 344: Vehicle Dimensions
Specifications Vehicle dimensions E01100202281 Front track 1,525 mm Overall width 1,770 mm Front overhang 870 mm Wheel base 2,670 mm Rear overhang 755 mm Overall length 4,295 mm Petrol-powered vehicles 195 mm Ground clearance (unladen) Diesel-powered vehicles 170 mm Without roof rails 1,615 mm Overall height (unladen) With roof rails... - Page 345 Specifications Body 5.63 m Minimum turning radius Wheel 5.3 m 9-05...
-
Page 346: Vehicle Performance
Specifications Vehicle performance E01100301924 Petrol-powered vehicles 1600 models 183 km/h (114 mph) 1800 models 186 km/h (116 mph) Maximum speed 194 km/h (121 mph) 2000 models 192 km/h (120 mph) 188 km/h (117 mph) Diesel-powered vehicles 200 km/h (124 mph), 188 km/h* (117 mph) Maximum speed 198 km/h (123 mph), 185 km/h* (115 mph) *: Low power engine... -
Page 347: Vehicle Weight
Specifications Vehicle weight E01100404085 Petrol-powered vehicles 1600 models 1800 models Item INTENSE INTENSE INFORM INVITE INVITE INSTYLE ULTIMATE Without optional parts 1,270 kg 1,290 kg 1,385 kg 1,390 kg 1,290 kg, 1,300 kg Kerb weight With full optional 1,300 kg 1,353 kg, 1,313 kg 1,353 kg 1,398 kg... - Page 348 Specifications 2000 models Item INTENSE INTENSE INTENSE INVITE INVITE INVITE ULTIMATE ULTIMATE ULTIMATE Without optional 1,355 kg 1,360 kg 1,420 kg 1,425 kg 1,450 kg 1,455 kg parts Kerb weight With full optional 1,368 kg 1,413 kg 1,433 kg 1,478 kg 1,463 kg 1,508 kg parts...
- Page 349 Specifications Diesel-powered vehicles INVITE Item INFORM INTENSE INSTYLE Without optional parts 1,450 kg 1,460 kg 1,525 kg Kerb weight With full optional parts 1,472 kg 1,523 kg 1,588 kg Maximum gross vehicle weight 2,060 kg, 2,130 kg* Front 1,120 kg Maximum axle weight Rear 1,000 kg, 1,090 kg*...
-
Page 350: Engine Specifications
Specifications Engine specifications E01100602302 Petrol-powered vehicles Item 1600 models 1800 models 2000 models Engine models 4A92 4B10 4B11 No. of cylinders 4 in line 4 in line 4 in line Total displacement 1,590 cc 1,798 cc 1,998 cc Bore 75.0 mm 86.0 mm 86.0 mm Stroke... -
Page 351: Electrical System
: Vehicles for equipped with Auto Stop & Go (AS&G) system : Vehicles for Russia, Kazakhstan and Ukraine NOTE For vehicles equipped with the Auto Stop & Go (AS&G) system, contact a MITSUBISHI MOTORS Authorized Service Point when replacing the battery. 9-11... -
Page 352: Tyres And Wheels
Tyres and wheels E01100902624 Tyre 215/65R16 98H 215/60R17 96H Size 16x6 1/2 JJ, 16x6 1/2 J 17x6 1/2 J Wheel Offset 46 mm NOTE Contact your MITSUBISHI MOTORS Authorized Service Point for details on the combination used on your vehicle. 9-12... -
Page 353: Fuel Consumption
Specifications Fuel consumption E01101100544 Extra-urban condi- Combined Urban conditions tions Item Fuel consumption Fuel consumption Fuel consumption (g/km) (L/100km) (L/100km) (L/100km) Without AS&G 139, 141* 6.0, 6.1* 7.8, 8.0* 1600 models With AS&G 1800 models Petrol-powered ve- hicles 10.1 2000 models 10.3 10.5 Without AS&G... -
Page 354: Refill Capacities
Specifications Refill capacities E01101303299 Petrol-powered vehicles 1600 models 1800 models, 2000 models 9-14... - Page 355 Specifications Diesel-powered vehicles Item Quantity Lubricants Oil pan 4.0 litres 1600 models Oil filter 0.2 litre Oil pan 4.0 litres Petrol-powered ve- 1800 models hicles Oil filter 0.3 litre Engine oil Refer to page 8-04. Oil pan 4.0 litres 2000 models Oil filter 0.3 litre Oil pan...
- Page 356 Specifications Item Quantity Lubricants 6.0 litres 1600 models [includes 0.65 litre in the reserve tank] Petrol-powered vehicles 7.5 litres 1800 models, DIA QUEEN SUPER LONG LIFE COOLANT PRE- Engine oil [includes 0.65 litre in 2000 models MIUM or equivalent* the reserve tank] 7.5 litres Diesel-powered vehicles [includes 0.62 litre in...
- Page 357 Alphabetical index Discharged battery (Emergency starting) 6-02 Cup holder 5-68 Disposal information for used batteries 06 Specification 9-11 Bluetooth® 2.0 interface 5-41 4-wheel drive operation 4-31 Bonnet 8-03 Daytime running lamps Bottle holder 5-69 Bulb capacity 8-24 Brake assist system 4-36 Replacement 8-30 Brake Demister (rear window) 3-57...
- Page 358 Alphabetical index Used engine oils safety instructions and disposal Inspection and maintenance following rough road information 05 operation 4-33 Exterior and interior lamp operation 8-17 Instruments 3-02 Interior lamps 5-62 General maintenance 8-17 Map lamps 5-63 General vehicle data 9-04 Genuine parts 05 Fluid capacities and lubricants 9-14 Glove box lamp...
- Page 359 Alphabetical index Bulb capacity 8-24 Force limiter 2-15 Mirror Inspection 2-24 Inside rear-view mirror 4-08 Pregnant women restraint 2-14 Outside rear-view mirrors 4-09 Pretensioner 2-14 Rear combination lamps Modification/alterations to the electrical or fuel sys- Seat Bulb capacity 8-24 tems 05 Adjustment 2-03 Replacement 8-31 Multi-information display 3-03...
- Page 360 Alphabetical index Used engine oils safety instructions and disposal in- formation 05 Tachometer 3-02 Tail lamps Bulb capacity 8-24 Vanity mirror lamp Replacement 8-31 Bulb capacity 8-24 Tailgate 1-26 Vehicle care precautions 7-02 Tank capacity 03 Vehicle dimensions 9-04 Tissue holder 5-67 Vehicle identification number plate 9-02 Tools 6-06 Vehicle information code plate 9-02...
Need help?
Do you have a question about the ASX and is the answer not in the manual?
Questions and answers
Fuel lever does not open fuel door