V-ZUG Winecooler SL Operating Instructions Manual
Hide thumbs
Also See for Winecooler SL:
- Operating instructions manual (28 pages) ,
- Operating instructions manual (20 pages)

Subscribe to Our Youtube Channel
Related Manuals for V-ZUG Winecooler SL


Summary of Contents for V-ZUG Winecooler SL
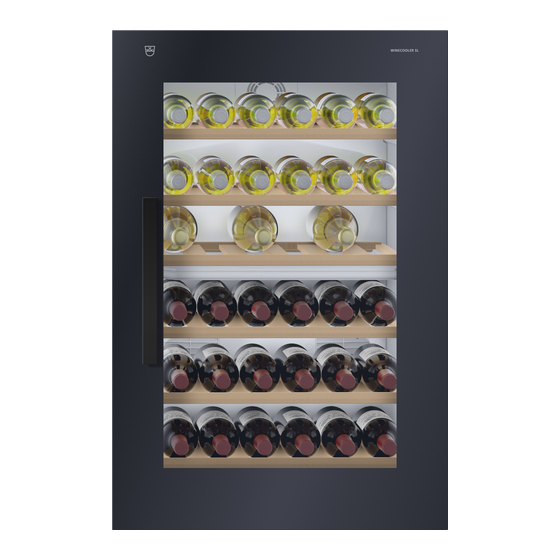
- Page 1 V-ZUG AG Kühlschrank Réfrigérateur Frigorifero Refrigerator WINECOOLER SL Bedienungsanleitung Mode d’emploi Istruzioni per l’uso Operating instructions...
- Page 2 Veuillez tenir compte des conseils de sécurité. Cara cliente V-ZUG, caro cliente V-ZUG Vi ringraziamo per aver scelto uno dei nostri prodotti. Il vostro apparecchio soddisfa elevate esigen- ze, e il suo uso è...
-
Page 3: Table Of Contents
Inhaltsverzeichnis Sicherheitshinweise Entsorgung Aufstellen / Aufstellort Das Gerät braucht Luft Einbau Elektrischer Anschluss Gerätebeschreibung Bedienteil Inbetriebnahme – Temperatur einstellen, ausschalten Ablageflächen verstellen Zwischenboden verstellen Beleuchtung auswechseln Richtig lagern Die Idealen Trinktemperaturen Abtauen Reinigung und Pflege Tipps zur Energie Was tun wenn… Garantie Betriebsgeräusche Français... -
Page 4: Sicherheitshinweise
Sehr geehrte Kundin, sehr geehrter Kunde, bevor Sie Ihr neues Gerät in Betrieb nehmen, lesen Sie bitte diese Bedienungs- anleitung aufmerksam durch. Sie enthält wichtige Informationen zum sicheren Ge- brauch, zum Aufstellen und zur Pflege des Gerätes. Bewahren Sie bitte die Bedienungsanleitung zum späteren Nachschlagen auf. Geben Sie sie an eventuelle Nachbesitzer des Gerätes weiter. -
Page 5: Entsorgung
Entsorgung Information zur Geräteverpackung Entsorgen Sie das Verpackungsmaterial Ihres Gerätes sachgerecht. Alle verwende- ten Verpackungsmaterialien sind umweltverträglich und wieder verwendbar. Zu den Werkstoffen: Die Kunststoffe können auch wiederverwertet werden und sind folgendermassen gekennzeichnet: >PE< für Polyäthylen, z.B. bei der äusseren Hülle und den Beuteln im Inneren. >PS<... -
Page 6: Aufstellen Aufstellort
Aufstellen Aufstellort Das Gerät soll in einem gut belüfteten und trockenen Raum stehen. Die Umge- bungstemperatur wirkt sich auf den Stromverbrauch und die einwandfreie Funktion des Gerätes aus. Daher sollte das Gerät . nicht direkter Sonneneinstrahlung ausgesetzt sein; . nicht an Heizkörpern, neben einem Herd oder sonstigen Wärmequellen stehen; . -
Page 7: Das Gerät Braucht Luft
Das Gerät braucht Luft Warnung! Um die Funktion des Gerätes nicht zu beeinträchtigen, dürfen die Lüf- tungsöffnungen nicht abgedeckt oder zugestellt werden. Die Tür des Gerätes dichtet die Einbaunische weitgehend ab. Deshalb muss die Belüftung durch die Öffnung im Möbelsockel erfolgen. Die erwärmte Luft muss durch den Luftschacht an der Rückwand des Möbels nach oben abziehen können. -
Page 8: Elektrischer Anschluss
Prüfen Sie bitte nach dem Einbau, insbesondere nach Türanschlagwechsel, ob die Türdichtung ringsum richtig abdichtet. Eine undichte Türdichtung kann zu verstärk- ter Kondensation und dadurch zu höherem Energieverbrauch führen (siehe auch Abschnitt «Was tun wenn...»). Elektrischer Anschluss Für den elektrischen Anschluss ist eine vorschriftsmässig installierte Schutzkontakt- Steckdose erforderlich. -
Page 9: Gerätebeschreibung
Gerätebeschreibung Bedienteil Ablageflächen (verstellbar) Zwischenboden (verstellbar) Typenschild Bedienteil Gerät ein-/ausschalten Taste mind. 3 Sek. drücken Temperaturwahl oben (5 – 18 °C einstellbar) Empfehlung: 5 – 12 °C (ideal für Weisswein, siehe auch Seite 12) Taste 3 Sek. drücken Anzeige blinkt Die Temperatur kann schrittweise eingestellt werden. -
Page 10: Ablageflächen Verstellen
Supercool Taste 3 Sek. drücken Die gelbe Kontrolllampe leuchtet. Das Gerät kühlt die obere Zone während 24 Std. auf + 5 °C und danach automatisch nach der eingestellten Temperatur. Innenbeleuchtung permanent eingeschaltet: 3 Sek. drücken Innenbeleuchtung nur bei Türöffnung eingeschaltet: 3 Sek. -
Page 11: Zwischenboden Verstellen
Zwischenboden verstellen Der Zwischenboden kann 1 Position nach oben oder nach unten verstellt werden. Zwischenboden nach vorne ziehen und türseitig anheben. Beim Einsetzen in eine andere Höhe in umgekehrter Reihenfolge vorgehen. Beachten Sie bitte, dass der hintere Teil des Zwischenbodens in die dafür vorgese- hene Aussparung in der Rückwand eingeschoben wird. -
Page 12: Richtig Lagern
Richtig lagern Das Gerät verfügt über 2 separat einstellbare Temperaturzonen (beide einstellbar von 5 – 18 °C): Obere Zone Weisswein, Champagner, Sekt, Roséwein Untere Zone Rotwein Bitte beachten Sie, die eingestellte Temperatur in der unteren Zone muss gleich oder höher sein, als diejenige in der oberen Zone. Die idealen Trinktemperaturen* 6 –... -
Page 13: Tipps Zur Energie
Das Gerät nie mit Dampfreinigungsgeräten reinigen. Feuchtigkeit könnte in elektri- sche Bauteile gelangen – Stromschlaggefahr! Heisser Dampf kann zu Schäden an Kunststoffteilen führen. Das Gerät muss trocken sein, bevor Sie es wieder in Betrieb nehmen. Achtung! Ätherische Öle und organische Lösungsmittel können Kunststoffteile angreifen, z.B. - Page 14 Störung Mögliche Ursache Abhilfe Gerät arbeitet nicht. Gerät ist nicht einge- Gerät einschalten. schaltet. Netzstecker ist nicht Netzstecker einstecken. eingesteckt oder lose. Sicherung hat ausgelöst Sicherung überprüfen, oder ist defekt. gegebenenfalls erneuern. Steckdose ist defekt. Störungen am Stromnetz behebt Ihr Elektrofachmann. Die Kühlraumtemperatur Temperatur ist nicht Bitte im Abschnitt...
-
Page 15: Garantie
Garantie Die Garantie wird ab Lieferdatum des Gerätes an den Endverbraucher gewährt. Allfällige Mängel, die während der Garantiezeit trotz vorschriftsmässigem Gebrauch auftreten und auf einen Material- oder Fabrikationsfehler zurückzuführen sind, wer- den im Rahmen dieser Garantie durch den Kundenservice behoben. Nicht unter Garantie fallen . - Page 16 Stichwort Ursache Bemerkung Brummen Kälteaggregat normales Arbeitsgeräusch des Kälteaggregates, Lautstärke abhängig von der Gerätegrösse Surren Ventilator normales Betriebsgeräusch, durch Belüftung Gurgeln Kältekreislauf normales Betriebgeräusch, Blubbern durch Strömung des Kältemittels Rauschen im Kältekreis Zischen Kältekreislauf normales Betriebsgeräusch durch Einspritzen des Kältemittels in den Verdampfer Knacken Gehäuse...
- Page 17 Index Conseils de sécurité Elimination Installation L’appareil a besoin d'air Montage Branchement électrique Description de l'appareil Commande Mise en service – Réglage de la température, arrêt Ajuster les clayettes Ajuster le fond intermédiaire Changement de l'éclairage Conservation exacte Les températures idéales Dégivrage Nettoyage et entretien Conseils d'économie d'énergie...
- Page 18 Chère cliente, cher client, Veuillez lire attentivement la totalité du présent mode d'emploi avant de mettre votre nouvel appareil en service. Il contient des informations importantes sur le bon usage, l'installation et l'entretien de l'appareil. Conservez ce mode d'emploi afin de pouvoir le consulter ultérieurement. Remettez- le à...
- Page 19 Elimination Informations sur l'emballage de l'appareil Eliminez l'emballage de votre appareil de manière adéquate. Tous les matériaux d'emballage respectent l'environnement et peuvent être recyclés. A propos des matériaux: Les matières plastiques peuvent aussi être recyclées. Elles sont caractérisées comme suit: >PE<...
- Page 20 Installation Lieu de montage L'appareil doit être installé dans une pièce bien aérée et sèche. La température envi- ronnante a une incidence sur la consommation d'électricité et le bon fonctionne- ment de l'appareil. Pour ces raisons, il est conseillé: . de ne pas exposer l'appareil à l'insolation directe; .
- Page 21 L'appareil a besoin d'air Attention! Veiller à ne pas couvrir ou obstruer les orifices d'entrée et de sortie d'air. La porte de l'appareil ferme en grande partie l'espace encastrable. Pour cette rai- son, l'aération doit s'effectuer par l'ouverture située dans le socle du meuble. L'air réchauffé...
- Page 22 Une fois monté, contrôlez particulièrement, après le changement de la butée de porte, si le joint ferme bien tout autour. Un joint de porte non étanche peut provo- quer une augmentation de la condensation et donc une plus forte consommation d'énergie (voir aussi «Que faire, lorsque...»).
- Page 23 Description de l'appareil Commande Clayettes (ajustables) Fond intermédiaire (ajustable) Plaque signalétique Commande Marche / Arrêt de l'appareil Appuyer au minimum 3 sec. sur le bouton Sélection de la température du haut (réglable de 5 – 18 °C) Recommandation: 5 – 12 °C (idéal pour les vins blancs, voir page 26) Appuyer pendant 3 sec.
- Page 24 Extra-froid Appuyer sur le bouton pendant 3 sec. Le voyant lumineux jaune est allumé. L'appareil refroidit la zone supérieure à + 5 °C en 24 heures, puis automatiquement à la température réglée. Eclairage intérieur allumé en permanence: Appuyer pendant 3 sec. Eclairage intérieur uniquement allumé...
- Page 25 Ajuster le fond intermédiaire Le fond intermédiaire peut être ajusté d'une position vers le haut ou le bas. Pour cela, tirer de la paroi arrière et soulever côté porte. La mise en place à une hauteur différente s'effectue dans le sens contraire. Veillez à insérer la partie arrière du fond intermédiaire dans l'évidemment prévu dans la paroi arrière.
- Page 26 Conservation exacte L'appareil dispose de 2 zones distinctes de température à propre réglage (toutes les deux réglables entre 5 – 18 °C): Compartiment supérieur Vins blancs, champagnes, vins mousseux, vins rosés) Compartiment inférieur Vins rouges La température réglée dans le compartiment inférieur doit toujours être identique ou supérieure à...
- Page 27 Ne jamais nettoyer l'appareil avec des nettoyeurs à vapeur. L'humidité pourrait pénétrer dans les composants électriques: Risque de choc électrique! La vapeur brûlante peut causer des dommages aux pièces en matière plastique. L'appareil doit être sec avant d'être remis en service. Attention! Les huiles essentielles et les solvants organiques peuvent attaquer les pièces en matière plastique, comme p.ex.
- Page 28 Panne Cause possible Remède L'appareil ne fonctionne Appareil non connecté. Mettre l'appareil en marche. pas. Prise mâle non raccordée Brancher la prise mâle. ou mal raccordée. Fusible déclenché ou Contrôler le fusible, le défectueux. changer si besoin est. Prise femelle défectueuse. Votre électricien répare les défaillances dues au secteur.
- Page 29 Garantie La garantie est accordée au consommateur à compter de la date de livraison. Les éventuels défauts qui surviennent pendant la période de garantie malgré un usage conforme et qui sont dus à un défaut de matériau ou de fabrication, sont réparés par le service après-vente dans le cadre de la présente garantie.
- Page 30 Bruit Cause Remarque Ronflement Groupe frigorifique Bruit normal de fonctionnement du groupe frigorifique, intensité suivant la taille des appareils Vrombissement Ventilateur Bruit normal de fonctionnement dû à la ventilation Gargouillement Circuit de refroidissement Bruit normal de fonctionnement dû au Bruissement courant de l'agent réfrigérant dans le circuit de réfrigération Sifflement...
- Page 31 Indice Avvertenze di sicurezza Smaltimento Posizionamento / Luogo d’installazione L’apparecchio ha bisogno di aria Incasso Collegamento elettrico Descrizione dell’apparecchio Pannello di controllo Messa in funzione – regolare la temperatura, spegnere il frigorifero Spostare i ripiani Spostare la mensola Sostituire la lampada dell’illuminazione Corretta disposizione del carico Temperature ideali per i vini Sbrinamento...
-
Page 32: Avvertenze Di Sicurezza
Gentile Cliente! Prima di mettere in funzione il vostro nuovo apparecchio, vi preghiamo di leggere attenta- mente le presenti istruzioni per l’uso. Esse contengono importanti informazioni per l’uso sicuro nonché per un’installazione e manutenzione corrette del vostro apparecchio. Il presente libretto deve essere conservato per successive consultazioni e conse- gnato agli eventuali futuri proprietari dell’apparecchio. -
Page 33: Smaltimento
Smaltimento Informazioni riguardanti l’imballaggio Smaltire i materiali d’imballaggio in modo appropriato. Tutti i materiali utilizzati per d’imballaggio sono ecologici e quindi riciclabili. Informazioni riguardanti i materiali Anche i materiali sintetici possono essere riciclati e sono perciò identificati dalle seguenti sigle: >PE<... -
Page 34: Posizionamento Luogo D'installazione
Posizionamento Luogo d’installazione L’apparecchio deve essere installato in un luogo asciutto e ben aerato. La temperatura dell’ambiente influisce sul consumo energetico e sul buon funzionamento del l’ap- parecchio. Per questo motivo l’apparecchio . non deve essere esposto direttamente ai raggi solari; . -
Page 35: L'apparecchio Ha Bisogno Di Aria
L’apparecchio ha bisogno di aria Attenzione! Per assicurare una corretta ventilazione, tali aperture di ventilazione non devono essere coperte e devono essere tenute libere da ogni ostruzione. La porta copre in gran parte la nicchia di incasso. Per questo motivo l’aerazione deve essere assicurata dall’apertura nello zoccolo del mobile. -
Page 36: Collegamento Elettrico
Assicuratevi dopo l’incasso, soprattutto se fosse stata invertita la posizione della porta, che la guarnizione sia stagna. Una tenuta non appropriata della porta può comportare un aumento della condensa e quindi un maggiore consumo di energia (vedi anche capitolo «Cosa fare, se...»). Collegamento elettrico Per l’allacciamento elettrico deve essere disponibile una presa con messa a terra installata secondo le norme vigenti. -
Page 37: Descrizione Dell'apparecchio
Descrizione dell’apparecchio Pannello di controllo Ripiani (regolabili) Mensola (regolabile) Targhetta dei dati Pannello di controllo Accensione / spegnimento dell’apparecchio Premere il tasto per 3 secondi Selezione delle temperatura reparto superiore (regolabile da 5 – 18 °C) Consigliato: 5 – 12 °C (ideale per vino bianco, vedi pag. 40) Premere il tasto per 3 secondi l’indicazione lampeggia La temperatura può... -
Page 38: Spostare I Ripiani
Supercool Premere il tasto per 3 secondi la spia gialla si accende. Il reparto superiore viene raffreddato nel giro di 24 ore a + 5 °C e in seguito automaticamente in base alla temperatura impostata. Illuminazione interna sempre accesa: premere per 3 secondi Illuminazione interna accesa solo all’apertura della porta: premere per 3 secondi Se la porta rimane aperta per più... -
Page 39: Spostare La Mensola
Spostare la mensola La mensola può essere spostata di una posizione più in alto o in basso. Per fare ciò, estrarla dalla parete posteriore, tirarla verso di voi e sollevarla dal lato della porta. Per riposizionarla all’altezza desiderata, procedere in ordine inverso. Controllare che la parte posteriore della mensola sia stata inserita bene nella fessura predisposta sulla parete posteriore. -
Page 40: Corretta Disposizione Del Carico
Corretta disposizione del carico L’apparecchio dispone di due zone di temperatura regolabili separatamente (impo- stabili ambedue da 5 – 18 °C): reparto superiore vino bianco, champagne, spumante, vino rosato reparto inferiore vino rosso Tenete conto che la temperatura impostata nel reparto inferiore deve essere alme- no uguale o più... -
Page 41: Consigli Per Il Risparmio Energetico
Non utilizzare mai dispositivi a vapore per pulire l’apparecchio. L’umidità potrebbe penetrare nelle parti elettriche -> rischio di scosse elettriche! Il vapore caldo potrebbe inoltre danneggiare le parti in plastica. L’apparecchio deve essere ben asciutto prima di metterlo di nuovo in funzione. Attenzione! Oli essenziali e solventi organici, quali per esempio succhi e acidi di frutta, burro e detergenti contenenti acido acetico, possono attaccare le parti in plastica. - Page 42 Inconveniente Possibile causa Soluzione L’apparecchio non L’apparecchio non è Accendere l’apparecchio. funziona. acceso. La spina non è inserita Inserire la spina. bene nella presa. È intervenuto l’interruttore Controllare ed eventual- di sicurezza oppure è mente sostituire l’interrut- difettoso. tore di sicurezza. La presa è...
-
Page 43: Garanzia
Garanzia La garanzia inizia con la data di consegna dell’apparecchio all’utente finale. Eventuali difetti che dovessero manifestarsi durante il periodo di garanzia nonostante l’uso pre- visto e corretto dell’apparecchio e che siano imputabili ad un difetto di fabbricazione o del materiale, saranno rimossi nell’ambito delle presente garanzia dal Centro di Assistenza Tecnica. - Page 44 Anomalia Causa Annotazione «Borbottio» Generatore del freddo Normale rumore di funzionamento del generatore del freddo; l’intensità dipende dalla dimensione del apparecchio Ronzio Ventilatore Normale rumore di funzionamento dovuto alla ventilazione Gorgoglio Circuito refrigerante Normale rumore di funzionamento Fruscio dovuto al passaggio del refrigerante nel circuito refrigerante Fischio Circuito refrigerante...
- Page 45 Contents Safety instructions Disposal Installation The appliance needs air Installation Electrical connection Product description User panel Commissioning – setting temperature, switching off Adjusting storage racks Adjusting the temperature zone divider Changing the light fitting Proper loading Ideal drinking temperatures Defrosting Cleaning and maintencance Energy-saving tips What to do if…...
-
Page 46: Safety Instructions
Dear Customer Please read these instructions carefully before starting to use your appliance. They contain important information about the safe operation, installation and maintenance of your appliance. Please keep them for reference and pass them on to any subsequent user. Safety instructions Warning: Do not operate any electrical appliances inside. -
Page 47: Disposal
Disposal Information about the appliance packaging Dispose of your appliance packaging properly. None of the packaging materials used are harmful to the environment and they may be re-used. About the materials: the plastics may also be recycled and are identified as follows: >PE<... -
Page 48: Installation
Installation Installation site The appliance should be positioned in a well-ventilated, dry room. The ambient tempe- rature will influence energy consumption and the proper functioning of the appliance. For this reason, the appliance . Should not stand in direct sunlight; . -
Page 49: The Appliance Needs Air
The appliance needs air Warning! To ensure the proper functioning of the appliance, air vents should never be blocked or covered. The appliance door seals the installation unit almost completely, so an air vent is pro- vided in the base of the housing. Warmed air must be conducted via the ventilation shaft to the rear wall of the housing and then expelled upwards. -
Page 50: Electrical Connection
After installing, and particularly if the door hinge is reversed, please ensure that the door seal is tight all round. An imperfect door seal can lead to increased condensa- tion and thus to higher energy consumption (see the section headed «What to do if...»). -
Page 51: Product Description
Product description Control panel Storage racks (adjustable) Temperature zone divider (adjustable) Identification plate User panel Appliance on/off Press for at least 3 seconds. Select upper zone temperature (5 – 18 °C, adjustable) Recommendation: 5 – 12 °C (ideal for white wine, see page 54) Press for at least 3 seconds indicator flashes The temperature can be adjusted in steps. -
Page 52: Adjusting Storage Racks
Supercool Press for 3 seconds the yellow pilot light illuminates. The appliance cools the upper zone for 24 hours at + 5 °C and then automatically at the set temperature. Interior light switched on permanently: Press for 3 seconds Interior light on only while the door is open: Press for 3 seconds If the door is kept open for longer than 5 minutes, an acoustic door alarm will sound. -
Page 53: Adjusting The Temperature Zone Divider
Adjusting the temperature zone divider The temperature zone divider can be raised or lowered by 1 position. Pull forwards away from the rear wall, and lift on door side. Reverse this procedure to replace at a different level. Please ensure that the rear section of the temperature zone divider slots into the groove provided in the rear wall. -
Page 54: Proper Loading
Proper loading The appliance is separated into 2 adjustable temperature zones (both adjustable from 5 – 18 °C): Top compartment white wine, champagne, sparkling wine, rosé wine. Bottom compartment red wine Please ensure that the temperature set for the bottom compartment is always at least the same as or higher than that in the top compartment. -
Page 55: Energy-Saving Tips
Never steam-clean the appliance. Dampness may penetrate the electrical compo- nents, creating the risk of an electric shock. Hot steam may damage the plastic components. The appliance must be dry before it is used again. Caution! Plastic components may be attacked by essential oils and organic sol- vents such as fruit juices and the acids in butter, as well as by detergents containing vinegar. - Page 56 Fault Possible cause Solution Appliance doesn’t work. Appliance is not switched Switch on. Mains plug is loose or Insert the mains plug. not plugged in. Fuse has triggered or is Check fuse and replace if defective. necessary. Socket is defective. Faults with the mains supply must be repaired by a qualified electrician.
-
Page 57: Guarantee
Guarantee The guarantee runs from the date on which the appliance is delivered to the end user. Under the terms of the guarantee, the customer service department will rectify any faults which may occur despite proper use during the guarantee period and which may be attributable to faulty materials or manufacture. - Page 58 Description Cause Comment Droning Cooling aggregate Normal operating noise of the cooling aggregate. The level is dependent on the size of appliance. Humming Normal operating noise of the fan. Gurgling Cooling circuit Normal operating noise as coolant Babbling flows through the circuit. Murmuring Hissing Cooling circuit...
- Page 60 Ouvrez la porte de l’appareil. – La plaque signalétique se trouve sous l’eclairage. En cas de perturbations de fonctionnement, vous pouvez contacter le Centre de service de V-ZUG SA le plus proche au numéro de téléphone gratuit 0800 850 850.
-
Page 61: Assistenza Tecnica
Aprire lo sportello dell’apparecchio. – La targhetta dei dati si trova al di sotto dell’illuminazione. In caso di anomalie di funzionamento può rivolgersi al più vicino Centro di servizio della V-ZUG SA tele- fonando al numero gratuito 0800 850 850. - Page 64 V-ZUG AG Industriestrasse 66, 6301 Zug Tel. 041 767 67 67, Fax 041 767 61 61 vzug@vzug.ch, www.vzug.ch Service-Center: Tel. 0800 850 850 J628.10 - 1 168 494...
Need help?
Do you have a question about the Winecooler SL and is the answer not in the manual?
Questions and answers