Rimage everest User Manual
Hide thumbs
Also See for everest:
- User manual (35 pages) ,
- Software manual (2 pages) ,
- Reference manual (1 page)
Table of Contents
Advertisement
Quick Links
Advertisement
Table of Contents

Related Manuals for Rimage everest


Summary of Contents for Rimage everest
- Page 1 ™ Rimage Everest Printer User Guide...
- Page 3 Fax: +49-(0) 6074-8521-21 CD and DVD Recording Software Rimage™ is a trademark of the Rimage Corporation. Disclaimer Everest Printer™ is a trademark of the Rimage ® Corporation. Dell is registered trademark of Dell This Product, Software, or Documentation may be ®...
-
Page 4: Support Information
If you cannot find a solution on our website, Rimage Services, Europe at email Rimage Services at support@rimage.com. support@rimage.de. When you contact Rimage Services, please provide: • Unit serial number and software version. • Functional and technical description of the problem. -
Page 5: Table Of Contents
Printer Requirements..................1 Operating System requirements................1 Media requirements....................1 Ribbon requirements ..................... 1 Label design requirements ..................2 Identify the parts of the Everest printer ......... 3 Front view ......................3 Rear view ......................3 Control panel ....................4 Everest printer switches ..................5 Mode switch ...................... - Page 6 Clean the tacky rollers..................23 Clean the air filter ....................24 Clean the platen roller ..................25 Learn More ..................27 Status Messages ...................27 Everest Printer Specifications................28 Technical support and product updates............29 Safety precautions..................29 Safety Testing....................30 Rimage Everest Printer Limited 1 Year Warranty ..........31...
-
Page 7: Introduction
Rimage – contact Rimage at 800-445-8288. Ribbon requirements The Everest printer requires a print ribbon and a retransfer ribbon. The print ribbon has three colors: Cyan, Magenta, and Yellow (CMY). These three colors combine in printing to create full color discs. -
Page 8: Label Design Requirements
• Media – The media that is in Rimage Media Kits™ has a printable area of 24-118 mm. Most labels print well with the print settings set to 24 mm and 118 mm. To eliminate the white areas that may appear at the center or edge of the disc, you may want to use settings of 23 mm and 119 mm. -
Page 9: Identify The Parts Of The Everest Printer
Identify the parts of the Everest printer Identify the parts of the Everest printer This section describes the Everest printer hardware and features. These features are shown in front and rear views. Front view Side Cover Latches Print Pad Drawer... -
Page 10: Control Panel
Control panel The control panel, located on the front of the printer, includes an operator button and three LED’s (Light Emitting Diodes). The control panel allows you to monitor and control the Everest printer. 1. Operator Button The operator button is used to complete the following: •... -
Page 11: Everest Printer Switches
Identify the parts of the Everest printer Everest printer switches There are two switches on the rear of the Everest printer: the mode switch and the AC voltage switch. Mode Switch AC Voltage Switch Mode switch The mode switch is a rotary switch used to set the operational mode of the Everest printer. After changing the mode, the printer must be powered on again to recognize the change. -
Page 12: Operate The Rimage Everest Printer
Installing the Everest printer driver Before printing, you must install the printer driver. If your Rimage Everest printer was included with an autoloader that has an embedded PC or a control center, the Everest printer driver is already installed. Important: If an older version of the Everest printer driver was previously installed, remove the previous version before installing the new one. -
Page 13: Install The Everest Printer Driver On Macintosh
• If the Everest printer is a standalone printer, connect the power cord to an outlet to power on the printer. Note: The printer will go into power saving mode if it is idle for more than 30 minutes. When this occurs, the printer will take 2-3 minutes to warm-up after a job is sent to the printer. -
Page 14: Placing A Cd On The Printer Drawer
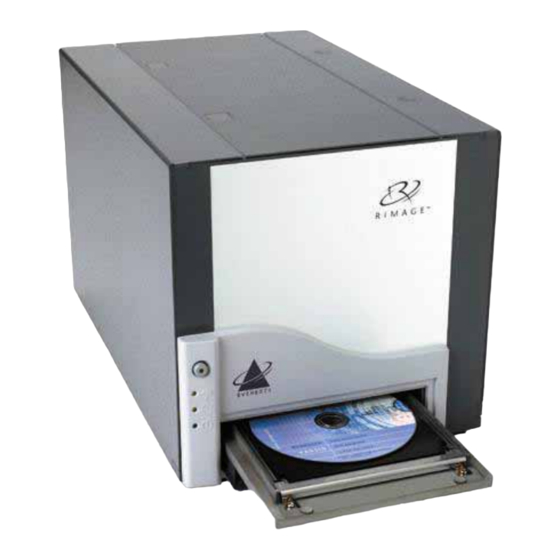
Rimage Everest Printer Placing a CD on the printer drawer To avoid scratching or damaging the recording surface of the disc, it is important to properly place the disc on the printer drawer. Use this procedure to place the disc on the printer drawer. -
Page 15: Setting Up Your Printing Preferences In Windows
Operate the Rimage Everest printer Setting up your printing preferences in Windows Printing preferences allow you to set up your Everest printer to produce the best possible labels on your discs. Note: If you are using a design program other than CD Designer, and printing with a Rimage autoloader system, the print driver settings must be configured before printing. -
Page 16: Setting Media Size, Media Type, Orientation, And Ribbon Type
Rimage Everest Printer Setting media size, media type, orientation, and ribbon type 1. Navigate to printing preferences. 2. Select the Main tab. 3. View or change the printing preferences. a. From the Media Type drop-down menu, select the appropriate Media Type. -
Page 17: Setting Print Quality, Color Matching, And Image Adjustments
Operate the Rimage Everest printer Setting print quality, color matching, and image adjustments 1. Navigate to printing preferences. 2. Select the Advanced tab. 3. View or change the printing preferences. a. Select the desired Print Quality. b. Select the desired Color Matching. -
Page 18: Setting The Printable Area
Rimage Everest Printer Setting the printable area 1. Navigate to printing preferences. 2. Select the Advanced tab. 3. View or change the printing preferences. a. To print on the disc hub, select the Print on Hub checkbox. b. To modify the printable area, select the Modify button. -
Page 19: Adjusting The Print Alignment And Color Density
Monitor. The Status Monitor dialog is active. Tip: On the Status tab, you can view information about the Everest printer such as the current firmware version, the progress of a print job, the installed ribbon type, and the percentage of retransfer sheet remaining. -
Page 20: Setting Up Your Printing Preferences On A Macintosh
Rimage Everest Printer Setting up your printing preferences on a Macintosh Printing preferences allow you to set up you Everest printer to produce the best possible labels on your discs. Navigate to printing preferences 1. Open the label file in the application of your choice. -
Page 21: Setting Print Quality And Color Matching
Note: The default setting for color matching is CMYK. 4. When you have made the desired choices, select Print. To close the Everest properties dialog without saving your changes, select Cancel. Setting the printable area 1. Navigate to printing preferences. -
Page 22: Adjusting The Print Alignment And Color Density
2. Select the Info… button. The Information dialog displays. Tip: In the Information dialog, you can view information about the Everest printer such as the current firmware version, the progress of a print job, the installed ribbon type, and the percentage of retransfer ribbon remaining. -
Page 23: Maintain The Everest Printer
Required tools: • Sponge swabs with long handles • High grade isopropyl alcohol For best results, use the Everest cleaning kit (part number 210725-001), which includes the tools isted above. 110632_H... -
Page 24: Changing The Print Ribbon
Rimage Everest Printer Changing the print ribbon Before changing the Everest print ribbon, allow time for the new ribbon to become acclimated to the environment. Allow more time for greater temperature and/or humidity differences. Ribbons must be stored at a temperature between 50°– 90°F (10–32°C). Avoid moisture and direct sunlight. - Page 25 Maintain the Everest printer 3. Install the new print ribbon. a. Remove the new ribbon from the packaging. b. Install the supply roll end of the print ribbon on the top of the carrier. c. Insert the large shaft in the large opening and snap in the small shaft.
-
Page 26: Changing The Retransfer Ribbon
Rimage Everest Printer Changing the retransfer ribbon Before changing the Everest retransfer ribbon, allow time for the new ribbon to become acclimated to the environment. Allow more time for greater temperature and/or humidity differences. Ribbons must be stored at a temperature between 50°– 90°F (10–32°C). Avoid moisture and direct sunlight. - Page 27 Maintain the Everest printer 2. Discard the used retransfer ribbon. 3. Install the new retransfer ribbon. a. Remove the retransfer ribbon from the packaging. b. With the supply roll on the left side, slide both retransfer rolls under the retransfer ribbon carrier.
-
Page 28: Cleaning The Everest Printer
Rimage Everest Printer Cleaning the Everest printer Clean the printhead Before you begin: Power off the printer 1. Access the printhead. a. Press the two cover latches to release the side cover. b. Lower the side cover. Cover Latches Side Cover c. -
Page 29: Clean The Tacky Rollers
Maintain the Everest printer Clean the tacky rollers Before you begin: Power off the printer 1. Remove the print ribbon. 2. To access the tacky rollers, remove the supply roll (the unused portion) of the print ribbon from the print ribbon carrier. -
Page 30: Clean The Air Filter
Rimage Everest Printer Clean the air filter Before you begin: Power off the printer 1. Remove the air filter. a. At the rear of the Everest printer, remove the two screws holding the fan cover. b. Remove the air filter. Fan Cover Screws 2. -
Page 31: Clean The Platen Roller
Maintain the Everest printer Clean the platen roller Important! The platen roller should be cleaned only if you notice a diminished print quality, such as white specks on the printed disc. Before you begin: 1. At the back of the printer, change the mode switch to position 3 (Diagnostic Mode). - Page 32 Rimage Everest Printer 3. Clean the platen roller. a. Apply isopropyl alcohol to the sponge swab. b. Use the sponge swab to wipe the platen roller, allowing it to rotate a full turn before moving to the next area. Caution: Do not apply pressure when cleaning the platen roller with the sponge swabs.
-
Page 33: Learn More
Learn More Status Messages When the Everest printer shows a status message, the front panel Error LED lights, indicating that an operator action is required. The CD Present LED flashes an error code when an error occurs. The Everest printer status messages and recommended operator actions are provided below. -
Page 34: Everest Printer Specifications
Printing Modes Single-color, CMY color, and CMY+White Print Quality Equivalent of 160 LPI (Lines Per Inch) using variable dot technology Media Types CD-R or DVD-R with Everest compatible coating. • Multi-Color Ribbon Cyan, Magenta, and Yellow ribbon for multi-color printing. •... -
Page 35: Technical Support And Product Updates
Learn More Technical support and product updates Support for the Rimage Everest printer is available through your authorized reseller. Important: Register your Rimage Everest printer so we can notify you of upgrades as they become available. Safety precautions This manual and the indications on the product allow proper and safe operation. The indication marks below help protect you and other persons from injury, and equipment from damage. -
Page 36: Safety Testing
Rimage Everest Printer fety Testing el: Everest Printer Prod uct ID: CDPR21 Noti ce for USA Federal Communications Commissions (FCC ) Statement his device complies with Part 15 of the FCC Rules. Operation is subject to the following two conditions: (1) T... -
Page 37: Rimage Everest Printer Limited 1 Year Warranty
Rimage Everest Printer Limited 1 Year Warranty Rimage warrants, to the original end user only, that all non-consumable parts of the Everest Printer or Everest II Printer will be free from defects in material or workmanship for 12 months, according to the following terms: •...
Need help?
Do you have a question about the everest and is the answer not in the manual?
Questions and answers