Table of Contents
Advertisement
Quick Links
Advertisement
Table of Contents

Related Manuals for Rimage Professional 2450


Summary of Contents for Rimage Professional 2450
-
Page 1: Rimage Professional™ 2450 User Guide
Rimage Professional™ 2450 User Guide... -
Page 2: About Rimage
This document may contain links to web sites that were current at the time of publication, but may have moved or become inactive since. This document may contain links to sites on the Internet that are owned and operated by third parties. Rimage Corporation is not responsible for the content of any such third-party site. -
Page 3: Table Of Contents
Accessory Kit ......................4.3 Adjusting Print Alignment.................. 12.2 Unpacking and Setup Instructions ............... 4.4 Maintaining the 2450..............13 Identifying the Parts of the Professional 2450 ......... 5 Importance of Maintenance................13.1 Status Light and Control Panel............6 Preventative Maintenance Schedule..............13.2 Status Light ...................... -
Page 4: Introduction
Rimage Professional 2450 system. The terms "system" and "autoloader" may be used throughout this manual to refer to the 2450. The 2450 is a part of the Rimage Professional series of products. The 2450 The term "printer" is used to refer to the integrated Everest 400 printer. -
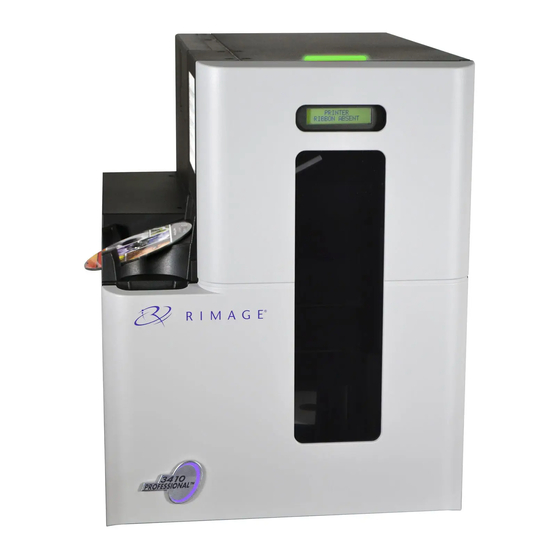
Page 5: Identifying The Parts Of The Professional 2450
Identifying the Parts of the Professional 2450 This section describes the hardware and features of the 2450 system. Back View Front View DiscWatch Status Light Control Panel Front Door Disc Dispenser Printer Door Lift Arm Output Bin Recorders Power Switch... -
Page 6: Status Light And Control Panel
6.2: Control Panel The control panel is located on the front of The Professional 2450 is equipped with a built-in status light that indicates the 2450. It includes the operator panel, various conditions. The table below illustrates status light states and the rotate carousel button (button 1), and the printer tray button explains the conditions indicated by each state. -
Page 7: Getting Started
7.2: Production Server Configuration Cycle The Professional 2450 must run through a full configuration cycle before it is ready for production. For this to occur, the 2450 autoloader must be powered on and connected to a PC with Rimage Software Suite installed. -
Page 8: Bin Settings, Loading, And Label Creation
Selecting Refresh Bins resynchronizes the quantities of media in each bin each media bin and designate bins as Input, Output, Reject, Reserved, so that it shows correctly on the control panel display and in Rimage Collate, or Unused. System Manager. This should be done after adding media to one or more 1. -
Page 9: Disc Production
9. Next, enter the number of copies, title the disc if desired, and then click sleep mode. When this occurs, the printer will take up to 4 on the Record icon. minutes to warm up after a job is sent. 2004849_A For more information visit rimage.com/support... -
Page 10: Display Name And Beeper Settings
1. From the Windows Start menu select All Programs > Rimage > Utilities > Gemini Utilities. Tip: Unless otherwise indicated, all Windows navigation statements 2. -
Page 11: Setting Printing Preferences
1. Select Start > Settings> Devices > Printers & Scanners. change the settings for Media Type, Media Size, Copies, or 2. Select Rimage Everest 400 on HID-0 if it is not the default already Orientation unless instructed to do so by a Rimage Technical and then click the Manage button. -
Page 12: Printable Area And Print Alignment
6. Select OK to close the Printing Preferences window. 12.2: Adjusting Print Alignment 1. Select Start > Settings> Devices > Printers & Scanners. 2. Select Rimage Everest 400 if it is not the default already and then click the Manage button. 3. Select Printing Preferences. -
Page 13: Maintaining The 2450
(included in the Cleaning the Tacky Rollers and Sensors the upper or Everest section on page 14. lower sensor is cleaning kit) not responding, or • 99% Isopropyl the label is off alcohol center 2004849_A For more information visit rimage.com/support... -
Page 14: Tacky Roller Cleaning
Change the Print Ribbon procedure on the inside of the printer cover. Print Ribbon Carrier 4. Refer to page 15 for instructions on how to clean tacky roller 2. Center Latch Print Ribbon Carrier 2004849_A For more information visit rimage.com/support... -
Page 15: Tacky Roller Cleaning (Continued)
Hook the end piece around the inside of the thumb screw and position the end piece so it is flush with the center bracket. c. Tighten the thumbscrew until the end piece is secure. 2004849_A For more information visit rimage.com/support... -
Page 16: Sensor Cleaning
Lower Sensor Tip: One end of the handle has a slot with a notch in it near the end. This is the end that goes into the printer. (See below.) Notch Swab Handle Swab 2004849_A For more information visit rimage.com/support... -
Page 17: Filter Maintenance
6. Reinstall the filters by again squeezing the long edges of the filter holder until the filters are securely fixed to the case vents. See the image to the right for correct placement. Tip: If your filters become worn or damaged, contact Rimage Support for replacements. 2004849_A For more information visit rimage.com/support... -
Page 18: Contact Information
• Current firmware and driver downloads Mexico/Latin America: 952-944-8144 17.3: Technical Support Attn: Rimage Services Europe Rimage offers a variety of service and support options that differ by region, Rimage Europe GmbH Email: support@rimage.de including Rapid Exchange+ and Software Subscription and Support. Please Telephone: +49 (0)6074.8521.0... -
Page 19: Cautions And Warnings
To ensure safety, read these precautions and familiarize yourself with • The Professional 2450 contains a lithium battery. There is a risk of explosion if the their meaning before using the equipment. battery is replaced by an incorrect battery. Dispose of the old battery according to the manufacturer’s instructions included with the battery packaging. -
Page 20: Country-Specific Cautions And Warnings
France: Do not use outdoors. • Italy: If used outside of own premises, general authorization is required. • Norway: This subsection does not apply for the geographical area within a radius of 20km from the center of NY-Alesund. 2004849_A For more information visit rimage.com/support... -
Page 21: Compliance Information
Compliance Information Professional 2450 Product RAS36 Model Notice for USA NOTE: This equipment has been tested and found to comply with the limits for a Class A digital device, pursuant to part 15 of the FCC Rules. These limits are designed to provide reasonable protection against harmful interference when this equipment is operated in a commercial environment.
Need help?
Do you have a question about the Professional 2450 and is the answer not in the manual?
Questions and answers