Table of Contents
Advertisement
Advertisement
Chapters
Table of Contents

Related Manuals for Gigaset N720 DECT IP


Summary of Contents for Gigaset N720 DECT IP
- Page 1 N72 0 DECT IP Multicell System Installation, configuration and operation...
-
Page 3: Gigaset N720 Dect Ip Multicell System
Available throughout the DECT network, freedom of movement when making calls. Manage the phone functions centrally at a management station Manage your Gigaset telephone system via your PC's Web browser. Save your telephone system's configuration on your PC after you have set it up. -
Page 4: Table Of Contents
Table of Contents Gigaset N720 DECT IP Multicell System ......3 Introduction ............6 Safety precautions . - Page 5 Authorisation Gigaset N720 DM PRO ........
-
Page 6: Introduction
Introduction Introduction Gigaset N720 DECT IP Multicell System is a DECT multicell system for connecting DECT base stations to a VoIP PABX. It combines the options of IP telephony with the use of DECT telephones. The following illustration shows the components of the Gigaset N720 DECT IP Multicell... - Page 7 Configuring handsets page 75 The functions of a handset on a Gigaset N720 DECT IP Multicell System are described in this document using the example of the Gigaset SL610H PRO handset. Detailed information about this handset and other approved Gigaset handsets can be found in the relevant user guide.
- Page 8 Please read these instructions before starting installation. Gigaset also offers the Gigaset N720 SPK PRO (Site Planning Kit) to help you measure the wireless coverage and signal quality on your DECT network. Information about setting up and using the Gigaset measuring equipment can also be found in the "Gigaset N720 DECT...
-
Page 9: Safety Precautions
Do not use the devices in environments with a potential explosion hazard (e.g., paint shops). If you give your Gigaset to a third party, make sure you also give them the user guide. Remove faulty devices from use or have them repaired by our Service team, as these could interfere with other wireless services. -
Page 10: First Steps
§§2§§ One Gigaset N720 IP PRO base station §§3§§ One CD with user guide (Gigaset N720 DM PRO only) This includes, for example, the "Gigaset N720 DECT IP Multicell System - Site Planning £ and Measurement Guide", page 8 Please note The Gigaset N720 DECT IP Multicell System devices are powered by Power over Ethernet (PoE). -
Page 11: Installing Base Stations And Dect Manager - Procedure
It does not need to be installed in the coverage area of the DECT wireless network. ¤ The Gigaset N720 IP PRO base stations and the Gigaset N720 DM PRO DECT Manager £ are intended for wall mounting ( page 16). -
Page 12: Connecting Base Stations And Dect Manager
First steps Connecting base stations and DECT Manager To be able to make calls with your Gigaset N720 DECT IP Multicell System via VoIP, the following conditions must be fulfilled: The DECT Manager is installed £ Your DECT Manager and base station are connected to the local network ( page £... - Page 13 First steps Connecting the power cable Please note This connection is only required if the device is not powered via PoE. If you do not use PoE, the power adapter must be plugged in at all times for operation, as the device will not work without a power supply. §§1§§...
-
Page 14: Connecting Devices To The Local Network And To The Internet
Connecting devices to the local network and to the Internet Data protection notice When the device is connected to the Internet, it automatically contacts the Gigaset support server to make it easier for you to configure the devices and to enable communication with Internet services. - Page 15 First steps §§1§§ Insert a plug from the Ethernet cable supplied (Cat 5 with 2 RJ45 modular jacks) into the LAN connection socket at the rear of the device. §§2§§ Insert the second Ethernet cable plug into a LAN socket for your local network or on the router.
-
Page 16: Mounting Devices On The Wall
First steps Mounting devices on the wall Gigaset N720 IP PRO base stations and Gigaset N720 DM PRO DECT Manager are intended for wall mounting. 50 mm You can fix the device to the wall with two or four screws: ¤... -
Page 17: Preparing To Use The Telephone System
First steps Preparing to use the telephone system To start using your Gigaset N720 DECT IP Multicell System, you must now perform the following steps: Register base stations to the telephone system and synchronise them Register handsets to the telephone system, configure and assign VoIP accounts... - Page 18 23). Registering handsets and assigning VoIP accounts All the handsets to be used for making calls on the Gigaset N720 DECT IP Multicell System must be registered on the DECT Manager. When registering, the handset is permanently assigned a VoIP connection as the receive and send connection.
- Page 19 First steps Setting up VoIP connections Before you start registering the handsets, please make sure that there are sufficient accounts available from your local VoIP PABX or from a VoIP provider, and that you have the login data to hand. You can set up accounts from a maximum of ten different providers. First configure the VoIP connections.
- Page 20 Depending on the device type, you can register your handset on other individual base stations or on a Gigaset N720 DECT IP Multicell System (up to four). Information about this can be found in the user guides for the relevant handsets and base stations.
-
Page 21: How To Proceed
First steps How to proceed Now you have successfully set up your phone, you will want to adapt it to your personal requirements. Use the following guide to quickly locate the most important subjects. Information on ..is located here. Making and accepting calls page 29 Using the network directories... -
Page 22: Operating Information
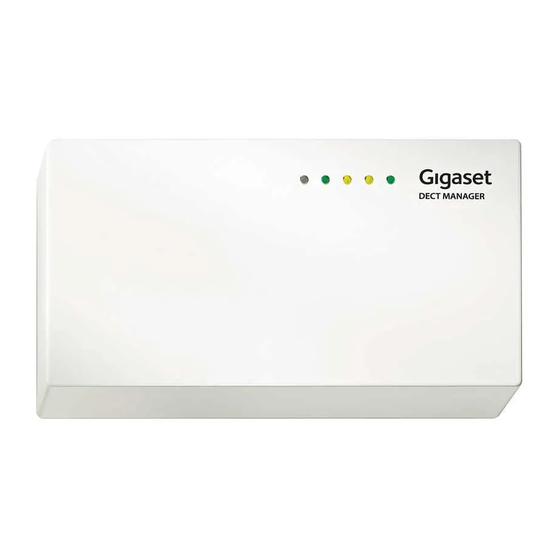
Operating information Operating information Light emitting diodes (LED) LEDs on the DECT Manager From top to bottom DECT Connection status to the base stations Power/LAN Power supply status If the power supply is OK, the LED indicates the LAN connection status. VoIP VoIP connections status (activation and registration) CALL... - Page 23 Operating information LEDs on the base stations The Gigaset N720 IP PRO base stations contain two DECT modules with separate status displays. From top to bottom DECT 1 Status of DECT module 1 Power/LAN Power supply status If the power supply is OK, the LED indicates the LAN connection status.
-
Page 24: Resetting The Device Settings
Operating information Resetting the device settings The devices have a reset button that you can use to restore the default device settings. This button is below the LEDs on the front of the device. Reset button Resetting the device to factory settings Caution This function resets all the settings you have made. - Page 25 Operating information Resetting to static IP addresses ¤ Press the reset button and hold it for four seconds. ¤ Release the reset button. ¤ Press the reset button again for four seconds. ¤ Release it again. The reset is carried out. The IP configuration is now set as follows: Parameter Value for the reset IP address type...
-
Page 26: Menu Tree (Handsets)
Operating information Menu tree (handsets) You use the functions of your Gigaset N720 DECT IP Multicell System via a registered handset. The functions of the telephone system are added to the handset menu, as shown below. Handset-specific functions, e.g., local directory or organiser, are not described here. -
Page 27: Understanding The Operating Steps
Operating information Understanding the operating steps The operating steps have been shortened and are based on a Gigaset SL610H PRO handset. Example: The display: Ç ³ ¢ ¢ Select Services Do Not Disturb ( = on) means: ¤ Press right on the control key to open the main menu. - Page 28 Operating information The change is effective immediately and does Settings not need to be confirmed. Next Call Anon. Call Divert Call Waiting ³ ¤ Do Not Disturb §Back§ Press the key below to skip back to Ringback Off the previous menu level. Back Change ¤...
-
Page 29: Making Calls
The Gigaset N720 DECT IP Multicell System uses a VoIP PABX or the services of a VoIP provider for Internet telephony. The availability of some phone functions depends on whether they are supported by the PABX/provider and whether they have been enabled. -
Page 30: Ending A Call
If all the Gigaset N720 DECT IP Multicell System connections are busy, the error message Operation failed! is displayed. If all connections to the base station connected to your handset are busy, ". . ." is shown on the display. -
Page 31: Accepting A Call
Making calls Accepting a call An incoming call on a Gigaset handset is indicated in three ways: by ringing, by a display on the screen and by the flashing keys. You can accept the call on the handset in the following ways: ¤... - Page 32 Silence Notes on phone number display (CLIP) By default, the number of the caller is shown on the handset of your Gigaset telephone. You do not have to make any other settings on your Gigaset telephone. However, if the caller's number is not displayed, this can be due to the...
-
Page 33: Call Waiting During A Call
Making calls Call waiting during a call If you get another call while conducting a call, you will hear the call waiting tone (short tone). If you have calling line identification (CLIP), the number of the waiting caller or the corresponding directory entry is displayed. -
Page 34: Initiating A Consultation Call
Making calls Initiating a consultation call You are talking to one participant and can call a second participant at the same time for consultation. You are conducting a call: Press the Recall key. This is only possible if the Recall key is enabled for call £... -
Page 35: Transferring A Call To Another Subscriber
Making calls Transferring a call to another subscriber You can transfer (connect) a call to another subscriber if your PABX/provider supports this function. You are conducting a call: ¤ £ Set up a consultation call ( page 34). When the participant answers: ¤... -
Page 36: Gigaset Hdsp - Telephony With Brilliant Sound Quality
Wideband telephony using the G.722 codec must be enabled in the DECT Manager £ Web configurator page 84. This setting applies to the entire Gigaset N720 DECT IP Multicell System. If wideband telephony is enabled, a maximum of four calls can be conducted simultaneously per base station (eight in narrowband mode). -
Page 37: Setting Phone Functions
= on). Using call forwarding (CF) When forwarding a call, the call is diverted to another connection. You can use call forwarding as a Gigaset N720 DECT IP Multicell System function or as a service offered by the VoIP PABX/provider. Ç... -
Page 38: Do Not Disturb
Setting phone functions Do not disturb You can activate the Do Not Disturb (DND) function if you do not want to receive any calls and you do not want the phone to ring, if your PABX/provider supports this function. You can still make calls when this function is activated. -
Page 39: Using Directories
The directories are displayed with the names specified in the Web configurator. Please note If handsets are connected to a Gigaset N720 DECT IP Multicell System, it is not possible to transfer entries from the local directory to another handset. -
Page 40: Using Corporate Directories
Using directories Using corporate directories You can use directories made available by a server in the corporate network on your handset. The following formats are possible: Directory in LDAP format (LDAP = Lightweight Directory Access Protocol) Directory in XML format Personal directory in XML format Prerequisite: The directories are available in the valid XML or LDAP format. -
Page 41: Using Online Directories
89) and the DECT Manager can access the Internet via its LAN connection. Exclusion of liability This service is country-specific. Gigaset Communications GmbH assumes no guarantee or liability for the availability of this service. The service may be discontinued at any time. - Page 42 Using directories A list of the cities/locations found is displayed if the search returns more than one result: Select city. If the name of a city/location is longer than one line, it is abbreviated. Select §View§ to view the complete name. §Change§...
- Page 43 Using directories You have the following options: ¤ You can scroll through the list with ¤ §View§ Press the display key . This displays the full details of the entry (name, category where applicable, address, telephone numbers). You can scroll through the entry with §Options§...
-
Page 44: Using The Call Lists
Using the call lists Using the call lists The following call lists are available: All Calls All outgoing, accepted and missed calls. Outgoing calls The last 20 numbers dialled (redial list). Accepted calls Calls that were answered (max. 15). Missed calls Calls that were not answered (max. -
Page 45: Dialling A Number From A List
Using the call lists If the caller has activated CLIP (= Calling Line Identification Presentation), the caller's phone number is identified. The caller can then be identified by this number if he or she is saved in a directory. Displaying detailed information §§View§§... -
Page 46: Displaying Messages
Displaying messages Displaying messages The following types of messages are displayed: Voice mails on network mailboxes (see below) £ Missed calls ( page £ eMails ( page Missed appointments (see user guide for your handset) The message key provides access to all your messages. Receipt of a new message is indicated as follows: By the message key flashing... -
Page 47: Play Messages
The following is displayed (Gigaset SL610H PRO as an example): If there are new messages in the network mailbox, the list Messages & Calls entry is shown in bold. -
Page 48: Email Notifications
75). Your handset display will show when a new eMail message has been received. On the Gigaset SL610 PRO, for example, an advisory tone sounds, the message key flashes and the Ë symbol is displayed in the idle display. - Page 49 The following details are displayed for each eMail: name or eMail address of the sender (one line, abbreviated if necessary) and date and time (date and time will only display correct values if sender and recipient are located in the same time zone). Example display on the Gigaset SL610H PRO handset: eMail Incoming Frank.Miller@mailp.com 10.10.11...
-
Page 50: Viewing The Message Header And Text Of An Email
Select an eMail entry. §Read§ Press the display key. The subject of the eMail (maximum 120 characters) and the first few characters of the text are displayed. Example display on the Gigaset SL610H PRO handset: eMail Subject: Invitation Text: Hi Anna, I... - Page 51 Select and press The sender's eMail address is displayed, over several lines if necessary (maximum 60 lines). §Back§ Press the display key to return to the incoming message list. Example display on the Gigaset SL610H PRO handset: eMail From: Anna.Sand@mailp.com Back...
-
Page 52: Info Centre - Continuous Internet Access From Your Phone
SL610H PRO, C610H, SL400H, S810H and E49H handset. With some of these handsets, you can launch the info centre directly from the main menu. For others (e.g., Gigaset C610H), you will find the info centre in the submenu É Additional Features. -
Page 53: Login For Personalised Info Services
Info centre – continuous Internet access from your phone Messages when loading requested information The information is loaded from the Internet. Wait a few seconds until the information is displayed. The display shows Please wait..If the information for an info service cannot be displayed, one of the following messages appears: Requested page can’t be reached. -
Page 54: Operating The Info Centre
Info centre – continuous Internet access from your phone Operating the info centre Depending on the type of info service requested, you can perform the following operations: Scrolling within an info service ¤ You can use to scroll downwards within an info service, and to scroll up (back). -
Page 55: Entering Text
Info centre – continuous Internet access from your phone §call§ Depending on the provider, if you press The number is dialled directly The number appears first in the display, in which case you must first confirm the number before it is dialled. ¤... -
Page 56: System Settings And Settings On The Handset
All settings for the VoIP account used by a handset for calls. Settings for the network mailbox and the eMail account. Configuration of online directories. Handset-specific settings are preset on your Gigaset. You can change these settings. This applies, for example, for Display settings, such as language, colour, backlight etc. - Page 57 ¢ ¢ Select Services PBX Control This function is only available if your Gigaset N720 DECT IP Multicell System PRO is connected to a Gigaset T500 PRO or T300 PRO PABX and services are provided via a RAP server £...
-
Page 58: Configuring The System On The Dect Manager
Configuring the system on the DECT Manager Configuring the system on the DECT Manager Use the Web configurator to set up your Gigaset N720 DECT IP Multicell System and configure your DECT network. Set up the DECT network, register and synchronise the base stations. - Page 59 Configuring the system on the DECT Manager If connecting to www.gigaset-config.com does not produce any results: ¤ Establish the DECT Manager's current IP address. ¤ Enter http:// and the current IP address for the DECT Manager in the address field of the Web browser (for example: http://192.168.2.10).
- Page 60 Configuring the system on the DECT Manager Please note £ You should change the password for security reasons ( page 71). If you do not make any entries for a lengthy period (approx. 10 minutes), you are automatically logged off. The next time you try to make an entry or open a Web page, the login screen is displayed again.
-
Page 61: Menu Bar
Configuring the system on the DECT Manager Menu bar The Web configurator menus are displayed as tab pages in the menu bar. You will find an £ overview of the Web configurator menu on page The following menus are available: Settings The menu allows you to make Settings on the DECT Manager. -
Page 62: Working Area
Configuring the system on the DECT Manager Working area Depending on the function selected in the navigation area, information or dialogue boxes are displayed in the working area that allow you to make or change your DECT network settings. Making changes You can make settings via input fields, lists or options. -
Page 63: Web Configurator Menu
Configuring the system on the DECT Manager Opening Web pages A brief outline of how to navigate to the individual Web configurator functions is given below. Example Defining dialling plans: ¢ ¢ Settings Telephony Dialling Plans To open the Web page, proceed as follows after login: ¤... -
Page 64: Connecting The Dect Manager To The Local Network (Lan/Router)
Configuring the system on the DECT Manager Connecting the DECT Manager to the local network (LAN/router) You can find the functions for connecting to the on the Web page: ¢ ¢ Settings Network and connectors IP Configuration In most cases, special settings are not required to connect the DECT Manager to the local network. - Page 65 Configuring the system on the DECT Manager Please note: – The IP address must be included in the address block used by the router/gateway for the local network. The valid address block is defined by the IP address for the router/gateway and the subnet mask (see example).
- Page 66 Configuring the system on the DECT Manager Configuring a HTTP proxy ¤ Select whether you want to release a separate proxy server in the network for your DECT Manager. ¤ If Yes, enter the IP address for the proxy server in the Proxy server address field. ¤...
-
Page 67: Configuring And Synchronising Base Stations
To do this you will need a list of all base stations, each with the MAC address of a DECT module and the location in the building or a unique name for the cell. You will find the MAC addresses for the DECT modules on the sticker attached to each respective Gigaset N720 IP PRO base station. - Page 68 Configuring the system on the DECT Manager The Own base station data window opens to configure this base station. ¤ Enter a unique identifier for the base station in the Name / location field (e.g., Ground Floor West). This name should make it easier to assign the base station within the logical and spatial structure of the DECT network.
- Page 69 Configuring the system on the DECT Manager If you select the Obtained automatically option for the IP address, you will not need to enter any further details. If you are using static IP addresses on your local network, you will also need to enter an IP £...
- Page 70 Configuring the system on the DECT Manager ¤ If you wish to remove the base station from the network, click on Delete base station. If you delete the base station, all data for this base station will be deleted from the DECT Manager.
-
Page 71: Security Settings
Configuring the system on the DECT Manager Base stations – displaying events This page displays counters for diagnostic purposes relating to various events that affect the base stations, e.g., active radio connections, handovers, unexpectedly terminated connections to a handset etc. ¢... - Page 72 Configuring the system on the DECT Manager The Invalid Certificates list contains the certificates received from servers that have not passed the certificate check when establishing a connection, and certificates from the Server Certificates/CA Certificates lists that have become invalid (e.g., because they have expired).
-
Page 73: Configuring Voip Providers
Wizard for selecting provider profiles Gigaset offers a range of provider profiles that you can use for configuration. The Gigaset N720 DM PRO searches for a provisioning file on the network and downloads a provider's configuration data and default settings from this file. - Page 74 Configuring the system on the DECT Manager Entering provider data Enter data manually here for a VoIP PABX or a provider for which there is no existing profile. You can obtain the data from the PABX administrator or your VoIP provider. ¤...
-
Page 75: Configuring Handsets
Configuring the system on the DECT Manager Configuring handsets You can use the Web configurator to register all handsets on the DECT network and for a VoIP connection. You can edit the settings for handsets that are already registered, deactivate or delete them and make further settings e.g., for using directories and network services. -
Page 76: Registering A Handset
Configuring the system on the DECT Manager Registering a handset Please note: Each handset is assigned a VoIP account. Registration in the DECT network and for the VoIP connection is started at the same time. If you assign a different VoIP account to a handset that is already registered, the connection already configured will be overwritten. - Page 77 Configuring the system on the DECT Manager Extended settings for handsets The page offers the following additional setting options for handsets: ¤ Online directories and network mailboxes ¤ Settings for audio codecs ¤ Exporting or importing the local directory ¤ Configuring the call manager and eMail reception ¤...
- Page 78 Configuring the system on the DECT Manager Network Mailbox Configuration: ¤ Enter the Call number or SIP name (URI) for the network mailbox and activate the network mailbox. ¤ If these settings are to apply to all configured handsets, click on OK. Settings for codecs The voice quality of VoIP calls is determined by the Codec...
- Page 79 Configuring the system on the DECT Manager Export and import local directory The Web configurator has the following options for editing and coordinating the directories of the registered handsets. Save the local directory to a PC. Entries are stored in vCard format in a vcf file on the PC.
- Page 80 Configuring the system on the DECT Manager Transfer rules The directory entries from a vcf file that are loaded onto the handset will be added to the directory. If an entry already exists for a name, it will either be supplemented or a new entry for the name will be created.
- Page 81 Configuring the system on the DECT Manager Receiving eMail ¤ If the DECT Manager is to check the receipt of eMails for the handset, enter the data for the eMail account here. ¤ Activate the option Yes for Check for new eMail. ¤...
-
Page 82: Additional Settings For Making A Call
Configuring the system on the DECT Manager Additional settings for making a call The following settings are available for telephony on all handsets. Call barring and access codes (see below, Dialling plans) £ Activating the area code for local calls page 83 £... - Page 83 Configuring the system on the DECT Manager Activating the area code for local calls using VoIP On this page, you provide details about the location of your phone. These are used to determine the international and local area dialling codes as well as country-specific tones (e.g., dialling tone or ring tone).
- Page 84 Configuring the system on the DECT Manager Additional VoIP settings On this page you can make settings for sending DTMF signals and for voice quality, set up call transfer and ringback, and configure settings for the ports for establishing VoIP connections.
- Page 85 Configuring the system on the DECT Manager Enabling the G.729 codec The G.729 codec allows telephony with very low bandwidth requirements and is recommended if minimal network capacity is to be used. You select the codecs for the £ VoIP connections in the "Advanced settings" for each handset ( page 78).
- Page 86 Configuring the system on the DECT Manager You can expand or change the settings for call transfer as follows: Transfer Call by On-Hook: The two participants are connected with one another when you press the end call key. The intermediary's connections with the participants are terminated.
- Page 87 Configuring the system on the DECT Manager Please note Settings for the R key are only possible if £ – The R key has not been activated for call transfer ( page 86) and £ – SIP Info has been activated ( page 84).
-
Page 88: Info Services
Configuring the system on the DECT Manager Info services You can set up various info services provided via the PABX, Gigaset.net or a different £ server. The info services can be opened via the menu on the handsets ( page 52). -
Page 89: Online Directories
Configuring the system on the DECT Manager Online directories You can make various online directories available so that they can be used and displayed on the handsets: Public Online Directories A number of well-known providers are available here. Each provider can provide a telephone directory and a classified directory. - Page 90 Configuring the system on the DECT Manager ¤ Enter the provider's details and a name for the provider and the directories. You can choose between the White and Yellow Pages. ¤ Click on Set to save your settings on the page. The online directories page is displayed again.
- Page 91 Configuring the system on the DECT Manager Corporate directories You can make online corporate directories for the registered handsets available on a server in LDAP or XML format. ¢ Settings Online directories Directory via Lightweight Directory Access Protocol (LDAP) If your corporate network provides a directory via an LDAP server, set up the function on this page.
-
Page 92: Device Management
Configuring the system on the DECT Manager ¤ Enter all the data for your LDAP server: Server address IP address for the LDAP server in your network. Server port Port number that is used to provide the LDAP service. The default setting is 389 Base Distinguished Entry at which the directory display/search is to begin. - Page 93 Configuring the system on the DECT Manager You can make the following changes: Enter another time server Deactivate the time server and enter the date and time manually Select the time zone for your location Activate/deactivate automatic adjustment of the clock to summer time Additional device settings This page ¢...
- Page 94 PC so that the current system can be restored quickly if problems occur. The file is stored with the suffix .cfg (default: Gigaset-yyyy-mm-dd.cfg). If you change the settings accidentally or you need to reset the DECT Manager due to a fault, you can reload the saved settings from the file on your PC to your phone.
- Page 95 Configuring the system on the DECT Manager Rebooting the system Your Gigaset N720 DECT IP Multicell System can be set to automatically reboot regularly at a convenient time if required as a result of a system check. This does not normally cause the system to become unstable, but if an unforeseeable system error should occur, you can reboot the system manually.
- Page 96 Configuring the system on the DECT Manager System log (SysLog) The system report (SysLog) gathers information about selected processes performed by the DECT Manager and base stations during operation and sends this to the configured SysLog server. ¢ ¢ Settings Management System log ¤...
- Page 97 Configuring the system on the DECT Manager Updating firmware for the base/downgrading firmware updates Regular updates to the firmware for the DECT Manager and base stations are provided by the operator or supplier on a configuration server. You can download these updates onto the DECT Manager or base stations as required.
-
Page 98: Dect Manager And Base Station Status
Configuring the system on the DECT Manager ¤ Specify when an update or downgrade should be performed. immediately The update/downgrade is performed when you click the Update firmware or Start downgrade button. later The update/downgrade is performed at the time you indicate in the lines underneath. -
Page 99: Customer Care
Customer care Customer care Questions? For rapid assistance, refer to this user guide or visit www.gigaset.com/pro. The trade outlet where you bought your PABX will be happy to help with further questions relating to your Gigaset Professional PABX. Questions and answers If you have any questions when using your phone, please contact us at http://wiki. - Page 100 Customer care The connection to a participant on hold is automatically terminated after a short time. ¥ The session timer on the VoIP PABX is set for an insufficient time. Check the timer setting and increase it if necessary. You hear an error tone (descending tone sequence) when keying an input. ¥...
-
Page 101: Information On Operating Gigaset Voip Telephones With Routers With
Network Address Translation (NAT) Generally speaking, no special telephone or router configuration is required when operating a Gigaset VoIP phone with NAT router. The configuration settings described in this section are only necessary if you encounter one of the following problems. - Page 102 Local port The SIP and RTP port numbers set on the phone. You can set an RTP base port for the Gigaset N720 DECT IP Multicell System base stations, from which the system automatically determines the ports required (32 per £...
-
Page 103: Checking Service Information
DECT Manager's device item number DECT Manager's IP address RFP-Scan This function can be used during or after installation and enables you to identify the DECT base stations (Gigaset N720 IP PRO) from which a handset receives radio waves at a particular location. -
Page 104: Environment
Environment Our environmental mission statement We, Gigaset Communications GmbH, bear social responsibility and are actively committed to a better world. Our ideas, technologies and actions serve people, society and the environment. The aim of our global activity is to secure sustainable life resources for humanity. -
Page 105: Appendix
Country-specific requirements have been taken into consideration. We, Gigaset Communications GmbH, declare that this device meets the essential require- ments and other relevant regulations laid down in Directive 1999/5/EC. -
Page 106: Specifications
General specifications DECT Manager and base stations Power over Ethernet Gigaset N720 DM PRO: PoE IEEE 802.3af < 3.8 W (Class 1) Gigaset N720 IP PRO: PoE IEEE 802.3af < 6.4 W (Class 2) LAN interface RJ45 Ethernet, 10/100 Mbps... -
Page 107: Glossary
Glossary Glossary ADSL Asymmetric Digital Subscriber Line Special form of DSL. Application Layer Gateway NAT control mechanism for a router. Many routers with integrated NAT use ALG. ALG lets the data packets in a VoIP connection pass and adds the public IP address of the secure private network. The router's ALG should be deactivated if the VoIP provider offers a STUN server or an outbound proxy. - Page 108 Glossary Client Application that requests a service from a server. Cluster Subdivision of a DECT network into groups (subnets) by a central management station (DECT Manager). All telephones in the network use the central functions of the PABX (VoIP configuration, directories, etc.). However, the base stations only synchronise within a cluster, meaning that a handover of a handset from one cluster to a neighbouring cluster is not possible.
- Page 109 You can specify the IP address of the primary/secondary DNS server. See also: DynDNS. Domain name Name of one (of several) Web server(s) on the Internet (e.g., gigaset.com). The domain name is assigned to the relevant IP address by DNS. DSCP...
- Page 110 Glossary DSLAM Digital Subscriber Line Access Multiplexer The DSLAM is a switch cabinet in an exchange where all subscriber connectors converge. DTMF Dual Tone Multi-Frequency Dual tone multi-frequency dialling (DTMF). Dynamic IP address A dynamic IP address is assigned to a network component automatically via DECT. The dynamic IP address for a network component can change every time it registers or at certain time intervals.
- Page 111 Glossary Fragmentation Data packets that are too big are split into smaller packets (fragments) before they are transferred. They are put together again when they reach the recipient (defragmented). Full duplex Data transmission mode in which data can be sent and received at the same time. G.711 a law, G.711 μ...
- Page 112 Glossary Global System for Mobile Communication Originally a European standard for mobile networks. GSM can now be described as a worldwide standard. However, in the USA and Japan, national standards were previously more frequently supported. Handover Possibility for a subscriber with a DECT handset to change from one cell to another during a call or a data connection without interrupting this connection.
- Page 113 Glossary IP address A unique address for a network component within a network based on the TCP/IP protocols (e.g., LAN, Internet). On the Internet, domain names are usually assigned instead of IP addresses. assigns the corresponding IP address to the domain name. The IP address has four parts (decimal numbers between 0 and 255) separated by full stops (e.g., 230.94.233.2).
- Page 114 Glossary Music on hold Music on hold Music that is played while you are on a Consultation call or during Call swapping. The waiting participant hears music while on hold. Network Address Translation Method for converting (private) addresses to one or more (public) IP addresses. NAT enables the IP addresses of Network subscribers (e.g., VoIP telephones) in a...
- Page 115 Glossary Port Data is exchanged between two applications in a Network via a port. Port forwarding The Internet gateway (e.g., your router) forwards data packets from the Internet that are directed to a certain Port to the port concerned. This allows servers in the offer services on the Internet without you needing a public IP address.
- Page 116 Glossary Radio Fixed Part Base stations in a multicell DECT network. RFPI Radio Fixed Part Identity ID for a base station in a multicell DECT network. It includes the number (RPN) and an ID for the DECT Manager. A handset uses it to recognise the base stations it is connected to and the DECT network to which it belongs.
- Page 117 Glossary Server Provides a service to other Network subscribers (Clients). The term can indicate a computer/PC or an application. A server is addressed via IP address/Domain name and Port. SIP (Session Initiation Protocol) Signalling protocol independent of voice communication. Used for establishing and ending a call.
- Page 118 The recipient is solely responsible for making sure the data is received. The sender is not notified about whether it is received or not. Uniform Resource Identifier Character string for identifying resources (e.g., eMail recipient, http://gigaset.com, files). On the Internet, URIs are used as a uniform identification for resources. URIs are also described as SIP addresses.
- Page 119 Glossary VoIP provider A VoIP, SIP or Gateway provider is an Internet service provider that provides a Gateway for Internet telephony. As the phone works with the SIP standard, your provider must support the SIP standard. The provider routes calls from VoIP to the telephone network (analogue, ISDN and mobile) and vice versa.
-
Page 120: Accessories
Equipment for planning and analysing your DECT multicell system. The case contains two calibrated Gigaset S810H handsets and one Gigaset N510 IP PRO base station, plus other useful accessories for measuring the signal quality and wireless coverage on your DECT network. - Page 121 Accessories Gigaset SL400 handset Genuine metal frame and keypad High-quality keypad backlight 1.8" TFT colour display Bluetooth® and mini USB Directory for 500 vCards Talk/standby time of up to 14 hours/230 hours Large font for call lists and directory Brilliant sound quality in speaker mode: 4 adjustable...
- Page 122 Accessories Gigaset E49H handset Resistant to shocks, dust and water splashes Tough keypad with backlight Colour display Directory for 150 entries Talk/standby time of up to 12 h/250 h, standard batteries Brilliant sound quality in speaker mode Screensaver Alarm clock Room monitor www.gigaset.com/gigasete49h...
- Page 123 Accessories Compatibility The Gigaset N720 DECT IP Multicell System functions described in this user guide are available for the aforementioned handsets provided you have the following version or later: Handset Version Gigaset SL610H PRO 053.01 Gigaset SL400H 053.01 Gigaset S810H 053.01...
-
Page 124: Index
........Gigaset N720 IP PRO Call forwarding . - Page 125 Index Cluster ......Deleting ......
- Page 126 DSCP Gigaset N720 DECT IP Multicell System ....... . .
- Page 127 Index Installation DECT Manager, connection to ..........base station base station .
- Page 128 Index Navigation area, Web configurator ..Power adapter ............
- Page 129 Index Security warning ..... . Transmission rate .....
- Page 130 Index Web page ......structure ....Wide Area Network .
- Page 131 A31008-M2314-L101-2-7619...
Need help?
Do you have a question about the N720 DECT IP and is the answer not in the manual?
Questions and answers