Table of Contents
Advertisement
Advertisement
Table of Contents

Related Manuals for Gigaset S650 H Pro


Summary of Contents for Gigaset S650 H Pro
-
Page 3: Table Of Contents
Contents Contents Overview ................2 Safety precautions . -
Page 4: Overview
Overview Overview 3 Volume keys ( p. 11) for receiver/headset, ringtone, handsfree mode and appointment reminders 4 Display keys ( p. 11) 5 End call key, On/off key End call; cancel function; Go back one menu level Press briefly Return to idle status Press and hold Switch the handset on/off... - Page 5 Using the user guide effectively Using the user guide effectively Icons Warnings, which, if not heeded, can result in injury to persons or damage to devices or give rise to costs. Prerequisite for being able to carry out the following action. Important information regarding function and appropriate handling.
-
Page 6: Safety Precautions
Do not use the devices in environments with a potential explosion hazard (e.g. paint shops). If you give your Gigaset to a third party, make sure you also give them the user guide. Remove faulty devices from use or have them repaired by our Service team, as these could interfere with other wireless services. -
Page 7: Getting Started
Getting started Getting started Contents of the package • One handset, • One battery cover, • Two batteries, • One charging cradle incl. power adapter, • One belt clip, • Safety precautions Setting up the charging cradle The charging cradle is designed for use in closed, dry rooms within a temperature range of +5 °C to +45 °C. -
Page 8: Setting Up The Handset For Use
Getting started Setting up the handset for use The display is protected by a plastic film. Please remove the protective film! Inserting the batteries Only use rechargeable batteries, as this could otherwise result in significant health risks and personal injury. For example, the outer casing of the batteries could be destroyed or the batteries could explode. -
Page 9: Attaching The Belt Clip
Getting started Attaching the belt clip The handset has notches on each side for attaching the belt clip. • Attaching the belt clip: Press the belt clip onto the back of the handset so that the tabs on the belt clip click into place in the notches. -
Page 10: Connecting The Headset
Getting started Connecting the headset ¤ Connect the headset with 2.5 mm jack to the left side of the handset For information on recommended headsets, see the relevant product page at wiki.gigasetpro.com. The headset volume corresponds with the setting for the receiver volume ( p. - Page 11 The settings for VoIP telephony and send and receive connections are made at the base station. For Gigaset IP phones there is a web configurator that can be used for making the configuration on a computer.
-
Page 12: Using The Telephone
Getting to know your telephone Using the telephone Getting to know your telephone Switching the handset on/off ¤ Switch on: Press and hold the End call key on the handset when switched off ¤ Switch off: When the telephone is in idle status, press and hold the End call key Locking/unlocking the keypad The keypad lock prevents any accidental use of the telephone. -
Page 13: Control Key
Getting to know your telephone Control key The control key enables you to navigate the menus and input fields, and also to call up certain functions depending on the situation. In the description below, the side of the control key (up, down, right, left) that you have to press in the different operating situations is marked in black, e.g. -
Page 14: Menu Guidance
The main menu functions are partially base-specific. The main menu may look different on your handset. The example shows the menu of a handset from a Gigaset N720 DECT IP Multicell System. Back Basic functions of the handset p. 68 Submenus The functions in the submenus are displayed as lists. -
Page 15: Entering Text
Getting to know your telephone Entering text Input position ¤ to select an entry field. A field is activated when the New Entry cursor is blinking inside it. ¤ to move the position of the cursor. First Name: Peter Correcting incorrect entries Surname: •... -
Page 16: Making Calls
Making calls Making calls Making calls Information for Calling Line Identification: p. 19 When the display backlight is off ( p. 52) the display backlight is activated the first time that any key is pressed. Digit keys that are pressed appear in the display for pre- dialling, other keys have no further function. - Page 17 Making calls Dialling from the redial list The redial list contains the 20 numbers last dialled with the handset. ¤ Briefly press the Talk key . . . the redial list is opened . . . use to select an entry Press the Talk key If a name is displayed: ¤...
-
Page 18: One Touch Call
Making calls One touch call A predefined number is dialled by pressing any key. Activate one touch call mode: 07:15 ¤ . . . use to select Additional Features INT 1 22 Feb One Touch Call . . . use to activate Activation Call to . -
Page 19: Call Transfer
Making calls Call transfer Connecting an external call to a VoIP connection with a second external participant (depending on the provider). ¤ Use the display key Ext. Call to establish an external consultation call . . . use to enter the number of the second participant . -
Page 20: During A Conversation
Making calls During a conversation Handsfree mode Activate/deactivate handsfree mode during a call and when establishing a connection: ¤ Press the handsfree key Place the handset in the charging cradle during a call: ¤ Press and hold the handsfree key . -
Page 21: Network Services
Network services Network services Network services depend on the network provider (service provider) and must be requested from that provider. If your telephone is connected to a PABX, network services may also be available from the PABX. Information is available from your PABX operator, where applicable. Network services fall into two distinct groups: •... -
Page 22: Call Waiting During An External Call
Network services Calling Line Identification for outgoing calls Deactivating Calling Line Identification for the next call ¤ . . . use to select Select Services Next Call Anon..to enter the number Dial . . . the connection is established without Calling Line Identification Transferring the name from the online directory It is also possible to display the name of the caller as stored in the online directory instead of the... - Page 23 Network services Suppressing call waiting for the next call Call waiting will not be indicated for the next call, even if "call waiting" is activated. ¤ . . . use to select Select Services Next Call Call Waiting . . . use to enter the number Dial .
-
Page 24: Call Divert
Network services Call divert When diverting a call, the call is forwarded to another connection. ¤ . . . use to select Select Services Call Divert . . . then Switch on/off: Status : . . . use to select On or Off Enter the number for call divert: ¤... - Page 25 Network services Call swapping Switching between two calls. The other call is placed on hold. ¤ Call Swap During an external call, dial the number of a second participant (consultation call) or accept a waiting caller . . . the display shows the numbers and/or names of both call participants, the current participant is marked with ¤...
-
Page 26: Message Lists
Message lists Message lists Notifications about missed calls, messages on the network mailbox and missed alarms are saved in the messages list. As soon as a new message arrives, an advisory tone will sound. The Example Message key also flashes (if activated p. - Page 27 Message lists Activating/deactivating Message key flashing Receipt of new messages is displayed by a flashing Message key on the handset. This type of alert can be activated/deactivated for each message type. This setting is entered on the base for each registered handset. You can change this setting for your handset: In idle status: ¤...
-
Page 28: Call Lists (Depends On The Base Station)
Call lists (depends on the base station) The telephone saves different types of calls (missed, accepted and outgoing calls) in lists. List entry The following information is displayed in the list entries: Example on a Gigaset base station • The list type (in the header) •... -
Page 29: Directories
Local handset directory Directories Local handset directory The local directory is unique to the handset. However, it is possible to send entries to other handsets ( p. 29). Opening the directory ¤ Press briefly in idle status ¤ . . . use to select Directory Directory entries... -
Page 30: Deleting Entries
Local handset directory Caller Picture: ¤ . . . use to select a picture that is to be displayed during a call from the participant (Resource Directory p. 42). Save entry: Save The entry is only valid if it contains at least one number. For Caller Melody (VIP) and Caller Picture: the telephone number of the caller must be supplied. - Page 31 The sending and receiving handset must both be registered to the same base station. The other handset and the base station are able send and receive directory entries. The base station is not a Gigaset N720 IP Multicell System (transfer can only be carried out by the administrator).
- Page 32 Local handset directory Copying the entire directory ¤ Options Copy All to Internal . . . use to select the receiving handset OK . . . the entries are copied one after the other Copying a vCard using Bluetooth Copy directory entries in vCard format, e.g. to exchange entries with a mobile phone. Bluetooth mode is activated ( p.
-
Page 33: Online Directories
The online directories are set up and activated on the base. Exclusion of liability Gigaset Communications GmbH assumes no guarantee or liability for the availability of this service. The service may be discontinued at any time. Opening an online directory/Yellow Pages ¤... - Page 34 Online directories The selected online directory supports the number search. No entries found to match the search criteria given: • Start a new search: • Change search criteria: Change Too many entries found: • Start a refined search: Refine • The number of hits appears in the display (depends on the provider).
-
Page 35: Voice Mail
Network mailbox Voice Mail Network mailbox Each network mailbox accepts incoming calls made via the corresponding line (fixed line network or corresponding VoIP phone number). In order to record all calls, a network mailbox should be set up for both the fixed line network and the VoIP connection. The network mailbox is automatically called via the corresponding connection. -
Page 36: Set Fast Access For The Network Mailbox
Set fast access for the network mailbox Playing back messages ¤ Press and hold ¤ Press the Message key . . . use to select network mailbox ( Mailbox: IP1) ¤ . . . use to select Voice Mail Play Messages . -
Page 37: Additional Functions
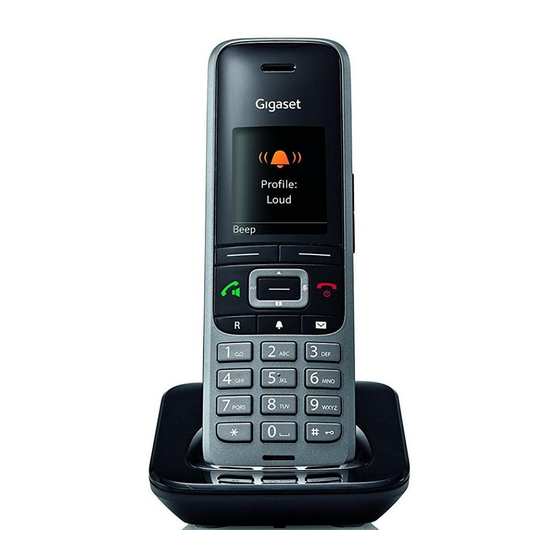
Sound profiles Additional functions Sound profiles The telephone has 3 sound profiles for adapting the handset to the environmental conditions: Profile Loud, Profile Silent, Profile Personal ¤ to switch between the profiles . . . the profile is changed straight away without a prompt The profiles are set as follows by default: Default setting... -
Page 38: Calendar
Calendar Calendar You can remind yourself of up to 30 appointments. July 2014 In the calendar, the current day is outlined in white; on days with appointments, the numbers are displayed in colour. When a day Mo Tue We Th Fri Sat Su is selected, it will be outlined in colour. - Page 39 Calendar Notification of appointments/anniversaries Anniversaries are transferred from the directory and displayed as an appointment. An appointment/anniversary is displayed in idle status and the selected ringtone plays for 60 seconds as a notification. • Acknowledge and stop the reminder: Press the display key OFF •...
-
Page 40: Alarm Clock
Alarm clock Alarm clock Date and time have been set. Activating/deactivating the alarm clock and setting the wake-up time ¤ . . . use to select Organiser Alarm Clock OK . . . then ¤ Switch on/off: Activation: . . . use to select On or Off ¤... -
Page 41: Room Monitoring
Room monitoring Room monitoring When the room monitor is switched on, the stored (internal or external) destination number is called as soon as a defined noise level is exceeded in the vicinity of the handset. The alarm to an external number is cancelled after approximately 90 seconds. You can answer the alarm using the Two Way Talk function. - Page 42 Room monitoring Switching off/interrupting the alarm ¤ Switch off the alarm: In idle status press the display key OFF ¤ Interrupt the alarm: Press the End call key during an alarm Deactivating the alarm remotely The alarm is forwarded to an external destination number. The receiving phone supports tone dialling.
-
Page 43: Protection Against Unwanted Calls
Protection against unwanted calls Protection against unwanted calls Time control for external calls Date and time have been set. Enter a time period during which the handset should suspend Example ringing to indicate external calls e.g. during the night. ¤ Time Control . -
Page 44: Resource Directory
Resource Directory Resource Directory Sounds for ringtones and images that can be used as caller pictures (CLIP pictures) or as a screensaver are saved in the handset's resource directory. A range of monophonic and polyphonic sounds and pictures have been pre-set but further images and sounds can be downloaded using a PC ( p. -
Page 45: Bluetooth
Bluetooth Check memory Display the available memory for screensavers and CLIP-pictures. ¤ . . . use to select Additional Features Resource Directory Capacity OK . . . the percentage of available memory is displayed Bluetooth The handset is able to use Bluetooth™ to communicate wirelessly with other devices that also use this technology e.g. -
Page 46: Registering Bluetooth Devices
Bluetooth Registering Bluetooth devices The distance between the handset in Bluetooth mode and the active Bluetooth device (headset or data device) should not exceed 10 m. The registration of a headset overwrites a previously registered headset. If a headset is to be registered that is already registered with a different device, this connection must be deactivated before registering. -
Page 47: Additional Functions Using The Pc Interface
Change . . . use to change the name Save Additional functions using the PC interface The Gigaset QuickSync program has been installed on the computer. Free to download at www.gigaset.com/quicksync QuickSync functions: • Sync the handset's directory with Outlook •... - Page 48 Establish connection to the handset ¤ Start firmware update in Gigaset QuickSync . . . Information about this can be found in the Gigaset QuickSync help feature The update process may take up to 10 minutes (not including download time).
-
Page 49: E-Mail Notifications (Depends On The Base Station)
E-mail notifications (depends on the base station) E-mail notifications (depends on the base station) The receipt of new e-mail messages is displayed on the handset: An advisory tone sounds, the Message key flashes and the icon is displayed in the idle display. An e-mail account is set up with an Internet provider. - Page 50 E-mail notifications (depends on the base station) Viewing the message header and text of an e-mail ¤ . . . use to select Messaging eMail . . . use to select e-mail entry Read The subject of the e-mail (maximum 120 characters) and the first Example: few characters of the text (maximum 560 characters) are displayed.
-
Page 51: Info Centre (Depends On The Base Station)
Info Centre (depends on the base station) Info Centre (depends on the base station) The Info Centre provides information from the network or Internet on the handset display (e.g. company information, messages or the weather forecast). Information available in the Info Centre can also be used as a screensaver. -
Page 52: Setting The Handset
Setting the handset Setting the handset Date and time To ensure you have the correct time for incoming calls and to use the alarm clock and calendar, for example, the date and time must be set. The date and time are taken from a time server on the Internet, provided that the phone is connected to the Internet and synchronisation with the time server is activated. - Page 53 Setting the handset Display and keypad Screensaver A digital or analogue clock, Info Services and a range of pictures can be selected to be displayed as a screensaver when in idle status. ¤ . . . use to select Settings Display &...
-
Page 54: Display Backlight
Setting the handset Large font Show text and icons in call lists and in the directory in a larger size in order to improve legibility. Only one entry is shown in the display and names are abbreviated if necessary. ¤ . - Page 55 Setting the handset Activating/deactivating Auto Answer When set to Auto Answer, the handset accepts an incoming call as soon as it is removed from the charging cradle. ¤ . . . use to select Settings Telephony Auto Answer Change ( = on) Regardless of the Auto Answer setting, the connection ends as soon as you place the handset back in the charging cradle.
- Page 56 Setting the handset Earpiece and handsfree profile Select a sound profile in order to adapt the telephone as much as possible to the surroundings. ¤ . . . use to select Settings Audio Settings Acoustic Profiles Earpiece Profiles / Handsfree Profiles .
- Page 57 Setting the handset Ringtone melody Set a variety of ringtones for internal and external calls for every available receive connection of the telephone (Landline, IP1) or set the same ringtone for All calls. ¤ . . . use to select Settings Audio Settings Ringtones (Handset)
- Page 58 Setting the handset Activating/deactivating advisory tones The handset notifies acoustically about different activities and statuses. These advisory tones can be activated/deactivated independently of each other. ¤ . . . use to select Settings Audio Settings Advisory Tones OK . . . then Tone when keys are pressed: ¤...
- Page 59 Setting the handset Fast access to numbers and functions Number keys: It is possible to assign a number from the directory to the keys Display keys: The left and right display keys have a function preset by default, but the keys can be re-assigned.
- Page 60 Setting the handset Assigning display keys, changing assignments The available options depend on the base station. If the phone is registered to a PABX, the display keys can also be assigned via the PABX if required. ¤ Press and hold the left or right display key in idle status . . . the list of possible key assignments is opened .
- Page 61 Setting the handset Additional settings/functions depending on the base station Registering a handset to multiple base stations Your handset can be registered to up to four base stations. The active base station is the base station to which the handset was last registered. The other base stations remain saved in the list of available base stations.
-
Page 62: Changing The Handset Pin
Setting the handset Changing the handset PIN The handset is protected against unauthorised use by a PIN (default setting: 0000). The handset PIN must be entered e.g. when deactivating the keypad lock or when entering Bluetooth connections. Change the telephone's 4-digit PIN (default setting: 0000): ¤... -
Page 63: Appendix
Do you have any questions? Find prompt access to support in this user guide and at www.gigaset.com/pro. The phone retailer from whom you purchased your telephone system will be happy to assist with any further questions regarding your Gigaset Professional Telephone system. - Page 64 Service (Customer Care) The other party cannot hear you. • The handset is "muted". Activate the microphone again ( p. 18) Some of the network services do not work as specified. • Features are not enabled. Contact the network provider for details. The caller's number is not displayed.
-
Page 65: Manufacturer's Advice
Environment Our environmental statement We at Gigaset Communications GmbH are aware of our social responsibility. That is why we actively take steps to create a better world. In all areas of our business – from product planning and production to sales and waste of disposal – following our environmental conscience in eve- rything we do is of utmost importance to us. -
Page 66: Contact With Liquid
Switzerland) is subject to national approval. Country-specific requirements have been taken into consideration. We, Gigaset Communications GmbH, declare that this device meets the essential requirements and other relevant regulations laid down in Directive 1999/5/EC. A copy of the Declaration of Conformity is available at this Internet address: www.gigaset.com/docs... -
Page 67: Technical Data
1.2 V Capacity: 750 mAh Handset operating times/charging times The operating time of your Gigaset depends on the capacity of the battery, its age and the way it is used. (All times are maximum possible times). Standby time (hours)* 300/180 Talktime (hours) Operating time with 1.5 hours of calls per day (hours) *... -
Page 68: Display Icons
Display icons Display icons The following icons are displayed depending on the settings and the operating status of your telephone. Icons in the status bar Icon Meaning Icon Meaning Signal strength (No Radiation off ) Battery charge status: 1% -100% White: between 11% and 100% white, if Maximum Range on;... - Page 69 Display icons Other display icons Icon Meaning Icon Meaning Alarm clock is on, display with alarm Information time (Security) prompt Action complete (green) Please wait ... Action failed (red)
-
Page 70: Menu Overview
Open the main menu: when handset is in idle status press Not all functions are available on all base stations, in all countries or from all network providers. Gigaset S650H PRO basic functions (always available) Settings p. 38 Alarm Clock... - Page 71 53 Area Codes p. 56 System Handset Reset p. 60 Handset PIN p. 60 Example: Gigaset S650H PRO on a Gigaset N720 DECT IP Multicell System Settings Settings Select Services Next Call Anonym. p. 20 Call Divert p. 22 Call Waiting p.
- Page 72 Menu overview Additional Features Room Monitor p. 39 One Touch Call p. 16 Resource Directory Screensavers p. 42 Caller Pictures Sounds Capacity Bluetooth Activation p. 43 Search for Headset p. 44 Search Data Device p. 44 Known Devices p. 44 Own Device p.
- Page 73 Menu overview Settings Date/Time p. 50 Audio Settings Handset Volume p. 54 Acoustic Profiles Earpiece Profiles p. 54 Handsfree Profiles p. 54 Advisory Tones p. 56 Silent Alert p. 55 Ringtones (Handset) Volume p. 54 Melodies p. 55 Time Control p.
-
Page 74: Index
Index Index ....... Activating/deactivating message LED Calendar ....Advisory tones Call . - Page 75 Index ..... . Charging, silent Display ..CLI, Calling Line Identification activating/deactivating new message .
- Page 76 Index ......Info Centre IP address Handset ......dialling .
- Page 77 Index ......Menu key Protection from calls ..... . . Message anonymous .
- Page 78 Index ..... . . Signal strength Signal tone, see Advisory tones ......Update .
Need help?
Do you have a question about the S650 H Pro and is the answer not in the manual?
Questions and answers