Table of Contents
Advertisement
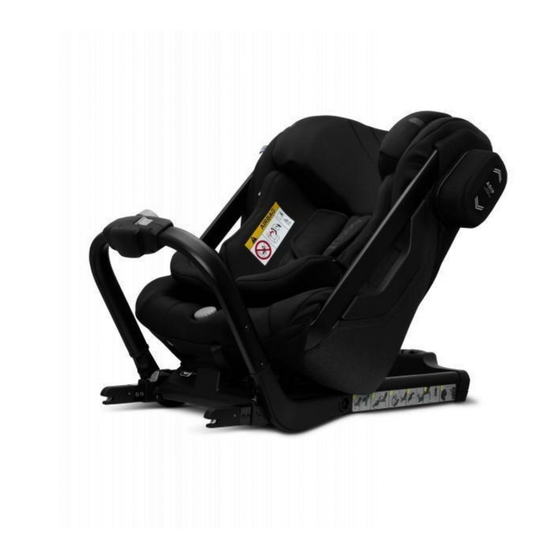
CONVERTIBLE CHILD RESTRAINT
Instructions for Installation & Use
IMPORTANT: KEEP THIS BOOKLET IN THE PLACE PROVIDED ON THE CHILD RESTRAINT
Rearward Facing
For use with children up
to approximately 6 months.
Check that this child restraint will fit in your car.
Product features and decoration may vary from images & illustrations.
FOR CARS
Series No. JS7A/2010
Forward Facing
For use with children from approximately
6 months to approximately 4 years of age.
Advertisement
Table of Contents

Summary of Contents for Hipod JS7A/2010
- Page 1 CONVERTIBLE CHILD RESTRAINT FOR CARS Instructions for Installation & Use Series No. JS7A/2010 IMPORTANT: KEEP THIS BOOKLET IN THE PLACE PROVIDED ON THE CHILD RESTRAINT Forward Facing Rearward Facing For use with children up For use with children from approximately 6 months to approximately 4 years of age.
-
Page 2: Table Of Contents
INdeX INtrodUCtIoN Page INtrodUCtIoN to be used only in a rearward-facing position for an infant until their shoulders reach the lower shoulder height WArNINgS marker (approximately 6 months of age). then to be used in a forward-facing position until their shoulders ShoUlder heIght mArkerS &... -
Page 3: Warnings
• the restraint is not intended to be a substitute baby cot or bed. It is only designed to enable safe • Use the restraint exactly as shown in the instructions. transportation of children in motor vehicles. do not leave a baby in the restraint for long periods of time. •... -
Page 4: Shoulder Height Markers & A Growing Child
ShoUlder heIght mArkerS & A groWINg ChIld ShoUlder heIght mArkerS & the NeXt SteP NEwBORN (REARwARD FACINg) Shoulder height markers are provided on this restraint for a visual indication that the child is safe to ride in this restraint. do not turn to forward-facing until the child's shoulder's reach the lower marker. lower shoulder label A do not continue to use the restraint if the child's shoulders are above the top marker. -
Page 5: Shoulder Height Markers & The Next Step
ShoUlder heIght mArkerS & FeAtUreS - reAr FACINg the NeXt SteP bAbY USe reArWArd FACINg For the next child restraint choose from: to be used only in a rearward-facing position until the infant's shoulders reach the lower shoulder height marker (approximately 6 months of age). •... -
Page 6: Features
SUItAble For USe FeAtUreS - reAr FACINg bAbY USe reArWArd FACINg bAbY USe reArWArd FACINg to be USed WIth A lAP SASh or lAP oNlY SeAt belt IN the Car's Anchor Fitting bACk oF moSt CArS WIth ForWArd-FACINg SeAtS. Stabilising Bar (Shown in Baby Use mode - for rear facing) to be used only in a rearward-facing position for an infant 590mm until their shoulders reach the lower shoulder height marker... -
Page 7: How To Set-Up
hoW to Set-UP hoW to Set-UP bAbY USe reArWArd FACINg bAbY USe reArWArd FACINg CHANgINg SHOULDER STRAP SLOTS: FOR BABy USE REARwARD-FACINg ADJUSTINg HARNESS STRAP HEIgHT: FOR BABy USE REARwARD-FACINg Correct fitment of the harness is very A. If fitted in the car, remove the restraint from vehicle important as it restrains the baby in the Harness as instructed on page 25. - Page 8 hoW to Set-UP hoW to Set-UP bAbY USe reArWArd FACINg bAbY USe reArWArd FACINg g. ensure there are no twists in the shoulder strap e. Pull the shoulder strap out of the slot. and the buckle tongues face the correct way. Cross bar Pull CAUTION:...
-
Page 9: How To Install
hoW to INStAll hoW to INStAll bAbY USe reArWArd FACINg bAbY USe reArWArd FACINg INSTALLINg INTO VEHICLE (REARwARD FACINg) CONTINUED CHILD RESTRAINT ANCHORAgE to use this child restraint, the car will need a child restraint anchor fitting in the seating position that you d. - Page 10 hoW to INStAll hoW to INStAll bAbY USe reArWArd FACINg bAbY USe reArWArd FACINg g. engage seat belt buckle and tongue. Attachment Clip (hook) ensure Upper Anchorage Strap is not slack, h. re-attach the cover by connecting the plastic attached to the car's fasteners and align restraint centrally to the Anchor Fitting.
- Page 11 hoW to INStAll hoW to INStAll bAbY USe reArWArd FACINg bAbY USe reArWArd FACINg ANgULAR ADJUSTMENT OF RESTRAINT IMPORTANT: If using an extension Strap, positioning the Attachment Clip above the baby may lead to injury in an accident Some vehicle seats have more rearward slope than others. If the angle of the seat causes the baby to be too therefore make sure that the Attachment Clip is not positioned in front of the vehicle seat.
- Page 12 hoW to USe hoW to USe bAbY USe reArWArd FACINg bAbY USe reArWArd FACINg PLACINg BABy INTO RESTRAINT harness Adjustment e. Always make sure the baby is dressed to allow lever harness buckle to be pulled up between baby’s A. ensure the shoulder straps are adjusted to the Adjuster legs e.g.
- Page 13 hoW to USe hoW to USe bAbY USe reArWArd FACINg bAbY USe reArWArd FACINg REMOVINg BABy FROM RESTRAINT h. Pull harness adjustment strap to take up the slack in the harness adjusting to a comfortable but firm fit. A loose A.
-
Page 14: Features
FeAtUreS ForWArd FACINg FeAtUreS ForWArd FACINg toddler USe ForWArd FACINg toddler USe ForWArd FACINg to be used only in a forward- facing position by children whose shoulder's have reached the lower shoulder Car's Anchor Fitting height marker (approximately 6 months of age) until the shoulders reach the upper shoulder height marker Slots for adjusting height of shoulder straps. -
Page 15: How To Set-Up
SUItAble For USe - ForWArd FACINg hoW to Set-UP toddler USe ForWArd FACINg toddler USe ForWArd FACINg ADJUSTINg HARNESS STRAP HEIgHT: FOR CHILD USE FORwARD-FACINg to be USed WIth A lAP SASh or lAP oNlY SeAt belt IN the bACk oF moSt CArS WIth ForWArd- FACINg SeAtS. - Page 16 hoW to Set-UP hoW to Set-UP toddler USe ForWArd FACINg toddler USe ForWArd FACINg d. Pull the shoulder strap out of the slot. CHANgINg SHOULDER STRAP SLOTS: FOR CHILD USE FORwARD-FACINg A. remove the restraint from vehicle as instructed on page 40.
-
Page 17: How To Install
hoW to Set-UP hoW to INStAll toddler USe ForWArd FACINg toddler USe ForWArd FACINg INSTALLINg INTO VEHICLE (FORwARD FACINg) F. ensure there are no twists in the shoulder strap and the buckle tongues face the correct way. (UPRIgHT OR RECLINED) Pull out to unlock A. - Page 18 hoW to INStAll hoW to INStAll toddler USe ForWArd FACINg toddler USe ForWArd FACINg F. Push to lock the stabilising bar into upright forward facing position. refer to illustration below for location g. Position restraint in forward facing route lap & of Upright Slot.
- Page 19 hoW to INStAll hoW to INStAll toddler USe ForWArd FACINg toddler USe ForWArd FACINg Upper Anchorage J. hook the attachment clip to the car's anchor fitting as Attachment Clip (hook) Pull to remove Strap shown. make sure to remove as many twists as possible Attachment slack, then store from the upper anchorage strap.
- Page 20 hoW to USe hoW to USe toddler USe ForWArd FACINg toddler USe ForWArd FACINg PLACINg TODDLER IN THE RESTRAINT C. Fit either harness tongue into the harness tongue buckle followed by the other tongue until a A. lengthen harness by lifting up harness Adjuster lever click is heard.
-
Page 21: Care & Maintenance
hoW to USe CAre & mAINteNANCe toddler USe ForWArd FACINg REgULAR CARE OF THIS RESTRAINT: REMOVINg CHILD FROM RESTRAINT A. Press red button on harness buckle then both harness tongues will be released. lift the shoulder straps Please check the following items regularly to ensure the safety of your child: from the child’s shoulders and remove the child from the car. - Page 22 CAre & mAINteNANCe CAre & mAINteNANCe C. Unhook elastic loops. A. disengage harness b. disconnect shoulder harness straps CLEANINg THE SEAT tongues from harness from metal strap connector at the Use only mild soap and water to clean all metal and plastic parts of the restraint. do not use chemicals or Crotch buckle.
-
Page 23: Accessories & Features
ACCeSSorIeS & FeAtUreS ACCeSSorIeS & FeAtUreS the following instructions apply to accessories that may be supplied with this restraint at point of purchase. If POCKETS (if fitted to the cover) not, a variety of accessories are available from various retailers of Next generation Nursery Products Pty ltd. the pockets sewn on the trim are designed for your convenience. - Page 24 ACCeSSorIeS & FeAtUreS ACCeSSorIeS & FeAtUreS Short Messy Mat™ MESSy MAT™ SEAT PROTECTOR (If supplied) TOyBAR (IF SUPPLIED) Place ribbed or pocket end of the messy mat™ seat protector the toybar accessory is only for use on this product in rear facing on edge of car seat, smooth back toward seat join (’A’) and fit in (baby) mode.
-
Page 25: Travelling Tips
trAVellINg tIPS INStAllAtIoN oF CAr ANChor FIttINg Consult the vehicle owner's handbook for location of anchorage fittings or anchorage points and the possible SAFETy use of spacers. Some vehicles may have an anchor fitting fitted by the vehicle manufacturer. If anchorage points Never hold a baby in arms when riding in a motor vehicle. -
Page 26: Installation Of Car Anchor Fitting
INStAllAtIoN oF CAr ANChor FIttINg INStAllAtIoN oF CAr ANChor FIttINg extension Strap distance to be measured. IF THE CAR IS FITTED wITH CHILD RESTRAINT ANCHORAgE UPPER ANCHORAgE FITTINg length 300mm (Use Safe-n-Sound part 0035) POINT Fig.1. Attachment bolt length 600mm (Use Safe-n-Sound part 0036) locate the anchorage point behind the rear seating position. -
Page 27: In Case Of Crash
INStAllAtIoN oF CAr ANChor FIttINg IN CASe oF CrASh oNlY USe A 5/16 UNC grAde 5 bolt. IF the bolt IS Not the If your restraint has been involved in a severe crash, you should destroy the restraint even if no damage is Note: marking on CorreCt leNgth the CAr mANUFACtUrer’S hANd book CAN obvious. - Page 28 NoteS NoteS...
- Page 29 CUSTOMER SERVICE: P/No. 2200427/A...